I ruined three batches of these spooky spider cookies with pretzel legs before I figured out the trick. Not a dramatic overstatement—three separate attempts, each one a sticky, legless disaster. The first time, the pretzels slid right off the chocolate like they had somewhere better to be. The second time, I pressed them in too deep and the cookies cracked clean in half. The third time, I just stared at the mess and ate the evidence. It was frustrating, honestly, because the idea was so simple: a rich chocolate cookie base, dark and crumbly, with eight little pretzel legs poking out the sides. But simple doesn’t mean easy, you know? What finally worked wasn’t some fancy technique I learned in a pastry class. It was just me, standing in my kitchen at midnight, realizing I needed to chill the dough longer and let the chocolate set before I touched anything. That quiet “aha” moment—that’s when these cookies finally came together.
These spooky spider cookies with pretzel legs are now my go-to Halloween treat. They look like they crawled out of a haunted house, but they taste like the best part of autumn—deep cocoa, a little salt from the pretzels, and that satisfying snap when you bite through the leg. I’ve brought them to costume parties and left them on neighbors’ doorsteps, and every time, people do that double-take where they laugh and grab another. That’s the thing about Halloween baking: it’s supposed to be fun, not fussy. And once you nail the method, these are actually pretty forgiving.
Why You’ll Love This Recipe
Let’s be real—Halloween treats can be a mixed bag. Some look amazing but taste like cardboard. Others taste great but look like a toddler assembled them. These spooky spider cookies with pretzel legs hit that sweet spot where presentation and flavor actually cooperate. Here’s why they work:
- Quick to Assemble: The dough comes together in about 15 minutes, and the decorating is straightforward once you get the rhythm down. Perfect for a weeknight baking session when the kids are buzzing about costumes.
- Simple Ingredients: Nothing weird here. Butter, sugar, cocoa powder, flour, eggs, vanilla, and pretzels. You probably have most of this in your pantry right now.
- Perfect for Halloween Parties: These cookies are conversation starters. People can’t resist picking one up and examining the legs before taking a bite. They’re great for school bake sales, too.
- Crowd-Pleaser: I’ve watched adults go back for thirds. The salty-sweet combination is addictive, and the chocolate flavor is deep without being overly rich.
- Unbelievably Delicious: The cookie itself is soft and fudgy, with a slight crackle on top. The pretzels add crunch and that salty contrast that makes you reach for another one before you’ve finished the first.
What makes these different from other Halloween cookies I’ve tried is the texture balance. A lot of decorated cookies sacrifice taste for appearance—they’re dry or overly sweet because the frosting does all the heavy lifting. These spider cookies are built around the dough itself. The chocolate is the star, and the pretzels are the supporting actor. Plus, you don’t need any special piping bags or food coloring. Just your hands, a baking sheet, and a little patience.
I remember the first time I brought these to a friend’s Halloween party. I set the platter down next to a store-bought tray of frosted pumpkin cookies, and within twenty minutes, my plate was empty. Someone actually asked if I could make them for their kid’s classroom party the next week. That’s when I knew this recipe was a keeper—not because it was fancy, but because it made people happy.
What Ingredients You Will Need
This recipe uses straightforward ingredients to create a rich, fudgy chocolate cookie that holds up well to the pretzel legs. Nothing complicated here—just quality basics that work together. Here’s what you’ll need:
- Unsalted butter, softened (1 cup / 2 sticks / 226g) — I prefer using unsalted so I can control the salt level. Let it sit out for about 30 minutes before starting. If you’re in a rush, cut it into small cubes and let it soften for 15 minutes.
- Granulated sugar (1 cup / 200g) — Standard white sugar gives the cookies a nice structure and helps them spread just enough.
- Light brown sugar, packed (½ cup / 100g) — This adds moisture and a subtle molasses depth that complements the chocolate. Don’t skip it—the combination of sugars makes a difference.
- Large eggs (2, room temperature) — Room temperature eggs incorporate more evenly into the creamed butter. If you forgot to take them out, place them in a bowl of warm water for 5 minutes.
- Vanilla extract (2 teaspoons) — Pure vanilla is best, but imitation works fine here since the chocolate is the dominant flavor.
- All-purpose flour (2 cups / 240g) — Spoon and level your flour into the measuring cup. Scooping directly can pack it down and make the cookies dry.
- Unsweetened cocoa powder (¾ cup / 75g) — I recommend a Dutch-process cocoa for a darker, smoother chocolate flavor. My personal favorite is Valrhona, but Hershey’s Special Dark works great too. Natural cocoa will work, but the cookies will be slightly less rich and a bit lighter in color.
- Baking soda (1 teaspoon) — Helps the cookies spread and gives them a slight crackle on top.
- Salt (½ teaspoon) — Enhances the chocolate flavor and balances the sweetness.
- Mini pretzel twists (about 60-70) — These become the spider legs. Look for the small twist-style pretzels, not the stick pretzels. The twists have that nice curved shape that looks more leg-like. I use Snyder’s or Utz brands—they’re sturdy enough to hold up during baking.
- Candy eyes (about 24 pairs) — Optional but highly recommended for the full spider effect. You can find them at craft stores or online. If you don’t have them, a small dot of white frosting with a chocolate chip in the center works as a substitute.
- Semi-sweet chocolate chips (½ cup / 85g, for melting) — Used to attach the eyes and add a little extra chocolate on top. You can also use melting wafers if you prefer.
A note on the pretzels: don’t use the thin, fragile stick pretzels. They break too easily when you’re inserting them into the dough. The mini twists are thicker and have more surface area, so they grip the cookie better. I learned this the hard way after my first batch turned into a pile of pretzel crumbs.
Equipment Needed
You don’t need a professional bakery setup for these cookies. Here’s what I use:
- Electric stand mixer or hand mixer — Creaming the butter and sugar by hand is possible but tiring. A mixer makes it faster and gives you a lighter texture. I use my KitchenAid for almost everything.
- Large mixing bowls (at least 2) — One for the dry ingredients, one for the wet.
- Baking sheets (2-3) — Light-colored aluminum sheets work best. Dark sheets can cause the bottoms to brown too quickly.
- Parchment paper or silicone baking mats — Parchment is my go-to because it’s easy to clean up and the cookies slide right off. Silicone mats work too, but they can make the cookies spread a tiny bit more.
- Cooling rack — Essential for letting the cookies set properly before you add the legs and eyes.
- Small saucepan or microwave-safe bowl — For melting the chocolate chips to attach the eyes.
- Cookie scoop (about 1.5 tablespoons) — Not required, but it gives you evenly sized cookies. I use a #40 scoop.
- Spatula — For transferring the cookies to the cooling rack.
If you don’t have a stand mixer, a hand mixer works perfectly. I actually used a hand mixer for years before upgrading, and the results were the same. The key is just making sure the butter and sugar are well-creamed.
Preparation Method
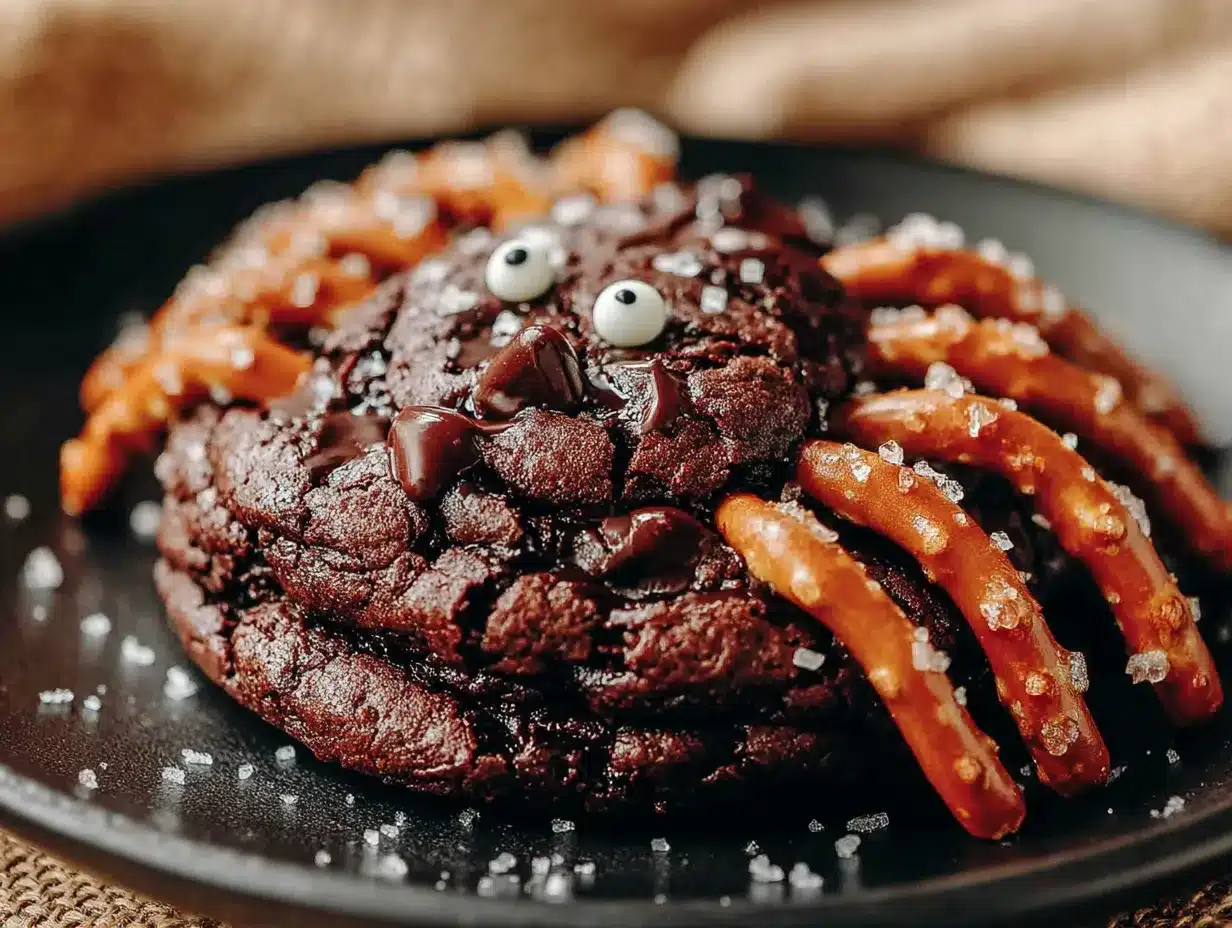
Let’s walk through this step by step. I’ll include all the little details I wish someone had told me before I started.
- Preheat and prep. Set your oven to 350°F (175°C). Line your baking sheets with parchment paper. This isn’t optional—the cookies will stick to an unlined sheet.
- Cream the butter and sugars. In your large mixing bowl, beat the softened butter, granulated sugar, and brown sugar together on medium speed for about 3 minutes. You’re looking for a light, fluffy texture—pale in color and smooth. Scrape down the sides of the bowl halfway through. Don’t rush this step; proper creaming aerates the dough and gives the cookies a better texture.
- Add the eggs and vanilla. Beat in the eggs one at a time, mixing well after each addition. Add the vanilla extract and mix until combined. The mixture might look slightly curdled at this point—that’s normal, especially if your eggs were cold. Keep going.
- Combine the dry ingredients. In a separate bowl, whisk together the flour, cocoa powder, baking soda, and salt. Whisking aerates the mixture and ensures the baking soda is evenly distributed. No one wants a pocket of baking soda in their cookie.
- Mix the dry into the wet. Gradually add the dry ingredients to the wet mixture, mixing on low speed. Add it in three additions, mixing just until the flour disappears after each one. Overmixing at this stage will make the cookies tough. Stop as soon as you don’t see any more white streaks.
- Chill the dough. This is the step I skipped on my first disastrous attempt. Cover the bowl with plastic wrap and refrigerate for at least 30 minutes, or up to 2 hours. Chilled dough is firmer and easier to shape. It also prevents the cookies from spreading too much in the oven. Trust me on this—don’t skip the chill.
- Scoop and shape. Using your cookie scoop or a tablespoon, portion out rounded tablespoons of dough (about 1.5 tablespoons each). Roll each portion into a smooth ball between your palms. Place them on the prepared baking sheets, spacing them about 2 inches apart. You should get about 24 cookies from this batch.
- Bake. Bake for 10-12 minutes. The cookies should look set around the edges but still slightly soft in the center. They’ll continue to set as they cool. If you overbake them, they’ll be dry and crumbly. I usually check at the 10-minute mark and add a minute if needed.
- Cool completely. Let the cookies rest on the baking sheet for 5 minutes, then transfer them to a wire cooling rack. They need to be completely cool before you add the pretzel legs—warm cookies will cause the chocolate to melt and the pretzels to slide off. I learned this the hard way.
- Insert the pretzel legs. Once the cookies are cool, gently insert 4 mini pretzel twists into each side of each cookie, angling them slightly outward. The pretzels should go in about halfway—not too deep or they’ll crack the cookie. If a cookie cracks, just press it back together gently. It happens.
- Attach the eyes. Melt the chocolate chips in a small saucepan over low heat or in the microwave in 20-second bursts, stirring between each. Dip the back of each candy eye into the melted chocolate and press it onto the cookie. Place two eyes on each spider. The chocolate acts as glue and sets within a few minutes.
- Let everything set. Allow the cookies to sit at room temperature for about 15-20 minutes so the chocolate hardens. Then they’re ready to serve.
One thing I always do: after inserting the pretzels, I give each cookie a gentle squeeze to make sure the legs feel secure. If a pretzel wobbles, I just push it in a tiny bit deeper. Better to catch it now than have a spider lose a leg on the serving platter.
Cooking Tips & Techniques
After those three failed batches, I picked up a few tricks that make these cookies foolproof. Here’s what I wish I’d known from the start:
Chill the dough, no exceptions. I know it’s tempting to skip this step when you’re in a hurry, but chilled dough is the difference between a cookie that holds its shape and a flat, legless blob. The cold butter solidifies the fat, which means the cookies spread less in the oven. Thirty minutes is the minimum; an hour is better. If you’re planning ahead, you can chill the dough overnight.
Use a light hand with the pretzels. When inserting the legs, don’t force them. Pretzels are brittle, and they’ll snap if you push too hard. I use a gentle twisting motion as I press them in—it helps them slide into the cookie without cracking it. If a pretzel does break, just grab another one. I always keep a few extra on hand for this reason.
Watch the bake time carefully. These cookies are better slightly underbaked than overbaked. At 12 minutes, they should look set on the edges but still soft in the middle. They’ll firm up as they cool. If you’re unsure, err on the side of underbaking. A dry, crumbly spider cookie is a sad thing.
Don’t overcrowd the baking sheet. I can fit 8 cookies on a standard half-sheet pan. Any more than that, and they’ll spread into each other. Give them space—they need room to breathe.
Test one cookie first. If you’re nervous about the technique, bake a single test cookie before committing to a full sheet. This lets you check the spread, the texture, and the bake time without risking an entire batch. I do this with every new recipe, and it’s saved me more than once.
I once forgot to chill the dough and tried to bake anyway. The cookies spread into thin, lacy disks that looked nothing like spiders. I ended up calling them “melted spider webs” and served them with ice cream. They tasted fine, but the presentation was a mess. Lesson learned.
Variations & Adaptations
One of the best things about this recipe is how easy it is to tweak. Here are a few variations I’ve tried and loved:
- Gluten-Free Version: Substitute the all-purpose flour with a 1-to-1 gluten-free baking flour blend. I’ve used Bob’s Red Mill with good results. The texture will be slightly more tender, but the cookies hold together well. Just make sure your pretzels are certified gluten-free—some brands aren’t.
- White Chocolate Spiders: Swap the semi-sweet chocolate chips for white chocolate in both the dough and the eye attachment. The contrast between the dark cocoa and white chocolate is striking. I did this for a “ghost spider” version last year, and the kids went crazy for them.
- Peanut Butter Twist: Add ½ cup of creamy peanut butter to the dough when you cream the butter and sugars. The peanut butter flavor pairs beautifully with the chocolate and the salty pretzels. This variation is dangerously addictive.
- Spicy Chocolate Spiders: Add ½ teaspoon of cayenne pepper and ¼ teaspoon of cinnamon to the dry ingredients. The heat sneaks up on you after a few bites, and it works surprisingly well with the pretzel salt. These are great for adult Halloween parties.
- No-Candy-Eye Option: If you can’t find candy eyes, make your own. Pipe two small dots of white royal icing onto each cookie, then place a mini chocolate chip in the center of each dot. They look just as cute and taste better.
- Mint Chocolate Version: Add ½ teaspoon of peppermint extract to the dough along with the vanilla. The mint-chocolate-pretzel combination is surprisingly good—like a Thin Mint with legs.
I tried the peanut butter version for a Halloween potluck, and someone asked if I could make them every year. It’s now my secret weapon for parties where I want to impress without spending hours in the kitchen.
Serving & Storage Suggestions
These cookies are best served at room temperature, ideally within a few hours of assembling them. The pretzels stay crunchy, and the chocolate eyes are firmly attached. If you’re serving them at a party, arrange them on a dark platter or a black cake stand for maximum spooky effect. I like to scatter a few extra pretzels around the plate to look like “broken spider legs”—it’s a fun touch that gets people laughing.
For storage, place the cookies in an airtight container at room temperature. They’ll stay fresh for up to 5 days, though the pretzels will start to soften after about 3 days. If you’re making them ahead of time for a party, I recommend baking the cookies and storing them plain, then adding the pretzel legs and eyes the day of the event. The pretzels stay much crunchier that way.
You can also freeze the baked cookies (without the pretzels and eyes) for up to 3 months. Wrap them individually in plastic wrap and place them in a freezer-safe bag. When you’re ready to serve, thaw them at room temperature for about 30 minutes, then add the legs and eyes. The texture will be slightly softer, but they’ll still taste great.
If you have leftovers (unlikely, but possible), the cookies can be stored in the fridge for up to a week. The cold temperature keeps the pretzels crunchier. Just let them sit out for 10 minutes before serving to take the chill off.
One more thing: these cookies travel well. I’ve packed them in a single layer in a cookie tin with parchment paper between the layers, and they arrived at a party across town in perfect condition. Just make sure the eyes are fully set before you stack them.
Nutritional Information & Benefits
Let’s be honest—these are Halloween treats, not health food. But here’s the breakdown if you’re curious. Per cookie (based on 24 cookies):
- Calories: Approximately 180-200
- Total Fat: 9g (5g saturated)
- Carbohydrates: 25g (14g sugar)
- Protein: 3g
- Fiber: 1g
- Sodium: 180mg
The cocoa powder in these cookies contains flavonoids, which are antioxidants that support heart health. Dark chocolate in moderate amounts has been linked to improved mood and reduced inflammation—so there’s that. The pretzels add a little iron and B vitamins from the enriched flour. And the butter? Well, butter makes everything better, and a little bit goes a long way.
If you’re watching your sugar intake, you can reduce the granulated sugar to ¾ cup and the brown sugar to ⅓ cup. The cookies won’t be as sweet, but they’ll still be delicious. For a lower-fat option, substitute half the butter with unsweetened applesauce—the texture will be more cake-like, but the flavor will still be there.
These cookies contain dairy (butter), gluten (flour and pretzels), and eggs. If you have allergies, check the gluten-free variation I mentioned earlier. For a dairy-free version, use a plant-based butter substitute and dairy-free chocolate chips.
Conclusion
These spooky spider cookies with pretzel legs are the kind of recipe that makes Halloween baking feel effortless and fun. They look impressive on the table, but they’re actually pretty simple once you get the hang of it. The deep chocolate flavor, the salty crunch of the pretzels, and those googly eyes staring up at you—it’s hard not to smile when you see them.
I love how customizable they are. You can make them spooky or silly, spicy or sweet, gluten-free or loaded with peanut butter. They’re forgiving enough for beginners but impressive enough for seasoned bakers. And honestly, watching people’s faces light up when they see a plate of these spiders is one of my favorite parts of fall.
So give them a try. Don’t worry if your first few spiders look a little lopsided—mine certainly did. That’s part of the charm. And if you come up with a fun variation, drop it in the comments. I’m always looking for new ideas, and I’d love to hear what you come up with. Happy Halloween baking!
Frequently Asked Questions
Can I make the dough ahead of time?
Yes! The dough can be refrigerated for up to 3 days or frozen for up to 3 months. If freezing, shape the dough into balls first, then freeze them on a baking sheet before transferring to a freezer bag. Bake directly from frozen, adding 2-3 minutes to the bake time.
Why did my cookies spread too much?
This usually happens when the dough isn’t chilled enough, or the butter was too soft. Make sure your butter is softened but not melted, and chill the dough for at least 30 minutes. Also, check that your baking soda is fresh—old baking soda loses its effectiveness.
Can I use chocolate sticks instead of pretzels for the legs?
Absolutely! Chocolate sticks or thin breadsticks work well. Just keep in mind that chocolate sticks will soften faster and might melt in warm weather. Pretzels give the best crunch and hold up the longest.
How do I keep the candy eyes from falling off?
Make sure the cookies are completely cool before attaching the eyes, and use enough melted chocolate to create a strong bond. Let the chocolate set fully before moving the cookies—about 15-20 minutes at room temperature.
Can I make these cookies vegan?
Yes, with a few substitutions. Use a plant-based butter substitute (like Earth Balance), a flax egg (1 tablespoon ground flaxseed mixed with 3 tablespoons water per egg), and dairy-free chocolate chips. The texture will be slightly different, but they’ll still be delicious.
Pin This Recipe!
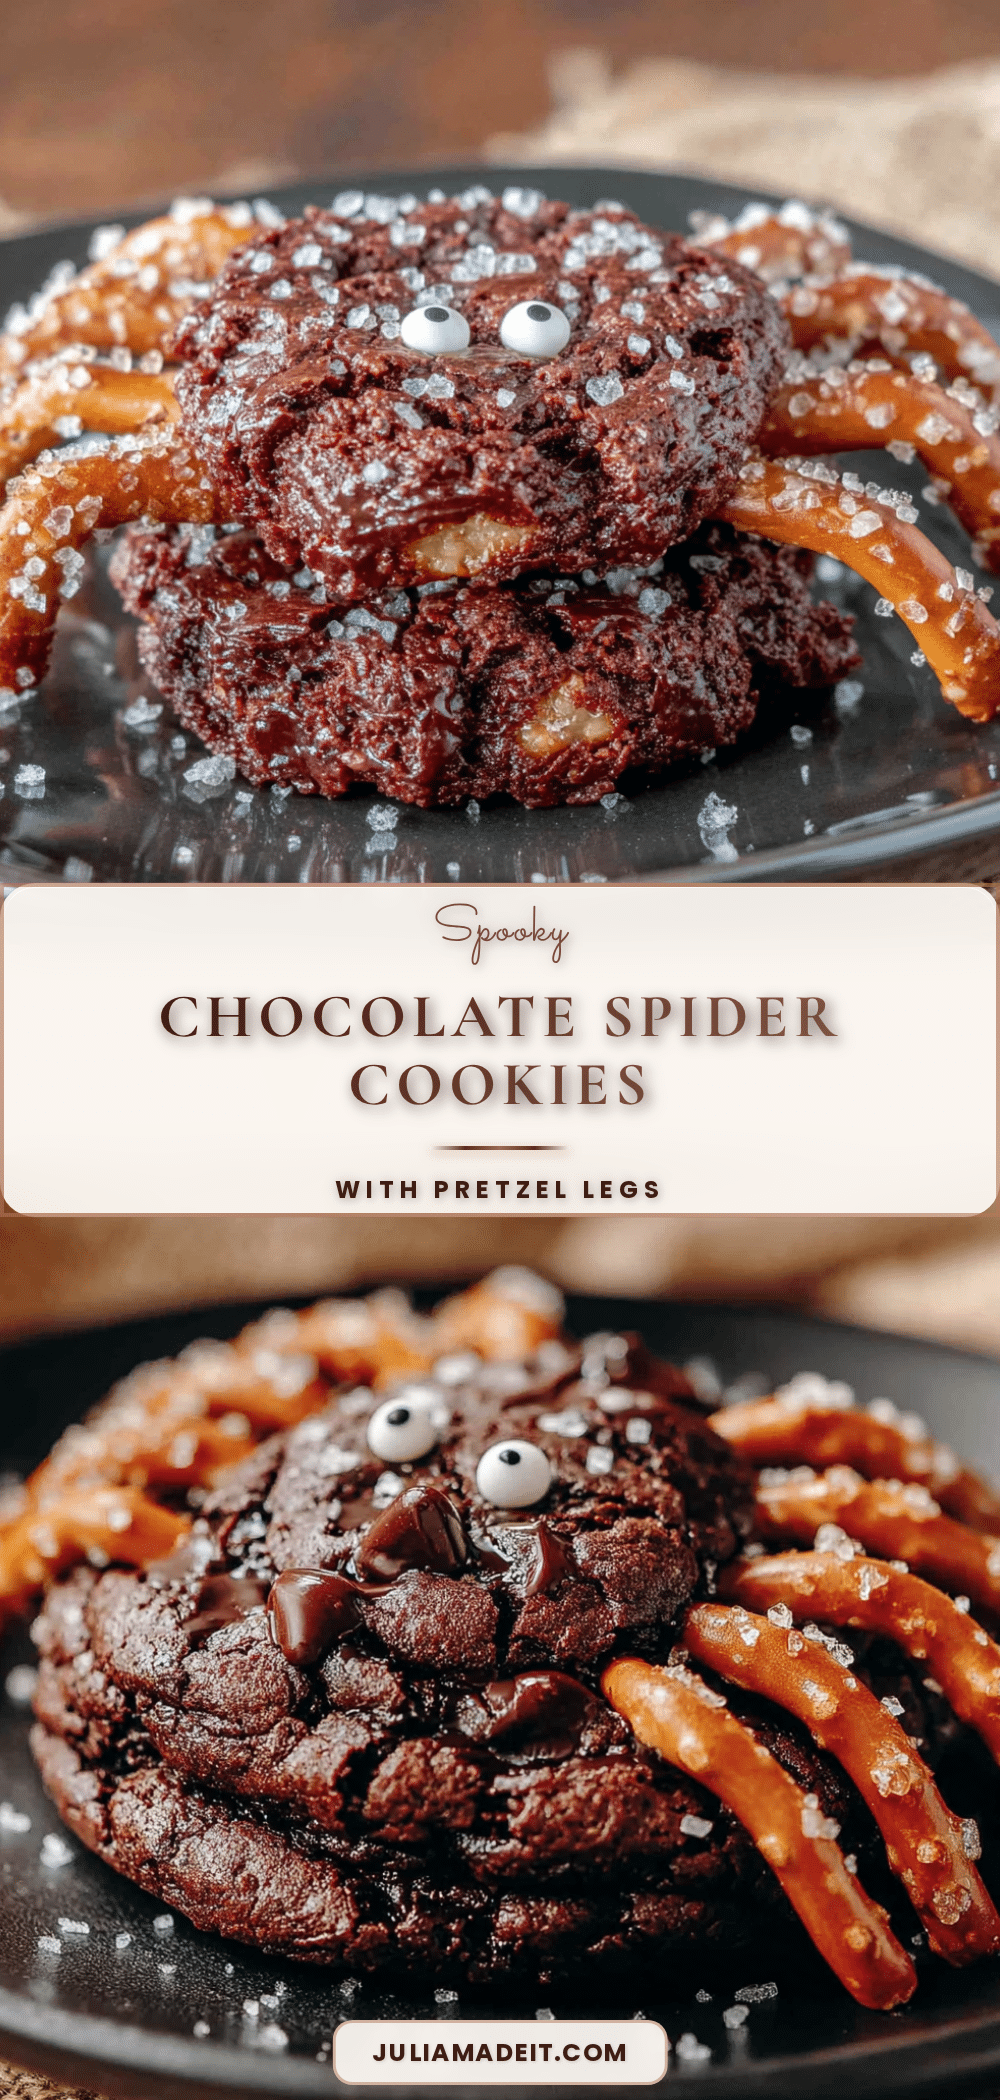
Spooky Spider Cookies with Pretzel Legs: Easy Halloween Treat
Rich chocolate cookies with salty pretzel legs and candy eyes, perfect for Halloween parties. These spooky treats are easy to assemble and deliver a delicious salty-sweet flavor.
- Prep Time: 15 minutes
- Cook Time: 12 minutes
- Total Time: 1 hour 2 minutes (includes chilling)
- Yield: 24 cookies 1x
- Category: Dessert
- Cuisine: American
Ingredients
- 1 cup (2 sticks / 226g) unsalted butter, softened
- 1 cup (200g) granulated sugar
- ½ cup (100g) light brown sugar, packed
- 2 large eggs, room temperature
- 2 teaspoons vanilla extract
- 2 cups (240g) all-purpose flour
- ¾ cup (75g) unsweetened cocoa powder (Dutch-process preferred)
- 1 teaspoon baking soda
- ½ teaspoon salt
- 60–70 mini pretzel twists
- About 24 pairs candy eyes
- ½ cup (85g) semi-sweet chocolate chips (for melting)
Instructions
- Preheat oven to 350°F (175°C). Line baking sheets with parchment paper.
- In a large bowl, beat softened butter, granulated sugar, and brown sugar together on medium speed for about 3 minutes until light and fluffy. Scrape down sides halfway through.
- Beat in eggs one at a time, mixing well after each. Add vanilla extract and mix until combined.
- In a separate bowl, whisk together flour, cocoa powder, baking soda, and salt.
- Gradually add dry ingredients to wet mixture in three additions, mixing on low speed just until flour disappears after each. Do not overmix.
- Cover bowl with plastic wrap and refrigerate dough for at least 30 minutes (up to 2 hours).
- Scoop rounded tablespoons of dough (about 1.5 tablespoons each) and roll into smooth balls. Place on prepared baking sheets, spacing 2 inches apart. Makes about 24 cookies.
- Bake for 10-12 minutes until edges are set but centers are still soft. Cool on baking sheet for 5 minutes, then transfer to wire rack to cool completely.
- Once cookies are cool, gently insert 4 mini pretzel twists into each side of each cookie, angling slightly outward. Insert about halfway.
- Melt chocolate chips in small saucepan over low heat or microwave in 20-second bursts, stirring between each. Dip back of each candy eye into melted chocolate and press onto cookie. Place two eyes on each spider.
- Let cookies sit at room temperature for 15-20 minutes until chocolate hardens. Serve.
Notes
Chill the dough for at least 30 minutes to prevent spreading. Insert pretzels gently with a twisting motion to avoid cracking cookies. For best crunch, add pretzels and eyes the day of serving. Store in airtight container at room temperature for up to 5 days (pretzels soften after 3 days).
Nutrition
- Serving Size: 1 cookie
- Calories: 190
- Sugar: 14
- Sodium: 180
- Fat: 9
- Saturated Fat: 5
- Carbohydrates: 25
- Fiber: 1
- Protein: 3
Keywords: Halloween cookies, spider cookies, pretzel legs, chocolate cookies, easy Halloween treat, spooky cookies