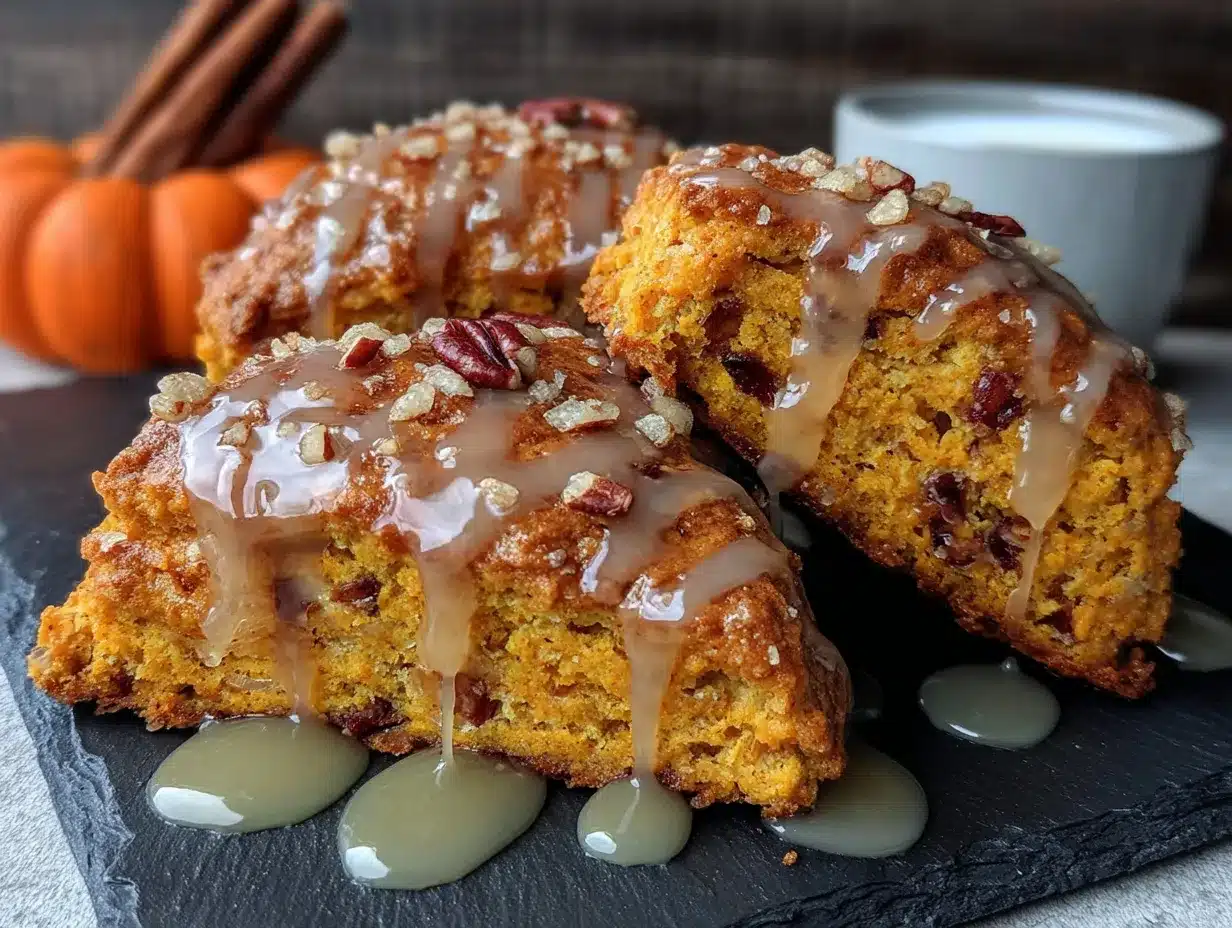
My husband took a bite, stopped mid-chew, and just looked at me. Not in a dramatic way—more like he was trying to figure out if he liked it as much as he thought he did. Then he reached for another one without saying a word. That’s when I knew these pumpkin scones with maple glaze were actually something special.
I’d been testing fall recipes for weeks, and honestly, I was getting tired of pumpkin everything. But these scones were different. They weren’t dense or gummy like some scone attempts I’ve had (you know the ones—they look promising but taste like dry sawdust). These were flaky, tender, and actually tasted like real pumpkin, not just spice mix.
The maple glaze came about by accident. I was out of powdered sugar for a traditional glaze, and maple syrup was sitting right there on the counter. I figured, why not? And honestly, that happy little accident turned into the best part. The maple doesn’t overpower the pumpkin—it just sits on top with this subtle sweetness that makes you take another bite before you’ve finished the first one.
I’ve made these scones at least six times since that first batch, tweaking the butter temperature and the glaze ratio until everything felt right. They’re the kind of recipe that makes you want to pour a cup of coffee and sit down for a minute, even on a busy morning. And if you’re anything like me, you’ll find yourself making excuses to bake them again.
Why You’ll Love This Recipe
These pumpkin scones with maple glaze aren’t just another fall baking project. They’re genuinely easy to make, and they turn out perfectly every time if you follow a few simple steps. Here’s why they’ve become my go-to autumn recipe:
- Quick & Easy : From start to finish, these come together in about 35 minutes. No chilling the dough overnight, no complicated folding techniques. Just mix, shape, bake, and glaze.
- Simple Ingredients : You probably have most of these in your pantry already. Canned pumpkin, flour, butter, spices, and maple syrup. No fancy extracts or hard-to-find items.
- Perfect for Fall Mornings : These scones are ideal for cozy weekend breakfasts, Thanksgiving brunch, or even a mid-afternoon treat with tea. They travel well too, so they’re great for sharing.
- Crowd-Pleaser : I’ve brought these to two different gatherings, and both times people asked for the recipe. Even folks who say they’re “not really scone people” went back for seconds.
- Unbelievably Flaky : The secret is in how you handle the butter. We’ll get to that, but trust me—these are nothing like those dry, crumbly scones from the coffee shop.
What makes these different from other pumpkin scone recipes is the technique. Instead of creaming the butter into the dry ingredients until it disappears, you leave visible pieces of cold butter throughout the dough. That’s what creates those flaky layers when the butter melts in the oven. Plus, the maple glaze isn’t just a drizzle—it soaks into the top slightly, creating this perfect sweet crust.
These scones are the kind of thing that makes you close your eyes after the first bite. They’re comfort food reimagined—faster and easier than homemade biscuits, but with that same soul-soothing satisfaction. Perfect for impressing guests without stress, or turning a simple Tuesday morning into something memorable.
What Ingredients You Will Need
This recipe uses simple, wholesome ingredients to deliver those flaky layers and rich pumpkin flavor. Most of these are pantry staples, especially if you do any fall baking.
For the Scones
- 2 cups all-purpose flour (I use King Arthur Flour for consistent results, but any brand works)
- 1/3 cup packed light brown sugar (adds moisture and a subtle molasses note that pairs beautifully with pumpkin)
- 1 tablespoon baking powder (make sure it’s fresh—this is crucial for rise)
- 1 teaspoon ground cinnamon
- 1/2 teaspoon ground nutmeg (freshly grated if you have it, but pre-ground works fine)
- 1/2 teaspoon ground ginger
- 1/4 teaspoon ground cloves
- 1/2 teaspoon salt
- 6 tablespoons cold unsalted butter, cut into small cubes (this is non-negotiable—the butter must be cold)
- 1/2 cup canned pumpkin puree (not pumpkin pie filling—just pure pumpkin)
- 1/4 cup heavy cream (plus extra for brushing the tops)
- 1 large egg
- 1 teaspoon vanilla extract
For the Maple Glaze
- 1 cup powdered sugar
- 3 tablespoons pure maple syrup (not pancake syrup—real maple syrup makes a difference here)
- 1-2 tablespoons milk or cream (to adjust consistency)
- Pinch of salt
A few notes on ingredient choices. I’ve tested this with both salted and unsalted butter, and honestly, unsalted gives you more control over the salt level. If you only have salted butter, just reduce the added salt to 1/4 teaspoon. For the pumpkin, I recommend Libby’s brand—it’s consistently thick and not watery, which matters for scone texture. If your pumpkin puree seems loose, pat it dry with a paper towel before using.
For a dairy-free version, you can substitute cold coconut oil for the butter and use full-fat oat milk or coconut cream instead of heavy cream. The texture will be slightly different—less flaky, more tender—but still delicious. I’ve also made these with gluten-free 1-to-1 baking flour, and they turned out surprisingly well. Just handle the dough gently and don’t overmix.
Equipment Needed
You don’t need anything fancy for these pumpkin scones with maple glaze. Here’s what I use:
- Large mixing bowl (any size works, but bigger is better for mixing without spilling flour everywhere)
- Pastry cutter or two forks (a pastry cutter makes cutting in the butter much easier, but forks work in a pinch)
- Baking sheet (I recommend lining it with parchment paper for easy cleanup)
- Parchment paper (keeps the scones from sticking and makes transferring them a breeze)
- Sharp knife or bench scraper (for cutting the scones cleanly—a dull knife will squish the edges)
- Small bowl (for whisking together the wet ingredients)
- Whisk
- Pastry brush (for brushing cream on top—a silicone one works great)
- Cooling rack (helps the glaze set without getting soggy on the bottom)
I’ve made these without a pastry cutter by using my fingers to pinch the butter into the flour, and it worked fine. Your hands warm up the butter faster though, so work quickly. A good baking sheet makes a difference—I use a light-colored one because dark sheets can over-brown the bottoms. If you’re using a dark sheet, reduce the oven temperature by 25 degrees.
Preparation Method
Let me walk you through this step by step. The key to flaky scones is keeping everything cold and handling the dough as little as possible.
- Preheat your oven to 400°F (200°C). Line a baking sheet with parchment paper and set it aside.
- Whisk together the dry ingredients. In a large bowl, combine the flour, brown sugar, baking powder, cinnamon, nutmeg, ginger, cloves, and salt. Make sure the brown sugar is broken up—no lumps hiding in there. Whisk until everything is evenly distributed.
- Cut in the cold butter. Add the cold butter cubes to the flour mixture. Using a pastry cutter or two forks, cut the butter into the flour until the mixture resembles coarse meal with some pea-sized butter pieces remaining. This should take about 2-3 minutes. Don’t overdo it—those visible butter pieces are what create the flaky layers. The mixture should look uneven, not like sand.
- Mix the wet ingredients. In a separate small bowl, whisk together the pumpkin puree, heavy cream, egg, and vanilla extract until smooth. The mixture should be a uniform orange color with no streaks of egg white.
- Combine wet and dry ingredients. Pour the wet mixture into the dry ingredients. Use a rubber spatula or your hands to gently mix until just combined. The dough will look shaggy and a bit dry in spots—that’s exactly what you want. Stop mixing as soon as there are no dry patches of flour visible. Overmixing will make the scones tough.
- Shape the dough. Turn the dough out onto a lightly floured surface. Gently bring it together with your hands, patting it into a circle about 3/4 inch thick. Don’t use a rolling pin—just pat it down gently. The dough should be about 8 inches in diameter. If it cracks around the edges, just press it back together.
- Cut the scones. Using a sharp knife or bench scraper, cut the circle into 8 wedges like a pizza. Cut straight down—don’t saw back and forth, which can seal the edges and prevent rise. Transfer the scones to the prepared baking sheet, spacing them about 2 inches apart. They won’t spread much, but they need room for air to circulate.
- Brush with cream. Brush the tops of each scone with a little extra heavy cream. This helps them brown beautifully in the oven and gives the tops a slight crunch.
- Bake. Place the baking sheet in the preheated oven and bake for 14-16 minutes, or until the scones are golden brown on the bottom and the tops are lightly browned. They should feel firm to the touch but still give slightly when pressed. The kitchen should smell like a fall candle at this point.
- Cool. Transfer the scones to a cooling rack and let them cool for at least 10 minutes before glazing. If you glaze them while they’re too hot, the glaze will just melt and run off.
- Make the glaze. While the scones cool, whisk together the powdered sugar, maple syrup, and a pinch of salt in a small bowl. Add milk or cream 1 teaspoon at a time until the glaze reaches a drizzling consistency—thick enough to coat the back of a spoon but thin enough to drip slowly. You want it to set on top of the scones, not soak in completely.
- Glaze the scones. Drizzle the glaze over the slightly warm scones using a spoon or a piping bag with the tip snipped off. Let the glaze set for about 5 minutes before serving. The scones are best enjoyed warm, but they’re also fantastic at room temperature.
Cooking Tips & Techniques
I’ve made plenty of scone mistakes over the years, so you don’t have to. Here’s what I’ve learned:
Keep everything cold. This is the number one rule of flaky scones. If your butter starts to soften before the scones go in the oven, pop the shaped scones in the fridge for 10-15 minutes. I’ve even frozen them for 10 minutes on a warm day. The cold butter creates steam pockets as it melts in the oven, which gives you those flaky layers.
Don’t twist the cutter. If you’re using a round biscuit cutter instead of cutting wedges, press straight down and lift straight up. Twisting seals the edges and prevents the scones from rising properly. Same goes for cutting wedges—cut straight down with a sharp knife.
Handle the dough minimally. The more you work the dough, the more the butter melts and the gluten develops, resulting in tough, dense scones. Mix until just combined, shape gently, and get them in the oven. I’ve ruined batches by trying to make the dough perfectly smooth—don’t be like me.
Check your baking powder. If your baking powder is old, your scones won’t rise. Test it by dropping a teaspoon into hot water—if it fizzes vigorously, it’s still good. If it barely bubbles, get a new can. This is a lesson I learned the hard way with a flat batch of biscuits.
Use a light touch with the glaze. You want the glaze to sit on top, not soak into the scone. If the scones are too warm when you glaze them, the glaze will disappear into the crumb. Let them cool until just barely warm to the touch.
Multitask efficiently. While the scones are baking, clean up your workspace and make the glaze. That way, by the time the scones come out and cool slightly, you’re ready to go. It makes the whole process feel much less rushed.
Variations & Adaptations
One of the best things about these pumpkin scones with maple glaze is how easy they are to adapt. Here are some variations I’ve tried and loved:
Pumpkin Chocolate Chip Scones. Add 1/2 cup of mini chocolate chips to the dry ingredients before adding the wet. The chocolate pairs surprisingly well with the pumpkin spices. I’ve used both semi-sweet and dark chocolate, and both work great. If you’re a fan of pumpkin chocolate chip cream cheese swirl bread, you’ll love this version.
Pumpkin Pecan Scones. Fold in 1/2 cup of toasted chopped pecans after the dough comes together. Toast them first in a dry pan for 3-4 minutes until fragrant—it makes a huge difference in flavor. You can also sprinkle extra pecans on top before baking for a crunchy finish.
Dairy-Free Version. Substitute the cold butter with cold coconut oil or a high-quality vegan butter stick. Use full-fat oat milk or coconut cream instead of heavy cream. The texture is slightly less flaky but still tender and delicious. I’ve tested this, and it works well for those with dairy sensitivities.
Spiced Maple Glaze. Add a pinch of cinnamon and a tiny pinch of nutmeg to the glaze for extra warmth. This is my favorite variation—it makes the maple flavor even more pronounced and cozy.
Gluten-Free Version. Use a 1-to-1 gluten-free baking flour blend. I’ve had good results with Bob’s Red Mill brand. The dough will be a bit more fragile, so handle it gently and don’t skip the chilling step. The texture is more tender than flaky, but the flavor is spot-on.
Savory-Sweet Twist. Skip the glaze and brush the baked scones with melted butter and sprinkle with coarse sugar and a pinch of flaky sea salt. It’s less sweet but still delicious, especially alongside a bowl of creamy roasted tomato basil soup for a cozy lunch.
Serving & Storage Suggestions
These pumpkin scones with maple glaze are best served slightly warm, when the glaze is still a little soft and the interior is tender. I like to pair them with a hot cup of coffee or a creamy brown sugar cinnamon pumpkin chai latte for the ultimate fall experience.
For a brunch spread, arrange the scones on a platter with fresh apple slices, a bowl of whipped butter, and maybe some honey or apple butter on the side. They also work beautifully alongside scrambled eggs and bacon for a more substantial breakfast.
Storage: Store leftover scones in an airtight container at room temperature for up to 2 days. After that, they start to dry out. If you need to keep them longer, freeze them without the glaze.
Freezing: To freeze, bake the scones without the glaze and let them cool completely. Wrap each scone individually in plastic wrap, then place them in a freezer bag. They’ll keep for up to 3 months. When you’re ready to enjoy them, thaw at room temperature, then reheat in a 350°F oven for 5-7 minutes. Glaze after reheating.
Reheating: The best way to reheat a scone is in the oven or toaster oven at 350°F for 5 minutes. The microwave works in a pinch but will make them soft rather than crisp on the outside. If you’re reheating glazed scones, do it gently—the glaze can melt if the heat is too high.
One thing I’ve noticed: these scones actually taste even better the next day. The flavors meld together, and the texture evens out. So don’t worry if you have leftovers—they’ll still be delicious tomorrow morning with your coffee.
Nutritional Information & Benefits
Here’s the approximate nutritional breakdown for one scone (with glaze), based on 8 servings:
- Calories: 290
- Total Fat: 12g
- Saturated Fat: 7g
- Cholesterol: 55mg
- Sodium: 310mg
- Total Carbohydrates: 42g
- Dietary Fiber: 1g
- Sugars: 22g
- Protein: 4g
These values are estimates and will vary based on specific ingredients and portion sizes.
While these scones are definitely a treat, pumpkin does offer some nutritional benefits. Pumpkin is rich in vitamin A (from beta-carotene), which supports eye health and immune function. It also provides fiber and potassium. The maple syrup in the glaze contains antioxidants and minerals like zinc and manganese, though in small amounts.
For a slightly lighter version, you can reduce the glaze amount or skip it entirely and dust the scones with powdered sugar instead. The scones themselves are still delicious without the glaze—just less sweet. If you’re watching your sugar intake, consider using a sugar substitute in the scone dough, though I haven’t tested this personally.
Conclusion
These pumpkin scones with maple glaze have become my favorite fall recipe for a reason. They’re simple enough for a weekday morning but special enough for Thanksgiving brunch. The flaky texture, warm spices, and sweet maple glaze come together in a way that feels both comforting and a little bit special.
I love that this recipe is forgiving—you don’t need to be a pastry chef to get great results. Just keep your butter cold, handle the dough gently, and don’t skip that cream wash on top. The little details make a big difference.
If you make these, I’d love to hear how they turn out. Leave a comment below and let me know if you tried any variations—I’m always looking for new ideas to test in my kitchen. And if you’re in the mood for more fall baking, check out my cozy brown butter apple crisp or these easy pumpkin cream cheese muffins for more seasonal inspiration.
Happy baking, friends. I hope these scones bring a little warmth and sweetness to your fall mornings.
Frequently Asked Questions
Can I use fresh pumpkin instead of canned?
Yes, but you need to cook and puree it first, then drain off as much liquid as possible. Fresh pumpkin has more water than canned, which can make the dough too sticky. I recommend roasting the pumpkin, pureeing it, and then letting it drain in a cheesecloth-lined sieve for at least an hour. Canned pumpkin is more consistent and easier, but fresh works if you have it.
Why did my scones turn out dry?
Dry scones usually come from overmixing the dough or overbaking them. Mix until just combined—stop when you don’t see dry flour anymore. And check your oven temperature; an oven that runs hot can dry out scones quickly. Pull them out when they’re just golden on the bottom, even if the tops look pale. They’ll continue cooking slightly as they cool.
Can I make the dough ahead of time?
Absolutely. You can shape the scones, place them on a parchment-lined baking sheet, and refrigerate them for up to 24 hours before baking. You can also freeze the unbaked scones on the sheet, then transfer them to a freezer bag. Bake from frozen, adding 2-3 minutes to the baking time. This is great for having fresh scones on a busy morning.
Can I use a different glaze?
Of course. A simple vanilla glaze (powdered sugar, milk, and vanilla) works beautifully. Cream cheese glaze is also amazing—mix 2 ounces softened cream cheese with 1 cup powdered sugar and enough milk to thin it out. For a less sweet option, skip the glaze and brush the warm scones with melted butter and sprinkle with cinnamon sugar.
How do I get the flakiest layers?
The secret is visible butter pieces in the dough. When you cut in the butter, leave some pieces the size of small peas. Those pieces melt in the oven, creating steam that lifts the dough into layers. Also, don’t twist when cutting the scones—straight down cuts keep the edges unsealed so they can rise properly. Chilling the shaped scones for 10 minutes before baking also helps maintain those butter pockets.
Pin This Recipe!

Pumpkin Scones with Maple Glaze: Easy Fall Recipe

These pumpkin scones with maple glaze are flaky, tender, and taste like real pumpkin. The maple glaze adds a subtle sweetness that makes these scones perfect for fall mornings, brunch, or a cozy treat with coffee.
- Prep Time: 15 minutes
- Cook Time: 16 minutes
- Total Time: 35 minutes
- Yield: 8 servings 1x
- Category: Dessert
- Cuisine: American
Ingredients
- 2 cups all-purpose flour
- 1/3 cup packed light brown sugar
- 1 tablespoon baking powder
- 1 teaspoon ground cinnamon
- 1/2 teaspoon ground nutmeg
- 1/2 teaspoon ground ginger
- 1/4 teaspoon ground cloves
- 1/2 teaspoon salt
- 6 tablespoons cold unsalted butter, cut into small cubes
- 1/2 cup canned pumpkin puree
- 1/4 cup heavy cream (plus extra for brushing tops)
- 1 large egg
- 1 teaspoon vanilla extract
- 1 cup powdered sugar
- 3 tablespoons pure maple syrup
- 1–2 tablespoons milk or cream
- Pinch of salt
Instructions
- Preheat your oven to 400°F (200°C). Line a baking sheet with parchment paper and set it aside.
- Whisk together the dry ingredients. In a large bowl, combine the flour, brown sugar, baking powder, cinnamon, nutmeg, ginger, cloves, and salt. Make sure the brown sugar is broken up—no lumps hiding in there. Whisk until everything is evenly distributed.
- Cut in the cold butter. Add the cold butter cubes to the flour mixture. Using a pastry cutter or two forks, cut the butter into the flour until the mixture resembles coarse meal with some pea-sized butter pieces remaining. This should take about 2-3 minutes. Don’t overdo it—those visible butter pieces are what create the flaky layers. The mixture should look uneven, not like sand.
- Mix the wet ingredients. In a separate small bowl, whisk together the pumpkin puree, heavy cream, egg, and vanilla extract until smooth. The mixture should be a uniform orange color with no streaks of egg white.
- Combine wet and dry ingredients. Pour the wet mixture into the dry ingredients. Use a rubber spatula or your hands to gently mix until just combined. The dough will look shaggy and a bit dry in spots—that’s exactly what you want. Stop mixing as soon as there are no dry patches of flour visible. Overmixing will make the scones tough.
- Shape the dough. Turn the dough out onto a lightly floured surface. Gently bring it together with your hands, patting it into a circle about 3/4 inch thick. Don’t use a rolling pin—just pat it down gently. The dough should be about 8 inches in diameter. If it cracks around the edges, just press it back together.
- Cut the scones. Using a sharp knife or bench scraper, cut the circle into 8 wedges like a pizza. Cut straight down—don’t saw back and forth, which can seal the edges and prevent rise. Transfer the scones to the prepared baking sheet, spacing them about 2 inches apart. They won’t spread much, but they need room for air to circulate.
- Brush with cream. Brush the tops of each scone with a little extra heavy cream. This helps them brown beautifully in the oven and gives the tops a slight crunch.
- Bake. Place the baking sheet in the preheated oven and bake for 14-16 minutes, or until the scones are golden brown on the bottom and the tops are lightly browned. They should feel firm to the touch but still give slightly when pressed. The kitchen should smell like a fall candle at this point.
- Cool. Transfer the scones to a cooling rack and let them cool for at least 10 minutes before glazing. If you glaze them while they’re too hot, the glaze will just melt and run off.
- Make the glaze. While the scones cool, whisk together the powdered sugar, maple syrup, and a pinch of salt in a small bowl. Add milk or cream 1 teaspoon at a time until the glaze reaches a drizzling consistency—thick enough to coat the back of a spoon but thin enough to drip slowly. You want it to set on top of the scones, not soak in completely.
- Glaze the scones. Drizzle the glaze over the slightly warm scones using a spoon or a piping bag with the tip snipped off. Let the glaze set for about 5 minutes before serving. The scones are best enjoyed warm, but they’re also fantastic at room temperature.
Notes
Keep everything cold for flaky layers. Don’t overmix the dough. Let scones cool slightly before glazing. For dairy-free, use cold coconut oil and oat milk. For gluten-free, use 1-to-1 gluten-free flour blend. Scones can be frozen unglazed for up to 3 months.
Nutrition
- Serving Size: 1 scone
- Calories: 290
- Sugar: 22
- Sodium: 310
- Fat: 12
- Saturated Fat: 7
- Carbohydrates: 42
- Fiber: 1
- Protein: 4
Keywords: pumpkin scones, maple glaze, fall recipe, easy scones, pumpkin recipe, breakfast, brunch, flaky scones