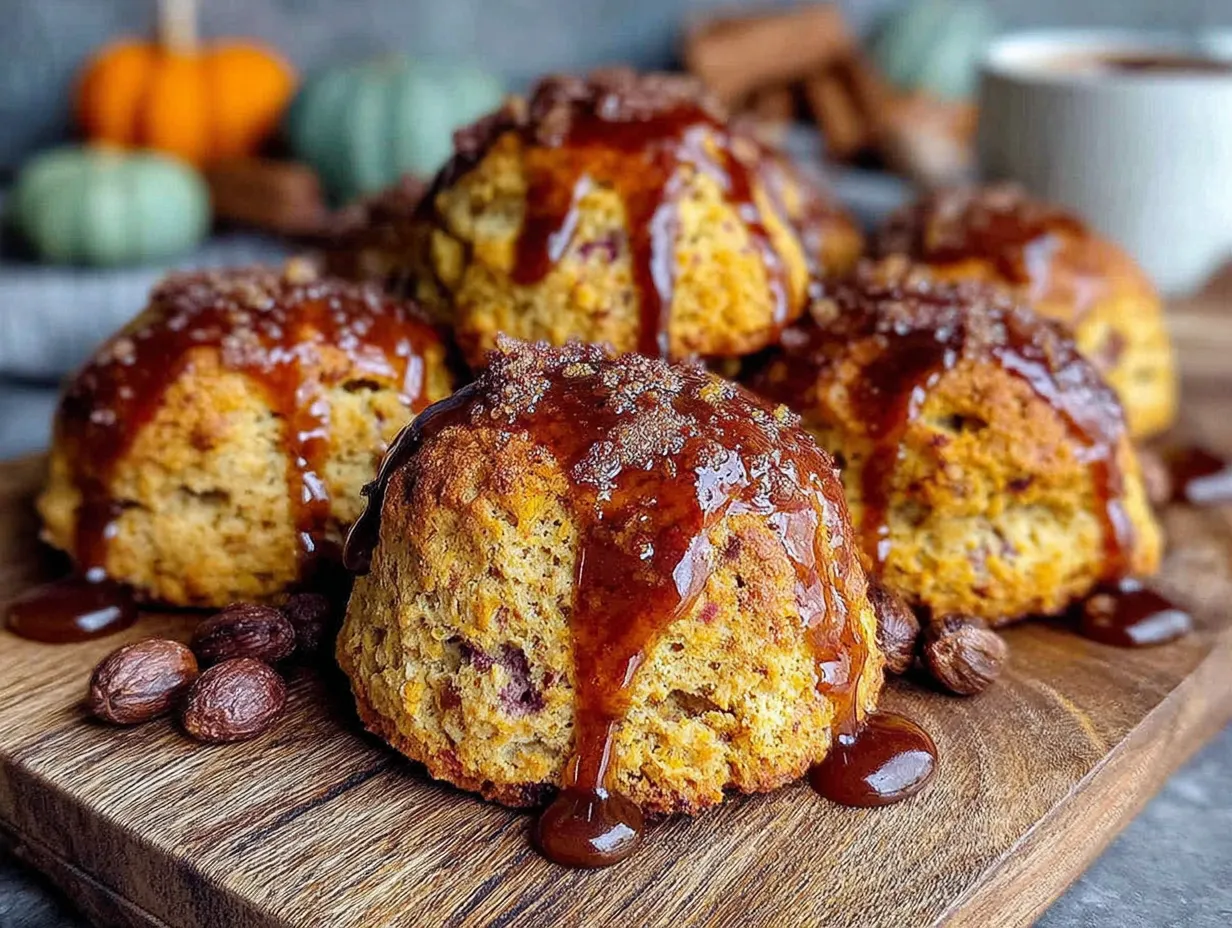
There used to be a tiny bakery tucked inside a converted Victorian house on a side street in Portland called “The Gilded Tart” that made these pumpkin scones that I still dream about. When they closed their doors suddenly three winters ago—a “for lease” sign appeared overnight, no goodbye, nothing—I honestly felt a little betrayed. That sounds dramatic, I know. But those scones were my October ritual. After seven tries—including one batch that came out so dense I could’ve used them as doorstops—I finally cracked the code. The secret wasn’t in the pumpkin (obviously) or even the spice blend. It was the brown butter glaze. That nutty, almost caramelized drizzle is what made those scones unforgettable. And now, I’m sharing the exact method with you.
Let me paint you a picture. It was a rainy Tuesday afternoon when I walked into The Gilded Tart for what I didn’t realize would be the last time. The bell above the door jingled, the air smelled like cinnamon and warm butter, and I ordered my usual: a pumpkin scone with a side of their house-made chai. The scone was tender, not dry like so many can be, and the glaze had this deep, toasty flavor that I couldn’t place. I asked the woman behind the counter what was in it. She just smiled and said, “a little patience and a lot of butter.” I mean, that’s not helpful, right? But now I get it. Browning butter is a patience game. It takes focus, a watchful eye, and the willingness to let it go just to the edge of burnt. That’s where the magic lives.
After The Gilded Tart vanished, I tried recreating those scones from memory. The first batch was a disaster—too much flour, not enough butter, and I skipped browning the butter entirely because I was in a hurry. (Honestly, who was I kidding?) The second batch was better, but the glaze was too sweet, masking that nutty flavor I was chasing. By the fifth try, I was starting to wonder if I’d imagined how good they were. Maybe you’ve been there—obsessing over a dish you can’t have anymore, convinced your memory is exaggerating. But then, on try number seven, I got it. The scone was flaky but soft in the center, the pumpkin flavor was subtle but present, and the brown butter glaze? It was perfect. That deep, toasty, almost-but-not-quite-burnt butter flavor coated every bite. I sat at my kitchen counter, took a bite, and I swear I could hear that little bell above the bakery door jingle again.
These scones are my love letter to that tiny bakery and to anyone who understands that some recipes are worth chasing. They’re not complicated—just a little bit of technique and a whole lot of heart. Whether you’re making them for a cozy fall morning, a Thanksgiving brunch, or just because it’s October and you deserve something warm and spiced, this recipe delivers. Let’s get into it.
Why You Will Love This Recipe
I have tested this recipe more times than I care to admit, and I can tell you with absolute confidence—this is the one. Here is why these scones deserve a permanent spot in your baking rotation:
- Quick & Easy: From start to finish, you are looking at about 35 minutes. The brown butter takes five minutes, the dough comes together in ten, and the bake time is just 15 to 18 minutes. Perfect for a lazy Saturday morning or a last-minute hostess gift.
- Simple Ingredients: No fancy grocery store trips. You probably have everything in your pantry already—flour, sugar, pumpkin puree, butter, and a few warm spices. The only “special” step is browning the butter, and I promise it is worth it.
- Perfect for Fall: These scones are the official taste of autumn. They pair beautifully with a hot cup of coffee, a chai latte, or even a glass of cold milk. They are great for Thanksgiving morning, pumpkin carving parties, or just a quiet, rainy afternoon.
- Crowd-Pleaser: I have brought these to brunches, potlucks, and even a book club meeting. Every single time, someone asks for the recipe. Kids love the sweetness, adults love the sophisticated brown butter glaze. It is a win-win.
- Unbelievably Delicious: The texture is the real star here. The scone itself is tender and flaky, not dry or crumbly. The pumpkin keeps it moist, the spices warm it up, and the brown butter glaze adds a nutty, almost toffee-like finish. It is comfort food at its finest.
What makes this recipe different from all the other pumpkin scone recipes out there? It is the technique. Most recipes skip browning the butter, but that step is non-negotiable. It adds a depth of flavor that you simply cannot get from regular melted butter or even browned butter extract. Plus, I use a combination of cold butter (for flakiness) and browned butter (for flavor), so you get the best of both worlds. This is not just another pumpkin scone recipe—it is the one.
What Ingredients You Will Need
This recipe uses simple, wholesome ingredients to deliver that bakery-quality flavor and texture. Most of these are pantry staples, but I have included a few notes to help you choose the best options.
For the Scones
- 2 cups all-purpose flour (I prefer King Arthur Flour for consistent results, but any brand works)
- 1/3 cup granulated sugar (adds just the right amount of sweetness without overpowering the pumpkin)
- 1 tablespoon baking powder (make sure it is fresh—old baking powder leads to flat scones)
- 1/2 teaspoon baking soda
- 1/2 teaspoon salt
- 1 teaspoon ground cinnamon
- 1/2 teaspoon ground ginger
- 1/4 teaspoon ground nutmeg (freshly grated is best, but pre-ground works fine)
- 1/4 teaspoon ground cloves
- 1/2 cup cold unsalted butter, cut into small cubes (this creates the flaky layers)
- 1/2 cup pumpkin puree (canned is fine—just make sure it is 100% pumpkin, not pumpkin pie filling)
- 1/4 cup heavy cream (adds richness; you can substitute with whole milk if needed)
- 1 large egg
- 1 teaspoon vanilla extract
For the Brown Butter Glaze
- 1/2 cup unsalted butter (this gets browned, so use a light-colored pan to monitor the color)
- 1 1/2 cups powdered sugar, sifted (sifting prevents lumps in the glaze)
- 2 to 3 tablespoons milk (whole milk or 2% works best; start with 2 tablespoons and add more if needed)
- 1/2 teaspoon vanilla extract
- Pinch of salt (balances the sweetness)
Ingredient Selection Tips: For the best flavor, use a high-quality pumpkin puree. I like Libby’s because it is consistent and not too watery. If you are using fresh pumpkin, make sure to roast and puree it until smooth, then drain any excess liquid. For the butter, I recommend using a European-style butter like Plugrà for the browning step—it has a higher fat content, which means more flavor and a richer color.
Substitution Guidance: If you are dairy-free, you can substitute the heavy cream with full-fat coconut cream and use a dairy-free butter for browning. The texture will be slightly different, but still delicious. For a gluten-free version, swap the all-purpose flour with a 1:1 gluten-free baking flour blend. I have tested this with Bob’s Red Mill 1:1, and it works beautifully.
Equipment Needed
You do not need a professional bakery setup for these scones. Here is what you will need:
- Large mixing bowl (for the dry ingredients)
- Medium mixing bowl (for the wet ingredients)
- Pastry cutter or two forks (to cut the cold butter into the flour)
- Light-colored saucepan or skillet (essential for browning the butter so you can see the color change)
- Baking sheet (lined with parchment paper or a silicone baking mat)
- Whisk
- Rubber spatula
- Sharp knife or bench scraper (to cut the scones into wedges)
- Cooling rack
If you do not have a pastry cutter, do not worry. I used two forks for years before I finally bought one. You can also use your fingers—just work quickly so the butter stays cold. For the baking sheet, any rimmed sheet pan will do. I prefer Nordic Ware because they are sturdy and conduct heat evenly.
Preparation Method
Follow these steps carefully, and you will have perfect pumpkin scones every time.
- Preheat your oven to 400°F (200°C). Line a baking sheet with parchment paper or a silicone mat. This prevents sticking and makes cleanup a breeze.
- Brown the butter. In a light-colored saucepan over medium heat, melt the 1/2 cup of unsalted butter. Stir constantly with a rubber spatula or whisk. The butter will foam, then bubble, and then start to turn golden. Watch it closely—it can go from golden to burnt in seconds. Once you see brown specks forming at the bottom and the butter smells nutty, remove it from the heat immediately. Pour it into a small heatproof bowl to stop the cooking process. Let it cool slightly while you prepare the scone dough.
- Mix the dry ingredients. In a large mixing bowl, whisk together the 2 cups of all-purpose flour, 1/3 cup of granulated sugar, 1 tablespoon of baking powder, 1/2 teaspoon of baking soda, 1/2 teaspoon of salt, 1 teaspoon of cinnamon, 1/2 teaspoon of ginger, 1/4 teaspoon of nutmeg, and 1/4 teaspoon of cloves. Make sure the spices are evenly distributed.
- Cut in the cold butter. Add the 1/2 cup of cold, cubed butter to the dry ingredients. Using a pastry cutter or two forks, cut the butter into the flour until the mixture resembles coarse crumbs with some pea-sized butter pieces remaining. Do not overwork it—those little butter chunks create flaky layers as they melt in the oven.
- Mix the wet ingredients. In a medium bowl, whisk together the 1/2 cup of pumpkin puree, 1/4 cup of heavy cream, 1 large egg, and 1 teaspoon of vanilla extract until smooth. The mixture should be a uniform orange color.
- Combine wet and dry. Pour the wet ingredients into the dry ingredients. Use a rubber spatula to fold everything together until just combined. Do not overmix—overworking the dough will make the scones tough. It is okay if there are a few dry spots; they will come together in the next step.
- Shape the dough. Turn the dough out onto a lightly floured surface. Gently bring it together with your hands, patting it into a circle about 3/4-inch thick. Do not use a rolling pin—your hands are gentler. If the dough is too sticky, dust your hands with a little flour.
- Cut the scones. Using a sharp knife or bench scraper, cut the circle into 8 wedges (like a pizza). Place the wedges on the prepared baking sheet, spacing them about 2 inches apart. They will spread slightly as they bake.
- Bake. Bake for 15 to 18 minutes, or until the scones are golden brown on the edges and a toothpick inserted into the center comes out clean. The tops should be lightly browned. Let them cool on the baking sheet for 5 minutes, then transfer to a cooling rack to cool completely.
- Make the glaze. While the scones are cooling, prepare the brown butter glaze. Take the cooled browned butter (it should be solid but soft) and add it to a medium bowl. Add the sifted powdered sugar, 2 tablespoons of milk, 1/2 teaspoon of vanilla extract, and a pinch of salt. Whisk until smooth. If the glaze is too thick, add the remaining tablespoon of milk, one teaspoon at a time, until it reaches a drizzling consistency.
- Glaze the scones. Once the scones are completely cool, drizzle the brown butter glaze over the top. Use a spoon or a piping bag with the tip snipped off. Let the glaze set for about 10 minutes before serving. This step is crucial—if you glaze them while they are still warm, the glaze will melt and run off.
Cooking Tips & Techniques
After seven attempts, I learned a few things the hard way. Here are my top tips for scone success:
- Keep everything cold. The key to flaky scones is cold butter. If your kitchen is warm, pop the cubed butter in the freezer for 10 minutes before cutting it into the flour. You can even chill the bowl and the flour mixture for a few minutes.
- Do not skip browning the butter. I know it is an extra step, but it is the soul of this recipe. The nutty, caramelized flavor is what makes these scones taste like they came from a bakery. If you are short on time, you can brown the butter a day ahead and keep it in the fridge.
- Use a light-colored pan. When browning butter, a dark pan makes it nearly impossible to see the color change. I learned this the hard way—my first batch of brown butter was basically burnt butter. Use a stainless steel or light-colored nonstick pan.
- Do not overmix. Overmixing develops gluten, which makes scones tough and chewy. Mix until the dough just comes together. It is okay if it looks a little shaggy.
- Let the scones cool completely. I know it is tempting to glaze them while they are still warm, but trust me on this. Warm scones will absorb the glaze, leaving you with a soggy top and a sticky mess. Patience pays off.
Variations & Adaptations
This recipe is a great base, and I have tried a few fun twists over the years. Here are some of my favorites:
- Maple Pecan Pumpkin Scones: Add 1/2 cup of chopped pecans to the dry ingredients. For the glaze, substitute the vanilla extract with 1 tablespoon of maple syrup and reduce the milk by 1 tablespoon. The maple flavor pairs beautifully with the brown butter.
- Chocolate Chip Pumpkin Scones: Fold in 1/2 cup of semi-sweet chocolate chips after combining the wet and dry ingredients. The chocolate adds a nice contrast to the warm spices. I have made this version for my niece’s birthday, and it was a huge hit.
- Vegan Pumpkin Scones: Substitute the cold butter with cold vegan butter (I like Miyoko’s), the heavy cream with full-fat coconut cream, and the egg with a flax egg (1 tablespoon ground flaxseed + 3 tablespoons water, let sit for 5 minutes). The texture will be slightly denser, but still delicious.
- Gluten-Free Pumpkin Scones: Use a 1:1 gluten-free flour blend that contains xanthan gum. I have tested this with Bob’s Red Mill 1:1, and it works perfectly. The scones are a bit more delicate, so handle them gently.
- Spiced Brown Butter Glaze: Add 1/4 teaspoon of pumpkin pie spice to the glaze along with the powdered sugar. It gives the glaze an extra layer of warmth that is perfect for fall.
Serving & Storage Suggestions
These scones are best served fresh, but they store surprisingly well. Here is how to enjoy them at their best:
- Serving Temperature: Serve at room temperature. If you want to warm them up, pop them in a 300°F (150°C) oven for 5 minutes. Do not microwave them—it will make the glaze sticky and the scones soggy.
- Presentation: Arrange the scones on a beautiful platter or cake stand. Drizzle the glaze in a zigzag pattern for a bakery-style look. Add a few fresh cranberries or a sprinkle of cinnamon on top for a pop of color.
- Complementary Dishes: These scones are perfect with a hot cup of coffee, a chai latte, or a pumpkin spice latte. For a brunch spread, serve them alongside scrambled eggs, crispy bacon, and fresh fruit.
- Storage: Store in an airtight container at room temperature for up to 3 days. The glaze will stay set, but the scones will soften slightly over time. To keep them longer, freeze the unglazed scones (see below).
- Freezing: You can freeze the baked, unglazed scones for up to 3 months. Wrap each scone individually in plastic wrap, then place them in a freezer-safe bag. To serve, thaw at room temperature, then warm in the oven and glaze fresh.
- Flavor Development: Honestly, these scones taste even better the next day. The spices meld together, and the brown butter flavor deepens. I have been known to make a batch just to eat over the weekend.
Nutritional Information & Benefits
Here is the estimated nutritional information for one scone (with glaze):
- Calories: 380
- Fat: 22g
- Carbohydrates: 44g
- Protein: 4g
- Fiber: 2g
- Sugar: 22g
Health Benefits: Pumpkin is packed with vitamin A, which supports eye health and immune function. The cinnamon and ginger have anti-inflammatory properties, and the butter provides a good source of healthy fats (in moderation, of course). These scones are a treat, but they also offer a few nutritional perks.
Dietary Considerations: This recipe contains dairy, eggs, and gluten. For dairy-free and gluten-free options, see the variations section above. The scones are nut-free as written, but if you add pecans or other nuts, be sure to label them accordingly.
Personal Wellness Perspective: I believe in balance. These scones are not an everyday breakfast, but they are perfect for special occasions, cozy weekends, or when you just need a little comfort. Enjoy them without guilt—life is too short for bad scones.
Conclusion
These pumpkin scones with brown butter glaze are more than just a recipe—they are a memory I finally recreated. They are tender, buttery, and perfectly spiced, with a glaze that adds a nutty, caramelized finish that you will not forget. Whether you are making them for a fall brunch, a holiday gathering, or just because you deserve something warm and delicious, these scones deliver every time.
I want to hear about your scone adventures! Did you try a variation? Did you burn the butter on your first try like I did? (No judgment here—it happens to the best of us.) Drop a comment below and share your experience. And if you loved this recipe, please share it with your friends and family. After all, good scones are meant to be shared.
Happy baking, and remember—a little patience and a lot of butter can fix almost anything.
Frequently Asked Questions
Can I use pumpkin pie filling instead of pumpkin puree?
No, I do not recommend it. Pumpkin pie filling is pre-sweetened and spiced, which will throw off the balance of the recipe. Stick with 100% pure pumpkin puree for the best results.
Why did my scones turn out dry?
Dry scones are usually a result of overmixing or overbaking. Mix the dough until it just comes together, and check the scones at the 15-minute mark. Every oven is different, so keep an eye on them.
Can I make the dough ahead of time?
Yes! You can prepare the dough, shape it into wedges, and freeze them on a baking sheet. Once frozen, transfer the wedges to a freezer bag. Bake from frozen, adding 2 to 3 minutes to the baking time.
How do I know when the butter is properly browned?
Look for three signs: the butter will foam, then the foam will subside, and you will see brown specks forming at the bottom of the pan. It will also smell nutty and toasty. Remove it from the heat immediately at this point.
Can I skip the glaze?
You can, but you will be missing out on the best part! The brown butter glaze is what makes these scones truly special. If you want a lighter option, try a simple dusting of powdered sugar instead.
Pin This Recipe!

Best Easy Pumpkin Scones with Brown Butter Glaze
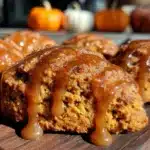
Tender, buttery pumpkin scones with a nutty brown butter glaze that tastes just like the ones from a beloved Portland bakery. Perfect for fall mornings or cozy weekends.
- Prep Time: 15 minutes
- Cook Time: 18 minutes
- Total Time: 33 minutes
- Yield: 8 servings 1x
- Category: Breakfast
- Cuisine: American
Ingredients
- 2 cups all-purpose flour
- 1/3 cup granulated sugar
- 1 tablespoon baking powder
- 1/2 teaspoon baking soda
- 1/2 teaspoon salt
- 1 teaspoon ground cinnamon
- 1/2 teaspoon ground ginger
- 1/4 teaspoon ground nutmeg
- 1/4 teaspoon ground cloves
- 1/2 cup cold unsalted butter, cut into small cubes
- 1/2 cup pumpkin puree
- 1/4 cup heavy cream
- 1 large egg
- 1 teaspoon vanilla extract
- 1/2 cup unsalted butter (for glaze)
- 1 1/2 cups powdered sugar, sifted
- 2 to 3 tablespoons milk
- 1/2 teaspoon vanilla extract (for glaze)
- Pinch of salt (for glaze)
Instructions
- Preheat your oven to 400°F (200°C). Line a baking sheet with parchment paper or a silicone mat.
- Brown the butter: In a light-colored saucepan over medium heat, melt 1/2 cup unsalted butter. Stir constantly until it foams, then bubbles, then turns golden with brown specks and smells nutty. Remove from heat immediately and pour into a heatproof bowl to cool slightly.
- Mix dry ingredients: In a large bowl, whisk together flour, sugar, baking powder, baking soda, salt, cinnamon, ginger, nutmeg, and cloves.
- Cut in cold butter: Add cold cubed butter to dry ingredients. Use a pastry cutter or two forks to cut it in until the mixture resembles coarse crumbs with some pea-sized butter pieces.
- Mix wet ingredients: In a medium bowl, whisk together pumpkin puree, heavy cream, egg, and vanilla extract until smooth.
- Combine wet and dry: Pour wet ingredients into dry. Fold with a rubber spatula until just combined. Do not overmix.
- Shape dough: Turn dough out onto a lightly floured surface. Gently pat into a circle about 3/4-inch thick.
- Cut scones: Cut the circle into 8 wedges. Place on prepared baking sheet, spacing 2 inches apart.
- Bake: Bake for 15 to 18 minutes, until golden brown on edges and a toothpick comes out clean. Cool on baking sheet for 5 minutes, then transfer to a cooling rack to cool completely.
- Make glaze: In a medium bowl, combine cooled browned butter, sifted powdered sugar, 2 tablespoons milk, vanilla extract, and a pinch of salt. Whisk until smooth. Add more milk if needed for drizzling consistency.
- Glaze scones: Once scones are completely cool, drizzle glaze over the top. Let set for 10 minutes before serving.
Notes
Keep butter cold for flaky scones. Brown butter can be made a day ahead. Do not overmix dough. Let scones cool completely before glazing.
Nutrition
- Serving Size: 1 scone
- Calories: 380
- Sugar: 22
- Sodium: 320
- Fat: 22
- Saturated Fat: 13
- Carbohydrates: 44
- Fiber: 2
- Protein: 4
Keywords: pumpkin scones, brown butter glaze, fall baking, easy scone recipe, bakery-style scones