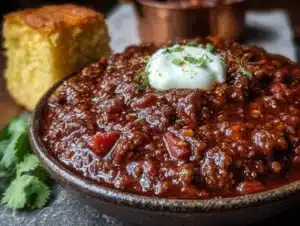
There used to be a tiny, red-painted food stand tucked behind a gas station off I-35 in Texas that made the best bowl of chili I have ever had. When they closed—just vanished one Tuesday with a handwritten sign taped to the window that said “Gone Fishin'”—I honestly felt a little hollow. That chili was thick, dark, meaty, and absolutely packed with flavor. No beans. No tomatoes chunks swimming around. Just pure, deep, beefy goodness that stuck to your ribs and left you licking the spoon.
After maybe twelve attempts—some were watery disasters, one was so spicy I couldn’t feel my tongue for an hour—I finally cracked the code. And let me tell you, this version nails that exact memory. It is rich, bold, and comes together in just thirty minutes on your stovetop. I am talking about the kind of chili that makes you close your eyes after that first bite and just nod slowly. You know that feeling when something tastes exactly like it should? That is this recipe.
I remember the day I finally got it right. I was standing over my stove, a little frustrated after batch number eleven tasted more like bland soup than chili. My neighbor Dave knocked on the door to borrow an egg, and I shoved a spoonful at him without warning. He chewed, looked at the pot, then back at me, and said, “That is the one.” I almost cried. Honestly. This is that recipe—the one I chased for months and finally caught. It is simple enough for a Tuesday night but impressive enough to serve to a crowd who thinks you slaved all day.
Why You Will Love This Recipe
This no-bean beef chili is about to become your secret weapon for hosting. I have tested this recipe at least a dozen times, tweaked the spice blend, adjusted the simmer time, and even had a chef friend taste-test it blind. It passed every single round. Here is why it works so well:
- Ready in 30 Minutes: No all-day simmering required. This chili develops deep flavor fast because of a few clever techniques I will share below. Perfect for when guests show up hungry or you forgot to plan dinner.
- Simple Ingredients: You probably have most of these in your pantry right now. Ground beef, canned tomatoes, chili powder, cumin, garlic. No weird specialty items needed.
- Perfect for Hosting: This chili is a showstopper at game day parties, potlucks, or casual dinner gatherings. It feeds a crowd, and the no-bean style feels a little more sophisticated—like something you would order at a BBQ joint.
- Crowd-Pleaser: I have served this to kids, picky eaters, and hardcore chili purists. Everyone goes back for seconds. The texture is smooth and meaty, and the flavor hits that perfect balance of savory, smoky, and warm.
- Unbelievably Delicious: The secret is in the browning technique and the spice bloom. You get layers of flavor that taste like they took hours, not minutes.
What makes this recipe different from all the other chili recipes out there is the double-browning method. Most recipes just dump the beef in and let it cook. I take an extra minute to really sear the meat in batches, which builds that deep, caramelized flavor foundation. Then I bloom the spices in the rendered fat before adding any liquid. That simple step changes everything. It is not just another chili recipe—it is the best version I have ever made, and I am pretty picky about my chili.
This is the kind of dish that makes you feel like a rockstar host without the stress. You can prep the ingredients in the morning, cook it in under thirty minutes when guests arrive, and let it sit on the stove while everyone helps themselves. It is comfort food that impresses without trying too hard.
What Ingredients You Will Need
This recipe uses simple, hearty ingredients to deliver that deep, beefy flavor without any filler. No beans here—just pure meat and spice goodness. Most of these are pantry staples, which makes this perfect for last-minute hosting.
- 2 pounds ground beef (80/20 blend) — The 20% fat is key here. Leaner beef will dry out and won’t give you enough rendered fat to bloom the spices. I prefer ground chuck for the best flavor-to-fat ratio. (adds richness and depth)
- 1 large yellow onion, finely diced — About 2 cups. The finer you dice, the more it melts into the chili. No one wants a big chunk of raw onion in their bite.
- 4 cloves garlic, minced — Fresh is non-negotiable here. Pre-minced jarred garlic has a different flavor that can turn bitter during cooking.
- 2 tablespoons chili powder — I recommend using a good quality chili powder blend like Gebhardt or Mexene. They have a balanced heat and deep color.
- 1 tablespoon ground cumin — This is the backbone of the chili flavor. Toast it in the pan for a few seconds before adding liquid for maximum impact.
- 1 teaspoon smoked paprika — Adds that subtle campfire smokiness that makes people think you cooked this over an open flame.
- 1 teaspoon dried oregano — Mexican oregano is best if you have it, but standard Mediterranean oregano works fine too.
- 1/2 teaspoon cayenne pepper — Adjust to your heat preference. I use 1/2 teaspoon for a mild warmth that doesn’t overpower.
- 1 can (14.5 ounces) fire-roasted diced tomatoes — Fire-roasted adds a layer of charred sweetness that regular diced tomatoes just don’t have. Do not drain them.
- 1 can (8 ounces) tomato sauce — This gives the chili its thick, rich body without being too acidic.
- 1 cup beef broth — Use low-sodium so you can control the salt level. I prefer Swanson or Kitchen Basics for consistent flavor.
- 1 tablespoon tomato paste — This is the secret to that deep red color and concentrated tomato flavor. Do not skip it.
- 1 tablespoon Worcestershire sauce — Adds umami and a little tang that brightens the whole dish.
- 1 teaspoon salt — Start with this and adjust at the end. Different brands of broth and tomatoes have varying salt levels.
- 1/2 teaspoon black pepper — Freshly ground is always better.
- Optional toppings: Shredded cheddar cheese, sour cream, chopped green onions, sliced jalapeños, crushed tortilla chips.
For the best results, I recommend using 80/20 ground beef from a local butcher if you can find one. The freshness makes a noticeable difference. If you need to use leaner beef, add a tablespoon of olive oil to the pan before browning to prevent sticking and add moisture.
Equipment Needed
You do not need any fancy equipment for this chili. A few basic tools will get the job done perfectly.
- Large heavy-bottomed pot or Dutch oven — I use my 5.5-quart Le Creuset Dutch oven, but any heavy pot works. The heavy bottom prevents scorching and distributes heat evenly. A cheap thin pot will give you hot spots and burnt chili.
- Wooden spoon or spatula — For breaking up the ground beef as it browns. A wooden spoon is gentle on your pot and gives you good leverage.
- Sharp chef’s knife — A dull knife makes dicing onions a miserable experience. Keep it sharp.
- Cutting board — Any sturdy board works. I prefer wood because it is gentler on knives.
- Measuring spoons — For accurate spice measurements. Eyeballing chili powder can lead to wildly different results.
- Can opener — Unless you buy the pull-tab cans.
- Ladle — For serving. A deep ladle makes portioning easy without making a mess.
If you do not have a Dutch oven, a large stainless steel pot or even a deep cast iron skillet will work. Just make sure it is big enough to hold all the ingredients without overflowing. A 4-quart pot is the minimum size I would recommend.
Preparation Method
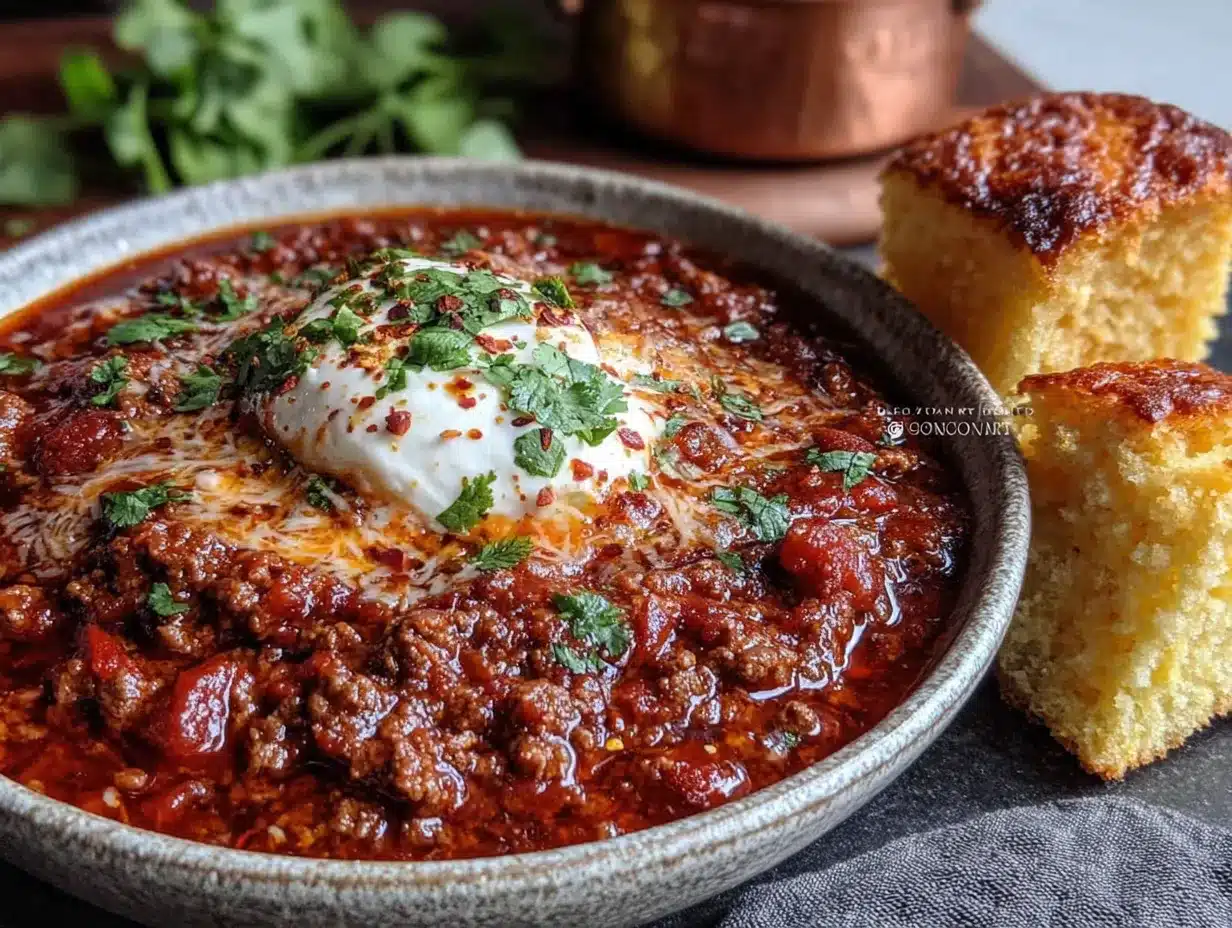
This chili comes together fast, so I recommend prepping all your ingredients before you turn on the heat. Dice the onion, mince the garlic, open the cans, and measure out your spices. Trust me, once that beef hits the pan, you will not have time to chop anything.
- Brown the beef in batches. Heat your pot over medium-high heat. Add half the ground beef (about 1 pound) and let it sit undisturbed for 3-4 minutes. You want a deep brown crust, not gray meat. Break it apart with your spoon and continue cooking until fully browned, about 5-6 minutes total. Transfer to a bowl using a slotted spoon, leaving the rendered fat in the pot. Repeat with the remaining beef. This double-browning step is what gives the chili that incredible depth. If you crowd the pan, the beef steams instead of sears.
- Sauté the aromatics. Reduce the heat to medium. Add the diced onion to the pot with the remaining beef fat. Cook for 4-5 minutes, stirring occasionally, until the onion is soft and translucent. Scrape up any browned bits from the bottom of the pot—that is pure flavor. Add the minced garlic and cook for 30 seconds until fragrant. Do not let the garlic burn or it will turn bitter.
- Bloom the spices. Add the chili powder, cumin, smoked paprika, oregano, cayenne, salt, and pepper directly to the onions and garlic. Stir constantly for 30-60 seconds until the spices are fragrant and darkened slightly. This blooming step wakes up the essential oils in the spices and makes them taste much more complex. Your kitchen will smell incredible right about now.
- Add the tomato paste. Stir in the tomato paste and cook for 1 minute, stirring constantly. The paste will darken and caramelize slightly, adding another layer of richness. This is a small step that makes a big difference.
- Combine the liquids. Pour in the fire-roasted diced tomatoes with their juices, the tomato sauce, beef broth, and Worcestershire sauce. Stir everything together, scraping the bottom of the pot to release any stuck-on bits. Bring the mixture to a gentle simmer.
- Return the beef. Add the browned beef back to the pot, along with any juices that accumulated in the bowl. Stir to combine. Reduce the heat to low and let the chili simmer uncovered for 15-20 minutes, stirring occasionally. The chili will thicken as it cooks. If it looks too thick, add a splash of beef broth. If it looks too thin, let it simmer a few minutes longer.
- Taste and adjust. After 15 minutes, taste your chili. This is where you adjust the seasoning. Need more salt? Add it. Want more heat? Stir in a pinch more cayenne. A little too acidic? A pinch of sugar will balance it out. This is your chili, so make it taste exactly how you like it.
- Rest before serving. Turn off the heat and let the chili sit for 5-10 minutes before serving. This resting time allows the flavors to meld and the texture to settle. It will taste even better than when it was bubbling.
The chili should be thick enough to coat the back of a spoon without being pasty. If you prefer a thinner chili, add more broth. If you like it thicker, let it simmer a bit longer. The texture is totally up to you.
Cooking Tips & Techniques
After making this chili more times than I can count, I have learned a few tricks that make a real difference. Here are the ones I swear by.
Do not rush the browning. This is the single most important step in the entire recipe. If you crowd the pan, the beef releases too much moisture and steams instead of sears. You lose all that beautiful brown crust that gives chili its depth. Brown in two batches, even if it takes an extra five minutes. I once tried to save time by dumping all the beef in at once, and the result was a pale, sad chili that tasted more like meat soup. Never again.
Bloom your spices. Adding dry spices directly to the liquid is a missed opportunity. When you bloom them in hot fat first, they release their essential oils and become much more aromatic. The difference is night and day. I learned this the hard way after making a batch that tasted flat and one-dimensional. The blooming step only takes 30 seconds but adds so much complexity.
Use fire-roasted tomatoes. Regular diced tomatoes work in a pinch, but fire-roasted adds a subtle charred sweetness that mimics the flavor of chili cooked over an open fire. It is a small swap that makes a big impact. I always keep a few cans in my pantry for exactly this reason.
Let it rest. Chili always tastes better after it has had time to sit. The flavors need a few minutes to get to know each other. If you can, make this chili an hour before you plan to serve it and let it sit on the stove with the lid on. The flavor deepens noticeably. I have even made it a day ahead and reheated it, and it was spectacular.
Watch your salt. Different brands of broth and canned tomatoes have varying salt levels. Start with 1 teaspoon of salt and adjust at the end. You can always add more, but you cannot take it out. I learned this mistake when I used a high-sodium broth and added the full amount of salt. The chili was borderline inedible.
Skim the fat if needed. If you used 80/20 beef, there will be rendered fat on top of the finished chili. You can skim it off with a spoon if you prefer a leaner chili, or leave it for extra richness. I usually leave it because fat is flavor, but it is your call.
Variations & Adaptations
This chili is a great base recipe that you can customize in so many ways. Here are a few of my favorite variations.
Spicy Kick: Add 1-2 finely diced jalapeños with the onions, or stir in 1 tablespoon of chipotle peppers in adobo sauce for a smoky heat. I made this version for a Super Bowl party and it disappeared in minutes. The chipotle adds a deep, earthy spiciness that is hard to replicate.
Smoky Twist: Replace the smoked paprika with 1 teaspoon of liquid smoke added at the end of cooking. This gives the chili an intense campfire flavor that pairs beautifully with the beef. I like to serve this version with grilled cornbread on the side.
Turkey or Chicken Version: Substitute ground turkey or chicken for the beef. Use 93/7 lean ground turkey and add 2 tablespoons of olive oil to the pot before browning. The flavor is lighter but still delicious. This is my go-to when I want something a little healthier but still satisfying.
Vegetarian Option: Replace the beef with 2 cans of black beans and 1 cup of finely chopped mushrooms. The mushrooms add that meaty texture, and the beans provide protein. Use vegetable broth instead of beef broth. I tested this version for a vegetarian friend and she asked for the recipe immediately.
Slow Cooker Adaptation: Brown the beef and sauté the aromatics on the stovetop, then transfer everything to a slow cooker. Cook on low for 6-8 hours or high for 3-4 hours. The longer cooking time deepens the flavors even more. This is perfect for busy days when you want dinner ready when you walk in the door.
Keto-Friendly: This recipe is already low in carbs since it has no beans. Serve it over cauliflower rice or with a side of avocado for a keto-friendly meal. I have made this for keto friends and they were thrilled to have a hearty chili option.
Serving & Storage Suggestions
This chili is incredibly versatile when it comes to serving. Here is how I like to present it and store it.
Serving Temperature: Serve the chili hot, straight from the pot. I like to ladle it into deep bowls and let everyone add their own toppings. A toppings bar is always a hit at parties—set out bowls of shredded cheddar, sour cream, diced onions, jalapeños, and crushed tortilla chips.
What to Serve Alongside: This chili pairs beautifully with classic cornbread, a simple green salad, or crusty bread for dipping. For a full spread, I also like to serve loaded nachos on the side for guests to build their own plates. A cold beer or a glass of red wine rounds out the meal perfectly.
Storage: Leftover chili keeps beautifully in the refrigerator for up to 5 days. Store it in an airtight container. The flavors actually deepen overnight, so it often tastes even better the next day. I love making a double batch just for leftovers.
Freezing: This chili freezes wonderfully for up to 3 months. Let it cool completely, then transfer to freezer-safe bags or containers. I like to portion it into individual servings so I can grab one for a quick lunch. Thaw overnight in the refrigerator before reheating.
Reheating: Reheat the chili on the stovetop over medium-low heat, stirring occasionally. Add a splash of beef broth or water if it has thickened too much. You can also microwave individual portions in 30-second bursts, stirring in between. The texture stays great either way.
Flavor Development: This chili is one of those dishes that gets better with time. The spices meld and mellow, and the beef absorbs all the flavors. If you can, make it a day ahead and refrigerate it overnight. The difference is subtle but noticeable.
Nutritional Information & Benefits
Here is the approximate nutritional breakdown for one serving of this chili (about 1.5 cups, without toppings).
- Calories: 420
- Protein: 35g
- Fat: 28g
- Carbohydrates: 12g
- Fiber: 3g
- Sugar: 6g
- Sodium: 780mg
This chili is packed with protein from the beef, which helps keep you full and satisfied. The tomatoes provide a good dose of vitamin C and lycopene, a powerful antioxidant. The spices—especially cumin and chili powder—have anti-inflammatory properties and can aid digestion.
This recipe is naturally gluten-free, grain-free, and low-carb, making it suitable for keto, paleo, and Whole30 diets (just check your Worcestershire sauce for added sugar). It is also dairy-free if you skip the cheese toppings. The only potential allergen is the beef itself, so it is not suitable for vegetarians or vegans without the substitutions mentioned above.
I personally love that this chili feels indulgent but is actually pretty balanced. It is hearty enough to be a meal on its own, but light enough that you do not feel weighed down afterwards. That is the sweet spot for me.
Conclusion
This no-bean beef chili is the recipe I have been chasing for years, and I am so excited to share it with you. It is bold, beefy, and comes together in just thirty minutes, which makes it perfect for hosting a crowd or feeding your family on a busy weeknight. The technique is simple, the ingredients are accessible, and the result is genuinely restaurant-quality.
I love how versatile this chili is. You can spice it up, smoke it out, or keep it classic. You can serve it with all the toppings or keep it simple with just a sprinkle of cheese. It is the kind of recipe that becomes a staple in your rotation because it works every single time. And honestly, there is something so satisfying about pulling off a dish that tastes like it simmered all day when it only took half an hour.
I would love to hear how this chili turns out for you. Did you add your own twist? Did it remind you of a favorite chili from your past? Drop a comment below and let me know. And if you loved this recipe, share it with a friend who loves hosting as much as you do. Happy cooking, friends!
Frequently Asked Questions
Can I use a different type of ground meat?
Absolutely. Ground turkey, chicken, or even pork work well in this recipe. Just adjust the fat content by adding a little oil if needed, and keep an eye on the cooking time since leaner meats cook faster.
How can I make this chili thicker?
Simmer it uncovered for an additional 10-15 minutes to let more liquid evaporate. You can also stir in 1 tablespoon of cornstarch mixed with 2 tablespoons of cold water, then simmer for 2-3 minutes until thickened.
Can I make this chili in an Instant Pot?
Yes. Use the sauté function to brown the beef and cook the aromatics, then add the remaining ingredients. Pressure cook on high for 10 minutes, then do a natural release for 10 minutes before quick releasing the remaining pressure.
How long does this chili last in the refrigerator?
Stored in an airtight container, this chili will stay fresh for up to 5 days in the refrigerator. The flavors actually improve over the first 24 hours, so do not hesitate to make it ahead of time.
Can I add beans to this recipe?
Of course. If you want beans, stir in 1 can of drained and rinsed kidney beans or pinto beans during the last 10 minutes of simmering. Just note that this will change the texture and add more fiber and carbohydrates.
Pin This Recipe!
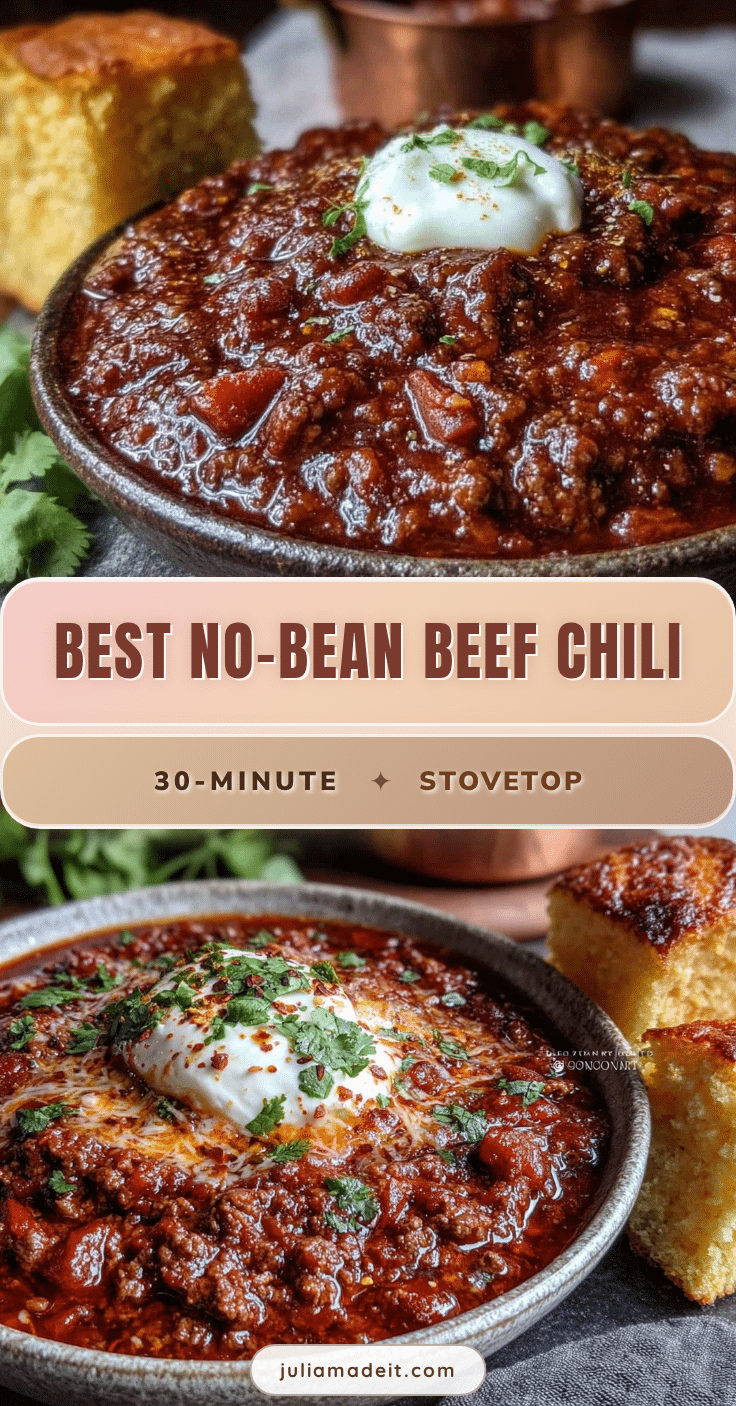
Best No-Bean Beef Chili Ready in 30 Minutes

This no-bean beef chili is thick, dark, meaty, and packed with flavor. It comes together in just thirty minutes on your stovetop, making it perfect for hosting a crowd or feeding your family on a busy weeknight.
- Prep Time: 10 minutes
- Cook Time: 30 minutes
- Total Time: 40 minutes
- Yield: 6 servings 1x
- Category: Main Course
- Cuisine: American
Ingredients
- 2 pounds ground beef (80/20 blend)
- 1 large yellow onion, finely diced
- 4 cloves garlic, minced
- 2 tablespoons chili powder
- 1 tablespoon ground cumin
- 1 teaspoon smoked paprika
- 1 teaspoon dried oregano
- 1/2 teaspoon cayenne pepper
- 1 can (14.5 ounces) fire-roasted diced tomatoes
- 1 can (8 ounces) tomato sauce
- 1 cup beef broth
- 1 tablespoon tomato paste
- 1 tablespoon Worcestershire sauce
- 1 teaspoon salt
- 1/2 teaspoon black pepper
- Optional toppings: shredded cheddar cheese, sour cream, chopped green onions, sliced jalapeños, crushed tortilla chips
Instructions
- Brown the beef in batches. Heat your pot over medium-high heat. Add half the ground beef (about 1 pound) and let it sit undisturbed for 3-4 minutes. Break it apart and continue cooking until fully browned, about 5-6 minutes total. Transfer to a bowl using a slotted spoon, leaving the rendered fat in the pot. Repeat with the remaining beef.
- Sauté the aromatics. Reduce the heat to medium. Add the diced onion to the pot with the remaining beef fat. Cook for 4-5 minutes, stirring occasionally, until the onion is soft and translucent. Add the minced garlic and cook for 30 seconds until fragrant.
- Bloom the spices. Add the chili powder, cumin, smoked paprika, oregano, cayenne, salt, and pepper directly to the onions and garlic. Stir constantly for 30-60 seconds until fragrant.
- Add the tomato paste. Stir in the tomato paste and cook for 1 minute, stirring constantly.
- Combine the liquids. Pour in the fire-roasted diced tomatoes with their juices, the tomato sauce, beef broth, and Worcestershire sauce. Stir together, scraping the bottom of the pot. Bring to a gentle simmer.
- Return the beef. Add the browned beef back to the pot, along with any juices. Stir to combine. Reduce heat to low and let simmer uncovered for 15-20 minutes, stirring occasionally.
- Taste and adjust. After 15 minutes, taste and adjust seasoning as needed.
- Rest before serving. Turn off the heat and let the chili sit for 5-10 minutes before serving.
Notes
Do not rush the browning step; brown in batches for best flavor. Bloom spices in hot fat for 30-60 seconds. Use fire-roasted tomatoes for extra depth. Let chili rest before serving for better flavor melding. Adjust salt at the end based on broth and tomato saltiness.
Nutrition
- Serving Size: 1.5 cups
- Calories: 420
- Sugar: 6
- Sodium: 780
- Fat: 28
- Saturated Fat: 10
- Carbohydrates: 12
- Fiber: 3
- Protein: 35
Keywords: no-bean chili, beef chili, 30-minute chili, Texas chili, easy chili recipe, stovetop chili