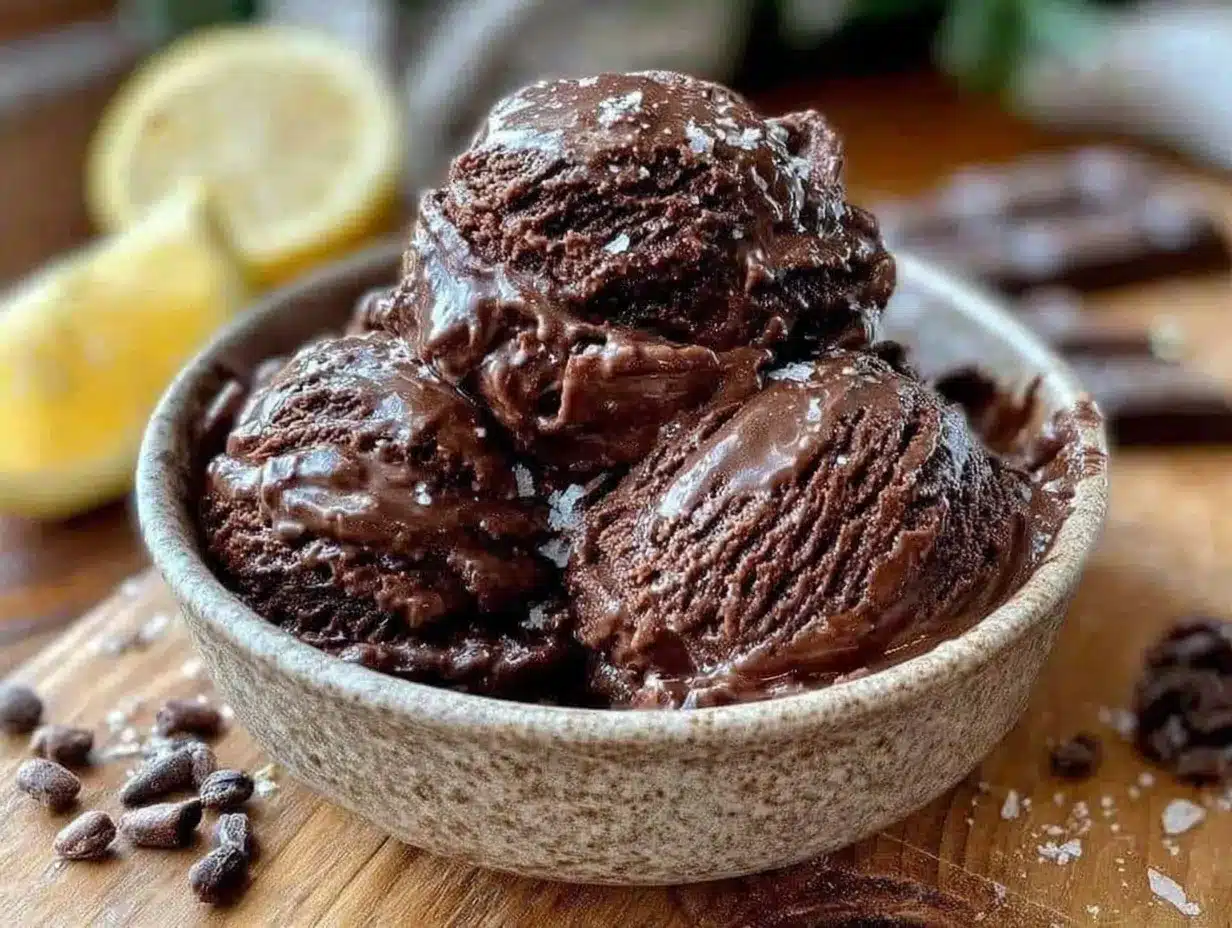
Let me tell you, the scent of rich, velvety chocolate swirling through the air as this creamy chocolate ice cream churns in the freezer is enough to make anyone’s mouth water. The first time I made this recipe, I was instantly hooked—the kind of moment where you pause, take a deep breath, and just smile because you know you’re onto something truly special. It takes me back to when I was knee-high to a grasshopper, sneaking spoonfuls of my grandma’s homemade ice cream on summer afternoons.
Years ago, I stumbled upon the perfect balance of creaminess and chocolate intensity on a rainy weekend, trying to recreate that nostalgic feeling of pure, indulgent comfort. My family couldn’t stop sneaking scoops off the cooling container (and I can’t really blame them). Honestly, this creamy chocolate ice cream recipe is dangerously easy to make but tastes like it took hours of love and skill.
Whether you’re looking to brighten up your Pinterest dessert board or need a sweet treat to impress at potlucks, this homemade ice cream will quickly become your go-to. Tested multiple times in the name of research, of course, it’s now a staple for family gatherings and gifting. Trust me, it feels like a warm hug in every bite, and you’re going to want to bookmark this one.
Why You’ll Love This Recipe
From my kitchen to yours, this creamy chocolate ice cream recipe stands out for so many reasons. Having tested countless versions over the years, I can confidently say this one hits all the right notes—the perfect rich flavor, smooth texture, and just the right sweetness. Here’s why this recipe is a must-try:
- Quick & Easy: Comes together in under 30 minutes of hands-on time, perfect for busy weeknights or last-minute dessert cravings.
- Simple Ingredients: No exotic ingredients or fancy gadgets needed; you likely have everything in your kitchen pantry.
- Perfect for Any Occasion: Great for birthday parties, cozy nights in, or summer barbecues where you want to impress without the stress.
- Crowd-Pleaser: Always gets rave reviews from kids and adults alike—honestly, it disappears fast!
- Unbelievably Delicious: The texture is ultra-smooth and creamy, with a perfectly balanced chocolate flavor that’s not too bitter or too sweet.
What makes this recipe different? It’s the simple technique of tempering the egg yolks and the use of high-quality cocoa powder combined with real melted chocolate that creates a luscious, silky base. Plus, I use a touch of espresso powder to boost the chocolate flavor without adding coffee taste—trust me, it’s a game changer.
It’s not just good—it’s the kind of dessert that makes you close your eyes after the first bite. This creamy chocolate ice cream recipe is comfort food with soul, fast to whip up but rich enough to turn any evening into a special occasion.
What Ingredients You Will Need
This recipe uses simple, wholesome ingredients to deliver bold flavor and satisfying texture without the fuss. Most are pantry staples, and you can easily swap a few if needed.
- Whole Milk (2 cups / 480 ml) – Provides the creamy base; full-fat works best.
- Heavy Cream (1 cup / 240 ml) – Adds richness and smooth texture.
- Granulated Sugar (¾ cup / 150 g) – Sweetens the ice cream evenly.
- Cocoa Powder, unsweetened (½ cup / 50 g) – Use a high-quality Dutch-processed cocoa like Valrhona for deep flavor.
- Bittersweet Chocolate, chopped (4 oz / 115 g) – Melted into the base for luxurious richness.
- Egg Yolks (4 large, room temperature) – For a creamy custard base that prevents ice crystals.
- Salt (¼ tsp) – Enhances the chocolate flavor.
- Vanilla Extract (1 tsp) – Adds warmth and complexity.
- Espresso Powder (optional, 1 tsp) – Intensifies the chocolate without adding coffee taste.
If you prefer a dairy-free version, swap the milk and cream with full-fat coconut milk and coconut cream. For a lower-sugar option, try using a natural sweetener like maple syrup or honey, but note this may affect freezing texture a bit.
Equipment Needed
- Ice cream maker (a classic churn model or a modern electric one both work well)
- Medium saucepan for heating milk and cream
- Mixing bowls, preferably heatproof for tempering eggs
- Whisk and rubber spatula
- Fine mesh sieve to strain custard (helps ensure smooth texture)
- Measuring cups and spoons for accuracy
- Instant-read thermometer (helpful but optional to check custard temperature)
Don’t have an ice cream maker? No worries—you can still make this recipe using a no-churn method with whipped cream and sweetened condensed milk, though the texture will be a bit different. I recommend a budget-friendly Cuisinart ice cream maker if you want to get serious—it’s easy to clean and gives consistent results.
Preparation Method
- Warm the Dairy: In a medium saucepan, combine 2 cups (480 ml) whole milk, 1 cup (240 ml) heavy cream, ½ cup (50 g) cocoa powder, and ¾ cup (150 g) granulated sugar. Whisk constantly over medium heat until the mixture is hot but not boiling—about 5-7 minutes. You’ll see the sugar dissolve and the cocoa blend smoothly. Remove from heat.
- Melt the Chocolate: Add 4 oz (115 g) chopped bittersweet chocolate to the hot mixture. Stir gently until completely melted and combined. The base should be glossy and thick.
- Temper Egg Yolks: In a separate bowl, whisk 4 large egg yolks. Slowly pour about 1 cup (240 ml) of the warm chocolate mixture into the yolks while whisking vigorously. This prevents scrambling and gently warms the eggs.
- Cook Custard: Pour the tempered egg mixture back into the saucepan. Cook over low heat, stirring constantly with a rubber spatula, until the custard thickens enough to coat the back of a spoon (about 170°F / 77°C). Don’t let it boil!
- Strain & Chill: Pass the custard through a fine mesh sieve into a clean bowl to remove any cooked bits. Stir in ¼ tsp salt, 1 tsp vanilla extract, and 1 tsp espresso powder (if using). Cover with plastic wrap, pressing it directly on the surface to prevent skin forming. Chill in the fridge for at least 4 hours or overnight.
- Churn the Ice Cream: Pour the chilled custard into your ice cream maker and churn according to manufacturer instructions—usually 20-30 minutes. You’ll notice it thicken and become creamy.
- Freeze to Firm Up: Transfer the soft ice cream to an airtight container and freeze for at least 2 hours before serving for the perfect scoopable texture.
If you want to speed things up, chilling the base overnight really helps develop flavor and texture. And a quick tip: don’t skip the straining step—trust me, it makes a world of difference in smoothness.
Cooking Tips & Techniques
One trick to achieving that ultra-smooth, creamy texture is to watch the custard carefully as it cooks—stir constantly and keep the heat low. I’ve made the mistake of rushing this part, and the eggs scramble, ruining the whole batch.
Also, tempering the yolks is key. Pouring the hot dairy too fast into the eggs will give you scrambled bits, so take your time pouring slowly while whisking. You know what they say—patience makes perfect ice cream!
Using high-quality cocoa and chocolate changes everything. I always keep a stash of Valrhona cocoa and Callebaut chocolate on hand for desserts like this. It’s a bit of an investment but totally worth it for the flavor punch.
If your ice cream maker bowl isn’t fully frozen, the ice cream won’t churn properly and can turn icy. I learned this the hard way, so I usually pop my bowl in the freezer the night before.
Lastly, don’t skip the resting time in the freezer after churning. The texture firms up and flavors meld, giving you that classic scoopable, luscious chocolate ice cream.
Variations & Adaptations
- Dairy-Free Version: Swap whole milk and heavy cream for full-fat coconut milk and coconut cream. Use dairy-free dark chocolate to keep it vegan-friendly. It’s a tropical twist with the same creamy feel.
- Extra Chocolate Crunch: Stir in chopped dark chocolate chunks or chocolate chips during the last 5 minutes of churning for a delightful texture contrast.
- Spicy Kick: Add a pinch of cayenne pepper or cinnamon to the custard base for a subtle warmth that balances the chocolate sweetness perfectly.
- Mocha Flavor: Increase espresso powder to 2 teaspoons and add a tablespoon of instant coffee granules for a rich coffee chocolate combo.
I once added a swirl of salted caramel sauce after churning for a decadent marbled effect—totally irresistible and a crowd favorite at my last gathering.
Serving & Storage Suggestions
Serve this creamy chocolate ice cream slightly softened for the best texture—about 5 minutes at room temperature should do the trick. Scoop into bowls or waffle cones and garnish with chocolate shavings or fresh berries for a beautiful presentation.
This ice cream pairs wonderfully with warm desserts like brownies or fruit pies, or simply enjoy it solo with a drizzle of chocolate syrup for a pure chocolate lover’s dream.
Store leftovers in an airtight container in the freezer. To prevent ice crystals, press a piece of parchment paper directly on the surface before sealing. It keeps the texture fresh for up to 2 weeks.
When reheating isn’t an option, soften it gently by transferring to the fridge for 20 minutes before scooping again. Over time, the chocolate flavor deepens and becomes even more luscious, so it only gets better the next day!
Nutritional Information & Benefits
A typical serving (½ cup / 125 ml) of this creamy chocolate ice cream contains approximately 300 calories, 20 grams of fat, 25 grams of carbohydrates, and 5 grams of protein. It’s a treat best enjoyed in moderation but offers some benefits too.
The cocoa powder used is rich in antioxidants, which can support heart health and mood improvement. Using real chocolate adds minerals like iron and magnesium, and the egg yolks provide vitamin A and healthy fats.
This recipe can easily be adapted to gluten-free diets and, with substitutions, to dairy-free or vegan needs. Just watch for allergens like eggs and dairy if serving to sensitive guests.
Conclusion
If you’re after a creamy chocolate ice cream recipe that’s genuinely easy to make yet tastes like you spent hours on it, this one’s for you. It’s rich, smooth, and perfectly chocolatey—the kind of dessert that makes you smile with every bite.
Feel free to tweak the chocolate intensity or try the variations to suit your taste. I love how this recipe brings back those nostalgic memories while still feeling fresh and homemade.
Give it a go, share your spin on it, and don’t forget to leave a comment telling me how it turned out. Trust me, once you try this, it’ll become your decadent dessert staple too!
FAQs About Creamy Chocolate Ice Cream
Q: Can I make this ice cream without an ice cream maker?
A: Yes! You can use a no-churn method by whipping heavy cream and folding it into sweetened condensed milk mixed with cocoa powder and melted chocolate. Freeze in a container, stirring occasionally for the first few hours to reduce ice crystals.
Q: How do I prevent ice crystals in my homemade ice cream?
A: Make sure to chill the custard base fully before churning, use enough fat (like cream and egg yolks), churn properly, and store in an airtight container with parchment paper pressed on top to minimize air exposure.
Q: Can I use milk chocolate instead of bittersweet chocolate?
A: You can, but bittersweet or dark chocolate provides a richer, less sweet flavor that balances the ice cream better. Milk chocolate will make it sweeter and less intense.
Q: How long does homemade chocolate ice cream last in the freezer?
A: For best quality, consume within 2 weeks. Stored properly, it can last up to a month, but texture and flavor may degrade over time.
Q: Is it possible to make this recipe vegan?
A: Yes! Use coconut milk and cream, vegan chocolate, and replace egg yolks with a cornstarch-thickened custard base or silken tofu blend for creaminess.
Pin This Recipe!
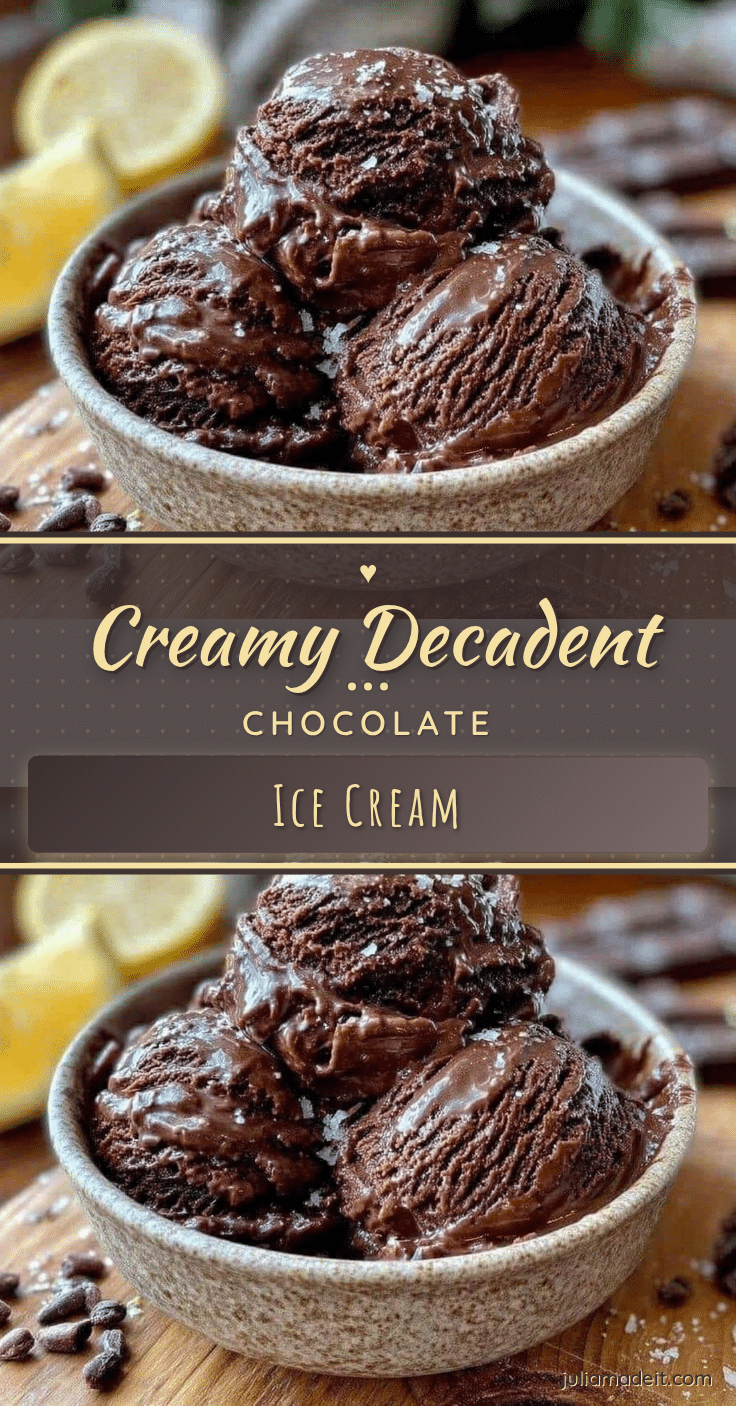
Creamy Chocolate Ice Cream Recipe Easy Homemade Decadent Dessert
A rich, velvety homemade chocolate ice cream that is creamy, smooth, and perfectly balanced in chocolate flavor. Easy to make with simple ingredients and ideal for any occasion.
- Prep Time: 15 minutes
- Cook Time: 15 minutes
- Total Time: 4 hours 30 minutes
- Yield: 8 servings 1x
- Category: Dessert
- Cuisine: American
Ingredients
- 2 cups whole milk (480 ml)
- 1 cup heavy cream (240 ml)
- 3/4 cup granulated sugar (150 g)
- 1/2 cup unsweetened cocoa powder (50 g)
- 4 oz bittersweet chocolate, chopped (115 g)
- 4 large egg yolks, room temperature
- 1/4 tsp salt
- 1 tsp vanilla extract
- 1 tsp espresso powder (optional)
Instructions
- In a medium saucepan, combine whole milk, heavy cream, cocoa powder, and granulated sugar. Whisk constantly over medium heat until hot but not boiling, about 5-7 minutes. Remove from heat.
- Add chopped bittersweet chocolate to the hot mixture and stir gently until completely melted and combined.
- In a separate bowl, whisk egg yolks. Slowly pour about 1 cup of the warm chocolate mixture into the yolks while whisking vigorously to temper the eggs.
- Pour the tempered egg mixture back into the saucepan. Cook over low heat, stirring constantly with a rubber spatula, until custard thickens enough to coat the back of a spoon (about 170°F / 77°C). Do not boil.
- Strain the custard through a fine mesh sieve into a clean bowl. Stir in salt, vanilla extract, and espresso powder if using. Cover with plastic wrap pressed directly on the surface and chill in the fridge for at least 4 hours or overnight.
- Pour the chilled custard into an ice cream maker and churn according to manufacturer instructions, usually 20-30 minutes, until thick and creamy.
- Transfer the soft ice cream to an airtight container and freeze for at least 2 hours before serving.
Notes
Chill the custard base overnight for best flavor and texture. Temper egg yolks slowly to avoid scrambling. Use high-quality cocoa powder and bittersweet chocolate for best results. Ensure ice cream maker bowl is fully frozen before churning. Press plastic wrap on custard surface to prevent skin formation. Rest ice cream in freezer after churning for optimal scoopability.
Nutrition
- Serving Size: 1/2 cup (125 ml)
- Calories: 300
- Fat: 20
- Carbohydrates: 25
- Protein: 5
Keywords: chocolate ice cream, homemade ice cream, creamy chocolate dessert, easy ice cream recipe, decadent dessert, chocolate custard ice cream