Let me tell you, the moment that rich, cocoa-tinged aroma mixed with the sweet tang of cream cheese frosting fills your kitchen, you know you’re in for something special. The first time I baked this decadent red velvet heart-shaped layer cake, I was instantly hooked—the kind of moment where you pause, take a deep breath, and just smile because you realize you’ve stumbled upon a dessert masterpiece. Years ago, when I was knee-high to a grasshopper, my grandma used to make simple cakes, but this red velvet creation? It feels like a warm hug wrapped in a fancy bow.
You know what’s honestly the best part? My family couldn’t stop sneaking slices off the cooling rack (and I can’t really blame them). This cake has become a staple for every family gathering, a sweet treat that brightens up special occasions like Valentine’s Day or anniversaries. It’s dangerously easy to make but looks like it took hours of effort. If you’re looking for a recipe that combines pure, nostalgic comfort with a little wow factor, this red velvet heart-shaped layer cake with cream cheese frosting is exactly what you want—trust me, you’re going to want to bookmark this one.
Why You’ll Love This Recipe
Honestly, this red velvet heart-shaped layer cake isn’t just another dessert; it’s the kind that makes you close your eyes after the first bite. Whether you’re a seasoned baker or a kitchen newbie, this recipe delivers on all fronts.
- Quick & Easy: Comes together in under 90 minutes, perfect for last-minute celebrations or sweet cravings.
- Simple Ingredients: No fancy trips to specialty stores—everything is likely sitting in your pantry or fridge already.
- Perfect for Special Occasions: Ideal for Valentine’s Day, anniversaries, or just to impress your loved ones.
- Crowd-Pleaser: Kids, adults, picky eaters—everyone raves about the moist texture and balanced flavor.
- Unbelievably Delicious: That classic red velvet cocoa flavor paired with a tangy, creamy frosting is comfort food at its finest.
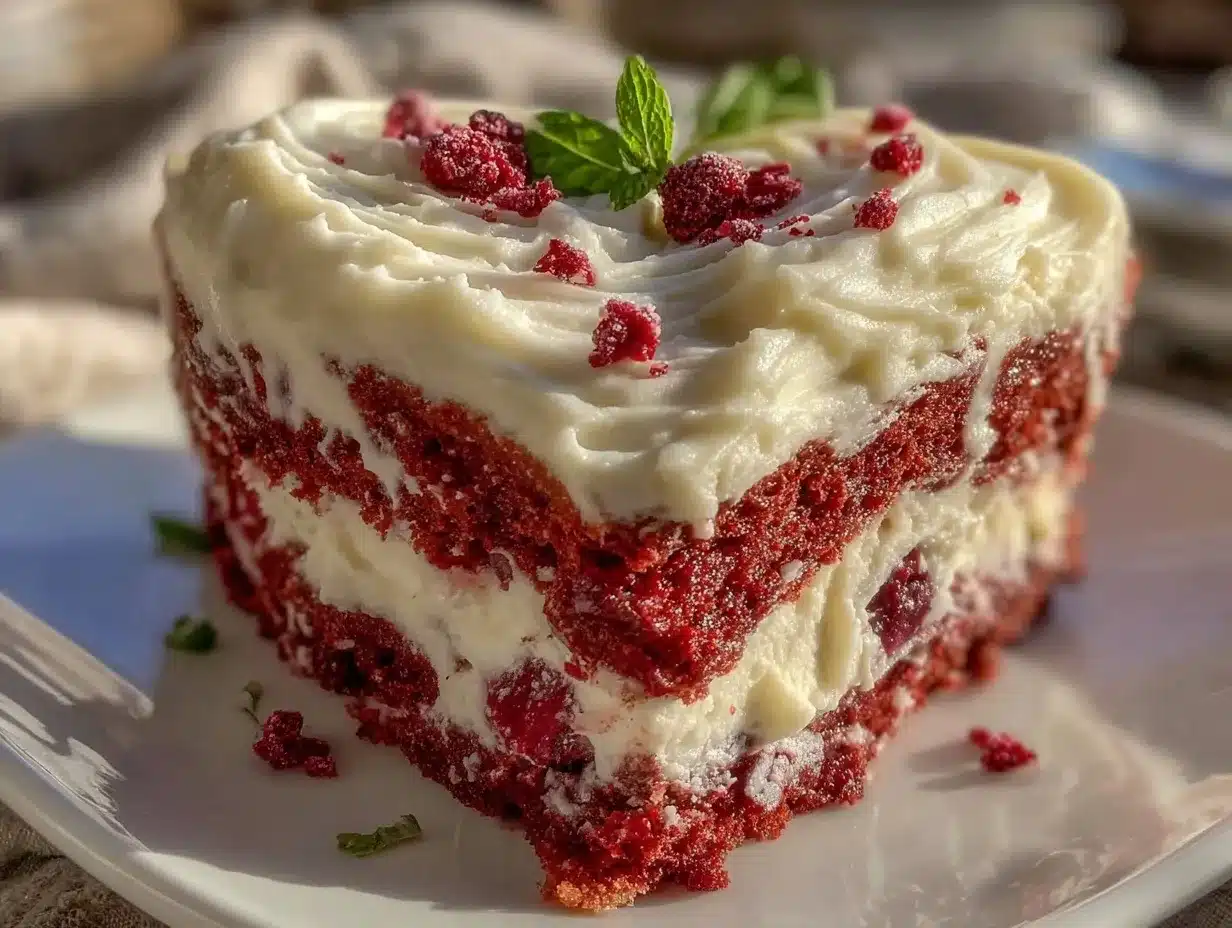
This recipe stands out because of the way the batter produces tender, moist layers that hold shape beautifully in a heart mold—no crumbling, no falling apart. Plus, the cream cheese frosting is whipped to just the right fluffiness, not too sweet, with a subtle tang. It feels like classic comfort food reimagined—faster, simpler, yet with that same soul-soothing satisfaction you expect from a homemade cake. Perfect for impressing guests without stress or turning an ordinary day into something memorable.
What Ingredients You Will Need
This recipe uses simple, wholesome ingredients to deliver bold flavor and satisfying texture without the fuss. Most are pantry staples, and you can swap a few to suit dietary needs or preferences.
- For the Cake Batter:
- All-purpose flour – 2 ½ cups (315g), sifted (I recommend King Arthur for best texture)
- Sugar – 1 ½ cups (300g), granulated
- Unsweetened cocoa powder – 2 tablespoons (use Dutch-processed for richer color)
- Baking soda – 1 teaspoon
- Salt – ½ teaspoon
- Buttermilk – 1 cup (240ml), room temperature (adds tenderness)
- Vegetable oil – 1 cup (240ml), neutral flavor
- Large eggs – 2, room temperature
- Red food coloring – 2 tablespoons (liquid or gel)
- Vanilla extract – 1 teaspoon
- White vinegar – 1 teaspoon (reacts with baking soda for lift)
- For the Cream Cheese Frosting:
- Cream cheese – 8 ounces (225g), softened (Philadelphia brand is my go-to)
- Unsalted butter – ½ cup (115g), softened
- Powdered sugar – 4 cups (480g), sifted
- Vanilla extract – 1 teaspoon
- Pinch of salt
Substitution tips: Use almond or gluten-free flour blend for gluten-free baking. Swap buttermilk with milk plus 1 tablespoon lemon juice if needed. Coconut-based cream cheese works well for dairy-free versions.
Equipment Needed
- Heart-shaped cake pans (two 8-inch or 9-inch pans) – essential for the signature shape, but you can use round pans and cut into hearts if needed.
- Electric mixer or stand mixer – makes frosting silky smooth and batter well mixed.
- Mixing bowls – at least two, medium and large.
- Measuring cups and spoons – for precise measurements.
- Rubber spatula – for scraping the bowl efficiently.
- Cooling rack – crucial for letting cakes cool evenly without sogginess.
- Offset spatula or butter knife – for smooth frosting application.
If you don’t have heart-shaped pans, I’ve used a simple round pan and cut out hearts with a knife or cookie cutter—works great in a pinch. For budget-friendly options, silicone pans are forgiving and easy to clean. Just remember to grease them well for that perfect release.
Preparation Method
- Preheat your oven to 350°F (175°C). Grease and flour two 8-inch heart-shaped cake pans, or line them with parchment paper. This step prevents sticking, which can be a pain later.
- Mix dry ingredients: In a large bowl, sift together 2 ½ cups all-purpose flour, 1 ½ cups sugar, 2 tablespoons cocoa powder, 1 teaspoon baking soda, and ½ teaspoon salt. Set aside.
- Combine wet ingredients: In another bowl, whisk 1 cup buttermilk, 1 cup vegetable oil, 2 large eggs, 2 tablespoons red food coloring, 1 teaspoon vanilla extract, and 1 teaspoon white vinegar until smooth and vibrant red.
- Blend wet and dry: Gradually add the dry ingredients to the wet mixture, stirring gently with a spatula or using a mixer on low speed. Mix just until combined—overmixing can make the cake dense.
- Pour batter evenly: Divide the batter between the two prepared pans, smoothing the tops with a spatula. The batter will be thick but pourable.
- Bake: Place pans in the oven and bake for 25-30 minutes, or until a toothpick inserted in the center comes out clean. Keep an eye toward the end to avoid overbaking—this cake loves to stay moist.
- Cool completely: Let cakes cool in pans for 10 minutes, then transfer to a wire rack to cool fully before frosting. This part is key—frosting warm cake leads to a melty mess.
- Make the cream cheese frosting: Beat together 8 ounces softened cream cheese and ½ cup softened butter until smooth and creamy. Gradually add 4 cups powdered sugar, one cup at a time, beating on low speed. Stir in 1 teaspoon vanilla extract and a pinch of salt. Beat until fluffy, about 3-5 minutes.
- Assemble the cake: Place one cake layer on your serving plate. Spread a generous layer of frosting on top (about 1 cup). Add the second layer, and coat the entire cake with the remaining frosting. Use an offset spatula for smooth edges and a pretty finish.
- Chill if desired: Pop the cake in the fridge for 30 minutes to set the frosting before slicing. This helps keep those heart-shaped edges nice and clean.
Pro tip: If your frosting feels too soft, add a bit more powdered sugar and chill it briefly. For even layers, use a serrated knife to level the cake tops before frosting.
Cooking Tips & Techniques
One thing I learned the hard way is not to skip sifting the dry ingredients—that cocoa powder especially tends to clump, and you want a silky batter. Mixing just until the flour disappears keeps the cake tender and airy. Overmixing is a common pitfall that leads to a tough crumb.
When it comes to the cream cheese frosting, room temperature ingredients are a must. Cold cream cheese or butter leads to lumps and uneven texture. If your frosting seems runny, a quick chill in the fridge tightens it up nicely without losing that luscious spreadability.
Multi-task by prepping your frosting while the cake cools to save time. Also, keeping your cakes on a cooling rack avoids soggy bottoms, which can happen if they cool in the pan too long.
An old trick I swear by is adding the vinegar to the wet mix last; it reacts with the baking soda to give that classic red velvet lift and subtle tang. You can’t skip that step if you want the perfect texture.
Variations & Adaptations
- Gluten-Free: Substitute all-purpose flour with a 1:1 gluten-free baking blend. The texture stays moist and tender.
- Vegan Version: Use plant-based cream cheese and butter substitutes. Replace eggs with flax eggs (1 tablespoon ground flaxseed + 3 tablespoons water per egg), and use non-dairy milk plus vinegar for buttermilk.
- Chocolate Lovers: Add ½ cup mini chocolate chips between layers or swirl melted chocolate into the frosting for an extra indulgence.
- Fruit Twist: Top with fresh raspberries or strawberries for a bright, tart contrast. In summer, fresh berries add a juicy pop atop the creamy frosting.
- Different Shapes: If you don’t have heart pans, bake in round pans and cut into heart shapes using a template or cookie cutter for the same festive look.
I once made this recipe with a hint of espresso powder in the batter—totally game-changing for a deeper chocolate flavor without overpowering the classic red velvet taste. Give that one a shot if you want a little twist.
Serving & Storage Suggestions
This cake is best served slightly chilled or at room temperature, which allows the frosting to be creamy and the layers tender. For presentation, a dusting of cocoa or a few fresh berries on top adds a lovely finishing touch.
Pair it with a cup of freshly brewed coffee or a glass of cold milk—the classic combo always wins. If serving at a party, slice into modest portions; the richness means a little goes a long way.
Store leftover cake covered in the refrigerator for up to 4 days. For longer storage, freeze the cake (wrapped tightly in plastic wrap and foil) for up to 2 months. Thaw overnight in the fridge before serving. When reheating slices, a few seconds in the microwave softens the frosting nicely without melting it.
Flavors actually mellow and marry together beautifully after a day, so if you can resist, it tastes even better the next day—honestly, it’s worth the wait.
Nutritional Information & Benefits
Each slice (based on 12 servings) contains approximately 350-400 calories, with moderate fat from the cream cheese and butter, balanced by protein from the eggs. The buttermilk adds a subtle source of calcium and tang.
This recipe can be adapted for dietary needs by swapping ingredients to lower carbs or cut gluten. The cream cheese frosting provides a good dose of calcium and protein, which feels like a small win when indulging in something so decadent.
While this cake is a treat, using real ingredients and homemade frosting means you know exactly what’s going in—no mystery additives or preservatives. For me, baking this cake is not just about dessert; it’s a moment to slow down, celebrate, and enjoy a slice of pure joy.
Conclusion
So, if you’re looking for a recipe that’s both show-stopping and seriously delicious, this decadent red velvet heart-shaped layer cake with cream cheese frosting is your new best friend. It’s perfect for impressing loved ones or simply indulging yourself on a cozy night in.
Feel free to tweak it to your taste—whether that means adding berries, switching up the frosting, or making it gluten-free. I love this recipe because it brings people together and always gets “oohs” and “aahs” without the fuss.
Give it a try, and please share how you personalize it—I’m always excited to hear your twists and stories. Happy baking, and may your kitchen smell as heavenly as mine does right now!
FAQs
Can I make this cake ahead of time?
Absolutely! You can bake the layers a day in advance and keep them wrapped tightly in the fridge. Assemble and frost the next day for best freshness.
What if I don’t have buttermilk?
No worries! Use regular milk with 1 tablespoon of lemon juice or vinegar added, let it sit for 5 minutes to curdle, then use as a buttermilk substitute.
How do I prevent the cream cheese frosting from being runny?
Make sure your cream cheese and butter are fully softened but not warm. If frosting is too soft, chill it briefly and add a little more powdered sugar to thicken.
Can I make this cake in a different shape?
Yes! You can use round or square pans and carve the cake into a heart shape, or just frost as is for a classic layered look.
Is this recipe suitable for kids?
Definitely! The flavor is mild and sweet, and the heart shape makes it especially fun for kids’ parties or special treats.
Pin This Recipe!
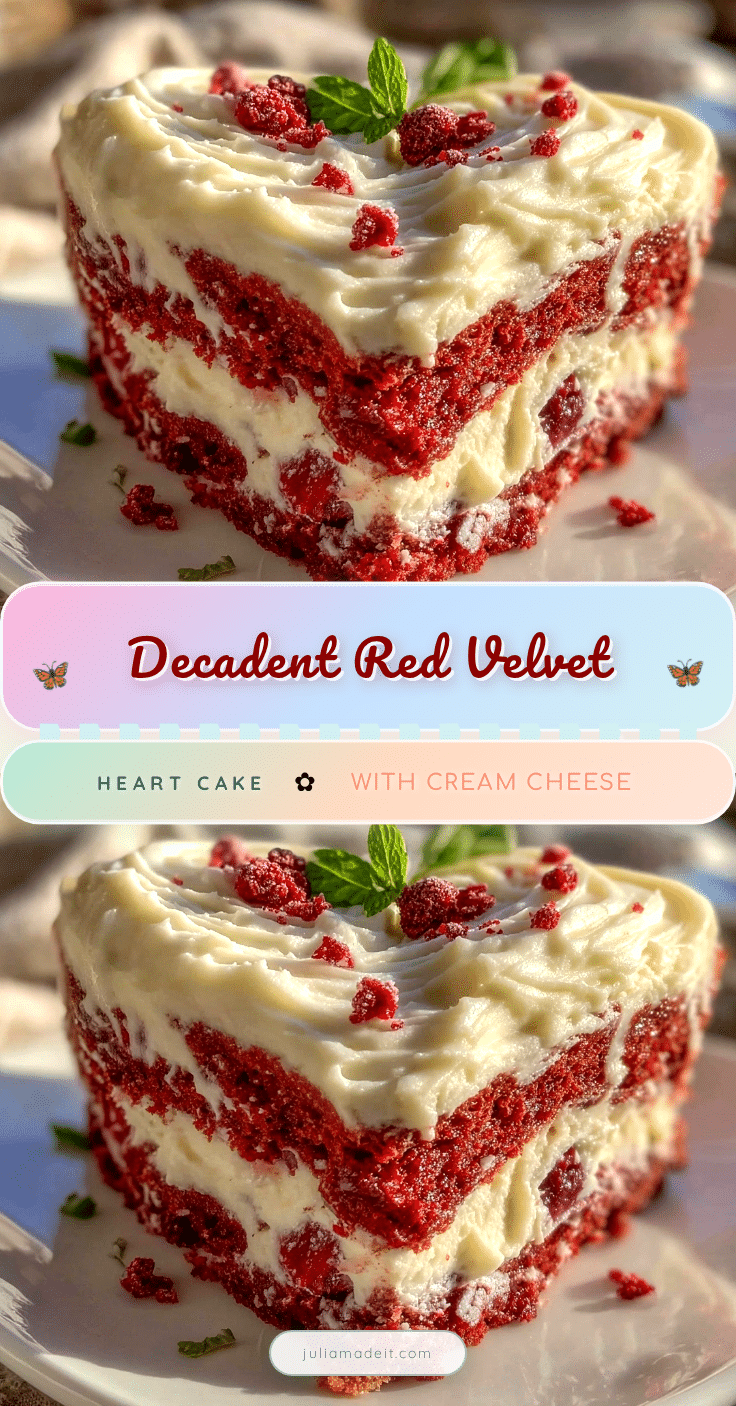
Decadent Red Velvet Heart-Shaped Layer Cake Easy Homemade Recipe with Cream Cheese Frosting
A rich and moist red velvet cake baked in heart-shaped pans, layered and frosted with tangy cream cheese frosting. Perfect for special occasions like Valentine’s Day or anniversaries.
- Prep Time: 20 minutes
- Cook Time: 30 minutes
- Total Time: 50 minutes
- Yield: 12 servings 1x
- Category: Dessert
- Cuisine: American
Ingredients
- 2 ½ cups (315g) all-purpose flour, sifted
- 1 ½ cups (300g) granulated sugar
- 2 tablespoons unsweetened cocoa powder (Dutch-processed recommended)
- 1 teaspoon baking soda
- ½ teaspoon salt
- 1 cup (240ml) buttermilk, room temperature
- 1 cup (240ml) vegetable oil, neutral flavor
- 2 large eggs, room temperature
- 2 tablespoons red food coloring (liquid or gel)
- 1 teaspoon vanilla extract
- 1 teaspoon white vinegar
- 8 ounces (225g) cream cheese, softened
- ½ cup (115g) unsalted butter, softened
- 4 cups (480g) powdered sugar, sifted
- 1 teaspoon vanilla extract
- Pinch of salt
Instructions
- Preheat your oven to 350°F (175°C). Grease and flour two 8-inch heart-shaped cake pans, or line them with parchment paper.
- In a large bowl, sift together 2 ½ cups all-purpose flour, 1 ½ cups sugar, 2 tablespoons cocoa powder, 1 teaspoon baking soda, and ½ teaspoon salt. Set aside.
- In another bowl, whisk 1 cup buttermilk, 1 cup vegetable oil, 2 large eggs, 2 tablespoons red food coloring, 1 teaspoon vanilla extract, and 1 teaspoon white vinegar until smooth and vibrant red.
- Gradually add the dry ingredients to the wet mixture, stirring gently with a spatula or using a mixer on low speed. Mix just until combined.
- Divide the batter evenly between the two prepared pans, smoothing the tops with a spatula.
- Bake for 25-30 minutes, or until a toothpick inserted in the center comes out clean.
- Let cakes cool in pans for 10 minutes, then transfer to a wire rack to cool completely before frosting.
- Beat together 8 ounces softened cream cheese and ½ cup softened butter until smooth and creamy.
- Gradually add 4 cups powdered sugar, one cup at a time, beating on low speed.
- Stir in 1 teaspoon vanilla extract and a pinch of salt. Beat until fluffy, about 3-5 minutes.
- Place one cake layer on your serving plate. Spread about 1 cup of frosting on top.
- Add the second layer and coat the entire cake with the remaining frosting. Use an offset spatula for smooth edges.
- Chill the cake in the refrigerator for 30 minutes to set the frosting before slicing.
Notes
Use almond or gluten-free flour blend for gluten-free baking. Substitute buttermilk with milk plus 1 tablespoon lemon juice if needed. Coconut-based cream cheese works well for dairy-free versions. Avoid overmixing the batter to keep the cake tender. Room temperature ingredients are essential for smooth frosting. Chill frosting if too soft and add more powdered sugar if needed. Use serrated knife to level cake layers for even frosting.
Nutrition
- Serving Size: 1 slice (1/12 of cak
- Calories: 375
- Sugar: 38
- Sodium: 320
- Fat: 18
- Saturated Fat: 7
- Carbohydrates: 50
- Fiber: 1
- Protein: 5
Keywords: red velvet cake, heart-shaped cake, cream cheese frosting, Valentine's Day dessert, layer cake, easy cake recipe, homemade cake