“You gotta try this mulberry jam,” my neighbor said one lazy Saturday afternoon, holding out a jar that looked like pure ruby sunshine. Honestly, I was skeptical — mulberries? They always seemed like those mysterious berries hanging around the edges of the garden, a bit wild and unpredictable. But that jar, with its gentle vanilla aroma weaving through the sweet tang, caught me off guard. I remember spreading it thick on a warm slice of toast, the jam melting slowly, creamy and fragrant, as the morning light filtered through the kitchen window.
That was the moment this Delicious Mulberry Jam with Vanilla became a quiet staple around my house. It’s not flashy or fussy, just that perfect balance of sweet and subtle vanilla warmth that makes you pause and savor. I ended up making it three times in one week (no exaggeration), tweaking each batch until it felt just right. It’s the kind of homemade treat that sneaks into your routine — on breakfast plates, alongside smooth cream cheese, or even dolloped on a bowl of plain yogurt for a touch of summer.
What I love most is how this jam captures those fleeting mulberry moments — a little wild, a little sweet, and with a creamy vanilla whisper that turns simple fruit into something memorable. There’s no rush, no complicated steps, just honest ingredients and a slow simmer that fills the kitchen with cozy scents. It’s the kind of recipe that, once you try, you’ll find yourself quietly reaching for again.
Why You’ll Love This Recipe
- Quick & Easy: This jam comes together in just about 45 minutes, perfect for those spontaneous berry hauls or when you suddenly crave a homemade sweet treat.
- Simple Ingredients: You probably already have vanilla and sugar in your pantry, and fresh or frozen mulberries make it even easier to whip up without extra shopping.
- Perfect for Any Occasion: Whether it’s a cozy weekend brunch or a thoughtful gift for neighbors, this jam fits right in with everything from buttery biscuits to morning toast.
- Crowd-Pleaser: I’ve shared this with friends who usually steer clear of berry jams, and they always come back asking for the recipe (even my picky eaters).
- Unbelievably Delicious: The silky vanilla infusion makes this jam stand apart from the usual sweet spreads — it’s creamy, fragrant, and just the right level of sweet-tart mulberry goodness.
This isn’t just another jam recipe. The trick of adding real vanilla bean or high-quality extract brings a depth that feels almost indulgent. Plus, the way the mulberries break down and thicken creates a jam that’s smooth with a bit of natural texture — not too runny or stiff.
It’s honestly one of those recipes that makes you close your eyes on the first bite and think, “Yep, this is the kind of homemade treat I want in my kitchen forever.” If you’ve ever loved a classic fruit jam but wished it had a little more personality, this version is your new best friend. (And if you like experimenting with flavors, pairing it with my cheddar bay biscuits is a total game-changer.)
What Ingredients You Will Need
This recipe calls for straightforward, wholesome ingredients that come together to highlight the fresh, natural flavor of mulberries with a creamy vanilla touch. Most of these are pantry staples, so you won’t need to hunt down anything fancy.
- Mulberries (about 4 cups / 600g fresh or frozen) — ripe and juicy mulberries give the jam its sweet-tart character. If you can’t find fresh, frozen works just fine and keeps the flavor intact.
- Granulated Sugar (1 ½ cups / 300g) — classic sweetener that balances the natural tartness of the berries. Feel free to adjust to taste.
- Fresh Lemon Juice (2 tablespoons / 30ml) — adds brightness and helps the jam set by activating the pectin naturally found in the fruit.
- Vanilla Bean (1 whole bean, split and scraped) or pure vanilla extract (1 teaspoon) — the star of the show for that creamy, aromatic note. Using a real bean makes a difference, but extract works great in a pinch.
- Water (½ cup / 120ml) — just enough to help the berries soften during cooking without making the jam too watery.
If you’re curious about sugar alternatives, I’ve found that light brown sugar or coconut sugar can be swapped in for a deeper, caramel-like flavor, though it will slightly darken the jam. For a refined texture, I recommend using a trusted brand like Domino or Wholesome Sweeteners. Also, if you want a vegan option, check that your vanilla extract is alcohol-based and not mixed with honey or dairy.
Seasonally, mulberries are fantastic in late spring to early summer, but if you want to try a winter twist, you could experiment with frozen berries or even blend in a bit of frozen blackberry for richness. The lemon juice is key for balance and preservation, so don’t skip it.
Equipment Needed
- Heavy-bottomed saucepan or jam pot: A sturdy pan helps prevent the jam from scorching as it simmers. I often use my 3-quart stainless steel pot for even heat distribution.
- Wooden spoon or heatproof spatula: For stirring the jam gently as it thickens.
- Fine-mesh sieve or food mill (optional): If you prefer a smoother jam without seeds or skins, this step is handy.
- Glass jars with lids: For storing the jam. Mason jars work perfectly and are easy to sterilize.
- Measuring cups and spoons: Accurate measurements help keep the sugar-to-fruit ratio just right.
If you don’t have a food mill, don’t worry — mashing the berries with the back of a spoon works fine for more textured jam. Personally, I keep a few small jam jars around so I can gift neighbors or stash some in the fridge for quick spreads. Sterilizing jars with boiling water is a simple step that really makes a difference in preserving your jams longer.
Preparation Method

- Prepare the mulberries: Rinse 4 cups (600g) of fresh or frozen mulberries gently under cold water. Drain them well and set aside. If using frozen berries, no need to thaw fully—just give them a quick rinse.
- Combine ingredients: In your heavy-bottomed saucepan, add the mulberries, 1 ½ cups (300g) granulated sugar, ½ cup (120ml) water, and the seeds scraped from 1 vanilla bean pod (or 1 teaspoon vanilla extract). If using a vanilla bean, toss the pod in too for extra flavor infusion.
- Cook the jam: Bring the mixture to a gentle boil over medium heat, stirring occasionally to dissolve the sugar. Once boiling, reduce to a simmer and cook uncovered for 30-40 minutes. Stir frequently to prevent sticking. You’ll notice the berries breaking down and the mixture thickening.
- Add lemon juice: Stir in 2 tablespoons (30ml) fresh lemon juice halfway through cooking. This brightens the flavor and helps the jam set.
- Check for doneness: To test if the jam is ready, place a small spoonful on a chilled plate and tilt it—if it wrinkles and doesn’t run immediately, it’s done. If not, continue simmering a few more minutes and test again.
- Optional strain: For a smoother texture, press the jam through a fine-mesh sieve or food mill to remove seeds and skins.
- Jar the jam: Remove the vanilla bean pod if used. Carefully ladle the hot jam into sterilized glass jars, leaving about ¼ inch (0.6 cm) headspace. Seal with lids while still warm.
- Cool and store: Let jars cool completely at room temperature, then refrigerate. Use within 3 weeks or freeze for longer storage.
One personal tip: stirring often during simmering saves you from a scorched pan and helps the jam thicken evenly. Also, if you’re pressed for time, I’ve sometimes sped up the cooking by increasing the heat briefly but always keep a close eye to avoid burning.
Cooking Tips & Techniques
Making homemade jam sounds simple, but a few tricks make all the difference between a so-so batch and a jar you’ll treasure:
- Use ripe, fresh mulberries: They naturally have enough pectin and sugar to set well. Overripe berries work too, but avoid underripe ones—they can be too tart and affect the flavor.
- Don’t rush the simmering: Low and slow is the way to go. It lets the jam thicken gradually and deepens the flavor.
- Test the set properly: The cold plate test is a classic for a reason. Jam will thicken more as it cools, but you don’t want it too runny or too stiff.
- Vanilla bean vs. extract: Using the bean pod and seeds really amps up the aroma, but if you only have extract, add it at the end to keep the flavor fresh.
- Watch for scorching: Stir often and use a heavy-bottomed pan. I’ve learned the hard way that burnt jam ruins a whole batch.
Honestly, the first time I tried this recipe, I didn’t stir enough and ended up with caramelized bits stuck to the bottom—lesson learned! Now I keep a wooden spoon handy and stir every few minutes. If you want to multitask, prepare your jars or kitchen cleanup during the simmering to save time.
Variations & Adaptations
Mulberry jam with vanilla is delicious as is, but if you like to experiment, here are some variations I’ve enjoyed:
- Spiced Mulberry Jam: Add a cinnamon stick or a few cloves during cooking for a warm, cozy flavor perfect for fall mornings.
- Low-Sugar Version: Reduce sugar to 1 cup (200g) and add a natural pectin powder to help the jam set without sacrificing sweetness.
- Mixed Berry Twist: Combine mulberries with blackberries or raspberries for a bolder, tangier jam.
- Alcohol-Infused: Stir in a splash of bourbon or brandy after cooking for an adult-friendly spread.
- Vanilla Bean Paste Substitute: If you can’t find vanilla beans, vanilla bean paste works beautifully and adds those lovely specks to your jam.
One of my favorite adaptations is making smaller batches using frozen berries in winter — it’s like capturing summer in a jar when fresh fruit isn’t around. If you’re interested in low-carb options, swapping sugar for erythritol and adding extra lemon juice helps keep the flavor balanced.
Serving & Storage Suggestions
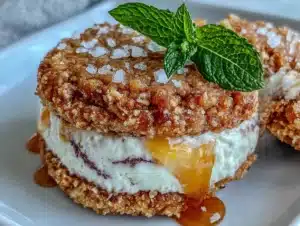
This mulberry vanilla jam shines best served at room temperature. Spread it thickly on toasted bread or warm biscuits — I especially love it alongside flaky buttermilk biscuits or my favorite cheddar bay biscuits.
It also makes a lovely topping for creamy yogurts, pancakes, or even a dollop on vanilla ice cream. For a savory pairing, try it with mild cheeses like brie or ricotta on a charcuterie board.
Store the jam in airtight jars in the refrigerator for up to 3 weeks. For longer storage, freezing is a good option — just leave some headspace in your containers as the jam will expand. Reheat gently in a small saucepan or microwave before serving to bring back that luscious spreadable texture.
Fun fact: the flavors deepen and mellow if you let the jam sit for a day or two after making it. So if you can wait, the wait is worth it.
Nutritional Information & Benefits
This homemade mulberry jam recipe provides a naturally sweet treat with a good dose of antioxidants and vitamins from the fruit itself. Per tablespoon (about 20g), you can expect roughly 50 calories, mostly from natural sugars, with minimal fat and protein.
Mulberries are rich in vitamin C, iron, and dietary fiber, supporting immunity and digestion. The addition of lemon juice adds a vitamin C boost, while vanilla has calming properties that complement the sweetness.
This jam is gluten-free and can easily fit into vegetarian or vegan diets when made with plant-based sugar options. Just be mindful of the sugar content if you’re monitoring carbohydrate intake.
In my experience, enjoying a small spoonful of this jam feels like a cozy, wholesome indulgence without the guilt of overly processed spreads.
Conclusion
This Delicious Mulberry Jam with Vanilla recipe isn’t just about making jam — it’s about capturing a simple moment of sweetness and warmth in your kitchen. The balance of tart mulberries with creamy vanilla makes it a unique treat that’s both comforting and refreshing.
Feel free to tweak it to your taste — less sugar, more spice, or mixing in your favorite berries. It’s forgiving and always rewarding. I keep a jar in my fridge for those mornings when I need a little extra comfort (or a quick gift for neighbors).
Cooking this jam reminded me how small, thoughtful homemade touches can brighten everyday life. If you try it, I’d love to hear how you make it your own — drop a comment or share your variations. Here’s to sweet moments made at home!
Frequently Asked Questions
Can I use frozen mulberries for this jam?
Yes! Frozen mulberries work well and keep the flavor intact. Just give them a quick rinse and cook a bit longer if needed to reach the right thickness.
Is it necessary to use a vanilla bean, or can I use extract?
Vanilla bean adds a richer, aromatic flavor and pretty specks, but pure vanilla extract is a great substitute. If using extract, add it near the end of cooking to preserve its aroma.
How long does homemade mulberry jam last in the fridge?
Stored in sterilized jars with airtight lids, the jam lasts about 3 weeks refrigerated. For longer storage, freezing is recommended.
Can I reduce the sugar in this recipe?
Yes, you can reduce sugar slightly, but too little may affect the jam’s set and preservation. Using natural pectin or adding lemon juice can help compensate.
What’s the best way to test if the jam is set?
Place a small spoonful on a chilled plate and tilt it. If it wrinkles and doesn’t run quickly, it’s ready. If not, simmer a few more minutes and test again.
Pin This Recipe!
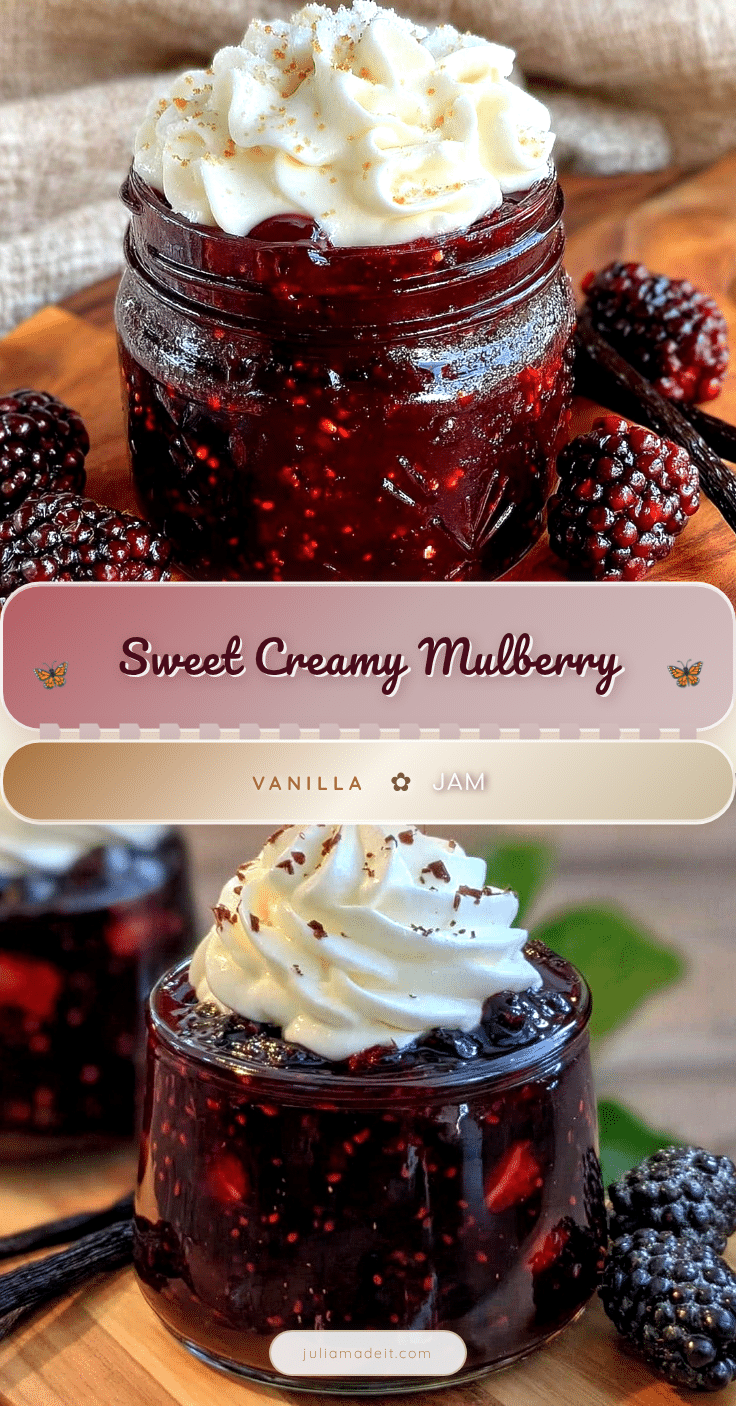
Delicious Mulberry Jam with Vanilla
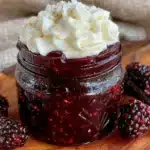
A quick and easy homemade mulberry jam infused with creamy vanilla, perfect for spreading on toast, biscuits, or yogurt. This jam balances sweet-tart mulberries with a subtle vanilla warmth for a memorable treat.
- Prep Time: 10 minutes
- Cook Time: 35 minutes
- Total Time: 45 minutes
- Yield: About 3 half-pint jars (approximately 6 servings) 1x
- Category: Preserves
- Cuisine: American
Ingredients
- 4 cups (600g) fresh or frozen mulberries
- 1 ½ cups (300g) granulated sugar
- 2 tablespoons (30ml) fresh lemon juice
- 1 whole vanilla bean, split and scraped, or 1 teaspoon pure vanilla extract
- ½ cup (120ml) water
Instructions
- Rinse 4 cups (600g) of fresh or frozen mulberries gently under cold water. Drain well and set aside. If using frozen berries, no need to thaw fully—just give them a quick rinse.
- In a heavy-bottomed saucepan, combine mulberries, 1 ½ cups (300g) granulated sugar, ½ cup (120ml) water, and the seeds scraped from 1 vanilla bean pod or 1 teaspoon vanilla extract. Toss the vanilla bean pod in for extra flavor infusion if using.
- Bring the mixture to a gentle boil over medium heat, stirring occasionally to dissolve the sugar. Once boiling, reduce to a simmer and cook uncovered for 30-40 minutes, stirring frequently to prevent sticking. The berries will break down and the mixture will thicken.
- Stir in 2 tablespoons (30ml) fresh lemon juice halfway through cooking to brighten flavor and help the jam set.
- Test for doneness by placing a small spoonful on a chilled plate and tilting it. If it wrinkles and doesn’t run immediately, the jam is ready. If not, continue simmering a few more minutes and test again.
- Optional: For a smoother texture, press the jam through a fine-mesh sieve or food mill to remove seeds and skins.
- Remove the vanilla bean pod if used. Carefully ladle the hot jam into sterilized glass jars, leaving about ¼ inch (0.6 cm) headspace. Seal with lids while still warm.
- Let jars cool completely at room temperature, then refrigerate. Use within 3 weeks or freeze for longer storage.
Notes
Stir often during simmering to prevent scorching and ensure even thickening. Use ripe mulberries for best flavor and natural pectin. The cold plate test is essential to check jam set. Vanilla bean adds richer aroma and specks, but extract is a good substitute added near the end. Sterilize jars before filling to preserve jam longer. Jam flavors deepen if allowed to sit for a day or two before use.
Nutrition
- Serving Size: 1 tablespoon (about
- Calories: 50
- Sugar: 12
- Carbohydrates: 13
- Fiber: 1
Keywords: mulberry jam, vanilla jam, homemade jam, berry jam, easy jam recipe, fruit preserves, vanilla bean, mulberries, sweet spread