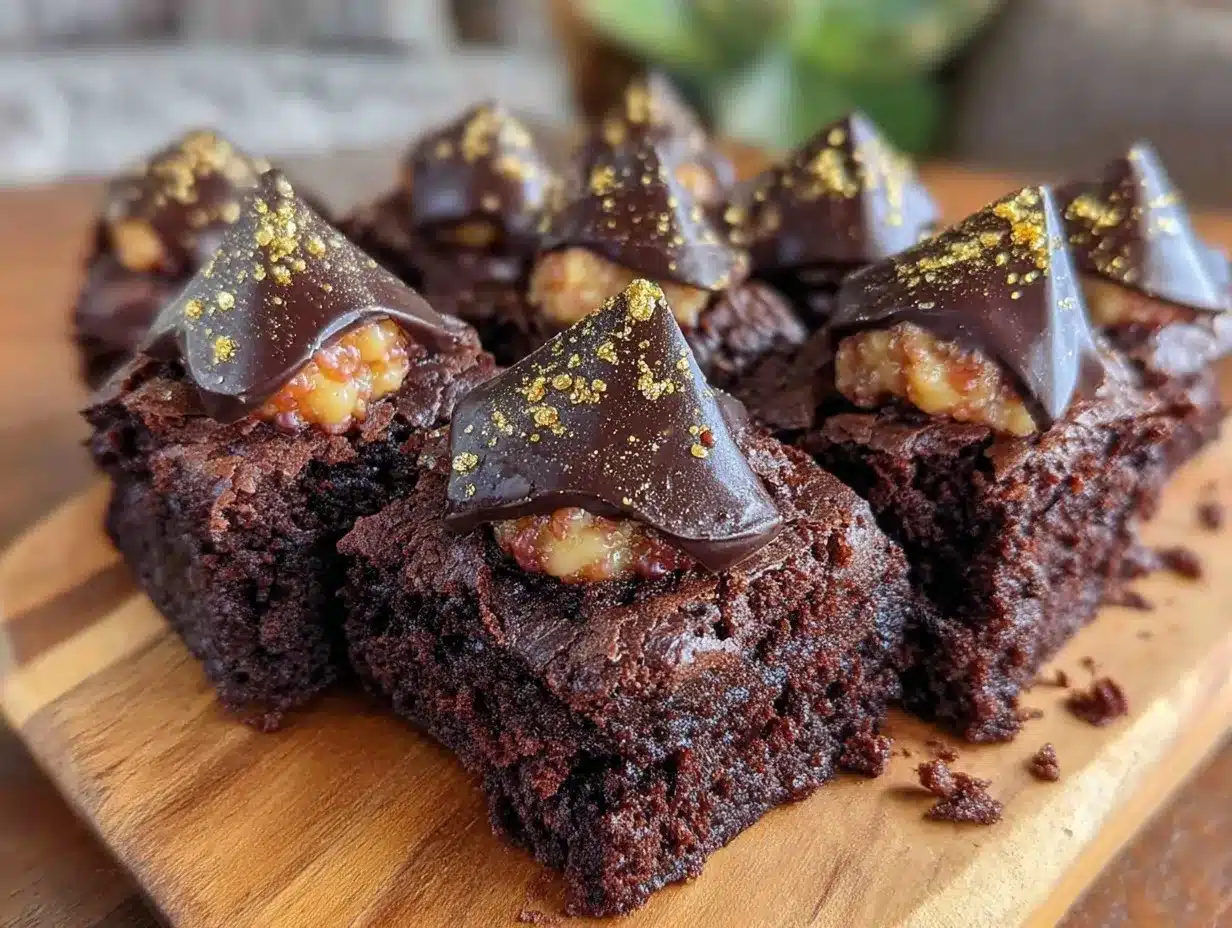
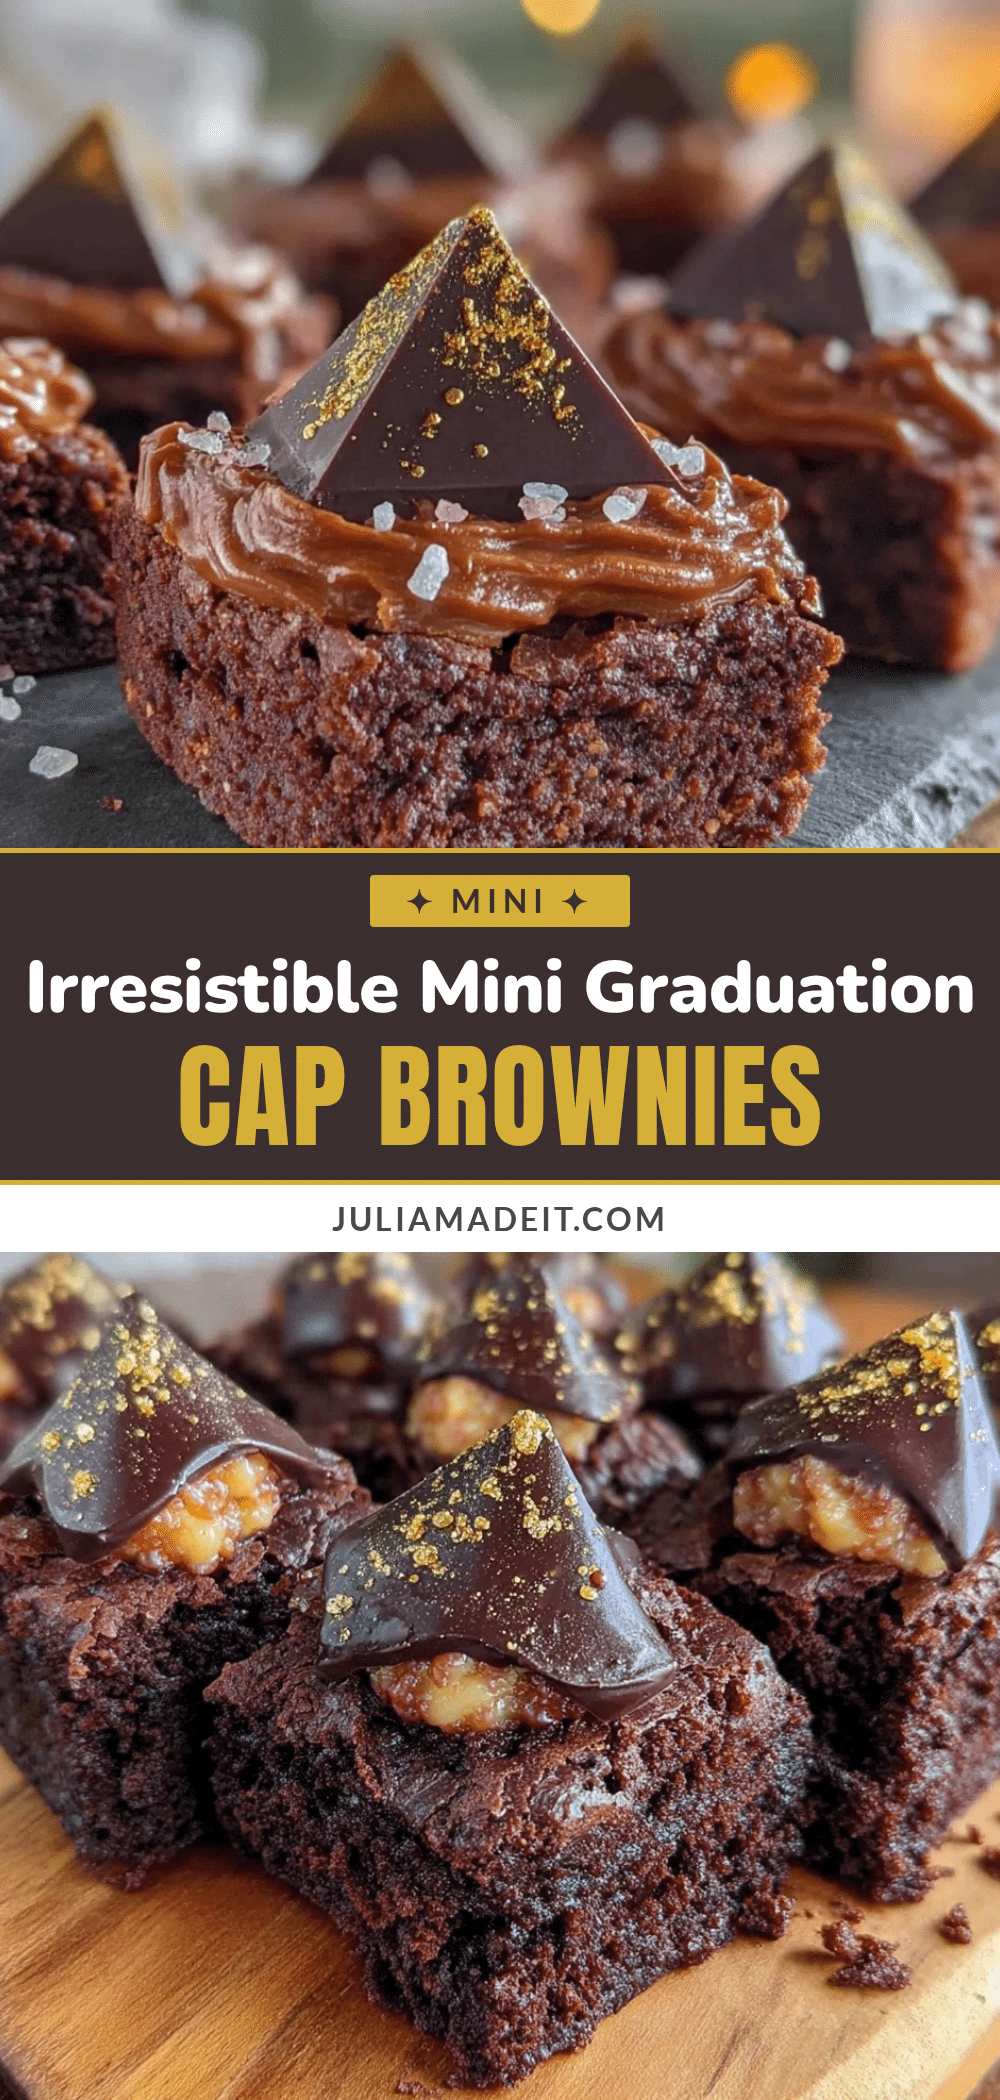
“I wasn’t planning on baking anything fancy that afternoon,” I said half-jokingly as my phone buzzed with a last-minute text from a friend: “Got any ideas for graduation treats? Something quick, cute, and fancy?” Honestly, my kitchen was a mess, and my motivation was hanging by a thread. But then, out of nowhere, the idea of these mini graduation cap brownies popped into my head. They weren’t originally meant to be this elegant, but as I dusted them with a little gold shimmer, everything changed.
The smell of melting chocolate mixing with a whisper of vanilla filled the air, and I found myself calming down, focused on creating something sweet and celebratory. These Perfect Mini Graduation Cap Brownies with Elegant Gold Dust became more than just a treat—they were a symbol of turning chaos into a small moment of joy. I ended up making them three times that week, tweaking the sizes and the dusting just a bit each time to get the effect just right.
What struck me most was how a simple batch of brownies transformed into these tiny, proud caps that felt like a nod to all the late nights and hard work behind every graduation ceremony. It was a quiet realization that sometimes, the sweetest rewards come from the simplest ideas—especially when they sparkle a little. That’s why this recipe stuck with me, and I’m sure it’ll find a special place on your celebration table too.
Why You’ll Love This Recipe
Making these Perfect Mini Graduation Cap Brownies with Elegant Gold Dust isn’t just about dessert; it’s about creating a fun, memorable moment with minimal fuss. I’ve tested this recipe multiple times, adjusting the baking times and dusting technique until it felt just right. Here’s what makes it stand out:
- Quick & Easy: These brownies come together in under 45 minutes, which is perfect for those last-minute graduation celebrations or when you’re juggling a million things.
- Simple Ingredients: You probably already have everything you need in your pantry—you know, staple staples like cocoa powder, eggs, and butter. No fancy trips to specialty stores required.
- Perfect for Parties: Whether it’s a graduation party, a casual get-together, or even a celebratory brunch, these mini treats fit right in.
- Crowd-Pleaser: Kids, adults, the picky eaters—you name it. The rich, fudgy texture paired with that little touch of gold dust always gets compliments.
- Elegant Twist: The gold dust isn’t just for show—it adds a subtle shimmer that makes these brownies feel special without being over the top.
- Unique Presentation: The mini brownie caps are not just adorable; they’re a creative take on traditional brownies, turning a simple dessert into a graduation keepsake.
This recipe isn’t just another brownie—it’s the kind of treat that makes you pause and smile with that first bite. It’s comfort food with a playful, celebratory twist, just right for marking milestones without stress or fuss. If you appreciate a good homemade dessert that looks like it belongs in a party spread, you’ll find this recipe the perfect fit.
What Ingredients You Will Need
This recipe uses simple, wholesome ingredients to deliver rich chocolate flavor and a fudgy, satisfying texture without any complicated steps. Most of these are pantry staples, but I’ve included a few tips for picking the best options to make your mini graduation cap brownies shine.
- Unsalted Butter, 1/2 cup (113g), melted – I prefer Land O’ Lakes for creamy consistency.
- Granulated Sugar, 1 cup (200g) – balances the bitterness of cocoa.
- Large Eggs, 2, at room temperature – helps create a tender crumb.
- Pure Vanilla Extract, 1 teaspoon – adds depth to the chocolate flavor.
- Cocoa Powder, 1/3 cup (35g), unsweetened – I recommend Hershey’s Special Dark for a richer taste.
- All-Purpose Flour, 3/4 cup (95g) – sifted for lightness.
- Salt, 1/4 teaspoon – enhances the chocolate notes.
- Powdered Sugar, for dusting the finished brownies (optional).
- Edible Gold Dust, a small amount for the elegant shimmer – available at baking supply stores or online.
- Black Fondant or Black Chocolate Melts, to create the little graduation cap tops – you can also use black candy melts for easier shaping.
- Wooden Toothpicks or Thin Straws, cut into small pieces, for the tassels.
If you want a gluten-free version, swapping the all-purpose flour with almond flour works well but expect a slightly denser texture. Also, if you prefer a dairy-free option, substitute the butter for a plant-based alternative like vegan margarine—just keep in mind the flavor may shift a bit.
Equipment Needed
- 8×8 inch (20×20 cm) baking pan: Essential for even brownie baking; I like using a non-stick metal pan for easy release.
- Mixing bowls: One medium for wet ingredients, one for dry.
- Measuring cups and spoons: Accuracy here really helps with consistent brownie texture.
- Whisk and spatula: For mixing without overworking the batter.
- Cooling rack: To cool brownies evenly before cutting and decorating.
- Sharp knife or brownie cutter: For neat, uniform mini squares.
- Small paintbrush or soft pastry brush: For applying the edible gold dust delicately.
- Rolling pin (optional): If working with fondant for caps.
If you don’t have a baking pan exactly 8×8, a similar sized pan will work fine—just keep an eye on the baking time. For fondant shaping, I sometimes use a small cookie cutter to keep caps consistent. If you’re low on equipment, a silicone baking mold with square cavities can save you the cutting step.
Preparation Method
- Preheat your oven to 350°F (175°C). Line your 8×8 inch baking pan with parchment paper, leaving an overhang on the sides to lift out the brownies easily. This step makes cleanup a breeze and helps keep the brownie edges intact.
- Mix the wet ingredients: In a medium bowl, whisk together the melted butter and granulated sugar until well combined and slightly glossy, about 1-2 minutes. Add the eggs one at a time, whisking after each addition, then stir in the vanilla extract.
- Combine dry ingredients: In a separate bowl, sift together the cocoa powder, all-purpose flour, and salt. This ensures no lumps and a lighter texture.
- Fold dry into wet: Gradually add the dry ingredients to the wet mixture, folding gently with a spatula just until combined. Don’t overmix here—you want fudgy brownies, not cakey ones.
- Pour the batter into your prepared pan: Smooth the top with a spatula to create an even layer. The batter will be thick and glossy, almost like fudge.
- Bake for 20-25 minutes: Check at 20 minutes with a toothpick; it should come out with a few moist crumbs but not wet batter. Overbaking dries them out, so keep a close eye.
- Cool completely: Transfer the pan to a cooling rack and let the brownies cool fully before removing. This can take 1-2 hours but is crucial for clean cutting.
- Cut into mini squares: Using a sharp knife, slice the brownies into 1.5-inch (4 cm) squares. Try to keep edges clean for the best presentation.
- Prepare the graduation caps: Roll out the black fondant thinly or melt the black candy melts and spread into small squares on parchment to harden. Once firm, place one square on top of each brownie.
- Add the tassels: Carefully insert a tiny piece of toothpick or a thin straw at an angle on the side of each cap. Dust the tops lightly with edible gold dust using a soft brush for that elegant shimmer.
This process might seem a little detailed, but trust me, the results are worth it. If your fondant feels sticky, a quick dusting of cornstarch helps. Also, if you want to speed things up, try using pre-made brownie bites from the store and decorating those instead.
Cooking Tips & Techniques
The secret to these mini graduation cap brownies lies in balancing fudgy texture with neat, clean presentation. Here are a few tips I’ve learned from trial and error:
- Don’t overbake: The brownies should still be a bit soft in the center when you take them out. They’ll firm up as they cool. I once baked a batch a little too long, and they turned crumbly instead of fudgy—big bummer!
- Use room temperature eggs: They blend better and help the batter hold together without becoming dense.
- Sifting dry ingredients: This makes a noticeable difference in texture, keeping the crumb light and preventing clumps of cocoa powder.
- Be gentle folding the batter: Overmixing introduces air and can make the brownies cakey, which isn’t what you want here.
- For the gold dust: Use a small, soft brush and apply lightly in layers. Too much dust can look like glitter overload rather than elegant shimmer.
- Cutting brownies: Use a warm, sharp knife and clean it between cuts for smooth edges. I dip my knife in hot water and dry it before each slice.
- Multitasking: While brownies bake, prepare your fondant or candy melts so you’re ready to assemble as soon as they’re cool.
These little touches make a big difference in the final look and taste. If you want to add a fun twist, try sprinkling a pinch of flaky sea salt on top before baking—it’s unexpected but fantastic.
Variations & Adaptations
If you want to switch things up or cater to different dietary needs, here are some variations I’ve played around with:
- Nutty Twist: Add 1/3 cup chopped toasted pecans or walnuts into the batter for a crunchy surprise inside each brownie.
- Fruity Flavor: Swirl in some raspberry jam or swirl cream cheese before baking for a tangy contrast to the rich chocolate.
- Gluten-Free: Substitute all-purpose flour with a 1:1 gluten-free baking flour mix. I’ve used Bob’s Red Mill with great results—just watch the baking time closely.
- Dairy-Free: Swap butter for coconut oil or vegan margarine and use dairy-free chocolate for the caps.
- Different Cap Designs: Instead of fondant, try using black licorice squares or chocolate-covered wafer cookies for a fun texture change.
One personal favorite variation is adding a pinch of espresso powder to the batter. It intensifies the chocolate flavor without making it taste like coffee—just a subtle, rich depth.
Serving & Storage Suggestions
These mini graduation cap brownies are best served at room temperature, so the fudgy texture and gold dust shimmer show off perfectly. They make a great finger food for parties or can be arranged beautifully on a dessert platter with fresh berries for a splash of color.
Pair them with a glass of cold milk, a cup of coffee, or even a sparkling lemonade to keep the celebration vibe going. For a more savory-sweet balance, try serving alongside something like creamy garlic mushroom chicken thighs or even crispy cheesy zucchini fritters for a full party menu.
To store, keep the brownies in an airtight container at room temperature for up to 3 days, or refrigerate for up to a week. If you want to freeze them, wrap each brownie individually in plastic wrap and place in a freezer-safe container—thaw overnight in the fridge before serving.
When reheating, a few seconds in the microwave helps refresh the fudgy softness. The gold dust stays intact, so the brownies still look elegant after warming.
Nutritional Information & Benefits
Each mini graduation cap brownie (about 1.5-inch square) contains approximately:
| Calories | 120 |
|---|---|
| Fat | 7g |
| Carbohydrates | 15g |
| Protein | 1.5g |
| Sugar | 12g |
The key ingredients—cocoa powder and eggs—bring some nutritional perks. Cocoa is rich in antioxidants and has heart-healthy flavonoids, while eggs provide protein and essential nutrients. Of course, these are indulgent treats, so moderation is key.
This recipe can be adapted to be gluten-free or dairy-free, catering to various dietary preferences, making it a thoughtful option for diverse guests at graduation parties. Just be mindful of potential allergens like eggs and nuts if you add them.
Conclusion
These Perfect Mini Graduation Cap Brownies with Elegant Gold Dust have become my go-to treat for marking special moments without stress or fuss. They’re easy enough to whip up on a busy day but special enough to impress and delight. I love how something so simple can feel so celebratory—with that little golden sparkle making all the difference.
Feel free to tweak the recipe to suit your tastes or dietary needs, whether that means adding nuts, switching to gluten-free flour, or trying a different frosting style. I’m always excited to hear how others make these brownies their own, so don’t hesitate to share your versions in the comments below.
Here’s to sweet celebrations, one mini cap at a time!
FAQs
Can I make these brownies ahead of time?
Yes! You can bake them a day or two in advance. Store in an airtight container at room temperature or in the fridge and add the gold dust just before serving for the freshest look.
What’s the best way to dust the brownies with gold?
Use a small, soft pastry brush to lightly apply edible gold dust. Apply in thin layers for a subtle shimmer rather than a heavy coating that looks unnatural.
Can I use a different chocolate for the graduation caps?
Absolutely. Black fondant is easiest for shaping, but you can also use black candy melts, licorice squares, or even dark chocolate pieces shaped into squares.
How do I keep the brownies fudgy and not dry?
Watch your baking time carefully. Take them out when a toothpick comes out with moist crumbs, not completely clean. Cooling fully before cutting also helps retain moisture.
Are these suitable for gluten-free diets?
Yes, by swapping all-purpose flour with a gluten-free baking mix, you can make these brownies gluten-free. Just keep an eye on baking time as it may vary slightly.
Pin This Recipe!
Perfect Mini Graduation Cap Brownies Recipe with Elegant Gold Dust
These mini graduation cap brownies are quick, easy, and elegant treats perfect for graduation celebrations. They feature a fudgy texture with a subtle shimmer of edible gold dust for a festive touch.
- Prep Time: 15 minutes
- Cook Time: 25 minutes
- Total Time: 1 hour 40 minutes
- Yield: 24 mini brownies 1x
- Category: Dessert
- Cuisine: American
Ingredients
- 1/2 cup (113g) unsalted butter, melted
- 1 cup (200g) granulated sugar
- 2 large eggs, at room temperature
- 1 teaspoon pure vanilla extract
- 1/3 cup (35g) unsweetened cocoa powder
- 3/4 cup (95g) all-purpose flour, sifted
- 1/4 teaspoon salt
- Powdered sugar, for dusting (optional)
- Edible gold dust, a small amount
- Black fondant or black chocolate melts, for graduation cap tops
- Wooden toothpicks or thin straws, cut into small pieces for tassels
Instructions
- Preheat your oven to 350°F (175°C). Line an 8×8 inch baking pan with parchment paper, leaving an overhang on the sides.
- In a medium bowl, whisk together the melted butter and granulated sugar until well combined and slightly glossy, about 1-2 minutes. Add the eggs one at a time, whisking after each addition, then stir in the vanilla extract.
- In a separate bowl, sift together the cocoa powder, all-purpose flour, and salt.
- Gradually fold the dry ingredients into the wet mixture with a spatula just until combined. Do not overmix.
- Pour the batter into the prepared pan and smooth the top with a spatula.
- Bake for 20-25 minutes, checking at 20 minutes with a toothpick. It should come out with a few moist crumbs but not wet batter.
- Cool the brownies completely on a cooling rack, about 1-2 hours.
- Cut the brownies into 1.5-inch (4 cm) mini squares using a sharp knife.
- Roll out black fondant thinly or melt black candy melts and spread into small squares on parchment to harden. Place one square on top of each brownie.
- Insert a tiny piece of toothpick or thin straw at an angle on the side of each cap for the tassel.
- Lightly dust the tops with edible gold dust using a soft brush.
Notes
Do not overbake to keep brownies fudgy. Use room temperature eggs for better texture. Sift dry ingredients for lightness. Use a warm knife dipped in hot water and dried between cuts for clean edges. Apply gold dust lightly in layers for an elegant shimmer. For gluten-free, substitute all-purpose flour with almond or gluten-free baking flour. For dairy-free, use plant-based butter alternatives.
Nutrition
- Serving Size: 1 mini brownie (1.5-
- Calories: 120
- Sugar: 12
- Fat: 7
- Carbohydrates: 15
- Protein: 1.5
Keywords: mini brownies, graduation treats, fudgy brownies, gold dust brownies, party desserts, easy brownies, chocolate brownies