For a while, I just accepted that lemon bars weren’t going to taste like something homemade with a buttery shortbread crust. You know, those moments when you bite into a lemon bar from a bakery or a box, and it’s either too tart, too sweet, or the crust feels like cardboard? That was my experience for years. I remember one afternoon, standing in my kitchen with a sad, dry lemon bar in hand, thinking, “There’s got to be a way to get that perfect balance of tangy brightness and rich, buttery crust.”
The kitchen smelled faintly of lemon zest, but the bars just didn’t deliver that satisfying snap of the crust followed by a lush, creamy lemon filling. I wasn’t in a rush or frustrated—just quietly persistent, fiddling with recipes here and there, trying to find that one that felt just right.
One weekend, after a few experiments and a lot of tasting (honestly, my family did the heavy lifting on that part), a recipe emerged. It wasn’t flashy or complicated. Instead, it was a simple combination of real butter, fresh lemons, and just the right amount of sugar, baked into a crust that held everything together without crumbling apart or turning soggy. It stuck with me because it’s honest, satisfying, and the kind of treat you can make anytime you want a little sunshine on your plate without fuss.
No fanfare here—just a quiet reminder that sometimes the best recipes come from patience and a few good lemons. This recipe for flavorful lemon bars with buttery shortbread crust became my go-to, the one I share with friends when they want a sweet that actually tastes homemade and real.
Why You’ll Love This Recipe
Having tested this lemon bars recipe countless times (sometimes twice in a weekend), I can say it hits a spot that’s hard to find in citrus desserts. Here’s what makes it stand out:
- Quick & Easy: You can have these ready in about an hour, which is great for last-minute dessert cravings or a weekend bake.
- Simple Ingredients: No exotic or hard-to-find items here—just pantry staples and fresh lemons. I usually grab organic lemons for their zest and juice; it really makes a difference.
- Perfect for Gatherings: Whether it’s a cozy afternoon with friends or a potluck, these bars always disappear fast.
- Crowd-Pleaser: Kids, adults, lemon haters—even they come back for seconds. The balance of tart and sweet is just right.
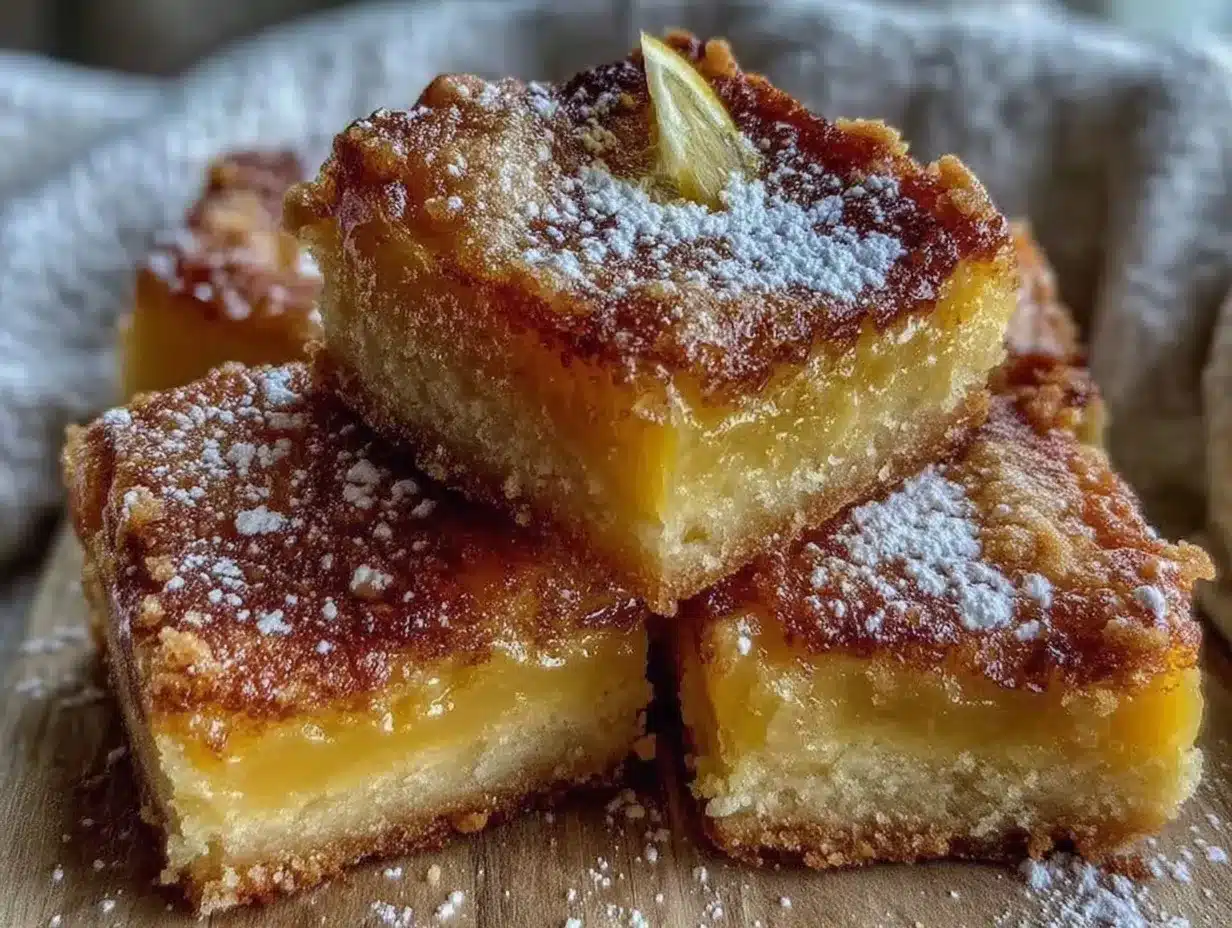
- Unbelievably Delicious: The buttery shortbread crust has a tender crumb that contrasts beautifully with the silky, tangy filling.
This recipe isn’t just another lemon bar. The crust is made with real butter and a touch of vanilla, baked just until golden, so it has that perfect snap. The filling is smooth, with fresh lemon juice and zest giving it a lively flavor that’s not overwhelming but just enough to make you pause and enjoy. The technique I landed on involves blind baking the crust first to keep it crisp, a step I didn’t know was so important until I learned the hard way.
Honestly, this recipe feels like comfort food reimagined—it’s bright and fresh but still indulgent enough to feel like a treat. It’s the kind of dessert that makes you close your eyes after the first bite and say, “Yeah, this is good.” And if you want other recipes that pair well with lemon’s brightness, you might enjoy my fresh watermelon cucumber feta salad with mint or my grilled peaches with creamy honey ricotta—both light, summery, and just as satisfying.
What Ingredients You Will Need
This recipe uses simple, wholesome ingredients to deliver bold flavor and a satisfying texture without any fuss. Most are pantry staples, and a few fresh items add that zing that makes these lemon bars memorable.
- For the Buttery Shortbread Crust:
- 1 cup (225g) unsalted butter, softened (I prefer KerryGold for its rich flavor)
- 1/2 cup (100g) granulated sugar
- 2 cups (240g) all-purpose flour
- 1/4 teaspoon salt
- 1 teaspoon pure vanilla extract (adds subtle depth)
- For the Lemon Filling:
- 4 large eggs, room temperature
- 1 1/2 cups (300g) granulated sugar
- 1/4 cup (30g) all-purpose flour (helps with the texture)
- 1/2 cup (120ml) freshly squeezed lemon juice (about 3-4 lemons, depending on size)
- 2 teaspoons finely grated lemon zest (for that extra punch)
- For Dusting (optional):
- Powdered sugar, for dusting the finished bars
If you want a gluten-free alternative, swapping the all-purpose flour in both crust and filling for a 1-to-1 gluten-free blend works well. For dairy-free, use a high-quality vegan butter substitute—you might lose a bit of richness but it’s still tasty.
When picking lemons, I look for firm, bright yellow ones with a slight give. Organic lemons are great because you’ll be using the zest, and you don’t want any wax or pesticides interfering with that fresh citrus flavor.
Equipment Needed
Making these lemon bars doesn’t require anything fancy, but a few tools make the process smoother:
- 8×8-inch (20x20cm) square baking pan – metal pans work best for even heat distribution
- Parchment paper – helps lift the bars out easily without sticking
- Mixing bowls – one for the crust, one for the filling
- Electric mixer or sturdy whisk – for creaming butter and eggs
- Microplane or fine grater – for zesting lemons
- Citrus juicer or reamer – makes getting fresh juice easier
- Rubber spatula – for folding ingredients gently
If you don’t have an electric mixer, a good whisk and some elbow grease will do just fine. For the baking pan, glass pans sometimes don’t brown the crust as evenly, so I tend to avoid those. Parchment paper is a game-changer here—trust me, it saves you a lot of scraping later.
Preparation Method
- Preheat the oven to 350°F (175°C). Line your 8×8-inch pan with parchment paper, leaving some overhang for easy removal later. This little prep step is a time-saver.
- Make the crust: In a mixing bowl, cream together 1 cup (225g) softened unsalted butter and 1/2 cup (100g) granulated sugar until light and fluffy—this usually takes about 3-4 minutes with a mixer. It smells amazing already.
- Add 2 cups (240g) all-purpose flour, 1/4 teaspoon salt, and 1 teaspoon vanilla extract to the butter mixture. Mix on low speed until just combined. The dough will be crumbly but should hold together when pressed.
- Press the crust evenly into the bottom of the prepared pan, making sure to pack it down firmly especially at the corners. This helps avoid a crumbly crust later. I use the bottom of a glass to smooth it out.
- Blind bake the crust: Bake for 18-20 minutes, or until the edges turn a light golden brown. This step keeps the crust crisp and prevents sogginess.
- Prepare the filling while the crust bakes: In a separate bowl, whisk together 4 large eggs and 1 1/2 cups (300g) granulated sugar until smooth and pale, about 2 minutes. This step ensures a creamy texture.
- Add 1/4 cup (30g) flour, 1/2 cup (120ml) fresh lemon juice, and 2 teaspoons grated lemon zest to the egg mixture. Whisk until fully combined and no lumps remain.
- Once the crust is done, remove it from the oven (leave the oven on) and pour the lemon filling over the hot crust. The heat helps the filling set evenly.
- Bake the entire pan for another 20-25 minutes, or until the filling is just set but still slightly jiggly in the center. Don’t overbake; you want that delicate custard-like texture.
- Let the bars cool completely at room temperature, then refrigerate for at least 2 hours to firm up before slicing.
- Use the parchment paper overhang to lift the bars out, slice into squares, and dust with powdered sugar if you like. Serve chilled or at room temperature.
One thing I learned the hard way: skipping the blind bake step leads to a soggy bottom, so don’t rush it. Also, chilling is key for clean slices—warm lemon bars tend to crumble or stick.
Cooking Tips & Techniques
Here are some tips I picked up along the way that keep these lemon bars tasting their best:
- Use room temperature eggs: They blend better with sugar and create a smoother filling.
- Don’t skip zesting: The lemon zest packs a punch of aromatic oils that juice alone can’t deliver.
- Blind bake the crust: This prevents that dreaded soggy bottom and gives a nice contrast to the creamy filling.
- Watch the filling closely: Pull the bars from the oven when they’re set but still slightly jiggly in the center—carryover heat will finish the job.
- Chill before slicing: Warm bars won’t cut cleanly and will crumble. Cold bars hold their shape.
- Use fresh lemon juice: Bottled lemon juice lacks brightness and can taste dull.
I once tried skipping the vanilla in the crust and missed the subtle flavor lift it gives. Also, I’ve found using a microplane for zesting works best—it avoids the bitter pith that a regular grater sometimes scrapes up. When multitasking, I prep and chill the crust while making the filling to save time.
Variations & Adaptations
This lemon bars recipe is pretty adaptable, which I appreciate since tastes and dietary needs vary.
- Gluten-Free: Swap the all-purpose flour with a 1-to-1 gluten-free baking flour in both crust and filling. I’ve tested this with a certified blend and the texture is nearly identical.
- Lower Sugar: Reduce the sugar by 1/4 cup in the filling if you prefer less sweetness. The lemon’s tartness balances it nicely.
- Herbal Twist: Add 1 teaspoon finely chopped fresh thyme or basil to the crust for a subtle herbal note that pairs surprisingly well with lemon.
- Alternative Citrus: Substitute lemon juice with lime or orange for a different citrus profile. Orange works beautifully with the vanilla crust.
- Vegan: Use a plant-based butter and replace eggs with a flax egg (1 tablespoon flaxseed meal + 3 tablespoons water per egg). The texture won’t be quite the same but still tasty.
Personally, I once added a thin layer of raspberry jam between the crust and filling for a fruity surprise—totally worth trying if you like mixed berry flavors. For a twist, you could also try making mini lemon bars in a muffin tin for easy portion control.
Serving & Storage Suggestions
These lemon bars are best served chilled or at room temperature. I often make them a day ahead so the flavors have time to meld, making the lemon brightness even more pronounced.
For presentation, dust with powdered sugar or garnish with thin lemon slices or a few fresh berries for color. They pair wonderfully with a cup of tea or a light summer cocktail.
Store any leftovers in an airtight container in the refrigerator for up to 4 days. They also freeze well—wrap tightly in plastic wrap and foil, then thaw overnight in the fridge before serving.
Reheat gently in a warm oven (about 300°F/150°C) for 5 minutes if you prefer them warm, but honestly, I love them cold best. The flavors develop beautifully over a day or two, softening the tartness and making the bars even more addictive.
Nutritional Information & Benefits
Each lemon bar (based on 16 pieces) provides roughly:
| Calories | 190 |
|---|---|
| Fat | 10g (mostly from butter) |
| Carbohydrates | 24g (mostly sugars and flour) |
| Protein | 2g |
| Fiber | 0.5g (from lemon zest) |
The recipe benefits from fresh lemon juice and zest, which provide vitamin C and antioxidants. Using real butter ensures you get natural fats rather than processed oils, which makes a difference in flavor and texture. This recipe is naturally gluten-free if you swap the flour and easily dairy-free with butter substitutes. Keep in mind the sugar content—reducing it slightly can help if you’re watching your intake.
Conclusion
This recipe for flavorful lemon bars with buttery shortbread crust is one of those desserts that quietly becomes a staple. It’s simple, dependable, and genuinely delicious without any fuss or fancy ingredients. I love how it balances bright citrus zing with a rich, tender crust—something that took a few tries to get right but feels absolutely worth it.
Feel free to tweak the sugar or try different citrus variations to make it your own. And if you ever need a fresh summer dessert to impress with minimal effort, these lemon bars will do the trick every time.
Sharing this recipe feels like passing along a little sunshine in dessert form—just the kind that makes a kitchen feel warm and inviting.
Frequently Asked Questions
Can I use bottled lemon juice instead of fresh?
Fresh lemon juice is best for bright, fresh flavor. Bottled lemon juice tends to be less vibrant and can affect the taste and texture.
How do I prevent the crust from getting soggy?
Blind baking the crust before adding the filling is crucial. It creates a crisp base that holds up against the lemon filling.
Can I make these lemon bars ahead of time?
Yes! They actually taste better after chilling overnight. Just store them in an airtight container in the fridge.
What’s the best way to slice lemon bars neatly?
Chill the bars completely, then use a sharp knife wiped clean between cuts to get clean edges without crumbling.
Can I freeze lemon bars?
Absolutely. Wrap them tightly in plastic and foil, freeze, and thaw in the fridge overnight before serving.
Pin This Recipe!

Flavorful Lemon Bars Recipe Easy Homemade Buttery Shortbread Crust

A simple and satisfying lemon bars recipe featuring a rich buttery shortbread crust and a silky, tangy lemon filling. Perfectly balanced tartness and sweetness with a crisp crust.
- Prep Time: 15 minutes
- Cook Time: 40-45 minutes
- Total Time: 2 hours 55 minutes
- Yield: 16 servings 1x
- Category: Dessert
- Cuisine: American
Ingredients
- 1 cup (225g) unsalted butter, softened
- 1/2 cup (100g) granulated sugar
- 2 cups (240g) all-purpose flour
- 1/4 teaspoon salt
- 1 teaspoon pure vanilla extract
- 4 large eggs, room temperature
- 1 1/2 cups (300g) granulated sugar
- 1/4 cup (30g) all-purpose flour
- 1/2 cup (120ml) freshly squeezed lemon juice (about 3–4 lemons)
- 2 teaspoons finely grated lemon zest
- Powdered sugar, for dusting (optional)
Instructions
- Preheat the oven to 350°F (175°C). Line an 8×8-inch square baking pan with parchment paper, leaving some overhang for easy removal.
- Make the crust: In a mixing bowl, cream together 1 cup softened unsalted butter and 1/2 cup granulated sugar until light and fluffy, about 3-4 minutes.
- Add 2 cups all-purpose flour, 1/4 teaspoon salt, and 1 teaspoon vanilla extract to the butter mixture. Mix on low speed until just combined. The dough will be crumbly but should hold together when pressed.
- Press the crust evenly into the bottom of the prepared pan, packing it down firmly especially at the corners. Smooth the surface with the bottom of a glass.
- Blind bake the crust for 18-20 minutes, or until the edges turn a light golden brown.
- Prepare the filling while the crust bakes: In a separate bowl, whisk together 4 large eggs and 1 1/2 cups granulated sugar until smooth and pale, about 2 minutes.
- Add 1/4 cup flour, 1/2 cup fresh lemon juice, and 2 teaspoons grated lemon zest to the egg mixture. Whisk until fully combined and no lumps remain.
- Remove the crust from the oven and pour the lemon filling over the hot crust. Return to the oven and bake for another 20-25 minutes, or until the filling is just set but still slightly jiggly in the center.
- Let the bars cool completely at room temperature, then refrigerate for at least 2 hours to firm up before slicing.
- Use the parchment paper overhang to lift the bars out, slice into squares, and dust with powdered sugar if desired. Serve chilled or at room temperature.
Notes
Blind bake the crust to prevent sogginess. Use room temperature eggs for a smooth filling. Chill bars before slicing for clean cuts. Fresh lemon juice and zest provide the best flavor. Parchment paper helps lift bars easily.
Nutrition
- Serving Size: 1 lemon bar (1/16th
- Calories: 190
- Fat: 10
- Carbohydrates: 24
- Fiber: 0.5
- Protein: 2
Keywords: lemon bars, lemon dessert, shortbread crust, homemade lemon bars, easy lemon bars, buttery crust, citrus dessert