Let me tell you, the scent of cocoa and vanilla swirling together while those fluffy red velvet waffles cook is enough to make anyone’s mouth water. The first time I made these waffles, I was instantly hooked—the kind of moment where you pause, take a deep breath, and just smile because you know you’re onto something truly special. I remember being knee-high to a grasshopper, watching my grandma whip up her famous red velvet cake every holiday, and thinking, “What if that magic could be breakfast?” Years ago, I stumbled on the idea of turning that beloved cake flavor into waffles during a rainy weekend when I was craving something sweet and cozy but different. Honestly, it’s dangerously easy and delivers pure, nostalgic comfort with every bite.
My family couldn’t stop sneaking them off the cooling rack (and I can’t really blame them). Let’s face it, who doesn’t love a waffle that’s soft and tender inside, with just the right hint of cocoa and that signature red hue? These fluffy red velvet waffles with cream cheese glaze are perfect for weekend brunches, holiday mornings, or even a sweet treat for your kids after school. You know what? After testing this recipe multiple times (in the name of research, of course), it’s become a staple for family gatherings and gifting. It feels like a warm hug you can eat, and you’re going to want to bookmark this one for sure.
Why You’ll Love This Recipe
This fluffy red velvet waffles recipe isn’t just good—it’s the kind of breakfast that makes you close your eyes after the first bite. Here’s why it stands out:
- Quick & Easy: Comes together in under 30 minutes, perfect for busy mornings or surprise guests.
- Simple Ingredients: No fancy grocery trips needed; you likely already have everything in your kitchen pantry.
- Perfect for Brunch: Great for weekend brunches, Valentine’s Day breakfast, or cozy winter mornings.
- Crowd-Pleaser: Kids and adults alike always ask for seconds—and thirds!
- Unbelievably Delicious: The fluffy texture combined with the tangy cream cheese glaze makes it next-level comfort food.
This recipe isn’t just another waffle recipe—it’s my best version. The secret lies in blending buttermilk for that tender crumb and adding a touch of vinegar to activate the cocoa’s richness. Plus, the cream cheese glaze is quick to whip up and perfectly balances the sweetness without being overpowering. Honestly, it’s comfort food reimagined—faster, lighter, but with the same soul-soothing satisfaction. Whether you’re impressing guests without stress or turning a simple breakfast into something memorable, these fluffy red velvet waffles with cream cheese glaze make it happen every time.
What Ingredients You Will Need
This recipe uses simple, wholesome ingredients to deliver bold flavor and satisfying texture without the fuss. Most are pantry staples, and a few easy swaps can make it work for you.
- All-purpose flour – 2 cups (240g), for the waffle base; I prefer King Arthur for best consistency.
- Cocoa powder – 2 tablespoons unsweetened (Dutch-processed if you can find it) to add that signature red velvet depth.
- Baking powder – 2 teaspoons, for lift and fluffiness.
- Baking soda – ½ teaspoon, reacts with vinegar for light texture.
- Salt – ¼ teaspoon, to balance flavors.
- Granulated sugar – ¾ cup (150g), for sweetness.
- Buttermilk – 1¾ cups (420ml), room temperature (adds tenderness; if you don’t have buttermilk, mix milk and vinegar and let sit 5 min).
- Vegetable oil – ½ cup (120ml), for moist waffles.
- Large eggs – 2, room temperature.
- Vanilla extract – 1 teaspoon, for warmth.
- Red food coloring – 2 tablespoons, gel or liquid (adjust for desired vibrancy).
For the Cream Cheese Glaze:
- Cream cheese – 4 ounces (115g), softened (I like Philadelphia brand for smoothness).
- Powdered sugar – 1 cup (120g), sifted to prevent lumps.
- Milk – 2 tablespoons (30ml), adjust for glazing consistency (whole milk works best).
- Vanilla extract – ½ teaspoon, to complement the glaze.
If you want a dairy-free option, swap the cream cheese for a dairy-free spread and use almond or oat milk in the glaze. For a gluten-free twist, almond flour works, but expect a slightly different texture.
Equipment Needed
- Waffle iron: Essential for getting those classic grids and crisp edges. A non-stick Belgian waffle maker works beautifully, but a traditional one will do.
- Mixing bowls: One large bowl for dry ingredients and another for wet ingredients.
- Whisk: For combining wet ingredients smoothly.
- Electric mixer or hand mixer: Useful for whipping the cream cheese glaze to a silky finish.
- Measuring cups and spoons: For accuracy, especially with baking powder and soda.
- Spatula: For folding ingredients gently and scraping the bowl.
If you don’t have a waffle iron handy, a well-seasoned cast-iron skillet can produce a similar effect, though you’ll miss the classic waffle texture. Regular cleaning and occasional seasoning keep your waffle iron performing at its best. On a budget? Look for mini waffle makers or electric griddles that double as waffle irons—they’re super versatile!
Preparation Method
- Preheat your waffle iron according to manufacturer instructions (usually 5-7 minutes). Lightly grease with a non-stick spray or melted butter.
- Mix dry ingredients: In a large bowl, sift together 2 cups (240g) all-purpose flour, 2 tablespoons cocoa powder, 2 teaspoons baking powder, ½ teaspoon baking soda, ¼ teaspoon salt, and ¾ cup (150g) granulated sugar. Whisk to combine evenly.
- Combine wet ingredients: In another bowl, whisk 1¾ cups (420ml) buttermilk, ½ cup (120ml) vegetable oil, 2 large eggs, 1 teaspoon vanilla extract, and 2 tablespoons red food coloring until smooth and homogenous.
- Make the batter: Pour the wet ingredients into the dry mix. Gently fold together with a spatula just until combined—don’t overmix! A few lumps are okay; overmixing can make waffles tough.
- Cook the waffles: Pour about ½ cup (120ml) batter onto the preheated waffle iron. Close the lid and cook for 4-5 minutes or until the waffle is crisp on the outside and springs back when lightly touched. The red color should be vivid and the edges slightly crisp.
- Remove and keep warm: Transfer the waffle to a wire rack to prevent sogginess. Repeat with remaining batter.
- Prepare the cream cheese glaze: In a bowl, beat 4 ounces (115g) softened cream cheese with 1 cup (120g) powdered sugar, 2 tablespoons (30ml) milk, and ½ teaspoon vanilla extract until smooth and pourable. Adjust milk to get the desired consistency. If too thick, add a teaspoon more milk; if too thin, add a bit more powdered sugar.
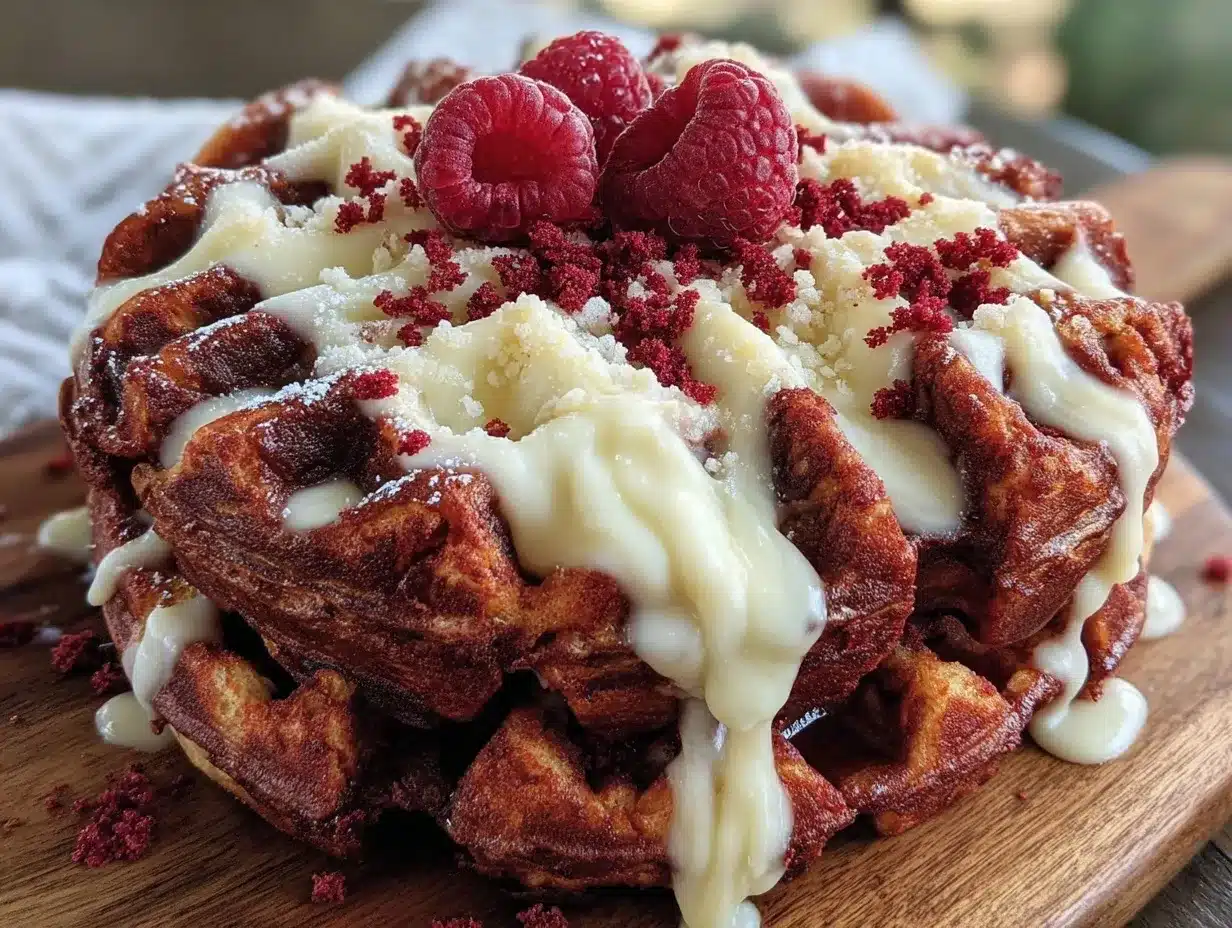
- Serve: Drizzle the cream cheese glaze generously over warm waffles. For extra flair, sprinkle with mini chocolate chips or fresh berries.
Pro tip: If the first waffle sticks, make sure to grease the iron well next time and don’t peek too early. Also, keep cooked waffles on a wire rack instead of stacking to maintain crispness. These little tricks save you from soggy disappointment!
Cooking Tips & Techniques
Getting fluffy red velvet waffles just right can be a little tricky, but here’s what I’ve learned through trial and error:
- Use room temperature ingredients: Eggs and buttermilk at room temp mix better and help your waffles rise evenly.
- Don’t overmix the batter: Lumps are fine! Overmixing develops gluten, making waffles dense instead of light and fluffy.
- Preheat the waffle iron fully: A hot iron ensures crispy edges and prevents sticking. If your waffles come out pale, your iron probably needs more time to heat.
- Work quickly: Once the batter is mixed, cook immediately. Letting it sit can cause the baking soda and powder to lose their fizz.
- Keep waffles warm without steaming: Place cooked waffles on a wire rack in a low oven (200°F/95°C) if making ahead. Avoid stacking—stacking traps steam and makes them soggy.
- Make the cream cheese glaze smooth: Beat the cream cheese first to remove lumps before adding sugar and milk. A smooth glaze is worth the extra whisking.
Honestly, my first batch was a little flat and sad, but after these tweaks, I nailed the perfect fluffy red velvet waffles every time. Patience and attention to small details make all the difference.
Variations & Adaptations
Want to switch things up? Here are some fun ways to customize your fluffy red velvet waffles with cream cheese glaze:
- Chocolate Chip Red Velvet: Add ½ cup mini chocolate chips into the batter before cooking for a chocolaty surprise.
- Vegan Version: Use plant-based milk and yogurt instead of buttermilk, replace eggs with flax eggs (2 tbsp ground flaxseed + 6 tbsp water), and swap cream cheese for vegan cream cheese in the glaze.
- Berry Boost: Fold fresh or frozen raspberries or strawberries into the batter for a fruity twist. In summer, this adds a bright, fresh note.
- Spiced Red Velvet: Add ½ teaspoon cinnamon and a pinch of nutmeg to the dry ingredients for warm spice vibes.
- Gluten-Free: Swap all-purpose flour for a 1:1 gluten-free baking flour blend; you might need to add 1-2 tablespoons extra liquid for perfect batter consistency.
I once tried swirling in a tablespoon of peanut butter into the batter for a nutty surprise—unexpected but delicious! Don’t be afraid to experiment based on your pantry and preferences.
Serving & Storage Suggestions
Serve these fluffy red velvet waffles warm, drizzled generously with cream cheese glaze and maybe a sprinkle of powdered sugar or some fresh berries for color. They pair beautifully with a cup of strong coffee or freshly brewed tea to balance the sweetness.
If you have leftovers (though that’s rare!), store waffles in an airtight container in the refrigerator for up to 3 days. To reheat, pop them in a toaster or oven at 350°F (175°C) for 5-7 minutes to crisp up again. The cream cheese glaze is best added fresh, but you can store it separately in the fridge for up to a week.
Flavors actually deepen overnight, so if you like, make the batter the night before and cook fresh waffles in the morning for a richer taste. Just keep the batter covered tightly in the fridge.
Nutritional Information & Benefits
Each serving (one waffle with glaze) contains approximately 300-350 calories, with a balanced mix of carbs, fats, and protein. The buttermilk adds calcium and probiotics, while the cocoa powder offers antioxidants. Using vegetable oil keeps the waffles moist without heaviness.
This recipe can be adapted for dietary needs; gluten-free flour and dairy-free cream cheese options make it accessible for many. If you’re mindful of sugar, you can reduce the granulated sugar slightly or use a natural sweetener alternative.
From a wellness perspective, this recipe strikes a nice balance between indulgence and nourishment—perfect for treating yourself without going overboard.
Conclusion
Fluffy red velvet waffles with cream cheese glaze bring a delightful twist to your breakfast routine. They’re easy to make, cozy to eat, and versatile enough to fit into any occasion. Whether you stick to the classic recipe or try some fun variations, you’re in for a treat that feels like a hug on a plate.
I love this recipe because it brings together nostalgic flavors with a fresh, quick-to-make format that my whole family adores. Give it a shot, tweak it your way, and let me know how you make it your own! Don’t forget to leave a comment or share your favorite adaptations—I’m always excited to hear your stories.
Happy waffle-making!
FAQs About Fluffy Red Velvet Waffles with Cream Cheese Glaze
Can I make the batter ahead of time?
Yes! You can prepare the batter the night before and keep it covered in the fridge. Just give it a gentle stir before cooking in the morning.
What if I don’t have buttermilk?
No worries! Mix 1¾ cups milk with 1½ tablespoons vinegar or lemon juice, let it sit 5 minutes, and use as a buttermilk substitute.
How do I store leftover waffles?
Cool completely, then store in an airtight container in the fridge for up to 3 days. Reheat in toaster or oven for best texture.
Can I freeze these waffles?
Absolutely! Freeze cooked waffles in a single layer on a baking sheet, then transfer to a freezer bag. Reheat straight from frozen in a toaster or oven.
Is the cream cheese glaze necessary?
It’s what makes these waffles shine, but if you’re short on time, powdered sugar dusted on top works too—though the glaze adds that perfect tangy sweetness.
Pin This Recipe!
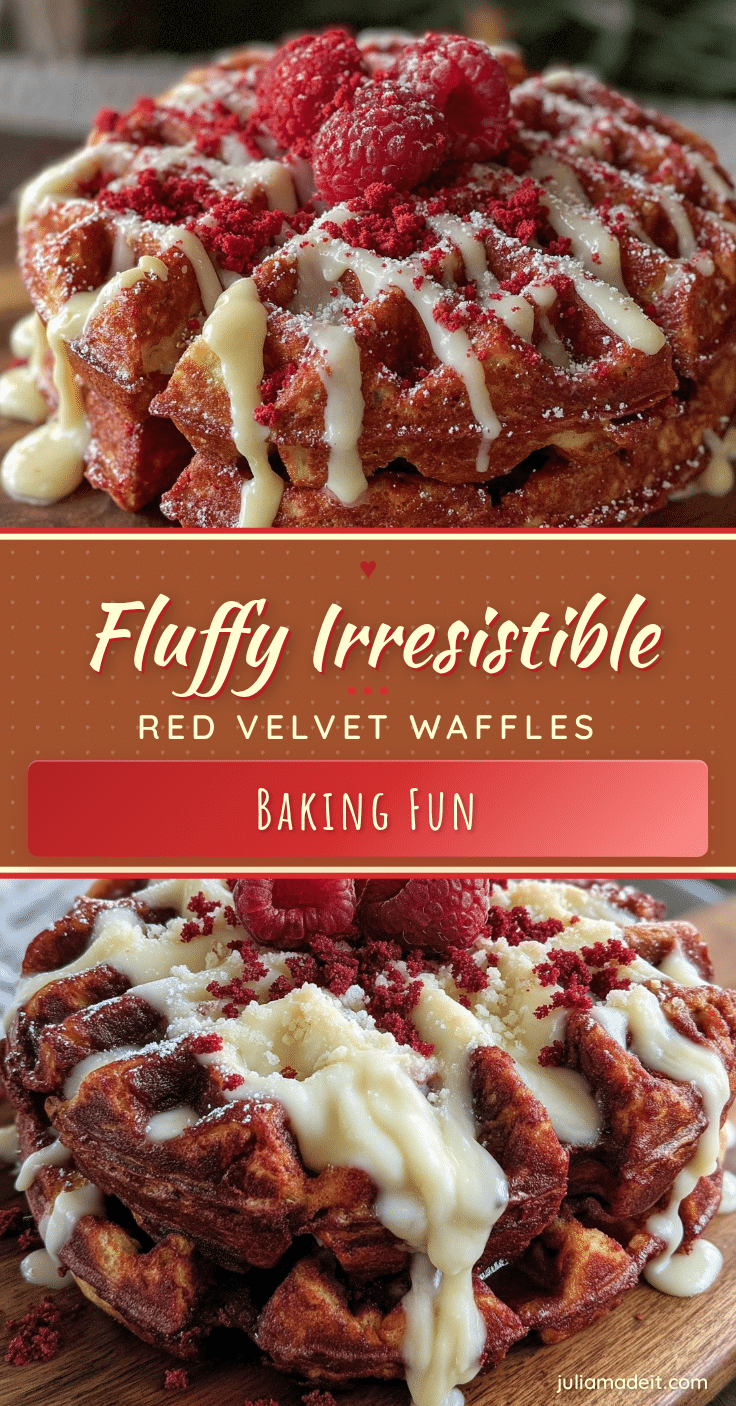
Fluffy Red Velvet Waffles Recipe with Easy Cream Cheese Glaze

These fluffy red velvet waffles combine the nostalgic flavors of red velvet cake with a tender crumb and a tangy cream cheese glaze, perfect for brunch or a sweet treat.
- Prep Time: 10 minutes
- Cook Time: 15 minutes
- Total Time: 25 minutes
- Yield: 6 servings 1x
- Category: Breakfast
- Cuisine: American
Ingredients
- 2 cups (240g) all-purpose flour
- 2 tablespoons unsweetened cocoa powder (Dutch-processed if available)
- 2 teaspoons baking powder
- ½ teaspoon baking soda
- ¼ teaspoon salt
- ¾ cup (150g) granulated sugar
- 1¾ cups (420ml) buttermilk, room temperature
- ½ cup (120ml) vegetable oil
- 2 large eggs, room temperature
- 1 teaspoon vanilla extract
- 2 tablespoons red food coloring (gel or liquid)
- For the Cream Cheese Glaze:
- 4 ounces (115g) cream cheese, softened
- 1 cup (120g) powdered sugar, sifted
- 2 tablespoons (30ml) milk (whole milk preferred)
- ½ teaspoon vanilla extract
Instructions
- Preheat your waffle iron according to manufacturer instructions (usually 5-7 minutes). Lightly grease with non-stick spray or melted butter.
- In a large bowl, sift together flour, cocoa powder, baking powder, baking soda, salt, and granulated sugar. Whisk to combine evenly.
- In another bowl, whisk buttermilk, vegetable oil, eggs, vanilla extract, and red food coloring until smooth and homogenous.
- Pour the wet ingredients into the dry mix. Gently fold together with a spatula just until combined; a few lumps are okay. Do not overmix.
- Pour about ½ cup (120ml) batter onto the preheated waffle iron. Close the lid and cook for 4-5 minutes or until the waffle is crisp on the outside and springs back when lightly touched.
- Transfer the cooked waffle to a wire rack to prevent sogginess. Repeat with remaining batter.
- To make the cream cheese glaze, beat softened cream cheese with powdered sugar, milk, and vanilla extract until smooth and pourable. Adjust milk or powdered sugar to reach desired consistency.
- Drizzle the cream cheese glaze generously over warm waffles. Optionally, sprinkle with mini chocolate chips or fresh berries.
Notes
Use room temperature ingredients for best results. Do not overmix the batter to keep waffles light and fluffy. Keep cooked waffles on a wire rack to maintain crispness. The cream cheese glaze can be made dairy-free by using vegan cream cheese and plant-based milk. Batter can be prepared the night before and stored in the fridge.
Nutrition
- Serving Size: One waffle with crea
- Calories: 325
- Sugar: 20
- Sodium: 350
- Fat: 16
- Saturated Fat: 5
- Carbohydrates: 42
- Fiber: 2
- Protein: 6
Keywords: red velvet waffles, cream cheese glaze, fluffy waffles, brunch recipe, easy waffles, breakfast waffles, red velvet breakfast