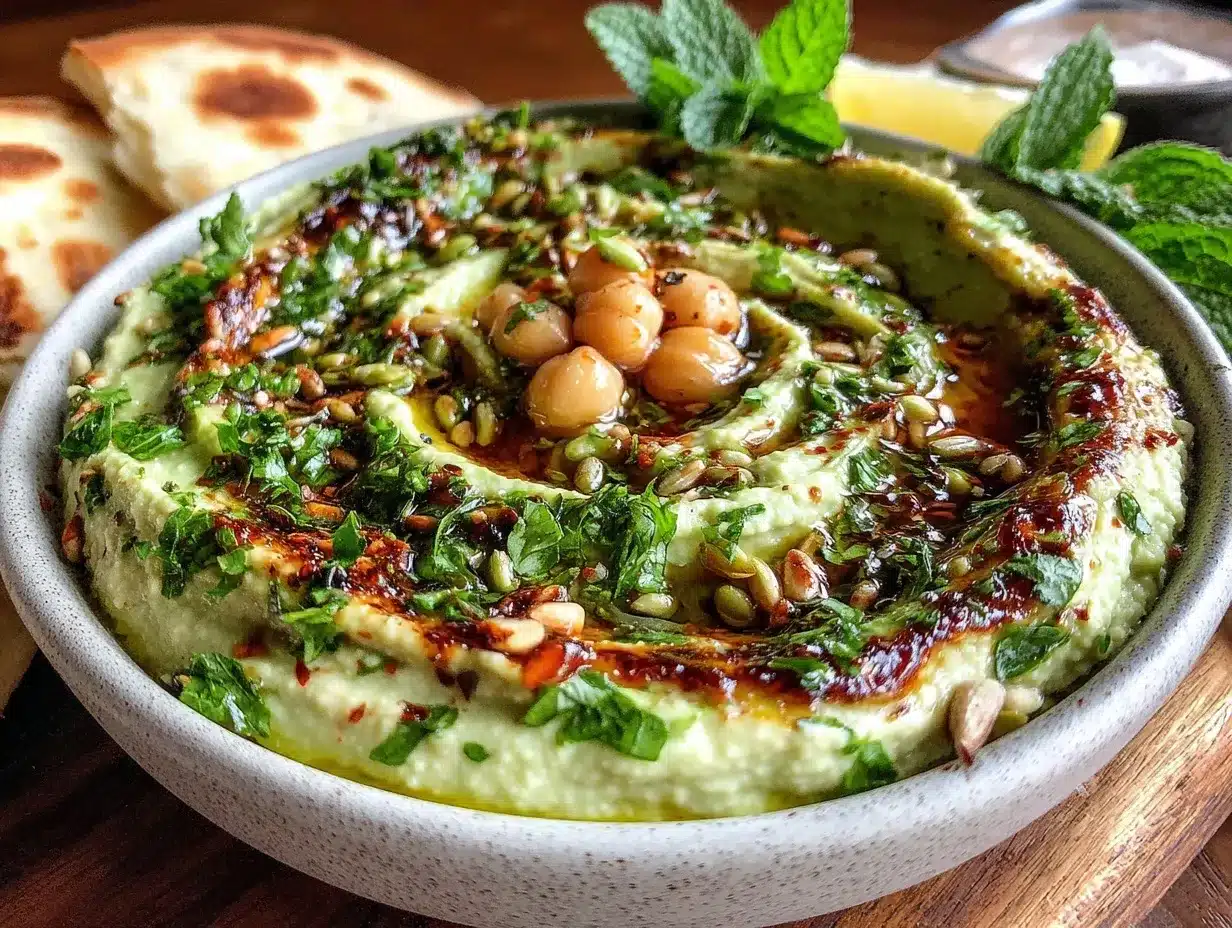
Let me tell you, the moment the aroma of fresh herbs and garlic swirled around my kitchen while blending this fresh green hummus, I knew I was onto something seriously delicious. The vibrant green color alone is enough to brighten up any snack table, but the creamy, zesty flavor truly steals the show. The first time I whipped up this fresh green hummus, I was instantly hooked—the kind of moment where you pause, take a deep breath, and just smile because you know you’ve discovered a new favorite.
Years ago, when I was knee-high to a grasshopper, my grandma’s kitchen was always filled with the scent of fresh herbs, and hummus was a rare treat. I stumbled upon this fresh green hummus recipe during a rainy weekend, trying to recreate that nostalgic comfort with a twist. Honestly, I wish I’d found it years ago because it’s dangerously easy to make and delivers pure, nostalgic comfort with a fresh, modern spin.
My family couldn’t stop sneaking spoonfuls off the counter (and I can’t really blame them). It’s perfect for potlucks, a quick snack, or a sweet treat for your kids after school. You know what? This fresh green hummus with creamy, zesty flavor has become a staple for family gatherings and gifting alike. I’ve tested it multiple times, in the name of research, of course, and it’s always a crowd-pleaser. Trust me, you’re going to want to bookmark this one.
Why You’ll Love This Recipe
This fresh green hummus recipe isn’t just another dip—it’s a little jar of magic that’s creamy, zesty, and packed with wholesome goodness. Here’s why you’ll find yourself coming back for more:
- Quick & Easy: Comes together in under 15 minutes, perfect for busy weeknights or last-minute cravings.
- Simple Ingredients: No fancy grocery trips needed; you probably have everything already in your kitchen.
- Perfect for Entertaining: Great for parties, picnics, or anytime you want to impress without the stress.
- Crowd-Pleaser: Loved by kids and adults alike, it disappears fast every time.
- Unbelievably Delicious: That creamy texture combined with a bright, zesty punch keeps everyone coming back.
What makes this fresh green hummus different? It’s all about the fresh herbs blended to perfection alongside the traditional chickpeas, creating a silky smooth texture that’s not too thick or thin. I like to toss in a little extra lemon zest and a hint of garlic to balance the flavors just right. Plus, swapping tahini for a splash of creamy avocado adds a luscious twist I haven’t seen anywhere else. This isn’t just hummus; it’s your new secret weapon for easy, healthy snacking with a flavor profile that makes you close your eyes after the first taste. It’s comfort food with a fresh attitude—quick, vibrant, and downright addictive.
What Ingredients You Will Need
This fresh green hummus recipe uses simple, wholesome ingredients to deliver bold flavor and satisfying texture without the fuss. Most are pantry staples, with a few fresh picks to brighten it up.
- Chickpeas (1 1/2 cups cooked or canned, drained and rinsed) – the creamy base; I prefer organic for taste and texture.
- Fresh herbs:
- 1 cup packed fresh parsley leaves
- 1/2 cup packed fresh cilantro leaves
- 1/4 cup fresh mint leaves (for that refreshing zing)
- Garlic (2 cloves, peeled and roughly chopped) – adds that punchy depth; adjust to taste.
- Lemon juice (1/4 cup freshly squeezed) – for brightness and that zesty kick.
- Extra virgin olive oil (1/3 cup, plus more for drizzling) – I recommend a fruity, high-quality brand like Colavita to get the best flavor.
- Tahini (3 tablespoons) – creamy, nutty goodness; use well-stirred tahini for smooth blending.
- Avocado (1/2 ripe, peeled and pitted) – optional but highly recommended for ultra-creamy texture.
- Ground cumin (1 teaspoon) – warms up the flavor profile.
- Salt (to taste, about 1/2 teaspoon) – balances the flavors perfectly.
- Water (2-4 tablespoons, as needed) – to loosen up the hummus if it feels too thick.
For substitutions, if you’re allergic to avocado or tahini, you can swap tahini with sunflower seed butter or omit avocado for a more traditional texture. Fresh herbs can be varied depending on the season—basil and dill work beautifully in spring and summer. And if canned chickpeas aren’t your thing, homemade cooked chickpeas yield a richer flavor.
Equipment Needed
- Food processor or high-speed blender: Essential for achieving that silky smooth texture. I’ve tried both, and a food processor gives a bit more control.
- Citrus juicer: Helpful but not mandatory; you can squeeze lemons by hand if you prefer.
- Measuring cups and spoons: For accuracy, especially with herbs and spices.
- Spoon or spatula: To scrape down the sides during blending.
- Serving bowl: To showcase your fresh green hummus—bonus points for a bright, colorful dish.
If you don’t have a food processor, a strong blender works fine but may require a bit more patience and scraping. For budget-friendly options, manual herb choppers can speed up prep, though it won’t get nearly as smooth. Keeping your equipment clean and dry before use helps with smooth blending and prevents any funky aftertastes.
Preparation Method
- Prepare your ingredients: Drain and rinse 1 1/2 cups of canned chickpeas (about 240g), peel and roughly chop 2 garlic cloves, and pick your fresh herbs. Roughly chop parsley, cilantro, and mint to help the food processor do its job. (Prep time: 5 minutes)
- Blend the herbs and garlic: In your food processor, add the fresh parsley, cilantro, mint, and garlic. Pulse a few times until roughly chopped and fragrant. This step wakes up the herbs and releases those vibrant flavors. (Approx. 1 minute)
- Add chickpeas and tahini: Toss in the chickpeas and 3 tablespoons of tahini. Blend for about 30 seconds to start combining everything. You’ll notice the mixture start to thicken and get creamy.
- Incorporate avocado and seasoning: Add the ripe avocado half, 1 teaspoon ground cumin, and 1/2 teaspoon salt. Blend again until smooth. The avocado makes the hummus extra luscious, but if you prefer classic hummus, feel free to skip this step.
- Pour in lemon juice and olive oil: Add 1/4 cup (60 ml) freshly squeezed lemon juice and 1/3 cup (80 ml) extra virgin olive oil. Blend for another 20-30 seconds. The lemon juice brightens the flavor, and the olive oil adds silkiness.
- Adjust consistency: If the hummus feels too thick, add 2 to 4 tablespoons of cold water, one tablespoon at a time, blending after each addition. You’re looking for a spreadable yet creamy texture. (Tip: Add less water if you want to dip veggies; more if you want a spread.)
- Taste and tweak: Give it a final taste and adjust salt or lemon juice if needed. Sometimes a little extra lemon juice can really wake up the flavors. (Pro tip: a pinch of smoked paprika on top is a nice touch!)
- Serve and garnish: Spoon into a bowl, drizzle with a little olive oil, and sprinkle some finely chopped herbs or sesame seeds for that inviting finish. (Serving time: immediate or chill for 30 minutes for flavors to meld.)
This whole process takes about 15 minutes, and honestly, it’s worth every second. If you ever find the hummus a bit grainy, blending a little longer or adding more olive oil usually smooths it out nicely. And don’t rush—letting it rest in the fridge for a bit intensifies the zesty flavors.
Cooking Tips & Techniques
Here are some insider tips I’ve picked up from many batches of fresh green hummus over the years:
- Use room temperature ingredients: Chickpeas, avocado, and tahini blend better and create a creamier texture when not cold straight from the fridge.
- Don’t skip rinsing canned chickpeas: It removes excess sodium and that canned taste, giving you a cleaner flavor.
- Pulse before blending: Roughly chopping herbs and garlic by pulsing prevents over-blending and bitterness.
- Slowly add olive oil: Pouring it in gradually while blending emulsifies the mixture better, making it silky smooth.
- Adjust water carefully: Adding too much water at once can make the hummus too thin, so go slow.
- Flavor balance: If it tastes flat, a squeeze of fresh lemon juice or a pinch of salt usually perks it right up.
- Multi-tasking: While the hummus chills in the fridge, prep your veggies or warm some pita bread to serve alongside.
- Texture troubleshooting: If the hummus feels grainy, blend longer or add a touch more olive oil. For extra smoothness, peeling the chickpeas before blending works wonders but is a bit time-consuming.
Honestly, I’ve learned these tips the hard way—burnt garlic, bland dips, and lumpy blends included. But once you get the hang of it, fresh green hummus becomes your quick, go-to dip for any occasion.
Variations & Adaptations
One of the joys of fresh green hummus is how adaptable it is. Here are a few ways to make it your own:
- Spicy green hummus: Add 1 small jalapeño or a pinch of cayenne pepper for a fiery kick that pairs well with fresh veggies.
- Seasonal herbs swap: In spring, try swapping mint and cilantro for basil and dill for a lighter, garden-fresh vibe.
- Low-fat version: Use less olive oil and omit avocado, replacing some with Greek yogurt for creaminess but fewer calories.
- Allergen-friendly: For sesame allergies, skip tahini and add a tablespoon of sunflower seed butter or more avocado.
- Roasted green hummus: Roast a handful of fresh spinach or kale before blending to deepen the flavor and add a smoky note.
I once tried a version with roasted poblano peppers instead of fresh herbs, and it turned out surprisingly tasty—perfect for taco nights or spicing up your lunchbox. The key is to taste as you go and adjust according to your mood and pantry.
Serving & Storage Suggestions
This fresh green hummus is best served chilled or at room temperature, allowing those herbs and zesty flavors to really shine. Serve it up with crisp pita chips, crunchy crudités like carrots and bell peppers, or even spread on sandwiches for a creamy punch.
It pairs beautifully with Mediterranean dishes—think grilled chicken, falafel, or a simple salad drizzled with olive oil and lemon. For beverages, a crisp white wine or sparkling water with lime complements the fresh flavors nicely.
Store leftovers in an airtight container in the refrigerator for up to 4 days. The flavor actually deepens after a day or two, so if you can wait, it’s worth it! To keep it fresh, drizzle a thin layer of olive oil on top before sealing. When you’re ready to enjoy again, simply stir and thin with a splash of water if needed.
For longer storage, freeze in small portions in ice cube trays, then transfer to a freezer bag. Thaw overnight in the fridge and stir well before serving. Just a heads-up: freezing might slightly change the texture, but the flavor remains fantastic.
Nutritional Information & Benefits
This fresh green hummus is a nutrient-packed snack that balances flavor with health benefits. Each serving (about 1/4 cup or 60g) provides approximately:
| Calories | 120 |
|---|---|
| Protein | 4 grams |
| Fat | 8 grams (mostly heart-healthy fats) |
| Carbohydrates | 9 grams (with 3 grams fiber) |
| Sodium | 150 mg |
Key ingredients like chickpeas offer plant-based protein and fiber, great for digestion and sustained energy. Fresh herbs are loaded with antioxidants and vitamins, while olive oil and avocado provide heart-healthy monounsaturated fats. This recipe is naturally gluten-free, dairy-free, and vegan, making it a versatile option for many dietary needs.
From a wellness perspective, this hummus feels like a guilt-free indulgence—creamy and satisfying without the heaviness. It’s a great way to sneak in extra greens and wholesome fats, especially for anyone looking to keep snack time both tasty and nourishing.
Conclusion
Honestly, this fresh green hummus recipe is a game-changer. It’s creamy, zesty, and packed with fresh herb goodness that’ll brighten your snack game and impress your guests without any fuss. Whether you’re a hummus newbie or a seasoned dip lover, this vibrant twist offers something new and exciting.
Don’t be shy about customizing it to your taste—more garlic, less lemon, or a spicy kick. I love this recipe because it feels like a warm hug from the inside out, and it’s become a beloved staple in my kitchen. Give it a try today; I promise it won’t disappoint.
If you make this fresh green hummus, I’d love to hear how you enjoyed it! Drop a comment below, share your variations, or tag me on social media. Let’s keep the delicious conversation going!
FAQs
Can I use frozen herbs for this fresh green hummus?
Frozen herbs can work in a pinch, but fresh herbs really make the flavor pop. If you use frozen, thaw and drain excess water before blending to avoid a watery hummus.
How long does homemade fresh green hummus last?
Stored in an airtight container in the fridge, it stays fresh for up to 4 days. Flavors usually improve after a day!
Can I make this hummus without tahini?
Yes! You can leave out tahini or replace it with sunflower seed butter or extra avocado for creaminess.
Is this recipe suitable for a low-carb diet?
While chickpeas contain carbs, the fiber content helps balance it. For stricter low-carb needs, reduce chickpeas slightly or serve smaller portions.
What’s the best way to serve fresh green hummus?
Serve chilled or at room temperature with pita bread, veggie sticks, or as a spread on sandwiches and wraps for a fresh, flavorful boost.
Pin This Recipe!
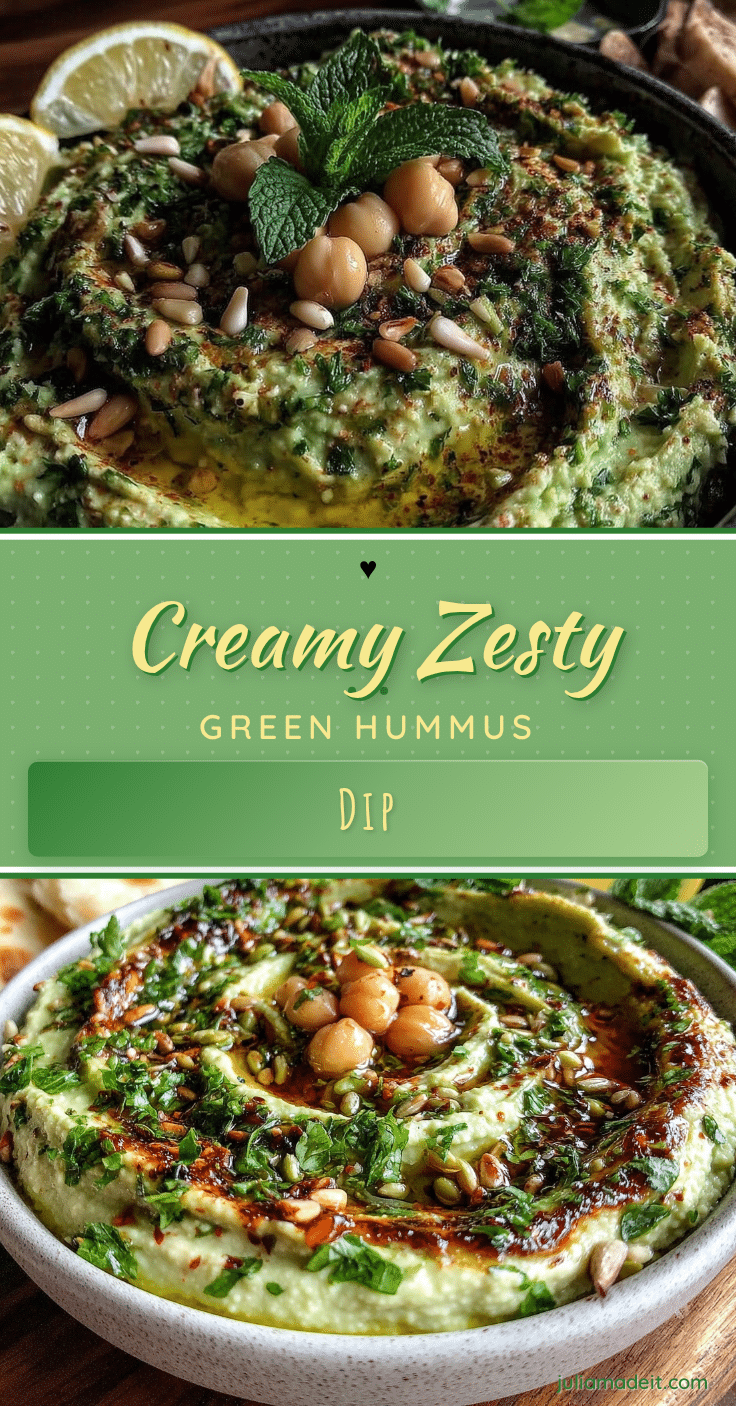
Fresh Green Hummus

A creamy, zesty, and vibrant green hummus made with fresh herbs, avocado, and traditional chickpeas. Perfect for quick snacks, entertaining, and healthy eating.
- Prep Time: 5 minutes
- Cook Time: 0 minutes
- Total Time: 15 minutes
- Yield: 6 servings 1x
- Category: Snack / Appetizer
- Cuisine: Mediterranean
Ingredients
- 1 1/2 cups cooked or canned chickpeas, drained and rinsed
- 1 cup packed fresh parsley leaves
- 1/2 cup packed fresh cilantro leaves
- 1/4 cup fresh mint leaves
- 2 cloves garlic, peeled and roughly chopped
- 1/4 cup freshly squeezed lemon juice
- 1/3 cup extra virgin olive oil, plus more for drizzling
- 3 tablespoons tahini
- 1/2 ripe avocado, peeled and pitted (optional)
- 1 teaspoon ground cumin
- 1/2 teaspoon salt, or to taste
- 2–4 tablespoons water, as needed
Instructions
- Drain and rinse 1 1/2 cups of canned chickpeas (about 240g), peel and roughly chop 2 garlic cloves, and roughly chop parsley, cilantro, and mint.
- In a food processor, add the fresh parsley, cilantro, mint, and garlic. Pulse a few times until roughly chopped and fragrant.
- Add chickpeas and 3 tablespoons of tahini. Blend for about 30 seconds to start combining everything.
- Add the ripe avocado half, 1 teaspoon ground cumin, and 1/2 teaspoon salt. Blend again until smooth. Skip avocado if you prefer classic hummus.
- Pour in 1/4 cup freshly squeezed lemon juice and 1/3 cup extra virgin olive oil. Blend for another 20-30 seconds.
- If the hummus feels too thick, add 2 to 4 tablespoons of cold water, one tablespoon at a time, blending after each addition until spreadable and creamy.
- Taste and adjust salt or lemon juice if needed. Optionally, sprinkle smoked paprika on top.
- Spoon into a serving bowl, drizzle with olive oil, and garnish with finely chopped herbs or sesame seeds. Serve immediately or chill for 30 minutes for flavors to meld.
Notes
Use room temperature ingredients for creamier texture. Rinse canned chickpeas to remove excess sodium and canned taste. Pulse herbs and garlic before blending to avoid bitterness. Slowly add olive oil while blending for silky smooth texture. Adjust water carefully to control consistency. Let hummus rest in fridge to intensify flavors. For extra smoothness, peel chickpeas before blending (optional).
Nutrition
- Serving Size: 1/4 cup (60g)
- Calories: 120
- Sodium: 150
- Fat: 8
- Carbohydrates: 9
- Fiber: 3
- Protein: 4
Keywords: hummus, green hummus, fresh herbs, avocado hummus, creamy dip, healthy snack, vegan, gluten-free