“Hey, you really have to try this,” my friend texted me one hectic Friday evening as I scrambled to figure out what to bring for a last-minute get-together. I was skeptical at first—charcuterie boards and desserts? Cookies on a fancy platter? Honestly, it sounded like too much effort for a casual hangout. But curiosity got the best of me.
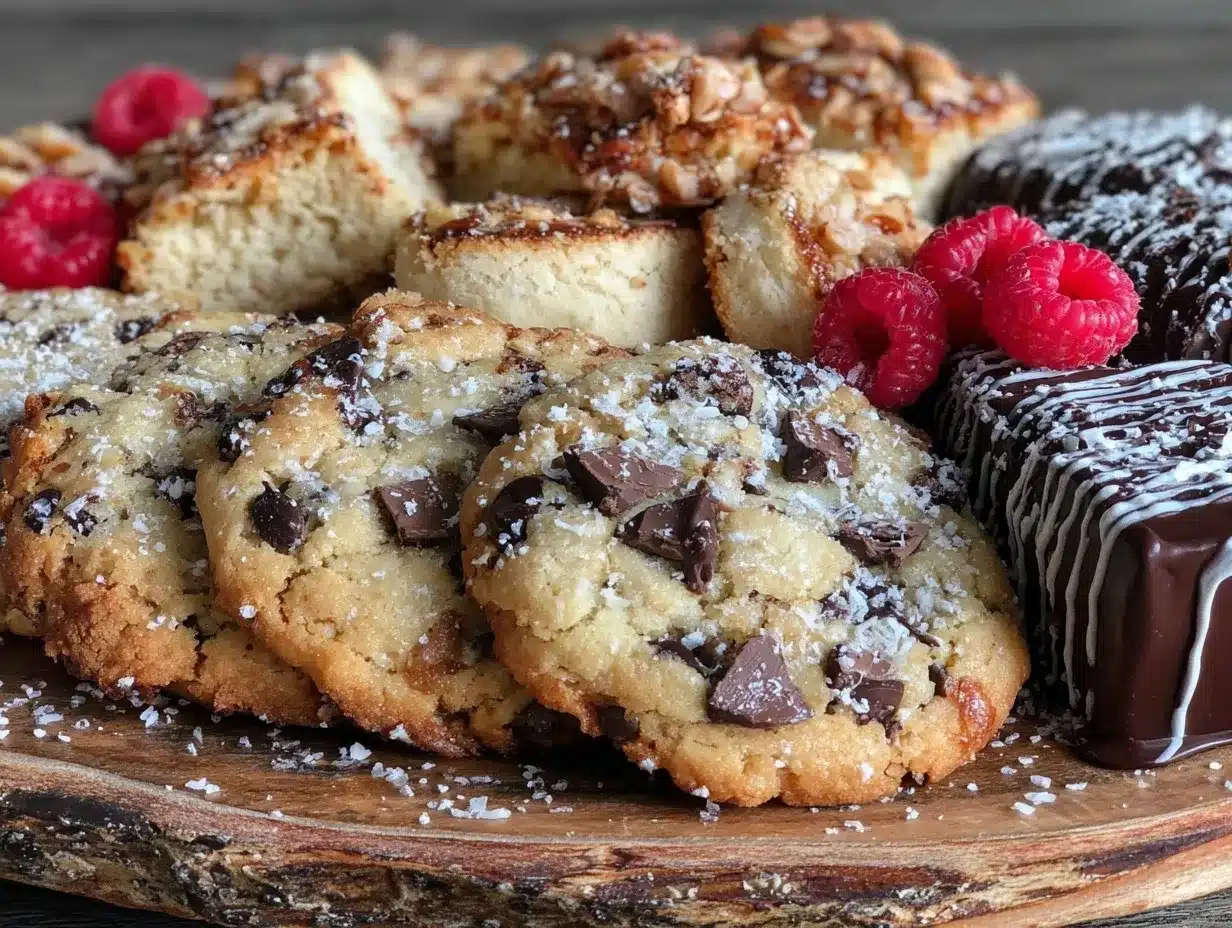
Fast forward a couple of hours, and there I was, standing in my kitchen surrounded by an assortment of cookies, chocolates, fruit, and nuts, arranging what would soon become my go-to dessert charcuterie board. The real magic wasn’t just how beautiful it looked—it was how this simple, no-bake setup turned a rushed evening into something unexpectedly special. Everyone kept coming back for “just one more,” and I caught myself smiling quietly, thinking, “Why didn’t I do this sooner?”
What stuck with me about this irresistible dessert charcuterie board with cookies is how it effortlessly blends charm and comfort. It’s not about perfection, but about the joy of sharing little bites that satisfy every sweet tooth and spark conversations. It’s a recipe born from a whirlwind evening that somehow made everything feel a bit more grounded and festive all at once.
So, if you’re looking for a dessert idea that’s as inviting as it is delicious, and that doesn’t demand hours of baking or fussing, this board might just be your new secret weapon for impressing guests or treating yourself. Let’s talk about why this dessert charcuterie board is a keeper, and how you can make one that’s just as irresistible.
Why You’ll Love This Irresistible Dessert Charcuterie Board with Cookies
This dessert charcuterie board has become my go-to for those moments when I want to wow without the hassle. After testing countless combinations and setups, here’s why I trust it to deliver every time:
- Quick & Easy: You can put this together in under 30 minutes — no oven required if you buy your favorite cookies or treats.
- Simple Ingredients: Everything you need is either a pantry staple or easy to find at any grocery store — no weird specialty shops necessary.
- Perfect for Any Occasion: Whether it’s a casual family movie night, a brunch with friends, or a festive holiday gathering, this board fits right in.
- Crowd-Pleaser: Kids and adults alike love picking at the variety — it’s like a little treasure hunt of sweets and treats.
- Unbelievably Delicious: The combination of textures — crispy cookies, creamy dips, fresh fruit — creates a flavor party that feels like comfort food with a twist.
What really sets this dessert charcuterie board apart is the thoughtful little details. For example, I always mix in a few homemade snickerdoodle cookies for that warm, cinnamon touch. Plus, adding a silky chocolate spread or a tangy fruit dip changes everything — it’s not just a platter of sweets; it’s an experience.
Honestly, this board feels like a cozy hug on a plate, perfect for those times you want to impress without stress. It’s the kind of dessert that makes you pause, savor, and maybe even close your eyes for a second after that first bite.
What Ingredients You Will Need
This dessert charcuterie board uses simple, wholesome ingredients to deliver a bold flavor and satisfying texture without the fuss. Most are pantry staples, with a few fresh touches to keep things bright and balanced.
- Cookies: A variety of textures and flavors — think chewy, crunchy, and buttery. Examples include:
- Snickerdoodle cookies (homemade or store-bought)
- Chocolate chip cookies (I prefer soft-baked for that melt-in-your-mouth feel)
- Shortbread or butter cookies (adds a crumbly richness)
- Fresh Fruit: Seasonal picks add freshness and color:
- Strawberries, sliced
- Grapes (red or green)
- Blueberries or raspberries
- Apple slices (tossed lightly in lemon juice to prevent browning)
- Chocolate & Sweets:
- Dark or milk chocolate chunks or candy pieces
- Mini marshmallows or chocolate-covered pretzels (for texture contrast)
- Dips & Spreads: These take your board next-level:
- Chocolate ganache or chocolate hazelnut spread (like Nutella)
- Vanilla bean yogurt or a sweet cream cheese dip (adds a creamy tang)
- Nuts & Extras: Salted or roasted nuts balance the sweetness:
- Almonds or pecans
- Honey-roasted peanuts
- Optional: edible flowers or mint leaves for garnish
If you want to switch things up, using gluten-free cookies or dairy-free spreads works well here. I personally love Almond Breeze almond milk yogurt for the dip because it’s creamy and dairy-free, but plain Greek yogurt is a solid classic choice. When summer rolls around, fresh berries are my go-to instead of frozen ones — they just brighten everything up.
Equipment Needed
- Large Serving Board or Platter: A wooden cutting board or a marble slab works beautifully — I’ve found that the natural textures make the colors pop.
- Small Bowls or Ramekins: For dips, spreads, and smaller items like nuts.
- Cheese Knives or Spreaders: Even if you’re just spreading chocolate or cream cheese dips, these help keep things neat.
- Tongs or Small Serving Spoons: Handy for picking up delicate cookies or fruit without smushing them.
You don’t need fancy tools here. I’ve put together boards on everything from a plain ceramic plate to my go-to wooden chopping board. Just make sure the surface is clean and big enough to spread out your ingredients without crowding. If you want to get fancy, a slate board adds a rustic touch, but honestly, any flat surface will do.
Preparation Method
- Gather Your Ingredients: Lay out all your cookies, fruit, nuts, chocolate, and dips on the counter. This helps you visualize the board before assembling. (Time: 5 minutes)
- Prep the Fruit: Wash and dry fruits like strawberries and grapes. Slice apples thinly and toss with a bit of lemon juice to keep them fresh and prevent browning. (Time: 5-7 minutes)
- Arrange the Bowls: Place small bowls or ramekins for dips evenly across the board. This prevents crowding and balances the layout. (Time: 2 minutes)
- Place the Cookies: Start placing your cookies around the dips and edges. Mix up textures so chewy cookies sit beside crunchy ones, adding visual interest. (Time: 5-7 minutes)
- Add Fruit Clusters: Fill in spaces with bunches of grapes, berry piles, and apple slices. Try to balance colors and shapes for a lively look. (Time: 5 minutes)
- Scatter Nuts and Chocolates: Sprinkle nuts and chocolate chunks in the gaps to fill empty spots and add texture layers. (Time: 3 minutes)
- Garnish: Finish with fresh mint leaves or edible flowers for a pop of green and elegance. (Optional, Time: 2 minutes)
- Final Touches: Check the board for balance — no big empty spaces or overcrowded areas. Adjust items as needed. (Time: 2 minutes)
Tip: If you’re short on time, you can prep fruits and nuts ahead. Just keep cookies fresh by storing them in an airtight container until assembly. I like to make a small chocolate spread from melted bittersweet chocolate and a bit of cream for dipping — it’s a quick homemade touch that really ups the game.
Cooking Tips & Techniques
Putting together a dessert charcuterie board might seem simple, but a few insider tips make it shine:
- Balance Flavors and Textures: Sweet, salty, crunchy, and creamy elements keep every bite interesting. For example, pair buttery shortbread with tart berries and a pinch of sea salt on nuts.
- Don’t Overcrowd: Leaving some space on the board helps each item stand out and makes grabbing easier — nobody wants to fish through a pile.
- Freshness Matters: Add delicate fruits last to avoid them getting mushy or leaking juice onto cookies.
- Layering: Stack some cookies or chocolate pieces slightly to add height and dimension. It’s a visual trick that makes the board look professional without effort.
- Keep It Chill: If you’re using spreads or dips, keep them refrigerated until right before serving to keep textures perfect.
I learned the hard way not to put soft cookies right next to juicy fruit — things get soggy fast. Also, when I first tried this with melted chocolate drizzle, it looked amazing but made the board sticky; now I keep chocolate chunks separate for dipping instead.
Variations & Adaptations
This dessert charcuterie board is super flexible and can be adapted to your mood or dietary needs:
- Seasonal Swaps: In fall, swap berries for sliced pears and add cinnamon-spiced nuts. Winter calls for candied orange peels and peppermint bark.
- Dietary Adjustments: Use gluten-free cookies and dairy-free dips to accommodate allergies. I’ve had great results with almond flour cookies and coconut yogurt-based dips.
- Flavor Twists: Add a salty element like pretzel sticks or sprinkle sea salt on chocolate chunks for a sweet-salty hit.
- Cooking Method Variations: If you want to bake your own cookies, recipes like my snickerdoodle cookies pair beautifully with this board.
- Personal Favorite: I like to add a small bowl of whipped cream infused with a hint of vanilla bean — it feels indulgent but can be portion-controlled easily.
Serving & Storage Suggestions
Serve your dessert charcuterie board at room temperature for the best flavor and texture. Cold cookies can get a bit hard, and chilled fruit loses some zing.
Pair it with a hot cup of coffee or a creamy vanilla sweet cream cold brew coffee for a perfect balance. For gatherings, set the board in the center so everyone can graze freely — it’s a natural conversation starter.
To store leftovers, cover the board tightly with plastic wrap or transfer items to airtight containers. Cookies keep best separately to avoid sogginess, and dips should be refrigerated. Reheat cookies gently in a 300°F (150°C) oven for 5 minutes to refresh the texture.
Flavors often develop and meld over a few hours, especially if you include dips like cream cheese spreads, making the board taste even better as the party goes on.
Nutritional Information & Benefits
This dessert charcuterie board can be as indulgent or balanced as you want. Here’s a rough estimate per serving (based on a moderate portion):
| Calories | Fat | Carbs | Sugar | Protein |
|---|---|---|---|---|
| 350-450 kcal | 15-25 g | 45-55 g | 25-35 g | 4-6 g |
Key ingredients like nuts provide healthy fats and protein, while fresh fruit adds fiber and vitamins. Using dark chocolate instead of milk boosts antioxidants. For those watching carbs, choosing lower-sugar cookies or focusing more on fruit and nuts helps keep things balanced.
This board is perfect for sharing a little sweetness while still sneaking in some nutritional perks — a nice treat that feels thoughtful and not over the top.
Conclusion
This irresistible dessert charcuterie board with cookies has become my favorite way to bring a little magic to everyday moments or special gatherings. It’s simple, flexible, and always hits the right note between indulgence and charm. You can customize it endlessly, making it truly your own.
Whether you’re throwing together a last-minute party spread or just want to treat yourself to something fun and sweet, this board makes dessert feel like an event. I hope it inspires you to gather your favorite cookies, fruits, and treats and create your own slice of happiness.
Let me know how you put your spin on it — I love hearing about new combinations or tweaks that make this dessert board even better. Happy assembling!
Frequently Asked Questions
Can I make the dessert charcuterie board ahead of time?
You can prep most ingredients a few hours ahead, especially fruits and nuts, but assemble the board just before serving to keep cookies fresh and fruit vibrant.
What’s the best way to keep cookies fresh on the board?
Place cookies away from juicy fruits and keep them in airtight containers until just before plating to avoid sogginess.
Can I include homemade cookies on the board?
Absolutely! Homemade cookies like snickerdoodles or chocolate chip cookies add a lovely personal touch and taste fantastic.
What are good alternatives if I have nut allergies?
Swap nuts for seeds like pumpkin or sunflower seeds, or add extra crunchy elements like pretzels or crispy wafer cookies.
How do I store leftovers from the dessert charcuterie board?
Store cookies and dry items separately in airtight containers at room temperature. Keep dips refrigerated and consume within 2-3 days.
Pin This Recipe!

Irresistible Dessert Charcuterie Board Ideas with Cookies to Impress

A quick and easy no-bake dessert charcuterie board featuring a variety of cookies, fresh fruit, nuts, chocolates, and dips that impresses guests and satisfies every sweet tooth.
- Prep Time: 15 minutes
- Cook Time: 0 minutes
- Total Time: 15 minutes
- Yield: 6 servings
- Category: Dessert
- Cuisine: American
Ingredients
- Snickerdoodle cookies (homemade or store-bought)
- Chocolate chip cookies (soft-baked preferred)
- Shortbread or butter cookies
- Strawberries, sliced
- Grapes (red or green)
- Blueberries or raspberries
- Apple slices (tossed lightly in lemon juice to prevent browning)
- Dark or milk chocolate chunks or candy pieces
- Mini marshmallows or chocolate-covered pretzels
- Chocolate ganache or chocolate hazelnut spread (like Nutella)
- Vanilla bean yogurt or sweet cream cheese dip
- Almonds or pecans
- Honey-roasted peanuts
- Optional: edible flowers or mint leaves for garnish
Instructions
- Gather all cookies, fruit, nuts, chocolate, and dips on the counter to visualize the board before assembling.
- Wash and dry fruits like strawberries and grapes. Slice apples thinly and toss with lemon juice to prevent browning.
- Place small bowls or ramekins for dips evenly across the board to prevent crowding and balance the layout.
- Arrange cookies around the dips and edges, mixing textures so chewy cookies sit beside crunchy ones.
- Fill in spaces with bunches of grapes, berry piles, and apple slices, balancing colors and shapes.
- Sprinkle nuts and chocolate chunks in gaps to fill empty spots and add texture layers.
- Garnish with fresh mint leaves or edible flowers for a pop of green and elegance (optional).
- Check the board for balance, adjusting items to avoid big empty spaces or overcrowding.
Notes
Prep fruits and nuts ahead if short on time, but assemble the board just before serving to keep cookies fresh and fruit vibrant. Keep dips refrigerated until serving. Avoid placing soft cookies next to juicy fruit to prevent sogginess. For a homemade touch, melt bittersweet chocolate with cream for a quick chocolate spread.
Nutrition
- Serving Size: Moderate portion per
- Calories: 400
- Sugar: 30
- Sodium: 150
- Fat: 20
- Saturated Fat: 8
- Carbohydrates: 50
- Fiber: 4
- Protein: 5
Keywords: dessert charcuterie board, cookies, no-bake dessert, easy dessert, party dessert, sweet platter, fruit and nuts, chocolate spread