“You can’t just bring a bag of chips,” my sister texted me the morning of her graduation party. Honestly, I was juggling a million things, and the thought of whipping up something fancy felt like climbing Everest barefoot. But then I remembered these chocolate dipped strawberries I’d made on a whim for a friend’s baby shower — something about the way the glossy chocolate hugged the juicy berries had everyone asking for the recipe. So, I grabbed some fresh strawberries, melted chocolate with a bit of cream, and decided to give those a fun twist with little edible caps and gowns. Not going to lie, I was skeptical at first — would they really look like graduation treats? Would people even notice? But as soon as I set them out, the kids and adults alike started pointing and smiling. Turns out, a simple idea like these cap and gown chocolate dipped strawberries can steal the show. That day I realized it’s not about fuss or fancy ingredients, but the joy a thoughtful, sweet bite brings to celebrations. And now, every graduation means these berries are a must-have on our dessert table — a little tradition born from a last-minute scramble and a sprinkle of creativity.
Why You’ll Love This Recipe
This recipe has become my go-to for graduation celebrations, and here’s why it stands apart:
- Quick & Easy: These chocolate dipped strawberries take less than 30 minutes to make — perfect for those busy graduation days when you want something impressive but fuss-free.
- Simple Ingredients: No fancy or hard-to-find items here. Just fresh strawberries, good-quality chocolate, and a few simple decorations to create that cap and gown effect.
- Perfect for Graduation Parties: These treats bring a festive vibe without being over the top — ideal for both casual family gatherings and more formal celebrations.
- Crowd-Pleaser: The juicy, sweet strawberries combined with smooth chocolate always get rave reviews, from kids who love the playful design to adults who appreciate the fresh ingredients.
- Unbelievably Delicious: The contrast of rich chocolate and bright berries hits that comfort-food spot, but feels light and refreshing, too.
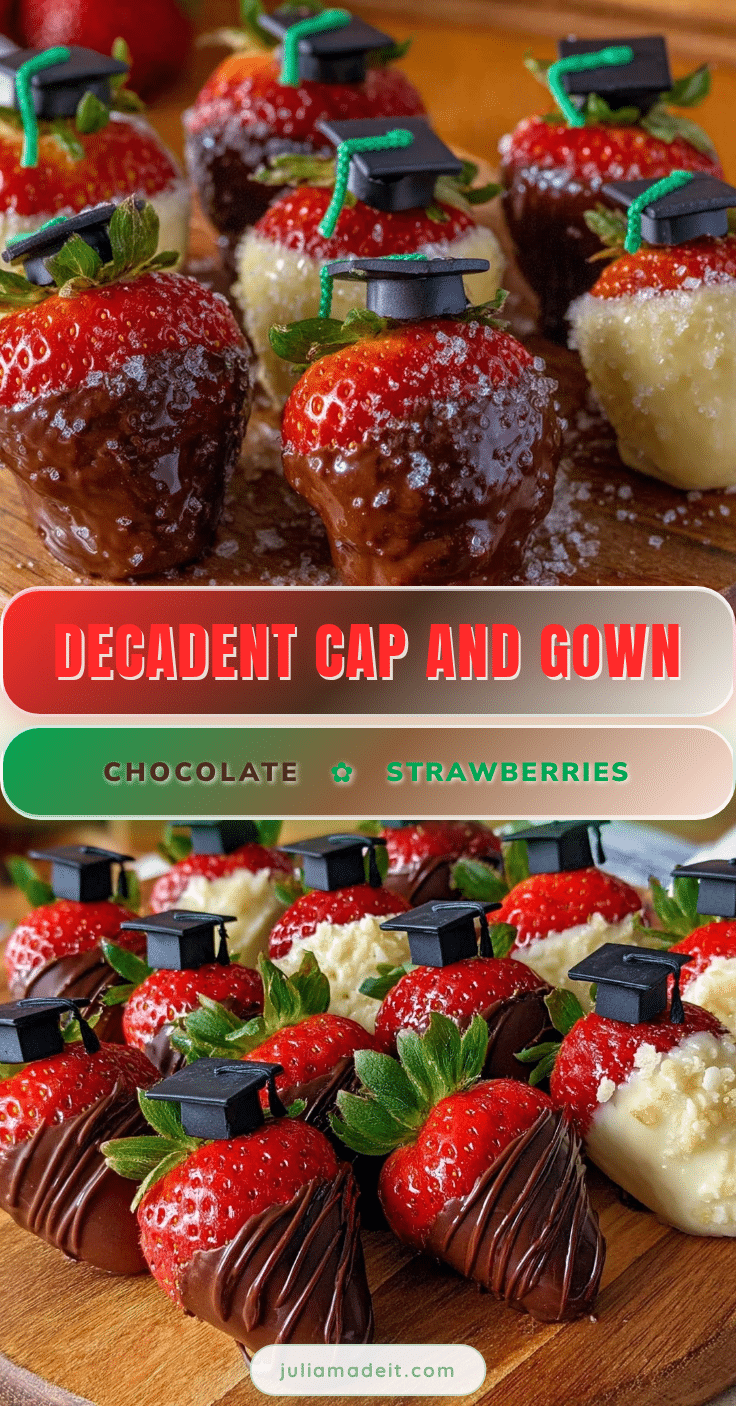
What sets this recipe apart? The special touch of decorating each berry to resemble a tiny cap and gown — it’s a creative twist that elevates simple chocolate dipped strawberries into a thoughtful graduation tribute. The chocolate is tempered just right for a glossy finish that snaps satisfyingly when you bite in. Plus, I’ve tested different chocolates and found that using a mix of semi-sweet and white chocolate lets you play with colors to make each piece pop. Honestly, these treats have become my small way of adding a personal touch to big moments, making graduation celebrations feel extra special without hours in the kitchen.
What Ingredients You Will Need
This recipe uses simple, wholesome ingredients to deliver bold flavor and a satisfying look without any fuss. Most of these are pantry staples or easy to grab at any grocery store just before the party.
- Fresh Strawberries: About 24 large strawberries, washed and thoroughly dried (dry berries are key to chocolate sticking well!)
- Semi-Sweet Chocolate Chips or Chopped Chocolate: 8 ounces (225 grams) — I prefer Ghirardelli for its smooth melt and rich flavor
- White Chocolate Chips: 4 ounces (115 grams) — for the cap details and gown accents
- Black Food Coloring Gel: A small amount to tint white chocolate for the caps (optional but adds a sharp look)
- Edible Gold or Yellow Sprinkles: For the tassels on the caps (adds a festive touch without extra work)
- Wax Paper or Parchment Paper: For drying dipped strawberries
- Toothpicks or Small Piping Bag: For decorating the caps and gowns precisely
Substitution tips: If you want a dairy-free or vegan version, swap semi-sweet chocolate with dairy-free dark chocolate and use coconut or almond milk-based white chocolate alternatives. For a gluten-free crowd, these strawberries are naturally safe and a refreshing option amidst heavier desserts. If fresh strawberries are out of season, frozen berries (thawed and dried) can work but expect them to be a bit softer.
Equipment Needed
- Microwave-Safe Bowls or Double Boiler: For melting chocolate gently. I usually go for the microwave method — short bursts and stirring in between keeps chocolate silky.
- Baking Sheet: Lined with wax or parchment paper to place dipped strawberries for drying.
- Toothpicks or Fine-Tip Piping Bags: Toothpicks are budget-friendly and great for small details, but a tiny piping bag offers more control for the gowns.
- Cooling Rack (optional): If you want the chocolate to set faster, placing berries on a rack lets air circulate.
Personally, I’ve found that having a good-quality silicone spatula makes stirring melted chocolate a dream. No fancy tempering tools needed here, which is a relief when you’re juggling graduation prep. If you don’t have piping bags, just snip a clean plastic sandwich bag’s corner for the decorations — it’s a handy hack I swear by.
Preparation Method
- Prepare Strawberries: Rinse 24 large strawberries under cold water and pat completely dry with paper towels. Any moisture will cause chocolate to seize or slide off, so this step is crucial. Set aside on a plate.
- Melt Semi-Sweet Chocolate: Place 8 ounces (225 g) of semi-sweet chocolate in a microwave-safe bowl. Heat in 30-second bursts, stirring after each, until smooth and glossy. Alternatively, use a double boiler over simmering water, stirring constantly.
- Dip Strawberries: Holding a strawberry by the stem, dip it into the melted chocolate, swirling to coat about two-thirds of the berry. Let excess drip off, then place on parchment-lined baking sheet. Repeat with all berries. Expect about 10 minutes for dipping.
- Chill to Set: Put the dipped strawberries in the fridge for 15 minutes to firm up the chocolate coating.
- Prepare White Chocolate Caps and Gowns: Melt 4 ounces (115 g) of white chocolate in the same way as before. If using black food coloring, stir a small amount into half the white chocolate for cap coloring.
- Decorate Caps: Using a toothpick or piping bag, pipe a small square (the mortarboard) onto the top of each chilled chocolate-covered strawberry. Add a tiny line or dot for the tassel and dip that part lightly in edible gold sprinkles for a touch of sparkle. This step takes about 15-20 minutes.
- Add Gown Details: With the remaining white chocolate, pipe a small “V” shape down the front of each strawberry for the gown’s collar. Let decorations set at room temperature or pop them back in the fridge for 10 minutes.
- Final Touches: Check for any drips or uneven spots, and if needed, smooth with a toothpick dipped in melted chocolate. Then refrigerate until serving — ideally under 2 hours for the best texture.
Pro tip: If you find the chocolate thickens too much during decorating, warm it gently in the microwave for 10 seconds and stir. Also, work quickly once strawberries are chilled so the white chocolate adheres well.
Cooking Tips & Techniques
Working with chocolate and fresh fruit can feel tricky, but here are some lessons I’ve picked up (sometimes the hard way!) to make your cap and gown chocolate dipped strawberries shine:
- Dry Strawberries Thoroughly: Water is the enemy of smooth chocolate coating. Even little droplets can cause bloom or slipping. Pat dry and air-dry for a few minutes before dipping.
- Use Good-Quality Chocolate: Cheap chocolate can taste waxy and not melt properly. I recommend brands like Ghirardelli or Callebaut for that silky finish.
- Temper or Gently Melt: Avoid overheating chocolate. Stir often and heat in short bursts to keep it shiny and avoid graininess.
- Work in Batches: If you have a lot to decorate, dip strawberries in smaller batches so the chocolate stays fluid and easy to work with.
- Practice Piping on Parchment First: Test your piping technique on paper before decorating berries to get a feel for pressure and flow.
- Timing Matters: Chill dipped berries before decorating to help the white chocolate stick better, but don’t let them dry out completely or condensation may form.
- Storage: Keep strawberries refrigerated but serve within 24 hours for best freshness — they’re best enjoyed soon after making.
Once, I tried skipping the chilling step before decorating and ended up with a melted mess. Trust me, patience here saves a lot of cleanup and heartbreak!
Variations & Adaptations
Feel free to get creative with your graduation strawberries to match your style or dietary needs:
- Color Variations: Swap the black-tinted white chocolate caps for school colors by tinting white chocolate in blue, red, green, or your preferred shades using food-safe gels.
- Vegan/Dairy-Free: Use dairy-free chocolate brands and coconut cream to melt instead of dairy-based cream. Fresh strawberries keep this dessert naturally vegan.
- Flavor Twists: Add a sprinkle of sea salt or drizzle with caramel for a sweet-salty combo. Or dip strawberries in dark chocolate and garnish with crushed nuts for extra texture.
- Alternative Decorations: Use edible markers or colored icing to draw tiny diplomas or names on the gowns.
- Frozen Version: Freeze the dipped strawberries (before adding decorations) for a refreshing summer treat that holds up well at outdoor parties.
I once tried a batch with a drizzle of mint chocolate on top for a fresh twist — it was surprisingly popular and added a little zing to the classic combo.
Serving & Storage Suggestions
These chocolate dipped strawberries are best served chilled but not ice cold — about 15 minutes out of the fridge softens the chocolate just enough to melt on your tongue. Arrange them on a decorative platter or as part of a dessert board (they pair beautifully with cookies and nuts, like those in the dessert charcuterie board ideas), adding a festive vibe to your table.
Store leftovers in a single layer in an airtight container in the refrigerator. They keep well for 24 hours but tend to soften and lose their crisp chocolate snap after that. Avoid freezing after decorating as the moisture can affect texture and appearance.
If you need to reheat slightly to refresh the chocolate shine, just let them sit at room temperature for 10 minutes before serving again. The flavors develop beautifully when the berries and chocolate have time to meld, making these a crowd favorite at any graduation celebration.
Nutritional Information & Benefits
While these treats feel indulgent, they’re actually lighter than many desserts thanks to fresh fruit and moderate chocolate use. Each serving (about 2 strawberries) has roughly 120 calories, 7 grams of fat, and 15 grams of sugar, mostly natural from fruit and chocolate.
Strawberries bring a dose of vitamin C, antioxidants, and fiber, making them a healthier dessert choice. Using dark chocolate adds heart-healthy flavonoids, and swapping in dairy-free options can accommodate lactose intolerance or vegan diets.
For those mindful of allergens, this recipe is naturally gluten-free and can be adapted for nut allergies by avoiding embellished toppings. Personally, I find these strawberries a guilt-free way to celebrate milestones — they satisfy sweet cravings while bringing fresh, natural ingredients to the table.
Conclusion
These Perfect Cap and Gown Chocolate Dipped Strawberries are more than just a pretty face at graduation parties — they’re a sweet nod to achievement, made with simple ingredients and a touch of creativity. Whether you’re scrambling last minute or planning ahead, this recipe fits the bill for an easy, crowd-pleasing dessert that looks impressive but doesn’t require pro skills.
Feel free to customize colors, decorations, or even pair them with other crowd favorites like the easy epic charcuterie board to make your celebration table unforgettable. I keep coming back to these strawberries because they bring smiles, sweet bites, and just the right amount of festivity to honor big moments — and I bet you will, too.
Would love to hear how you put your own spin on these treats or what other graduation desserts you adore. Drop a comment below and share your stories!
Frequently Asked Questions
How do I prevent the chocolate from melting too quickly on strawberries?
Make sure the strawberries are completely dry before dipping. Also, chill the dipped berries in the fridge to help the chocolate set firmly before serving.
Can I make these chocolate dipped strawberries a day ahead?
Yes, but store them in an airtight container in the fridge and consume within 24 hours for best texture and freshness.
What if I don’t have black food coloring for the caps?
You can use plain white chocolate caps or tint the white chocolate with any other color that fits your graduation theme.
Can I use frozen strawberries?
It’s possible if you thaw and dry them thoroughly, but fresh strawberries hold up better and give a firmer bite.
How do I make the tassels on the graduation caps look neat?
Use a toothpick to apply a tiny dab of melted chocolate, then sprinkle edible gold or yellow sprinkles immediately before it sets to mimic tassels.
Pin This Recipe!
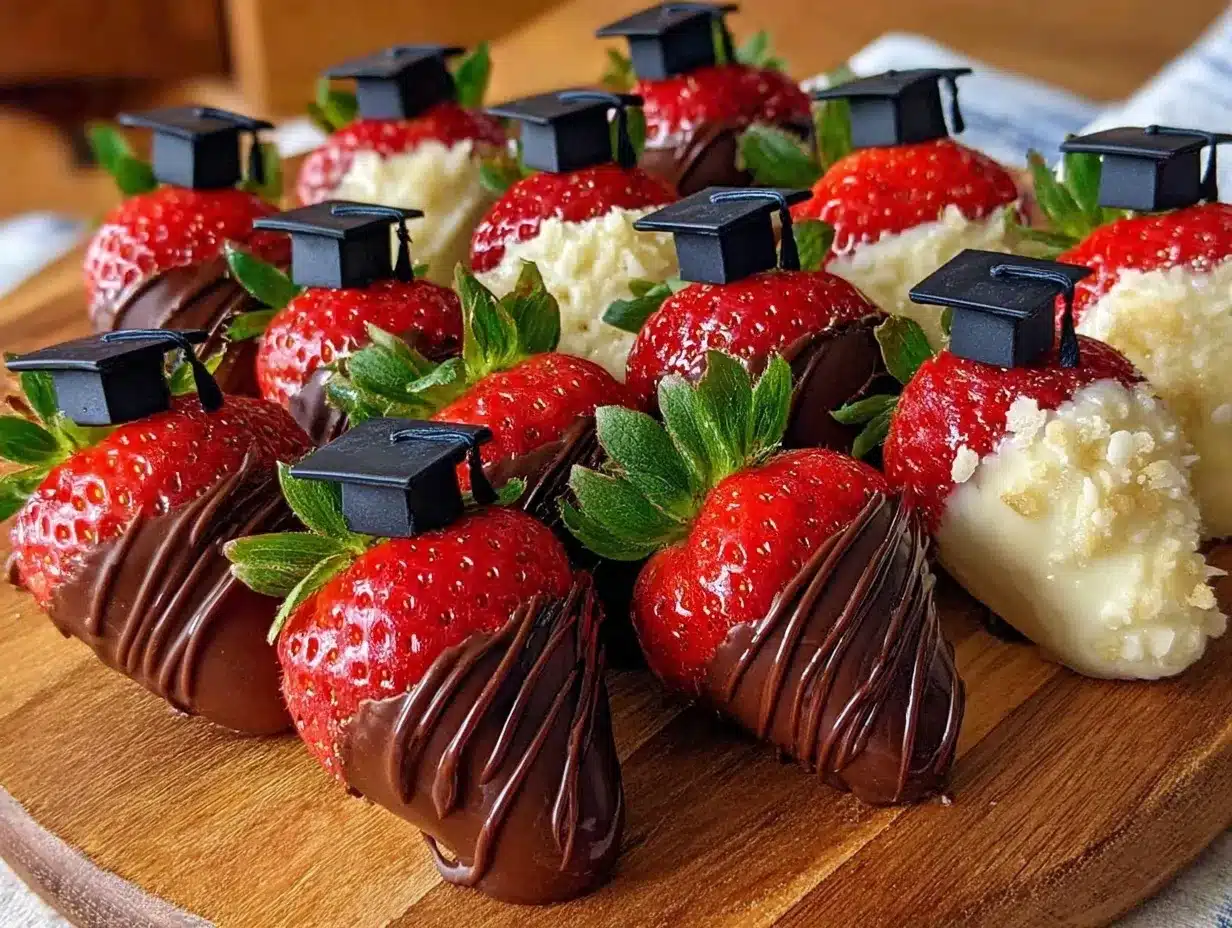
Perfect Cap and Gown Chocolate Dipped Strawberries Easy Graduation Treats

These chocolate dipped strawberries are a quick, easy, and festive treat perfect for graduation celebrations, decorated to resemble tiny caps and gowns.
- Prep Time: 15 minutes
- Cook Time: 15 minutes
- Total Time: 30 minutes
- Yield: 24 strawberries (about 12 servings, 2 strawberries per serving) 1x
- Category: Dessert
- Cuisine: American
Ingredients
- 24 large fresh strawberries, washed and thoroughly dried
- 8 ounces semi-sweet chocolate chips or chopped chocolate
- 4 ounces white chocolate chips
- Black food coloring gel (optional, for tinting white chocolate)
- Edible gold or yellow sprinkles (for tassels)
- Wax paper or parchment paper (for drying dipped strawberries)
- Toothpicks or small piping bag (for decorating)
Instructions
- Rinse 24 large strawberries under cold water and pat completely dry with paper towels. Set aside on a plate.
- Place 8 ounces of semi-sweet chocolate in a microwave-safe bowl. Heat in 30-second bursts, stirring after each, until smooth and glossy. Alternatively, use a double boiler over simmering water, stirring constantly.
- Holding a strawberry by the stem, dip it into the melted chocolate, swirling to coat about two-thirds of the berry. Let excess drip off, then place on parchment-lined baking sheet. Repeat with all berries.
- Put the dipped strawberries in the fridge for 15 minutes to firm up the chocolate coating.
- Melt 4 ounces of white chocolate in the same way as before. If using black food coloring, stir a small amount into half the white chocolate for cap coloring.
- Using a toothpick or piping bag, pipe a small square (the mortarboard) onto the top of each chilled chocolate-covered strawberry. Add a tiny line or dot for the tassel and dip that part lightly in edible gold sprinkles.
- With the remaining white chocolate, pipe a small “V” shape down the front of each strawberry for the gown’s collar. Let decorations set at room temperature or refrigerate for 10 minutes.
- Check for any drips or uneven spots, smooth with a toothpick dipped in melted chocolate if needed. Refrigerate until serving, ideally under 2 hours.
Notes
Dry strawberries thoroughly before dipping to prevent chocolate from seizing or sliding off. Use good-quality chocolate for best results. Chill dipped berries before decorating to help white chocolate adhere. Work quickly when decorating. Store in an airtight container in the fridge and consume within 24 hours for best freshness. Avoid freezing after decorating.
Nutrition
- Serving Size: 2 strawberries
- Calories: 120
- Sugar: 15
- Fat: 7
- Carbohydrates: 15
Keywords: chocolate dipped strawberries, graduation treats, cap and gown strawberries, easy dessert, party treats, chocolate dessert