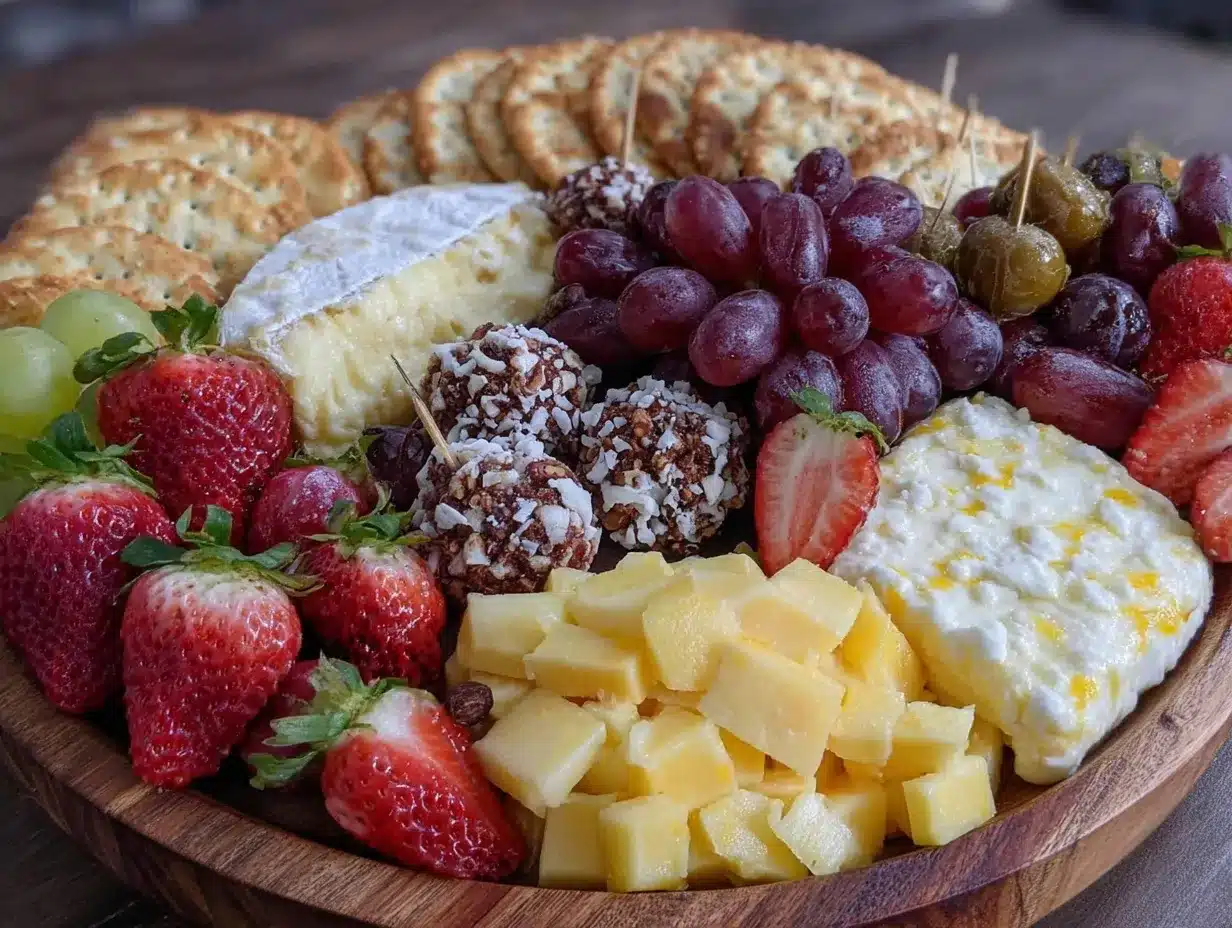
“Hey, can you help me put together a snack board? Like, something quick but looks fancy?” That text popped up from my niece just days before her graduation party. Honestly, I was juggling a million things and thought, “A charcuterie board? Isn’t that complicated?” But as I started pulling together a handful of ingredients, it hit me how this Perfect Graduation Charcuterie Board for Celebrations could be exactly the no-fuss, crowd-pleaser we needed.
There’s something about arranging meats, cheeses, fruits, and nibbles that turns a simple gathering into a celebration. It wasn’t about perfection at first—more about throwing together what was easy to grab from the fridge and pantry. Yet, by the time I finished, even I was surprised how it looked and tasted. That casual, almost accidental win made me realize this board isn’t just for the pros or Pinterest-perfect parties.
Since then, I’ve found myself making this charcuterie setup a few times a week for quick get-togethers or just to brighten an ordinary evening. It’s become my go-to for celebrations, especially graduations, where the vibe is joyful but the clock is ticking. The balance of savory, sweet, crunchy, and creamy elements somehow feels just right — like it’s saying, “Here’s to you, you did it!”
So, if you’re hunting for a Perfect Graduation Charcuterie Board for Celebrations that’s easy, elegant, and actually enjoyable to assemble, I think you’ll like what I’ve got lined up. No stress, just smart choices and a little flair that turns a simple board into a party centerpiece with personality.
Why You’ll Love This Recipe
This charcuterie board isn’t just thrown together; it’s tried and tested through several graduations, casual hangouts, and “I forgot to buy groceries” moments. Here’s why it’s become a favorite:
- Quick & Easy: You can have it ready in under 20 minutes, perfect when you’re juggling last-minute party prep.
- Simple Ingredients: No specialty stores needed—most items are pantry staples or easy to find at any grocery.
- Perfect for Celebrations: Whether it’s a graduation, birthday, or casual brunch, this board fits the vibe without overwhelming your kitchen.
- Crowd-Pleaser: From picky kids to seasoned adults, everyone finds something to love—plus, the mix of textures keeps it interesting.
- Unbelievably Delicious: The way the creamy cheese plays with salty meats and fresh fruit is honestly next-level—even if you don’t call yourself a “foodie.”
What sets this apart? I’ve balanced flavors and textures with a little secret: a simple honey drizzle over nuts and cheese that adds a subtle sweetness without going overboard. Plus, I swap in a few seasonal touches depending on what’s fresh or on sale, making it flexible and fun to customize.
This isn’t just a charcuterie board; it’s a little celebration on a platter that makes everyone smile and keeps the party flowing with ease. If you want to impress without sweating the details, this recipe is your best bet.
What Ingredients You Will Need
This recipe uses simple, wholesome ingredients to deliver bold flavor and satisfying texture without the fuss. Most are pantry staples or easy to grab fresh items that complement each other perfectly.
- Cured Meats:
- Prosciutto (thinly sliced) — for silky, delicate saltiness
- Salami (mild or spicy, sliced) — adds a bit of bite
- Chorizo slices (optional) — smoky twist
- Cheeses:
- Brie (soft and creamy, room temperature) — crowd favorite
- Sharp cheddar (cubed) — adds tang and firmness
- Manchego or aged gouda (sliced) — nutty, slightly sweet
- Fresh Fruits & Veggies:
- Seedless grapes (red or green) — juicy pop of sweetness
- Fresh figs or sliced apples — seasonal freshness
- Cherry tomatoes — bright color and acidity
- Cucumber slices — cool crunch
- Nuts & Crunch:
- Marcona almonds or roasted pecans — buttery crunch
- Mixed olives (green and black) — briny counterpoint
- Honey (for drizzling) — a touch of natural sweetness
- Breads & Crackers:
- Baguette slices (lightly toasted) — sturdy base
- Assorted crackers (multigrain, water crackers) — variety in texture
- Extras (Optional):
- Fig jam or spicy mustard — for dipping and layering flavors
- Dark chocolate chunks — a sweet surprise
For the best experience, I usually pick cheeses from trusted local dairies or well-known brands like Président for Brie and Cabot for cheddar. Seasonal touches, like swapping fresh figs for berries, keep it fresh and interesting. And if you’re gluten-free, almond crackers or rice cakes can step in for traditional crackers without missing a beat.
Equipment Needed
Putting together this Perfect Graduation Charcuterie Board for Celebrations requires minimal equipment, which is part of its charm.
- Serving Board or Platter: A large wooden cutting board or a marble slab works beautifully. I’ve found that a board around 18×12 inches offers enough space without overwhelming the table.
- Cheese Knives & Spreaders: A small set with different edges—serrated and spreader knives—makes serving easier. You don’t need fancy ones; budget-friendly sets from kitchen stores work fine.
- Small Bowls: For olives, nuts, and jams. I usually use ramekins or small ceramic bowls to keep things tidy.
- Tongs or Toothpicks: Handy for grabbing smaller items without messing up the arrangement.
- Sharp Knife: For slicing fruits, meats, and cheese blocks. A serrated knife helps with tougher crusts on bread.
If you don’t have a dedicated serving board, a clean baking sheet with parchment can double as a surface. I’ve also used colorful plates for smaller gatherings, which adds a casual vibe. Keeping knives sharp and boards clean makes the whole process smoother, and I always wipe down surfaces between adding ingredients to keep the presentation crisp.
Preparation Method
- Prepare the Board: Start with a clean, dry wooden or marble board. Set out your small bowls for olives, nuts, and jams near the edges. (Takes about 2 minutes.)
- Slice & Arrange Cheeses: Cut the cheddar into bite-sized cubes, slice the Manchego thinly, and leave the Brie whole or cut into wedges. Place cheeses spaced evenly around the board. Brie can go near a small spreader or knife for easy serving. (5-7 minutes)
- Add Meats: Fold prosciutto slices into loose ribbons, fan out salami and chorizo slices nearby. Avoid piling; let them breathe and show off their textures. (3-5 minutes)
- Place Fresh Fruits & Veggies: Cluster grapes in small bunches, arrange apple or fig slices in overlapping layers, and scatter cherry tomatoes and cucumber slices to fill gaps. This adds color and freshness. (5 minutes)
- Fill Bowls & Add Crunch: Fill small bowls with olives and nuts. Drizzle a little honey over the almonds or pecans for subtle sweetness. Position bowls strategically for balance. (3 minutes)
- Add Breads & Crackers: Fan out baguette slices and crackers along one or two edges. Toasting the bread lightly beforehand adds crunch and warmth. (5 minutes)
- Finishing Touches: Add dollops of fig jam or mustard in small spoonfuls on the board or in bowls. Scatter a few dark chocolate chunks for a surprise treat. Step back and adjust spacing for an inviting look. (2-3 minutes)
Pro Tip: If you’re prepping ahead, keep fresh fruits and vegetables chilled and add them just before serving to avoid sogginess. Also, letting cheeses sit at room temperature for 20 minutes enhances flavor and texture—don’t skip this simple step.
Occasionally, I find myself tempted to overcrowd the board, but less is more. Spaces let each element shine and make it easier for guests to graze without fighting for space. I learned this the hard way at a party where the board looked impressive but was a handful to navigate!
Cooking Tips & Techniques
While this recipe is more about artful assembly than cooking, a few techniques make all the difference:
- Cheese Prep: Always bring cheeses to room temperature before serving. Cold cheese dulls flavors and feels rubbery. I usually take them out 20-30 minutes before guests arrive.
- Meat Folding: Folding sliced meats into ribbons or loose piles adds volume and makes the board look fuller without adding more product. It’s a simple trick I picked up from a deli counter once.
- Balancing Flavors: Aim for salty, sweet, creamy, and crunchy elements. The honey-drizzled nuts add a sweet punch that contrasts with the briny olives and savory meats. Without balance, the board feels one-dimensional.
- Spacing & Color: Spread out colors across the board. Don’t cluster all the reds or greens in one spot. This makes it visually appealing and encourages guests to explore every corner.
- Multitasking: While the bread toasts, prep your cheeses and slice fruits. This saves time and keeps the process flowing smoothly.
One mistake I made early on was underestimating the importance of texture variety. A board with only soft cheeses and meats can feel flat. Adding crunchy nuts and crisp fruits really wakes up the palate and keeps people coming back for more.
Variations & Adaptations
This board is flexible and can be adapted to different tastes and dietary needs:
- Vegetarian Version: Swap meats for marinated artichokes, roasted red peppers, or grilled zucchini strips. Add extra cheeses like herbed goat cheese or aged Parmesan for punch.
- Seasonal Swaps: In spring or summer, use fresh berries, apricots, or watermelon instead of apples and figs. Winter calls for dried fruits like apricots or cranberries.
- Dietary Adjustments: For gluten-free guests, offer rice crackers or almond flour crackers instead of baguette slices. Use dairy-free cheeses made from cashews or coconut for lactose intolerance.
- Spicy Kick: Add pickled jalapeños or a spicy mustard alongside the traditional fig jam for those who like heat.
- Personal Favorite: I once added a little honey-roasted pecan brittle to the board, which surprised everyone and became the hit of the party!
For those interested in different board styles, you might appreciate the tips in my easy epic charcuterie board for beginners post, which covers foundational skills to make any board look professional.
Serving & Storage Suggestions
Serve your charcuterie board at room temperature for the best flavor and texture. This means taking cheeses and meats out 20-30 minutes before guests arrive.
Presentation counts—try to serve on a wooden or marble board for a rustic yet elegant feel. Garnish with fresh herbs like rosemary or thyme sprigs if you have some on hand.
Complement this board with light white wines, sparkling water with lemon, or iced tea for a refreshing pairing. If you want a sweet finish, consider adding an dessert charcuterie board alongside it, featuring cookies and chocolates to round out the celebration.
Leftovers can be wrapped tightly in plastic wrap or stored in airtight containers and refrigerated for up to 2 days. Avoid storing crackers on the board overnight, as they’ll get soggy. Reheat bread slices lightly in a toaster or oven before serving leftovers.
Flavors often deepen after a few hours, especially in the cheeses, so if you’re prepping early, this can actually improve the experience.
Nutritional Information & Benefits
This charcuterie board offers a balanced mix of nutrients, especially when you incorporate fresh fruits, nuts, and a variety of cheeses and meats.
- Cheeses provide calcium and protein, supporting muscle and bone health.
- Cured meats offer iron and B vitamins but should be enjoyed in moderation due to sodium content.
- Nuts like almonds add healthy fats and fiber, which help keep you full and support heart health.
- Fresh fruits and vegetables contribute antioxidants and vitamins, rounding out the board’s nutrition.
For those mindful of dietary restrictions, this board can be customized to be gluten-free, low-carb, or vegetarian without losing its celebratory feel. As always, moderation is key to enjoying indulgences like cured meats and cheese while keeping your wellness goals intact.
Conclusion
This Perfect Graduation Charcuterie Board for Celebrations has become my secret weapon for stress-free entertaining that still looks thoughtful and delicious. It’s adaptable, quick, and hits all the right notes flavor-wise, making it a winner every time.
I love how it invites guests to graze and chat, turning a simple snack into a moment worth savoring. The best part? You can tweak it endlessly to suit your taste or what’s in season without losing that wow factor.
Give it a try for your next celebration and see how easy it is to create a beautiful spread that feels special. And if you find your own spin on it, I’d love to hear what you come up with!
FAQs
- How long can I prepare the charcuterie board in advance? You can prep most elements up to a day before but hold off on assembling fresh fruits and veggies until closer to serving to keep them crisp.
- Can I make this board vegan? Absolutely! Use plant-based cheeses, replace meats with grilled or marinated veggies, and add plenty of nuts and fruits.
- What are some good drink pairings? Light white wines, sparkling water with citrus, or iced herbal teas complement the flavors nicely.
- How do I store leftovers? Wrap cheeses and meats separately in airtight containers and refrigerate. Keep crackers in a sealed bag to maintain crunch.
- Can I customize the board for kids? Yes! Include mild cheeses, sweet fruits like strawberries, and swap spicy meats for milder options like turkey slices.
Pin This Recipe!
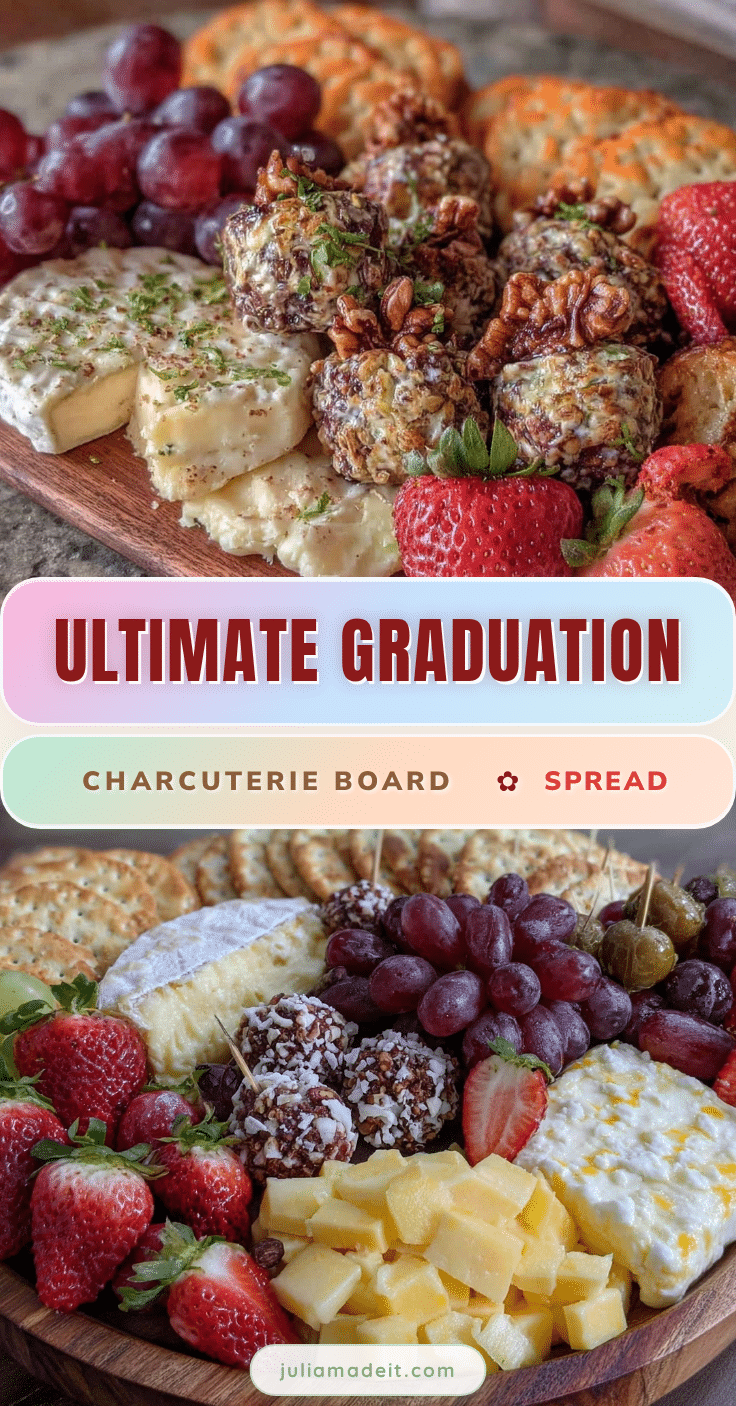
Perfect Graduation Charcuterie Board for Celebrations

An easy, elegant, and crowd-pleasing charcuterie board perfect for graduations and casual gatherings, featuring a balanced mix of meats, cheeses, fruits, nuts, and breads with a subtle honey drizzle.
- Prep Time: 15 minutes
- Cook Time: 0 minutes
- Total Time: 15 minutes
- Yield: 6-8 servings
- Category: Appetizer
- Cuisine: American
Ingredients
- Prosciutto (thinly sliced)
- Salami (mild or spicy, sliced)
- Chorizo slices (optional)
- Brie (soft and creamy, room temperature)
- Sharp cheddar (cubed)
- Manchego or aged gouda (sliced)
- Seedless grapes (red or green)
- Fresh figs or sliced apples
- Cherry tomatoes
- Cucumber slices
- Marcona almonds or roasted pecans
- Mixed olives (green and black)
- Honey (for drizzling)
- Baguette slices (lightly toasted)
- Assorted crackers (multigrain, water crackers)
- Fig jam or spicy mustard (optional)
- Dark chocolate chunks (optional)
Instructions
- Prepare the board: Start with a clean, dry wooden or marble board. Set out small bowls for olives, nuts, and jams near the edges. (About 2 minutes)
- Slice & arrange cheeses: Cut cheddar into bite-sized cubes, slice Manchego thinly, and leave Brie whole or cut into wedges. Place cheeses spaced evenly around the board. Brie can go near a small spreader or knife for easy serving. (5-7 minutes)
- Add meats: Fold prosciutto slices into loose ribbons, fan out salami and chorizo slices nearby. Avoid piling; let them breathe and show off their textures. (3-5 minutes)
- Place fresh fruits & veggies: Cluster grapes in small bunches, arrange apple or fig slices in overlapping layers, and scatter cherry tomatoes and cucumber slices to fill gaps. (5 minutes)
- Fill bowls & add crunch: Fill small bowls with olives and nuts. Drizzle a little honey over the almonds or pecans for subtle sweetness. Position bowls strategically for balance. (3 minutes)
- Add breads & crackers: Fan out baguette slices and crackers along one or two edges. Toast bread lightly beforehand for crunch and warmth. (5 minutes)
- Finishing touches: Add dollops of fig jam or mustard in small spoonfuls on the board or in bowls. Scatter a few dark chocolate chunks for a surprise treat. Adjust spacing for an inviting look. (2-3 minutes)
Notes
Bring cheeses to room temperature 20-30 minutes before serving for best flavor and texture. Drizzle honey over nuts for subtle sweetness. Keep fresh fruits and vegetables chilled until just before serving to avoid sogginess. Avoid overcrowding the board to allow each element to shine. Toast bread lightly for added crunch. Store leftovers in airtight containers and avoid leaving crackers on the board overnight.
Nutrition
- Serving Size: Approximately 1/6 to
- Calories: 30035
- Sugar: 8
- Sodium: 550
- Fat: 22
- Saturated Fat: 8
- Carbohydrates: 15
- Fiber: 3
- Protein: 12
Keywords: charcuterie board, graduation party, easy party snacks, appetizer platter, cheese board, meat and cheese platter, crowd-pleaser, quick snacks