“Can you believe we’re actually throwing a graduation party this weekend?” my friend texted me one late Thursday night. Honestly, I was scrambling to pull everything together, especially the dessert table. It felt like such a huge task—how do you make a celebration stylish without spending days? But as I started gathering ideas and mixing a few sweet treats, I realized something: creating the perfect graduation dessert table isn’t about perfection. It’s about charm, a sprinkle of creativity, and yes, a touch of personal flair.
It hit me while setting out those first cupcakes, each topped with a tiny edible graduation cap. The way the sunlight caught the sprinkles made the whole table sparkle with celebration, and suddenly all the last-minute stress melted away. This wasn’t just any dessert display; it was a collection of little moments that felt joyful and intentional. I found myself tweaking and re-tweaking, making sure that every bite brought a smile and every detail felt just right—not over the top, but stylish and memorable.
So, if you’re like me, juggling a million things but want a dessert table that wows without the overwhelm, keep reading. I’m sharing everything I learned to make your graduation celebration effortlessly chic and sweetly unforgettable. Trust me, once you’ve seen the magic of a well-planned dessert table, you’ll understand why this little tradition stuck with me for every milestone after.
Why You’ll Love This Recipe
Setting up the perfect graduation dessert table can feel daunting, but this guide breaks it down into simple, doable steps that anyone can follow. Over the years, I’ve tested and tweaked these ideas to save time and maximize style—here’s what makes this approach a winner:
- Quick & Easy: From selecting desserts to styling tips, you’ll have your table ready in under 2 hours, perfect for last-minute celebrations or busy days.
- Simple Ingredients: Most desserts use pantry staples or easy-to-find items, so no frantic grocery runs needed.
- Perfect for Stylish Gatherings: Whether you’re hosting a backyard bash or an elegant indoor party, these ideas bring that chic vibe effortlessly.
- Crowd-Pleaser: Kids, teens, and adults alike love these treats—there’s a little something for everyone’s sweet tooth.
- Unbelievably Delicious: Thoughtful flavor combos and textures make these desserts stand out without complicated recipes.
What really sets this apart? It’s the little details—like using edible gold accents, mixing textures with creamy and crunchy, and including customizable elements so guests feel part of the celebration. This isn’t just another dessert table idea; it’s about creating a centerpiece that feels personal and polished. Plus, the tips work well alongside other crowd favorites like the moist chocolate cake with luscious buttercream or even the tangy lemon bars I love for a refreshing twist. This recipe concept isn’t just for one day, it’s a celebration staple you’ll want to repeat.
What Ingredients You Will Need
This graduation dessert table uses simple, wholesome ingredients to deliver bold flavor and a satisfying mix of textures without the fuss. Most are pantry staples, and many have easy swaps to match dietary needs or seasonal availability.
- For the Cupcakes:
- All-purpose flour (or almond flour for gluten-free)
- Granulated sugar
- Unsalted butter, softened (I prefer Kerrygold for richness)
- Large eggs, room temperature
- Vanilla extract
- Baking powder
- Milk (dairy or plant-based)
- For the Frosting:
- Powdered sugar
- Unsalted butter, softened
- Heavy cream or coconut cream
- Vanilla extract
- Food coloring (optional, for school colors)
- Decorations:
- Edible gold leaf or gold sprinkles
- Mini fondant graduation caps or candy toppers
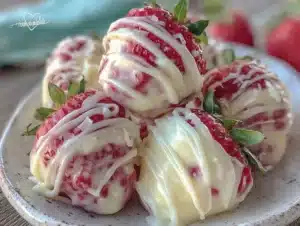
- Fresh berries or edible flowers (seasonal)
- Chocolate chips or shavings
- Colored sugar crystals
- Additional Dessert Items:
- Mini cheesecakes (store-bought or homemade)
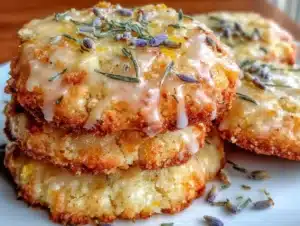
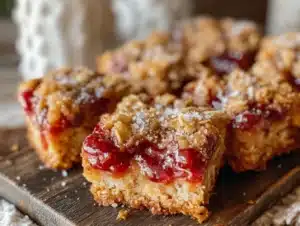
- Assorted cookies (try the lemon bars for a bright pop)
- Chocolate-covered pretzels or popcorn
- For Beverages:
- Cold brew coffee or iced tea
- Fruit-infused water
Feel free to swap out items based on your celebration’s theme or dietary needs—gluten-free flour blends or dairy-free creams work beautifully without sacrificing taste. Personally, I always keep a box of mini cheesecake bites on hand; they’re a crowd favorite that adds a little elegance without extra effort.
Equipment Needed
Setting up a stylish dessert table requires just a handful of essential tools—and luckily, nothing too specialized.
- Mixing bowls: Various sizes for batter and frosting; glass bowls work well for easy mixing and cleanup.
- Electric mixer: A handheld or stand mixer helps whip frosting to perfect fluffiness. If you don’t have one, a sturdy whisk and some elbow grease can do the trick.
- Muffin tin and cupcake liners: For baking cupcakes evenly; silicone liners are reusable and eco-friendly.
- Spatulas and piping bags: For frosting cupcakes and decorating with precision.
- Serving platters and stands: Tiered cake stands add height and visual interest. If you don’t have one, stack sturdy plates with small bowls underneath for a DIY option.
- Measuring cups and spoons: Accurate measurements make all the difference, especially for baking.
I’ve found that investing in a good piping bag set makes decorating a breeze—especially when adding those little graduation caps or piping swirls. If budget is tight, parchment cones work surprisingly well. And trust me, a few well-placed cake stands or trays can turn a simple spread into an eye-catching display without needing fancy linens or decorations.
Preparation Method
- Prepare the cupcake batter: Preheat your oven to 350°F (175°C). In a large bowl, cream together 1 cup (227g) softened unsalted butter and 1 ½ cups (300g) granulated sugar until light and fluffy, about 3-4 minutes with an electric mixer.
- Add eggs and vanilla: Beat in 3 large eggs, one at a time, followed by 2 teaspoons vanilla extract. This helps create a tender crumb and rich flavor.
- Combine dry ingredients: In a separate bowl, sift together 2 ½ cups (312g) all-purpose flour, 2 ½ teaspoons baking powder, and a pinch of salt. Gradually add this mixture to the wet ingredients, alternating with 1 cup (240ml) milk, beginning and ending with the flour mixture. Mix until just combined—overmixing can make cupcakes tough.
- Fill cupcake liners: Line a muffin tin with cupcake liners and fill each about two-thirds full. Bake for 18-22 minutes or until a toothpick inserted comes out clean. Let cool completely before frosting.
- Prepare frosting: Beat 1 cup (227g) softened unsalted butter until creamy. Gradually add 4 cups (480g) powdered sugar, 2 tablespoons heavy cream, and 2 teaspoons vanilla extract. Beat until fluffy, adding more cream if needed to reach desired consistency. Tint with food coloring to match your celebration’s palette.
- Decorate cupcakes: Using a piping bag fitted with a star tip, swirl frosting on each cupcake. Add edible gold leaf, sprinkles, or mini fondant graduation caps for that final touch.
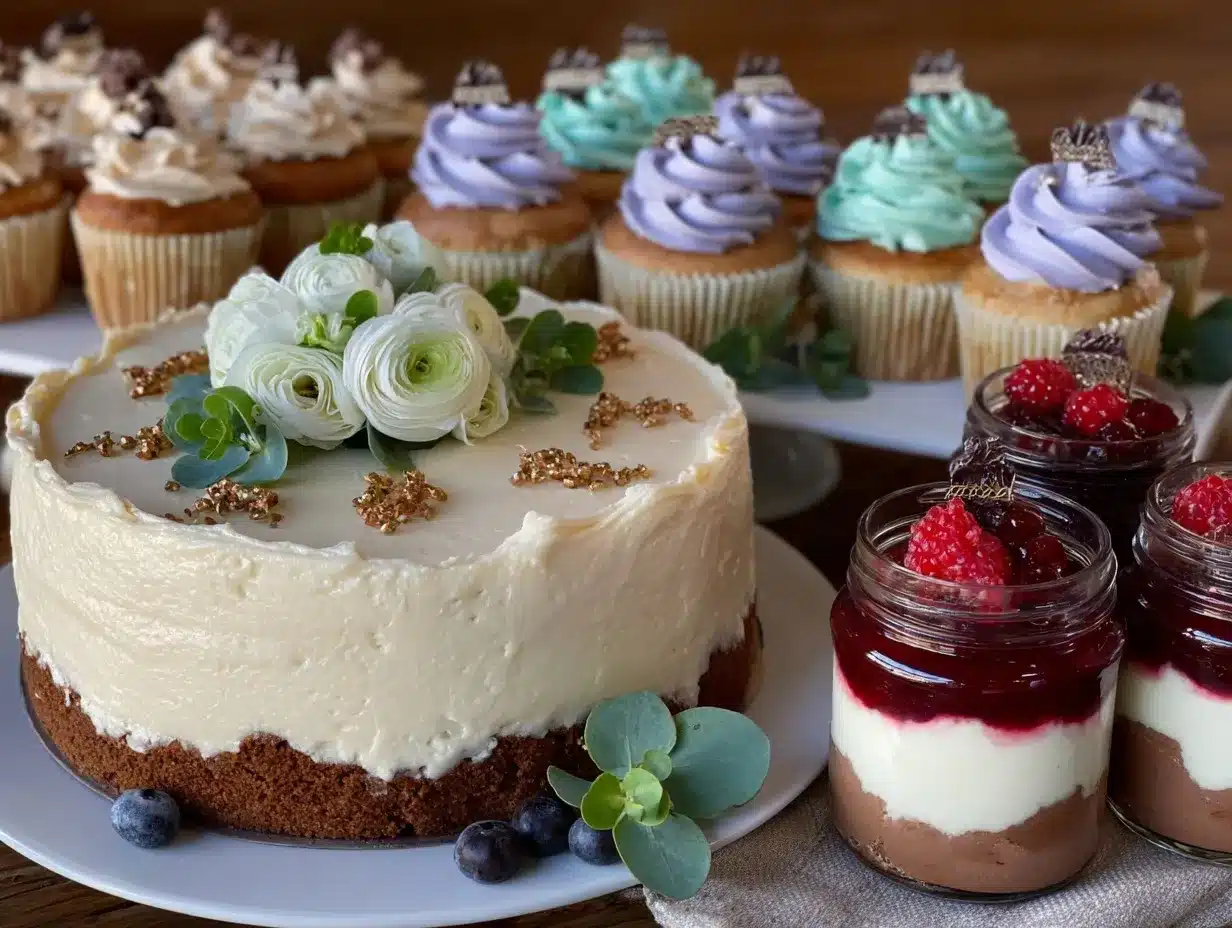
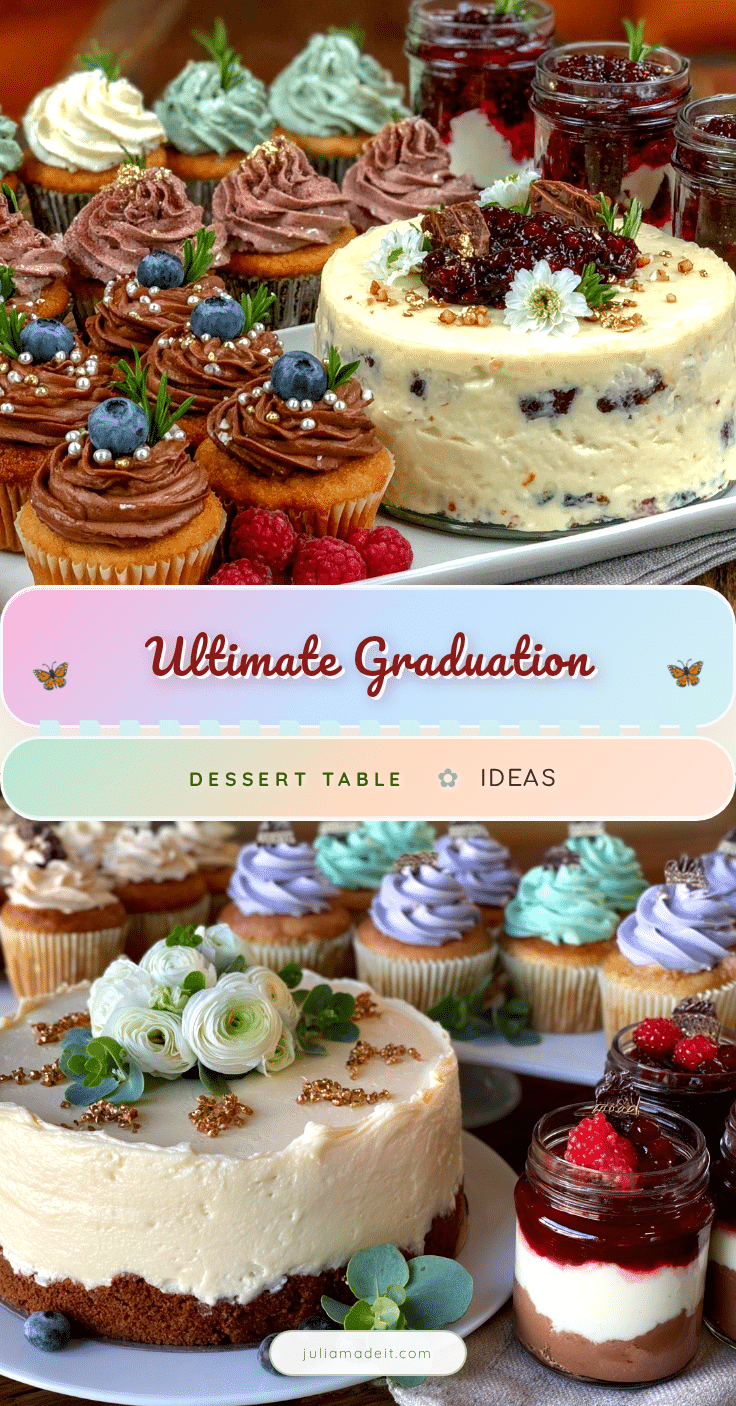
- Arrange on the dessert table: Place cupcakes on tiered stands or platters. Surround with mini cheesecakes, assorted cookies, and chocolate-covered treats. Use fresh berries or edible flowers to fill empty spaces and add color contrast.
- Final touches: Add small signs or chalkboard labels with fun messages or flavor descriptions. Set out beverage options like cold brew coffee or a refreshing fruit-infused water nearby for guests to enjoy alongside the sweets.
Quick tip: If you find your frosting too soft on a warm day, pop it in the fridge for 10-15 minutes before piping—it firms up nicely and holds shape better. Also, baking cupcakes a day ahead allows flavors to deepen, making your dessert table prep less stressful on party day.
Cooking Tips & Techniques
Honestly, the secret to a stunning graduation dessert table is all about layering textures and colors. Here’s what I’ve learned from countless celebrations:
- Don’t overbake cupcakes: Pull them out when a toothpick comes out with a few moist crumbs. Overbaked cupcakes dry out quickly and lose that soft, tender bite.
- Perfect your frosting consistency: Too soft and it’ll melt off; too stiff and it’s hard to pipe. Beat your butter first, then gradually add sugar and cream, stopping when you get a smooth, spreadable texture.
- Use tiered stands: They create visual interest and save table space. If you don’t have one, stacking plates with small jars or bowls as risers works well.
- Mix shapes and sizes: Combine cupcakes, mini cheesecakes, and bite-size cookies to keep things dynamic and inviting.
- Prep the night before: Bake cupcakes and cookies, and make frosting in advance. Assemble and decorate on the day of the party for freshness.
- Personalize with edible toppers: They add a celebratory flair without fuss. You can find mini graduation caps online or try making simple ones from fondant.
One time, I forgot to chill my frosting and ended up with a melty mess—lesson learned! From then on, I always remember to keep the frosting cool before decorating. Also, multitasking by prepping drinks and desserts simultaneously saves valuable time during party prep.
Variations & Adaptations
There’s no one-size-fits-all when it comes to a graduation dessert table. Here are some easy ways to make this your own:
- Dietary swaps: Use gluten-free flour blends for cupcakes, or swap heavy cream with coconut cream for dairy-free frosting. Vegan cupcakes are also an option with flax eggs and plant-based butter.
- Seasonal twists: Swap fresh berries in summer for spiced apple slices or candied nuts in fall-themed celebrations.
- Flavor variations: Add lemon zest to the cupcake batter for a bright note, or swirl in cocoa powder for chocolate lovers. I once made a salted caramel frosting that had everyone asking for seconds!
- Alternative desserts: Swap cupcakes with mini bundt cakes, or include a DIY s’mores station for a fun interactive element.
- Decor style: Match your school colors with custom sprinkles or edible glitter, or go minimalist with white frosting and greenery accents for a clean, elegant look.
Personally, I tried a batch of no-bake Oreo cheesecake bites alongside these cupcakes once, and the combo was a hit—adds a creamy, cool contrast to the fluffy cupcakes.
Serving & Storage Suggestions
For the best experience, serve your dessert table treats at room temperature, especially cupcakes and cheesecakes, so flavors shine through. Presentation matters, so arrange desserts with varying heights and colors to draw guests in.
Pair the dessert table with beverages like cold brew coffee, which refreshes the palate, or fruity iced teas for a lighter option. If you want to keep things cozy indoors, warm drinks like creamy vanilla sweet cream cold brew can complement the sweets beautifully.
Storage tips: Cupcakes and cookies store well in airtight containers at room temperature for up to 2 days. For longer storage, refrigerate cupcakes (unfrosted) for up to 5 days, or freeze them wrapped tightly for up to 3 months. Frosting can be stored separately in the fridge and whipped up again before serving.
When reheating, allow refrigerated desserts to come to room temperature before serving. Reheated mini cheesecakes can be warmed gently in the microwave for 10-15 seconds for a soft, melt-in-your-mouth texture. Flavors often deepen overnight, so assembling your dessert table a few hours ahead can actually enhance the taste.
Nutritional Information & Benefits
This dessert table is designed for celebration, so while it’s indulgent, it uses straightforward ingredients without artificial additives. Here’s a rough idea of what to expect per cupcake (without frosting):
- Calories: ~180–220
- Fat: 8–10g (mostly from butter)
- Carbohydrates: 25–30g
- Protein: 3–4g (from eggs and milk)
Using fresh berries adds antioxidants and vitamins, while opting for natural sweeteners or reduced sugar in frosting can lighten the load. For those with dietary restrictions, gluten-free or dairy-free alternatives keep the celebration inclusive without sacrificing flavor.
From a wellness perspective, I always remind myself that celebrations are about joy and connection—so a little indulgence paired with balanced meals the rest of the day keeps everything in harmony. Plus, homemade desserts like these avoid the preservatives and excess sugars found in many store-bought sweets.
Conclusion
Creating the perfect graduation dessert table is less about perfection and more about thoughtfulness—choosing treats that taste amazing, look inviting, and celebrate the moment with style. With simple ingredients, a few handy tools, and some creative touches, you can pull together a display that makes your graduate (and guests) feel truly special.
I love this approach because it’s flexible, approachable, and a little fun—whether you’re a seasoned baker or just starting out. Don’t hesitate to mix in your favorite recipes or flavors to make it your own. And hey, if you try these ideas, I’d love to hear how your party turned out or what twists you added!
Here’s to stylish celebrations and sweet memories that last well beyond the tassel turn.
FAQs About Graduation Dessert Table Ideas
What are some easy desserts to include on a graduation dessert table?
Simple cupcakes, mini cheesecakes, assorted cookies, and chocolate-covered treats like pretzels or popcorn are all easy to prepare and crowd-pleasing options.
How can I decorate a dessert table to match my school colors?
Use food coloring in frosting, sprinkles in your school’s colors, and edible accents like gold leaf for a polished look. Adding ribbons or signage in matching hues can also tie everything together.
Can I prepare the desserts ahead of time?
Yes! Bake cupcakes and cookies a day or two before, store them properly, and assemble the dessert table on the day of the party to keep everything fresh and stress-free.
What’s a budget-friendly way to create a stylish dessert table?
Use simple homemade desserts, DIY decorations like paper banners or chalkboard signs, and repurpose household items like plates and jars as stands or holders.
How do I keep frosting from melting on a warm day?
Chill your frosting before piping, keep desserts refrigerated until just before serving, and consider using buttercream with a higher powdered sugar ratio for better stability.
Pin This Recipe!
Perfect Graduation Dessert Table Ideas
Create a stylish and effortless graduation dessert table featuring simple cupcakes, mini cheesecakes, assorted cookies, and decorative touches that wow guests without overwhelming the host.
- Prep Time: 20 minutes
- Cook Time: 22 minutes
- Total Time: 42 minutes
- Yield: 24 cupcakes
- Category: Dessert
- Cuisine: American
Ingredients
- All-purpose flour (or almond flour for gluten-free)
- Granulated sugar
- Unsalted butter, softened (preferably Kerrygold)
- Large eggs, room temperature
- Vanilla extract
- Baking powder
- Milk (dairy or plant-based)
- Powdered sugar
- Heavy cream or coconut cream
- Food coloring (optional, for school colors)
- Edible gold leaf or gold sprinkles
- Mini fondant graduation caps or candy toppers
- Fresh berries or edible flowers (seasonal)
- Chocolate chips or shavings
- Colored sugar crystals
- Mini cheesecakes (store-bought or homemade)
- Assorted cookies (e.g., lemon bars)
- Chocolate-covered pretzels or popcorn
- Cold brew coffee or iced tea
- Fruit-infused water
Instructions
- Preheat oven to 350°F (175°C). In a large bowl, cream together 1 cup (227g) softened unsalted butter and 1 ½ cups (300g) granulated sugar until light and fluffy, about 3-4 minutes with an electric mixer.
- Beat in 3 large eggs, one at a time, followed by 2 teaspoons vanilla extract.
- In a separate bowl, sift together 2 ½ cups (312g) all-purpose flour, 2 ½ teaspoons baking powder, and a pinch of salt. Gradually add this mixture to the wet ingredients, alternating with 1 cup (240ml) milk, beginning and ending with the flour mixture. Mix until just combined.
- Line a muffin tin with cupcake liners and fill each about two-thirds full. Bake for 18-22 minutes or until a toothpick inserted comes out clean. Let cool completely before frosting.
- Beat 1 cup (227g) softened unsalted butter until creamy. Gradually add 4 cups (480g) powdered sugar, 2 tablespoons heavy cream, and 2 teaspoons vanilla extract. Beat until fluffy, adding more cream if needed. Tint with food coloring if desired.
- Using a piping bag fitted with a star tip, swirl frosting on each cupcake. Decorate with edible gold leaf, sprinkles, or mini fondant graduation caps.
- Arrange cupcakes on tiered stands or platters. Surround with mini cheesecakes, assorted cookies, and chocolate-covered treats. Add fresh berries or edible flowers for color and texture.
- Add small signs or chalkboard labels with fun messages or flavor descriptions. Set out beverage options like cold brew coffee or fruit-infused water nearby.
Notes
Chill frosting for 10-15 minutes if too soft before piping. Bake cupcakes a day ahead to deepen flavors. Use gluten-free flour or dairy-free cream for dietary swaps. Use tiered stands or stacked plates for visual interest. Personalize with edible toppers and school colors.
Nutrition
- Serving Size: 1 cupcake
- Calories: 200
- Sugar: 18
- Sodium: 150
- Fat: 9
- Saturated Fat: 5
- Carbohydrates: 28
- Fiber: 1
- Protein: 4
Keywords: graduation dessert table, cupcakes, party desserts, celebration treats, easy dessert ideas, stylish dessert table, crowd-pleaser desserts