Let me tell you, the smell of rich chocolate mingling with sweet vanilla buttercream swirling in school colors wafting from my kitchen is the kind of thing that stops you in your tracks. The first time I baked this perfect sheet cake with school colors buttercream frosting, it was for a last-minute school event, and honestly, I was instantly hooked. There’s this beautiful moment when you pull the cake out of the oven, the edges golden and the center soft, and you pause, take a deep breath, and just smile because you know you’re onto something truly special.
Years ago, when I was knee-high to a grasshopper, my grandma would make big sheet cakes for every occasion, and I always wished I had her knack for that perfect balance of moist cake and creamy frosting. This recipe is my little tribute to those memories, but with a modern twist—customizable school colors frosting that’s dangerously easy to whip up and looks like a million bucks. My family couldn’t stop sneaking slices off the cooling rack (and I can’t really blame them).
You know what? This sheet cake is perfect for potlucks, birthday parties, or just brightening up your Pinterest cookie board with a bold pop of color. I’ve tested this recipe more times than I can count—in the name of research, of course—and it’s become a staple for family gatherings, gifting, and those moments when you want cake to feel like a warm hug. Trust me, you’re going to want to bookmark this one.
Why You’ll Love This Recipe
This perfect sheet cake recipe with easy school colors buttercream frosting is a winner for a bunch of reasons, and here’s why you’ll adore it just as much as I do:
- Quick & Easy: Comes together in under an hour, perfect for busy weeknights or last-minute celebrations.
- Simple Ingredients: No fancy grocery trips needed; chances are you already have everything in your pantry.
- Perfect for School Events: Great for pep rallies, bake sales, or any occasion where school spirit shines bright.
- Crowd-Pleaser: Always gets rave reviews from kids and adults alike—trust me, it disappears fast!
- Unbelievably Delicious: The moist, tender crumb paired with the creamy, colorful frosting is comfort food at its best.
What sets this recipe apart? Well, the secret’s in the frosting technique. Instead of just coloring the whole batch one shade, I show you how to swirl multiple school colors together for that vibrant, eye-catching finish. Plus, the cake itself uses a simple but foolproof method that keeps it super moist without feeling heavy. This isn’t just another sheet cake; it’s your best version, the one you’ll be bragging about at every bake sale or family party.
Honestly, it’s the kind of cake that makes you close your eyes after the first bite and smile. It’s comfort food reimagined—fast, fun, and festive—perfect for impressing guests without breaking a sweat. So, let’s jump into making this showstopper!
What Ingredients You Will Need
This recipe uses simple, wholesome ingredients to deliver bold flavor and a satisfying texture without the fuss. Most of these are pantry staples, so you won’t need to hunt down anything exotic.
For the Cake Batter:
- All-purpose flour – 2 ½ cups (315g), sifted (for a tender crumb)
- Granulated sugar – 2 cups (400g), adds sweetness and moisture
- Unsweetened cocoa powder – ¾ cup (75g), use Dutch-process for richer flavor
- Baking powder – 1 ½ teaspoons, helps the cake rise
- Baking soda – 1 ½ teaspoons, balances the cocoa acidity
- Salt – 1 teaspoon, enhances all flavors
- Buttermilk – 1 cup (240ml), room temperature (adds tenderness; use dairy-free milk plus 1 tbsp vinegar for swap)
- Vegetable oil – ½ cup (120ml), keeps the cake moist
- Large eggs – 2, room temperature (helps structure)
- Vanilla extract – 2 teaspoons, for that warm, comforting aroma
- Hot coffee – 1 cup (240ml), freshly brewed (enhances the chocolate flavor)
For the School Colors Buttercream Frosting:
- Unsalted butter – 1 cup (227g), softened (I prefer Kerrygold for creaminess)
- Powdered sugar – 4 cups (480g), sifted to avoid lumps
- Heavy cream – 2-3 tablespoons (30-45ml), to thin as needed
- Vanilla extract – 1 teaspoon
- Gel food coloring – multiple colors matching your school’s palette (gel colors give the best vibrant finish without thinning the frosting)
Substitution tip: If you want a dairy-free version, swap butter with vegan margarine, and use plant-based milk in place of buttermilk with a touch of lemon juice.
Equipment Needed
- 9×13-inch sheet pan – essential for that classic sheet cake size; a light-colored, non-stick pan works best for even baking.
- Mixing bowls – at least two, medium and large, preferably glass or metal for easy scraping.
- Electric hand mixer or stand mixer – makes creaming butter and blending batter a breeze (I swear by my KitchenAid stand mixer, but a hand mixer works just fine).
- Measuring cups and spoons – for precise ingredient amounts.
- Rubber spatula – perfect for folding and scraping every last bit of batter.
- Wire cooling rack – lets your cake cool evenly and prevents sogginess.
- Offset spatula or butter knife – great for smooth frosting application.
- Food-safe piping bags and small round tips (optional) – if you want to get fancy with your school colors frosting swirls.
If you don’t have a stand mixer, no worries! Using a sturdy bowl and hand mixer works just as well. And if you’re budget-conscious, picking up a silicone spatula and a good sheet pan can instantly level up your baking game without breaking the bank.
Preparation Method
- Preheat and Prepare: Preheat your oven to 350°F (175°C). Grease your 9×13-inch sheet pan with butter or nonstick spray, then lightly flour it to prevent sticking. Set aside. (This step saves you from any cake sticking heartbreak!)
- Mix Dry Ingredients: In a large bowl, sift together the all-purpose flour, cocoa powder, baking powder, baking soda, and salt. Whisk to combine evenly. This helps your cake rise uniformly and avoids clumps.
- Cream Wet Ingredients: In a separate bowl, use your mixer to beat the softened butter and granulated sugar until light and fluffy, about 3-4 minutes. Add eggs one at a time, mixing well after each addition. Stir in the vanilla extract.
- Combine Dry and Wet: Alternately add the dry ingredients and buttermilk to the butter mixture, starting and ending with the dry ingredients. Mix on low speed just until combined. Overmixing can make the cake tough, so keep it gentle.
- Add Hot Coffee: Slowly pour in the hot coffee while mixing at low speed. The batter will be thin—that’s exactly how it should be! The coffee intensifies the chocolate flavor without tasting like coffee.
- Bake: Pour the batter into your prepared pan and smooth the top with a spatula. Bake for 35-40 minutes, or until a toothpick inserted in the center comes out clean. Oven times vary, so start checking at 35 minutes.
- Cool: Let the cake cool in the pan for 15 minutes, then turn it out onto a wire rack to cool completely before frosting. Patience here means your frosting won’t melt and slide off.
- Prepare Buttercream: Beat the softened butter on medium speed until creamy, about 2 minutes. Gradually add powdered sugar, one cup at a time, mixing well after each addition. Add vanilla extract and 2 tablespoons of heavy cream, beating until light and fluffy. Add more cream if needed to reach spreadable consistency.
- Divide and Color: Split the frosting into separate bowls based on the number of school colors you want. Use gel food coloring to tint each portion intensively without watering down the frosting.
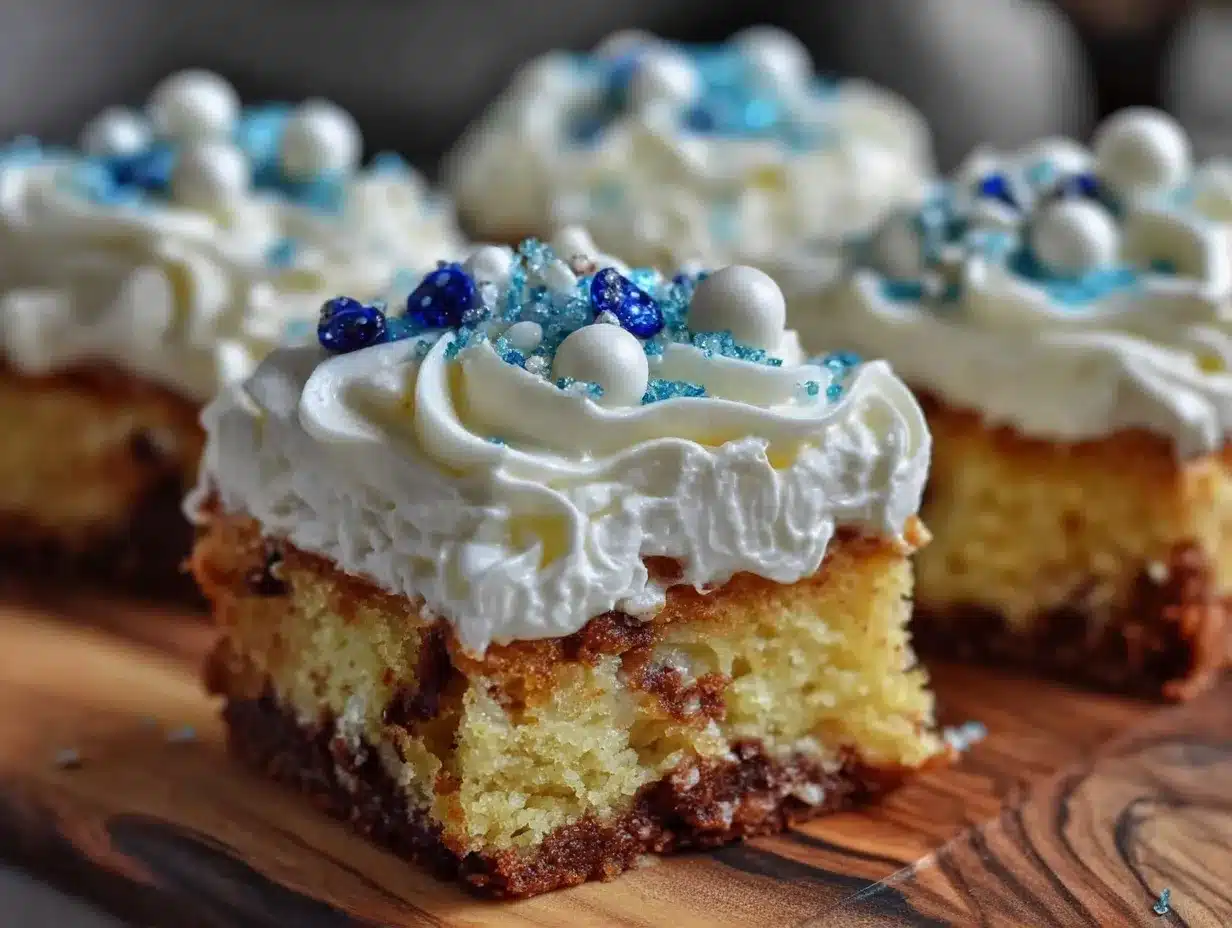
- Frost and Decorate: For a simple look, spread the colors in stripes or blocks. For fun swirls, spoon different colors side-by-side into a piping bag and pipe rosettes or stars. Get creative! It’s a great way to show school spirit.
- Final Touch: Chill the frosted cake for 15-20 minutes to set the buttercream before slicing and serving. This keeps everything neat and tidy.
Cooking Tips & Techniques
One of my biggest lessons with this recipe was learning not to overmix the batter. Overdoing it makes the crumb dense and less tender—trust me, I’ve had my share of brick-like disasters. Mixing just until ingredients come together keeps the cake light and fluffy.
Using hot coffee in the batter is a game changer for chocolate cakes. Don’t be shy about it; the coffee amps up the chocolate without making it taste like a mocha. Just make sure it’s hot but not boiling when you add it, so it blends smoothly.
When it comes to frosting, gel food coloring wins hands down. Liquid colors can thin your buttercream and affect texture, and powdered colors can be tricky to mix evenly. Gel stays vibrant and thick, perfect for those bold school colors.
Also, prepare the frosting in batches if you want multiple colors. It’s easier to manage and ensures each color is pure and bright. And if you don’t have piping bags, no worries—spreading the frosting in striped blocks with a spatula looks just as cool.
Timing is everything. Bake the cake first, then while it cools, whip up your frosting. This way, you’re not rushing and can focus on smooth, even frosting application. And don’t forget the cooling rack—letting your cake cool completely prevents frosting meltdowns.
Variations & Adaptations
- Flavor Twists: Swap the cocoa powder for lemon zest and juice to make a bright lemon sheet cake with matching pastel school colors frosting. It’s a refreshing alternative for spring events.
- Gluten-Free Option: Use a gluten-free flour blend (I like Bob’s Red Mill 1-to-1) instead of all-purpose flour. The texture stays surprisingly close to the original, and the frosting needs no change.
- Vegan Adaptation: Replace eggs with flax eggs (1 tbsp ground flaxseed + 3 tbsp water per egg), use dairy-free milk plus vinegar for buttermilk substitute, and vegan butter for the frosting. The colors and taste remain just as festive.
- Alternative Frosting: If buttercream’s not your thing, try cream cheese frosting tinted with school colors for a tangier finish. Just add a bit of powdered sugar to keep it spreadable.
- Decorating Variations: Instead of piped swirls, spread frosting in blocks or stripes for a clean, modern look. Add edible glitter or sprinkles matching the school colors for extra flair.
Personally, I once made this cake with half chocolate and half vanilla batter swirled together, and the school colors frosting on top brought the whole thing to the next level of fun. Try mixing it up to suit your event and taste buds.
Serving & Storage Suggestions
This cake is best served at room temperature so the frosting is soft and luscious. It pairs beautifully with a cold glass of milk or a hot cup of coffee, depending on your mood.
For presentation, slice the cake into generous squares, and if you’re feeling fancy, garnish with fresh berries or edible flowers in coordinating colors. It’s a guaranteed crowd-pleaser on the dessert table.
Store leftovers in an airtight container in the refrigerator for up to 5 days. The flavors actually develop and deepen after a day or two, making slices even better the next day. Bring the cake to room temp before serving to soften the buttercream.
You can freeze the unfrosted cake layers wrapped tightly in plastic wrap and foil for up to 3 months. Thaw completely before frosting. For frosted cake, freezing is possible but may cause slight texture changes in the buttercream.
Nutritional Information & Benefits
This perfect sheet cake isn’t just a treat; it’s made with ingredients that bring a little nutrition to the table. The cocoa powder provides antioxidants, and using buttermilk adds protein and calcium to the mix. Of course, it’s a dessert, so it’s meant to be enjoyed in moderation.
The buttercream frosting, while rich and creamy, can be adjusted by using less sugar or swapping heavy cream for lighter milk options if you want to watch calories. This recipe can also be tweaked for gluten-free or vegan diets as noted earlier, making it accessible for many preferences.
It contains common allergens like eggs, dairy, and gluten, so keep that in mind if you’re baking for a crowd. From a wellness perspective, sharing this cake with loved ones creates joy and connection—that’s nutrition for the soul, if you ask me!
Conclusion
All in all, this perfect sheet cake with easy school colors buttercream frosting is a recipe you’ll reach for again and again. It’s simple enough for beginners but impressive enough to wow any crowd. The customizable frosting lets you show off your team spirit or party colors with pride, while the tender, moist cake underneath keeps everyone coming back for more.
I love this recipe because it brings back fond memories while creating new ones—whether it’s a school event, birthday, or casual get-together. Plus, it’s just downright fun to make and decorate. You can tweak it based on your preferences or dietary needs, making it truly your own.
Give it a try, and let me know how your perfect sheet cake turns out! Drop a comment, share your school colors combos, or tell me your favorite variations. Happy baking, and here’s to sweet moments made even sweeter!
FAQs
Can I make this sheet cake gluten-free?
Yes! Swap the all-purpose flour for a 1-to-1 gluten-free flour blend, and you’ll still get a tender, delicious cake. No need to change the other ingredients.
How far in advance can I bake the cake?
You can bake the cake up to 2 days ahead. Keep it wrapped tightly at room temperature or refrigerated. Frost it just before serving for the best texture.
What’s the best way to get vibrant school colors in the frosting?
Use gel food coloring, as it’s concentrated and won’t thin your buttercream. Add colors gradually until you reach the perfect shade.
Can I use this frosting on cupcakes or other cakes?
Absolutely! This buttercream is versatile and perfect for cupcakes, layer cakes, or even cookies. Just adjust the quantity based on your needs.
How do I store leftover frosted cake?
Store leftover cake in an airtight container in the fridge for up to 5 days. Bring to room temperature before serving to soften the frosting.
Pin This Recipe!
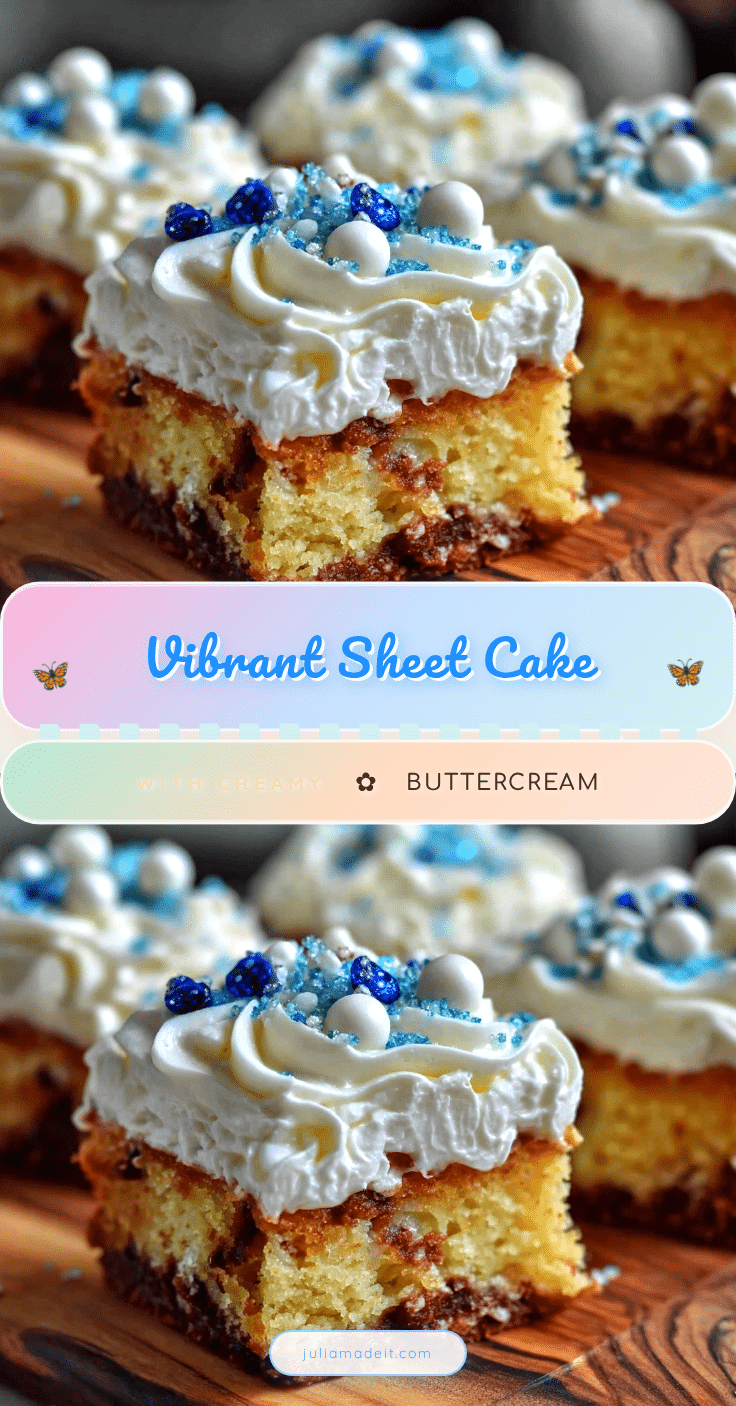
Perfect Sheet Cake Recipe with Easy School Colors Buttercream Frosting Tutorial

A moist and tender chocolate sheet cake paired with a creamy, colorful buttercream frosting perfect for school events and celebrations. This recipe is quick, easy, and customizable with vibrant school colors.
- Prep Time: 20 minutes
- Cook Time: 35-40 minutes
- Total Time: 1 hour
- Yield: 12 servings 1x
- Category: Dessert
- Cuisine: American
Ingredients
- 2 ½ cups (315g) all-purpose flour, sifted
- 2 cups (400g) granulated sugar
- ¾ cup (75g) unsweetened cocoa powder (Dutch-process recommended)
- 1 ½ teaspoons baking powder
- 1 ½ teaspoons baking soda
- 1 teaspoon salt
- 1 cup (240ml) buttermilk, room temperature (or dairy-free milk plus 1 tbsp vinegar)
- ½ cup (120ml) vegetable oil
- 2 large eggs, room temperature
- 2 teaspoons vanilla extract
- 1 cup (240ml) hot coffee, freshly brewed
- 1 cup (227g) unsalted butter, softened
- 4 cups (480g) powdered sugar, sifted
- 2–3 tablespoons (30-45ml) heavy cream
- 1 teaspoon vanilla extract
- Gel food coloring in multiple school colors
Instructions
- Preheat oven to 350°F (175°C). Grease a 9×13-inch sheet pan with butter or nonstick spray and lightly flour it. Set aside.
- In a large bowl, sift together flour, cocoa powder, baking powder, baking soda, and salt. Whisk to combine evenly.
- In a separate bowl, beat softened butter and granulated sugar with a mixer until light and fluffy, about 3-4 minutes. Add eggs one at a time, mixing well after each addition. Stir in vanilla extract.
- Alternately add dry ingredients and buttermilk to the butter mixture, starting and ending with dry ingredients. Mix on low speed just until combined; avoid overmixing.
- Slowly pour in hot coffee while mixing at low speed. Batter will be thin.
- Pour batter into prepared pan and smooth the top with a spatula. Bake for 35-40 minutes or until a toothpick inserted in the center comes out clean. Start checking at 35 minutes.
- Let cake cool in pan for 15 minutes, then turn out onto a wire rack to cool completely before frosting.
- For the buttercream, beat softened butter on medium speed until creamy, about 2 minutes. Gradually add powdered sugar, one cup at a time, mixing well after each addition.
- Add vanilla extract and 2 tablespoons heavy cream, beating until light and fluffy. Add more cream if needed to reach spreadable consistency.
- Divide frosting into separate bowls for each school color. Tint each portion with gel food coloring.
- Frost cake by spreading colors in stripes or blocks, or pipe swirls using piping bags and tips for decorative effects.
- Chill frosted cake for 15-20 minutes to set buttercream before slicing and serving.
Notes
Do not overmix the batter to keep the cake tender and light. Use hot but not boiling coffee to enhance chocolate flavor without bitterness. Gel food coloring is best for vibrant frosting without thinning it. Prepare frosting in batches for multiple colors. Chill frosted cake before slicing to prevent melting.
Nutrition
- Serving Size: 1 slice (1/12th of c
- Calories: 420
- Sugar: 40
- Sodium: 320
- Fat: 22
- Saturated Fat: 13
- Carbohydrates: 55
- Fiber: 3
- Protein: 4
Keywords: sheet cake, chocolate cake, buttercream frosting, school colors, easy cake recipe, party cake, potluck dessert