“You have got to try these sliders,” my buddy Mark said over the phone, practically bouncing with excitement. I was skeptical. Bacon cheeseburger sliders? Sounds like a party cliché, right? But honestly, after the chaos of a long day, I was craving something easy and comforting, something I could throw together without fuss. So, I gave in and decided to whip up these Ultimate Loaded Bacon Cheeseburger Sliders. And wow—let’s just say my initial doubt vanished the moment that first savory, cheesy bite hit my lips.
There’s something about the smell of sizzling bacon mingling with melted cheddar and perfectly toasted buns that just pulls you in. I remember standing in my kitchen, half exhausted but completely captivated by the layers of flavors building up in the pan. No frills, no fancy plating—just honest, satisfying food that felt like a little celebration on a plate.
What surprised me most was how these sliders turned a simple craving into a recipe I found myself making twice in one week. Whether I was hosting a casual hangout or just needed a quick, crowd-pleasing snack, they never failed to hit the spot. The best part? They’re loaded with flavor but come together fast enough to save you from the dreaded “what’s for dinner?” scramble. After a few tweaks and tastings, I’m confident these sliders will quietly become your go-to for any occasion that needs a little extra yum without the hassle.
Why You’ll Love This Recipe
Honestly, these Ultimate Loaded Bacon Cheeseburger Sliders have become my secret weapon for quick entertaining and satisfying weeknight meals. Here’s why they stand out:
- Quick & Easy: You’re looking at about 30 minutes from start to finish, which is perfect for busy evenings or last-minute guests.
- Simple Ingredients: No need for specialty shopping trips. Most of what you need is probably already in your fridge or pantry.
- Perfect for Parties: These sliders are the ultimate finger food, making them ideal for game days, potlucks, or casual hangouts.
- Crowd-Pleaser: Kids and adults alike ask for these again and again, thanks to the irresistible combo of crispy bacon, juicy beef, and melty cheese.
- Unbelievably Delicious: The way the cheese melts into the beef and the smoky bite of bacon creates a flavor combo that’s downright addictive.
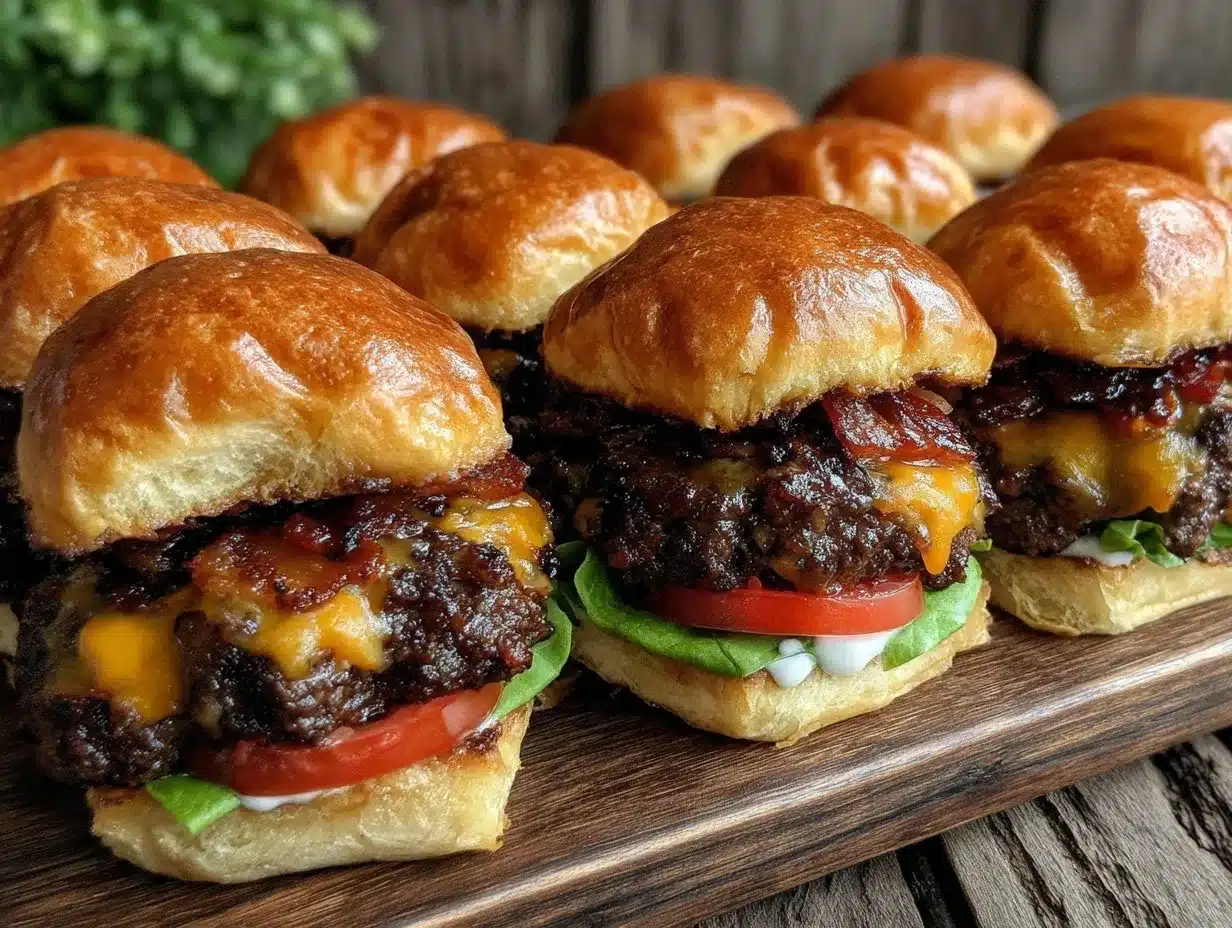
What really sets this recipe apart? It’s the layering of textures and flavors—the buttery toasted slider buns, the savory, well-seasoned beef patties, and the crispy bacon that adds just the right crunch. Plus, a little secret sauce (you’ll see in the recipe) that brings it all together with a tangy kick. This isn’t just another cheeseburger slider recipe; it’s one I’ve tested and tweaked for maximum yum without fuss.
Trust me, after the first bite, you’ll understand why these sliders stuck with me. They’re comfort food that feels like a treat, but they’re surprisingly easy to make. Perfect for impressing guests without breaking a sweat or turning a simple snack into something memorable.
What Ingredients You Will Need
This recipe uses straightforward, wholesome ingredients to deliver that classic bacon cheeseburger flavor with a juicy, satisfying texture. Most are pantry staples or easy to swap out if needed.
- Slider Buns: 12 soft, small buns (I prefer King’s Hawaiian for their slightly sweet, tender texture)
- Ground Beef: 1.5 pounds (680 grams) of 80/20 ground chuck for juicy, flavorful patties
- Bacon: 8 slices, cooked crisp and chopped (smoked bacon adds a great depth, but regular works too)
- Cheese: 12 slices of sharp cheddar cheese (feel free to mix it up with pepper jack for a little spice)
- Onion: 1 small yellow onion, finely chopped (adds sweetness and a little crunch)
- Dill Pickle Chips: About 24 slices (2 per slider, tangy and essential for that classic burger bite)
- Mayonnaise: ½ cup (120 ml), preferably full-fat for creaminess
- Ketchup: 2 tablespoons (adds sweetness and balances the savory flavors)
- Yellow Mustard: 1 tablespoon (for a subtle tang)
- Worcestershire Sauce: 1 teaspoon (boosts umami in the beef)
- Salt and Pepper: To taste (season the beef well!)
- Butter: 3 tablespoons, melted (to brush on buns before toasting)
If you want to switch things up, you can swap the cheddar for mozzarella for a gooey, milder cheese or use turkey bacon for a leaner option. I’ve also tried adding a few dashes of hot sauce to the mayo mix when I’m craving a little extra kick.
Equipment Needed
- A large mixing bowl for combining beef and seasonings
- A baking dish or sheet pan (a 9×13-inch pan works perfectly for assembling sliders)
- A skillet or frying pan to cook the bacon and optionally brown the patties
- A sharp knife and cutting board for prepping onions and pickles
- A basting brush for applying melted butter to the buns
- Aluminum foil to cover the sliders while baking (helps melt the cheese perfectly)
If you don’t have a skillet, you can cook the bacon in the oven on a wire rack-lined baking sheet—less cleanup and evenly crisp bacon! For the patties, forming them by hand works great, but a burger press can make this step quicker and more uniform. I generally use a simple wooden spoon and a spatula for handling the patties, and a pair of tongs for the bacon.
Preparation Method
- Preheat your oven to 350°F (175°C). This ensures a nice even bake for the sliders later.
- Cook the bacon: In a skillet over medium heat, cook 8 slices of bacon until crisp, about 8 minutes. Transfer to a paper towel-lined plate and chop into bite-sized pieces. Save a little bacon fat for cooking the beef if you want extra flavor.
- Prepare the beef mixture: In a large bowl, combine 1.5 pounds (680 g) of ground beef with 1 teaspoon Worcestershire sauce, salt, and black pepper. Mix gently—overmixing can make the patties tough.
- Form the patties: Divide the beef into 12 equal portions (about 2 ounces or 57 g each). Shape each into a thin, round patty slightly larger than your slider buns, since they will shrink while cooking.
- Cook the patties: Heat a skillet over medium-high heat. Cook patties for 2-3 minutes per side until just browned but still juicy inside. If you prefer, you can skip this step and bake directly, but browning adds great flavor.
- Mix the sauce: In a small bowl, combine ½ cup (120 ml) mayonnaise, 2 tablespoons ketchup, and 1 tablespoon yellow mustard. Stir well and set aside.
- Prepare the buns: Slice the 12 slider buns in half horizontally. Brush the cut sides with 3 tablespoons melted butter for a rich, toasted finish.
- Assemble the sliders: In a 9×13-inch baking dish, place the bottom halves of the buns. Spread a thin layer of the sauce on each bun. Add a slice of cheddar cheese, then the cooked beef patty, followed by chopped bacon, a sprinkle of chopped onions, and 2 dill pickle slices each.
- Top with buns: Place the top halves of the slider buns on each assembled stack. Brush the tops lightly with melted butter as well.
- Bake the sliders: Cover the baking dish tightly with aluminum foil. Bake in the preheated oven for 15 minutes, then remove the foil and bake for another 5 minutes to toast the buns and melt the cheese perfectly.
- Serve warm: Let the sliders rest for a couple of minutes before serving. This helps the juices settle so they don’t get too messy when you bite in.
If you want to add a little extra oomph, a quick sprinkle of smoked paprika or a dash of garlic powder into the beef mix really amps up the flavor. Also, make sure not to overcrowd the pan when browning patties; that way they get a nice crust instead of steaming.
Cooking Tips & Techniques
Cooking these Ultimate Loaded Bacon Cheeseburger Sliders isn’t rocket science, but a few tricks can make all the difference:
- Don’t overwork the beef: Mixing just until combined keeps the patties tender and juicy. Too much handling makes them dense and dry.
- Use 80/20 ground beef: The fat content is key for juicy, flavorful sliders. Leaner beef tends to dry out fast.
- Cook bacon until crisp: This adds texture and prevents sogginess. I like to cook it on medium heat to render the fat slowly.
- Toast buns with butter: This little step adds a golden crunch and buttery aroma that makes these sliders feel special.
- Cover while baking: Trapping steam melts the cheese without drying out the sliders. Removing the foil at the end crisps the tops just right.
- Multitask smart: While the bacon cooks, prep the beef and sauce to save time. Trust me, it feels like a smooth kitchen dance rather than a rush.
I once skipped browning the patties and baked them straight in the oven, and while that’s doable, the flavor and texture suffered. Browning creates that irresistibly savory crust that takes these sliders from good to unforgettable. Also, chopping the bacon too small can cause it to get lost in the mix—chunkier pieces add a satisfying crunch.
Variations & Adaptations
Want to switch things up or accommodate different diets? No problem:
- Vegetarian option: Use plant-based burger patties and swap bacon for smoked tempeh or coconut bacon. Use vegan cheese and buns to keep it fully plant-based.
- Spicy twist: Add sliced jalapeños or a drizzle of chipotle mayo for heat. Pepper jack cheese also amps up the spice.
- Gluten-free: Swap slider buns with gluten-free rolls or thickly sliced toasted sweet potatoes for a low-carb option.
- Seasonal toppings: In summer, try adding grilled pineapple slices or fresh tomato for a juicy burst. In winter, caramelized onions bring a rich sweetness.
- Cheese variety: Experiment with Swiss, mozzarella, or blue cheese crumbles if you want to mix the flavor profile a bit.
Personally, I once made a version inspired by my cheeseburger casserole by adding a creamy mushroom sauce inside the sliders—unexpected but insanely good! Feel free to get creative; these sliders are forgiving and adapt well to your favorite burger toppings.
Serving & Storage Suggestions
These sliders are best served warm, straight out of the oven when the cheese is gooey and the buns are perfectly toasted. For presentation, I like to arrange them on a large platter lined with parchment paper and garnish with some fresh parsley or chives for color.
They pair wonderfully with classic sides like crispy fries, onion rings, or even a simple green salad to balance the richness. For drinks, a cold craft beer or a sparkling soda complements the salty, smoky flavors beautifully.
To store leftovers, wrap the sliders tightly in plastic wrap or foil and keep them in the refrigerator for up to 3 days. Reheat gently in the oven at 325°F (160°C) for about 10 minutes to bring back that fresh-baked warmth without drying them out. You can also freeze them wrapped individually for up to 2 months—just thaw overnight in the fridge before reheating.
Interestingly, the flavors actually deepen a bit overnight, especially the bacon and sauce. So, if you’re not in a rush, letting them sit wrapped in the fridge can deliver a richer taste the next day.
Nutritional Information & Benefits
Each slider packs a satisfying blend of protein, fat, and carbs, making them a hearty snack or light meal. Roughly, one slider contains about 220 calories, 15 grams of fat, 14 grams of protein, and 10 grams of carbohydrates.
The ground beef provides essential iron and B vitamins, while bacon adds flavor and a touch of zinc and selenium. Using real cheddar cheese brings calcium and vitamin D to the table. Of course, these are indulgent sliders, so they’re best enjoyed in moderation.
For those mindful of dietary restrictions, swapping ingredients like turkey bacon or plant-based patties can reduce fat and calories. Using whole-grain slider buns or gluten-free options can cater to different nutritional needs.
From my experience, this recipe strikes a nice balance between comfort and nutrition—perfect for anyone who wants a satisfying bite without guilt.
Conclusion
The Ultimate Loaded Bacon Cheeseburger Sliders have quickly become a staple in my kitchen when I want something that’s easy to prepare but still feels special. The combination of juicy beef, crispy bacon, melty cheese, and that tangy sauce is simply irresistible. What’s great is how customizable they are—you can tailor them to your tastes or dietary needs without losing any of the magic.
I love how these sliders bring people together, whether it’s a casual get-together or a cozy night in. They’re proof that sometimes the simplest recipes, done with care, are the most memorable. If you try them, I’d love to hear how you make them your own or what toppings you add.
So, what are you waiting for? Time to make your kitchen smell like bacon and toasted buns, and enjoy some serious slider joy.
FAQs about Ultimate Loaded Bacon Cheeseburger Sliders
Can I make these sliders ahead of time?
Yes! You can assemble them a few hours before baking. Just cover tightly and refrigerate. Bake when ready to serve for best freshness.
What’s the best way to keep sliders from getting soggy?
To prevent sogginess, toast the buns with butter before assembling and avoid adding wet toppings until just before serving.
Can I use frozen ground beef for this recipe?
It’s best to use fresh or fully thawed ground beef. If using frozen, make sure it’s completely thawed and drained to avoid excess moisture.
What’s a good dipping sauce for these sliders?
A simple ketchup-mayo mix, ranch dressing, or a smoky BBQ sauce pairs excellently with the sliders’ flavors.
How do I keep the cheese from sliding off the patties?
Adding cheese while the patties are still hot helps it melt and stick better. Covering the sliders during baking encourages even melting too.
For more easy, crowd-friendly recipes that bring comfort and flavor, you might enjoy my Creamy Hamburger Helper Copycat or the Cozy Cheeseburger Casserole, which take classic flavors in a different direction but are just as satisfying.
Pin This Recipe!
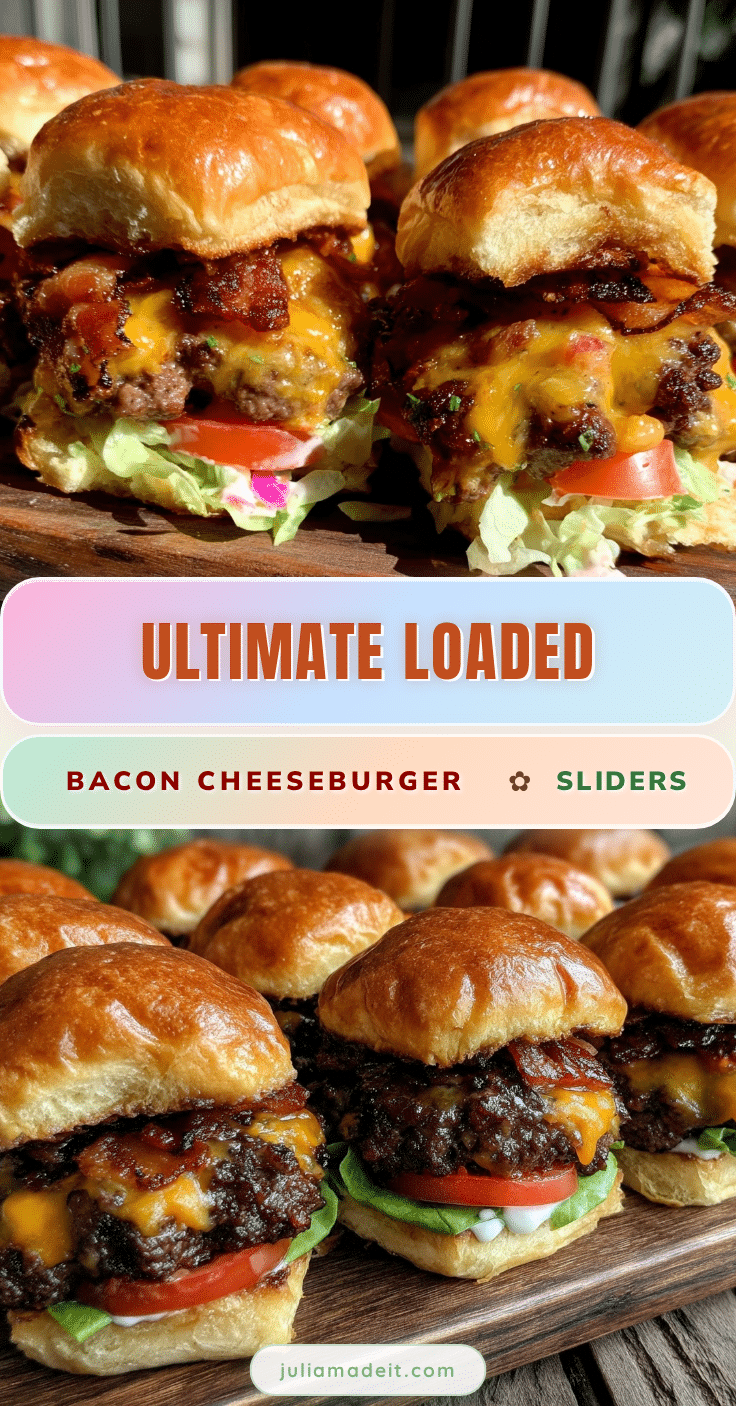
Ultimate Loaded Bacon Cheeseburger Sliders

These Ultimate Loaded Bacon Cheeseburger Sliders are a quick, easy, and crowd-pleasing snack perfect for parties or weeknight meals, featuring juicy beef patties, crispy bacon, melted cheddar, and a tangy secret sauce.
- Prep Time: 15 minutes
- Cook Time: 30 minutes
- Total Time: 45 minutes
- Yield: 12 sliders 1x
- Category: Snack
- Cuisine: American
Ingredients
- 12 slider buns (preferably King’s Hawaiian)
- 1.5 pounds (680 grams) 80/20 ground chuck
- 8 slices bacon, cooked crisp and chopped
- 12 slices sharp cheddar cheese
- 1 small yellow onion, finely chopped
- 24 dill pickle chips (2 per slider)
- ½ cup (120 ml) mayonnaise, preferably full-fat
- 2 tablespoons ketchup
- 1 tablespoon yellow mustard
- 1 teaspoon Worcestershire sauce
- Salt and pepper to taste
- 3 tablespoons butter, melted
Instructions
- Preheat your oven to 350°F (175°C).
- Cook the bacon in a skillet over medium heat until crisp, about 8 minutes. Transfer to paper towels and chop into bite-sized pieces. Save a little bacon fat if desired.
- In a large bowl, combine ground beef with Worcestershire sauce, salt, and pepper. Mix gently to combine.
- Divide the beef into 12 equal portions (about 2 ounces or 57 grams each) and shape into thin, round patties slightly larger than the slider buns.
- Heat a skillet over medium-high heat and cook patties 2-3 minutes per side until browned but still juicy. (Optional: skip this step and bake directly.)
- In a small bowl, mix mayonnaise, ketchup, and yellow mustard to make the sauce.
- Slice slider buns in half horizontally and brush cut sides with melted butter.
- In a 9×13-inch baking dish, place bottom halves of buns. Spread a thin layer of sauce on each, then add a slice of cheddar cheese, a cooked beef patty, chopped bacon, chopped onions, and 2 dill pickle slices.
- Top each slider with the bun tops and brush lightly with melted butter.
- Cover the baking dish tightly with aluminum foil and bake for 15 minutes. Remove foil and bake an additional 5 minutes to toast buns and melt cheese.
- Let sliders rest for a couple of minutes before serving.
Notes
Do not overwork the beef to keep patties tender. Use 80/20 ground beef for juiciness. Cook bacon until crisp for texture. Toast buns with butter for a golden crunch. Cover sliders while baking to melt cheese without drying. Browning patties before baking adds flavor but can be skipped. For less mess, let sliders rest before serving. Variations include vegetarian patties, turkey bacon, gluten-free buns, and spicy additions like jalapeños or chipotle mayo.
Nutrition
- Serving Size: 1 slider
- Calories: 220
- Sugar: 2
- Sodium: 450
- Fat: 15
- Saturated Fat: 6
- Carbohydrates: 10
- Fiber: 1
- Protein: 14
Keywords: bacon cheeseburger sliders, party snack, easy sliders, loaded sliders, bacon cheeseburger recipe, finger food, quick meal