“Are you sure these cake pops are supposed to look this bright?” my friend whispered as she eyed the bowl filled with neon blue and red cake crumbs. Honestly, I was just as skeptical at first. I’d never really thought about making cake pops in vibrant school colors before, but with a last-minute request for a spirited celebration, I had to think fast. What started as a rushed experiment turned into a colorful, bite-sized hit that had everyone asking for the recipe.
Late one evening, while prepping for a school spirit party, I found myself juggling between a mountain of other tasks and a stubbornly dry cake. Rather than toss it, I crumbled the cake and mixed it with frosting, thinking, “Why not roll these into fun pops and cover them in the school’s colors?” The vibrant hues brought such a joyful energy that even the kids were drawn to them before I could finish decorating.
That night, I realized these cake pops aren’t just about looks—they’re about bringing a little extra cheer to any celebration. Whether you’re a seasoned baker or just someone who wants to impress without the fuss, these vibrant school colors cake pops are surprisingly easy and endlessly fun. They’ve stuck around my kitchen routine for parties, game days, and even casual weekend treats because, honestly, who doesn’t love a pop of color with their dessert?
It’s one of those recipes that feels like a secret weapon for fun, simple celebrations that bring people together without stress. And if you keep reading, I’ll share all the little tricks that make these cake pops as delicious as they are eye-catching—promise you’ll want to keep this one in your back pocket.
Why You’ll Love This Recipe
Having tested this recipe over several school events and casual parties, I can say with confidence these vibrant school colors cake pops are a winner for many reasons. Here’s why they quickly became a favorite in my kitchen:
- Quick & Easy: You can whip these up in under an hour, making them perfect when you need a last-minute festive treat.
- Simple Ingredients: No need for weird specialty items—just cake, frosting, candy melts, and some food coloring or ready-made colored melts.
- Perfect for Celebrations: From school spirit rallies to birthday parties and even casual get-togethers, these pops add a fun, colorful touch.
- Crowd-Pleaser: Kids and adults alike can’t resist these bite-sized treats. They’re easy to eat and look so inviting on a platter.
- Unbelievably Delicious: The combination of moist cake crumbs and creamy frosting gives a rich, melt-in-your-mouth texture that’s pure comfort food.
What really sets this recipe apart is the technique I use to get the cake pop mixture just right—not too dry, not too sticky—which helps them hold their shape perfectly. Plus, I’ll share a decorating tip that gives the candy coating a smooth, glossy finish that’s so satisfying to bite into.
Honestly, this recipe feels like a little celebration in itself every time I make it. There’s something about those bright school colors that instantly lifts the mood and makes the whole room smile. And if you’ve ever struggled with getting cake pops to look just right, this recipe will bring you some relief.
What Ingredients You Will Need
This recipe uses simple, wholesome ingredients that come together to deliver bold flavor and vibrant color without any fuss. Most of these items are pantry staples or easy to find in stores, and I’ll note some substitutions to keep things flexible.
- Cake: One 9-inch round cake, baked and cooled (homemade or store-bought, any flavor you like—chocolate or vanilla work best)
- Frosting: About 1/2 cup (120g) of your favorite frosting (buttercream or cream cheese frosting both work beautifully)
- Candy Melts: 12 oz (340g) of candy melts in your school colors (I usually pick Wilton brand for reliable melting and vibrant shades)
- Food Coloring: Gel or paste food coloring to enhance candy melts if needed (gel works best to avoid thinning the melts)
- Lollipop Sticks: 50 sticks, sturdy and about 4.5 inches long
- Sprinkles or Edible Glitter: Optional for extra flair (pick colors that match or complement your school colors)
- Wax Paper or Parchment Paper: For drying the pops
- Optional Flavor Add-ins: A splash of vanilla extract or almond extract in the frosting for extra depth
If you’re aiming for gluten-free, you can swap the cake for a gluten-free box mix or homemade recipe. For a dairy-free version, use a dairy-free frosting and candy melts certified vegan. When using food coloring, I recommend gel-based brands like AmeriColor for bright, consistent hues without affecting the texture.
In summer, I’ve even swapped in fresh berry-flavored cake or added freeze-dried berry powder into the frosting for a seasonal twist. The key is to keep the cake moist but not overly crumbly, so the pops hold up well.
Equipment Needed
- Mixing Bowls: One large bowl to crumble the cake and another for melting the candy melts.
- Electric Mixer or Stand Mixer: Helpful for mixing the frosting and cake crumbs together evenly. Hand mixing works but takes more arm power.
- Baking Sheet: To place the cake pops on while they set.
- Styrofoam Block or Cake Pop Stand: Useful for standing the pops upright to dry without smudging the coating.
- Microwave-Safe Bowl: For melting candy melts in short bursts.
If you don’t have a cake pop stand, a block of floral foam wrapped in foil works just fine. I’ve also used a simple glass with holes poked in cling wrap stretched over the rim for a budget-friendly option. When melting candy melts, patience is key—heat in 20-second bursts and stir to avoid overheating and clumping.
For cleanup, a silicone spatula and a sharp knife for trimming any uneven cake edges come in handy. Over the years, I’ve learned that investing in a good thermometer helps with candy melts too—but it’s not essential.
Preparation Method
- Bake or prepare your cake: Use your favorite recipe or a boxed mix. Once cooled completely, crumble the cake into fine crumbs using your hands or a fork—aim for no big lumps. (This should take about 10 minutes.)
- Mix the cake crumbs and frosting: Add 1/4 cup (60g) of frosting at a time and gently mix until the mixture holds together when pressed but isn’t too sticky. You might need a bit more or less depending on your cake’s moisture. (This step takes roughly 5 minutes.)
- Shape the cake pops: Roll the mixture into 1.5-inch (4 cm) balls. Place them on a lined baking sheet. Chill in the fridge for at least 30 minutes to firm up—this helps prevent cracking when dipped.
- Melt the candy melts: Place candy melts in a microwave-safe bowl. Heat in 20-second intervals, stirring well between each, until smooth. Add gel food coloring if you want to intensify the color. Be careful not to overheat; the melts should be fluid but not watery.
- Attach the sticks: Dip the tip of each lollipop stick into the melted candy and insert it halfway into each cake ball. This “glue” step helps secure the stick. Return the pops to the fridge for 10 minutes to set.
- Dip the cake pops: Holding the stick, dip each cake pop into the melted candy, covering completely. Gently tap off excess coating while spinning the pop for an even layer. (This can take some practice to get smooth.)
- Decorate: Before the coating sets, sprinkle with matching edible glitter or sprinkles for extra fun. Stand the pops upright in a Styrofoam block to dry fully (about 15-20 minutes).
- Store or serve: Once dry, serve immediately or keep in an airtight container at room temperature for a day or two. For longer storage, refrigerate but bring to room temperature before serving.
Pro tip: If you notice cracking or the coating is too thick, warm the candy melts slightly and dip again for a smoother finish. Also, keep your hands dry to avoid melting the coating as you handle the pops.
Cooking Tips & Techniques
Making cake pops is as much about technique as it is about ingredients. One lesson I learned the hard way was the importance of the right cake-to-frosting ratio. Too much frosting and the pops get mushy; too little and they crumble apart. Gently mixing in small increments helps find that sweet spot.
Another tip is chilling the cake balls before dipping. I can’t stress this enough. Skipping this step often leads to cracked or misshapen pops. It’s worth the wait for a neat, professional look.
When melting candy melts, avoid overheating by using short bursts in the microwave or melting over a double boiler. Overheated melts become thick and grainy, making dipping frustrating. Also, stirring frequently keeps the temperature even.
For even coatings, hold the cake pop vertically while dipping and use a gentle spinning motion to remove excess candy. This prevents clumps and drips that can ruin the appearance.
Lastly, if you find it tricky to insert the sticks, try freezing the cake balls briefly before dipping. That extra firmness makes handling easier and helps the stick stay put.
Variations & Adaptations
These cake pops are a perfect canvas for creativity. Here are some ways to switch things up:
- Flavor Variations: Swap out the cake flavor for red velvet, lemon, or carrot cake to match your celebration’s vibe.
- Dietary Adaptations: Use gluten-free cake and dairy-free frosting for allergy-friendly options.
- Seasonal Twists: Incorporate seasonal spices like cinnamon or pumpkin pie spice in the cake crumbs for fall-themed pops.
- Decorative Flair: Try drizzling contrasting candy melts over the dried pops for a fun pattern or add edible gold dust for a touch of glam.
- Alternative Coating: Use melted chocolate instead of candy melts for a richer taste, though it may be less colorful.
Personally, I once made a batch using a moist chocolate cake with a peanut butter frosting base, then dipped them in bright gold and navy candy melts for a school sports banquet. It was a hit and showed how flexible this recipe can be.
Serving & Storage Suggestions
Serve these vibrant school colors cake pops at room temperature for the best flavor and texture. They look delightful arranged on a themed platter or even stuck in a decorated foam block as a centerpiece. Pair them with drinks like a creamy vanilla cold brew coffee to balance the sweetness, much like my favorite homemade cold brew recipe.
To store, keep the cake pops in an airtight container at room temperature for up to 2 days. Refrigeration is possible but the candy coating may become slightly sticky—bring them back to room temp before serving. For longer storage, freeze them individually wrapped in plastic wrap and place in a sealed container. Thaw in the fridge overnight.
Flavors tend to meld nicely after a day, so if you have time, make them a day ahead for an even tastier treat. Just be sure to keep them away from humidity to keep the coating crisp.
Nutritional Information & Benefits
Each cake pop contains approximately 150-180 calories depending on the cake and frosting used. They’re a treat best enjoyed in moderation but offer a delightful boost of energy for busy celebrations.
Using homemade frosting allows control over sugar content and fat quality. Choosing a cake with whole ingredients or reduced sugar can make these pops a bit more wholesome. Plus, the portion-controlled size helps prevent overindulgence compared to a slice of cake.
For those mindful of allergens, this recipe can be adapted to be gluten-free, dairy-free, or nut-free with simple ingredient swaps. It’s a fun way to bring everyone together while respecting dietary needs.
Conclusion
These vibrant school colors cake pops are more than just festive treats—they’re little bites of joy that brighten up any celebration with minimal effort. Whether you’re rallying school spirit, throwing a themed party, or simply craving a colorful dessert, this recipe gives you a fun and easy way to impress.
Feel free to make these your own by tweaking flavors, colors, or decorations. I love how adaptable they are and how they bring smiles every time I serve them. Plus, they’re a great project to share with kids or friends who want to get hands-on.
If you try this recipe, I’d love to hear how it went or see your creative twists! Sharing those moments makes this whole baking adventure even sweeter. So, ready to bring some color and fun to your next celebration? Go for it—you’ll be glad you did.
FAQs
- Can I use leftover cake to make these cake pops? Absolutely! This recipe is perfect for using up leftover or day-old cake as long as it’s not too dry.
- How do I prevent the cake pops from falling off the sticks? Dip the stick tip in melted candy before inserting and chill the pops to set the “glue” before fully dipping.
- Can I make cake pops ahead of time? Yes, you can make and store them in an airtight container at room temperature for a couple of days or freeze them for longer storage.
- What if I don’t have candy melts in my school colors? You can dye white candy melts with gel food coloring or use regular chocolate and decorate with matching sprinkles.
- How do I get a smooth candy coating on the cake pops? Use slightly warm candy melts, dip vertically, and tap off excess while gently spinning the pop to avoid drips and clumps.
Pin This Recipe!
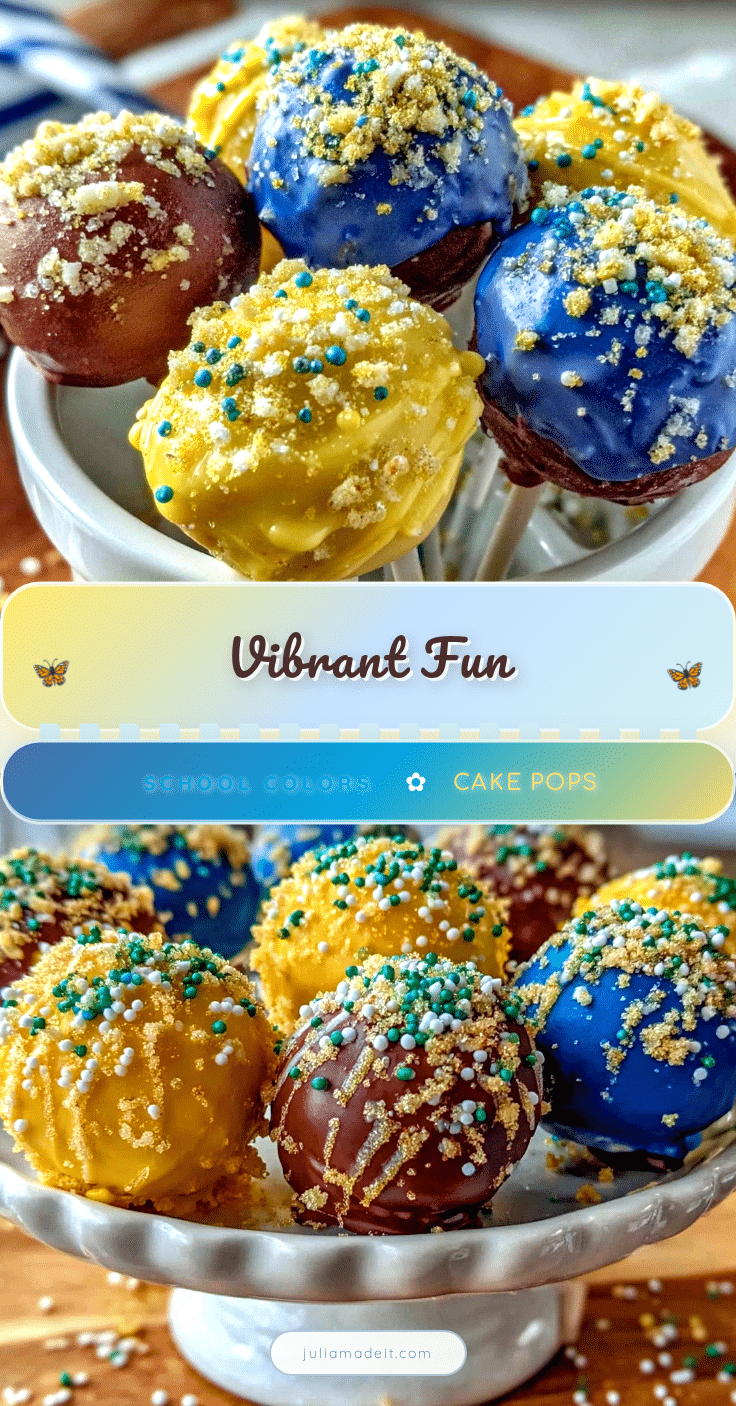
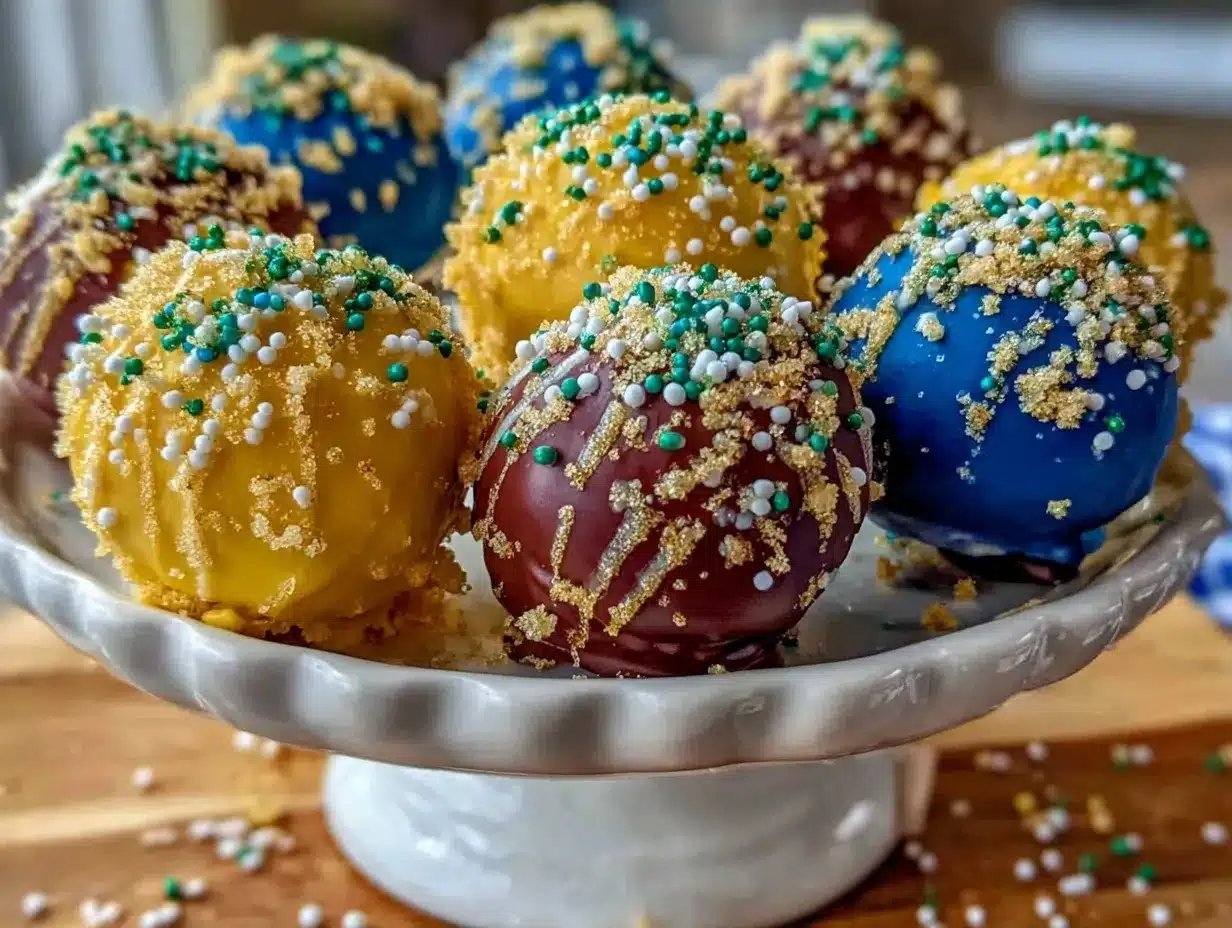
Vibrant School Colors Cake Pops

These vibrant school colors cake pops are easy, fun, and perfect for celebrations, combining moist cake crumbs with creamy frosting and colorful candy melts for a festive treat.
- Prep Time: 15 minutes
- Cook Time: 30 minutes
- Total Time: 45 minutes
- Yield: 50 cake pops 1x
- Category: Dessert
- Cuisine: American
Ingredients
- One 9-inch round cake, baked and cooled (homemade or store-bought, chocolate or vanilla recommended)
- About 1/2 cup (120g) of your favorite frosting (buttercream or cream cheese frosting)
- 12 oz (340g) of candy melts in your school colors
- Gel or paste food coloring to enhance candy melts if needed
- 50 lollipop sticks, sturdy and about 4.5 inches long
- Sprinkles or edible glitter (optional)
- Wax paper or parchment paper for drying the pops
- Optional: A splash of vanilla extract or almond extract in the frosting
Instructions
- Bake or prepare your cake using your favorite recipe or boxed mix. Once cooled completely, crumble the cake into fine crumbs using your hands or a fork, aiming for no big lumps (about 10 minutes).
- Mix the cake crumbs and frosting by adding 1/4 cup (60g) of frosting at a time and gently mixing until the mixture holds together when pressed but isn’t too sticky (about 5 minutes).
- Roll the mixture into 1.5-inch (4 cm) balls. Place them on a lined baking sheet and chill in the fridge for at least 30 minutes to firm up.
- Melt the candy melts in a microwave-safe bowl in 20-second intervals, stirring well between each, until smooth. Add gel food coloring if desired to intensify color.
- Dip the tip of each lollipop stick into the melted candy and insert it halfway into each cake ball. Return the pops to the fridge for 10 minutes to set.
- Holding the stick, dip each cake pop into the melted candy, covering completely. Gently tap off excess coating while spinning the pop for an even layer.
- Before the coating sets, sprinkle with matching edible glitter or sprinkles. Stand the pops upright in a Styrofoam block to dry fully (about 15-20 minutes).
- Once dry, serve immediately or keep in an airtight container at room temperature for up to 2 days. For longer storage, refrigerate or freeze wrapped individually.
Notes
Use gel food coloring to avoid thinning candy melts. Chill cake balls before dipping to prevent cracking. Warm candy melts slightly if coating cracks or is too thick. Keep hands dry when handling pops to avoid melting coating. Freezing cake balls briefly before dipping can help with stick insertion.
Nutrition
- Serving Size: 1 cake pop
- Calories: 150180
- Sugar: 18
- Sodium: 90
- Fat: 7
- Saturated Fat: 4
- Carbohydrates: 24
- Fiber: 0.5
- Protein: 2
Keywords: cake pops, school colors, celebration treats, easy dessert, colorful cake pops, party snacks, candy melts