The loaf came out of the oven and I just stood there staring at it through the glass door. It was the most beautiful shade of deep amber I’d ever seen on a sourdough, with little cracks where the steam was escaping and that smell—oh, that smell filled the whole kitchen with something between toasted pumpkin seeds and warm butter. My husband walked in and said, “Wait, is that bread actually pumpkin-colored?” without knowing I’d been testing this recipe for three weeks straight.
Honestly, I wasn’t even trying to make a pumpkin bread at first. I had a jar of sourdough discard sitting in the fridge (you know how it goes—you feed your starter and suddenly you have a cup of discard staring at you with judgment), and a half-can of pumpkin puree left over from making pumpkin cream cheese muffins the day before. I thought, why not just throw them together and see what happens? Worst case, I’d have weirdly colored bread that the chickens would love.
But something clicked. The pumpkin added this gentle sweetness that played off the tang of the sourdough in a way I didn’t expect. And because it’s a small batch—just one loaf—there’s no pressure. You’re not committing to a week of pumpkin bread. You’re making exactly enough to enjoy for a couple of days, maybe with some butter melted into a warm slice on a chilly afternoon.
This isn’t one of those complicated sourdough projects that requires a kitchen scale and a proofing basket and a whole weekend. This is the kind of bread you can decide to make at 2 PM and have on your table by dinner. It’s forgiving, it’s cozy, and it tastes like fall without trying too hard. I’ve made it four times now, and every single loaf has disappeared faster than I expected. That’s the kind of recipe worth sharing.
Why You’ll Love This Recipe
Let me tell you why this small-batch pumpkin sourdough discard bread has earned a permanent spot in my fall baking rotation. I’ve tested it enough times to know exactly what works and what doesn’t, so you don’t have to go through the trial and error yourself.
- Uses Up Sourdough Discard — If you maintain a sourdough starter, you know the struggle. This recipe turns that discard into something beautiful instead of throwing it away. It’s practically a win-win situation.
- Small Batch, Zero Waste — This makes one perfect loaf. Not three. Not a mountain of bread you’ll freeze and forget about. Just one cozy loaf that fits your life right now.
- No Complicated Techniques — You don’t need a Dutch oven, a banneton basket, or a lame for scoring. I’ve made this with a regular loaf pan and a kitchen towel, and it turns out gorgeous every time.
- Perfectly Balanced Flavor — The pumpkin adds moisture and a subtle sweetness that mellows out the sourdough tang. It’s not aggressively pumpkiny—it’s just right. Like a warm hug in bread form.
- Quick Enough for a Weekday — From mixing to slicing, this comes together in about 4-5 hours with mostly inactive time. You can work from home, clean the kitchen, or binge an episode while it rises.
- Foolproof for Beginners — I’ve had friends who’ve never baked sourdough before try this and succeed on their first attempt. The pumpkin actually makes the dough more forgiving because it adds so much moisture.
This isn’t just another pumpkin bread recipe. It’s the one that makes you feel like a real baker without the stress. The kind of bread that makes you close your eyes after that first bite, butter dripping down your fingers, thinking I made this. And you did—easily.
What Ingredients You Will Need
This recipe uses simple, wholesome ingredients that you probably already have in your pantry. The magic happens when they come together, creating a loaf that’s tender, flavorful, and beautifully golden. Here’s everything you’ll need:
For the Bread Dough
- 1 cup (240g) sourdough discard — Unfed, straight from the fridge works perfectly. Active or inactive doesn’t matter here since we’re using baking powder as our main leavener. I’ve used discard that was a week old and it still turned out great.
- 1 cup (240g) pumpkin puree — Make sure it’s 100% pure pumpkin, not pumpkin pie filling. I prefer Libby’s for consistent results, but any brand works. If your pumpkin puree seems watery, blot it with a paper towel before using.
- 1 large egg — Room temperature is ideal. If you forgot to take it out ahead of time, place it in a bowl of warm water for 5 minutes.
- 1/4 cup (60ml) maple syrup — Pure maple syrup adds the best flavor. You can substitute honey or brown sugar dissolved in a tablespoon of water if needed.
- 2 tablespoons (28g) melted butter — Unsalted, cooled slightly. Coconut oil works great for a dairy-free version, though the flavor will be slightly different.
- 1 teaspoon vanilla extract — Pure vanilla makes a difference, but imitation works in a pinch.
- 1 1/2 cups (190g) all-purpose flour — Spoon and level your flour for accuracy. Too much flour makes dense bread. I’ve also tested this with half whole wheat pastry flour and it worked beautifully.
- 1 teaspoon baking powder — Make sure it’s fresh. Old baking powder won’t give you that nice rise.
- 1/2 teaspoon baking soda — This helps neutralize the acidity from the sourdough and pumpkin.
- 1/2 teaspoon salt — Fine sea salt or table salt. Don’t skip it—salt balances the sweetness and enhances the pumpkin flavor.
- 1 1/2 teaspoons pumpkin pie spice — Store-bought is fine, but I’ll share my homemade blend below. It’s worth making your own if you have the spices on hand.
For the Topping (Optional but Recommended)
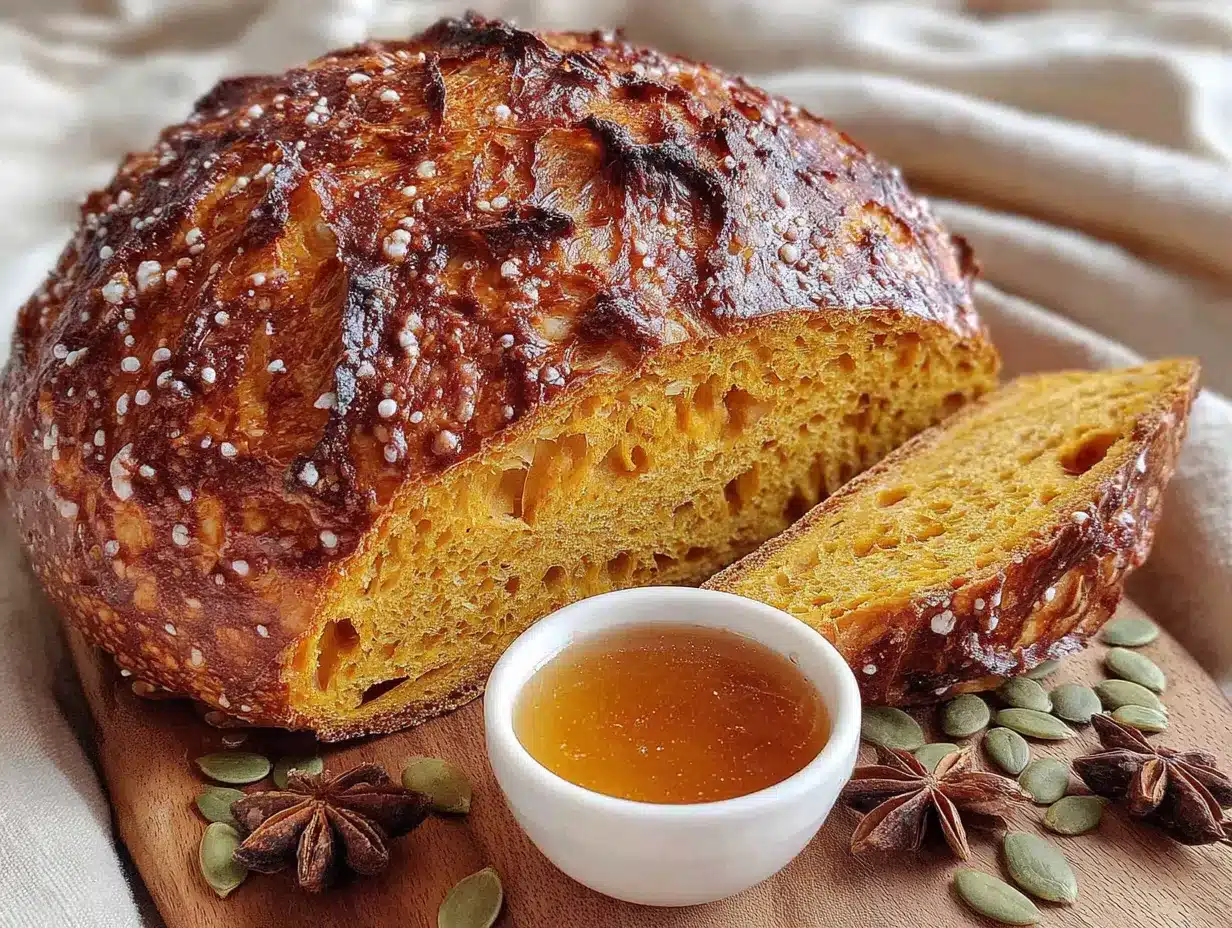
- 1 tablespoon pepitas (pumpkin seeds) — These add a lovely crunch and make the loaf look beautiful. I like to toast them lightly before sprinkling on top.
- 1 teaspoon turbinado sugar — That coarse sugar gives a sparkly, slightly crunchy crust. Regular granulated sugar works too, but turbinado is prettier.
Homemade Pumpkin Pie Spice Blend
If you want to make your own, mix together: 1/2 teaspoon cinnamon, 1/4 teaspoon ginger, 1/4 teaspoon nutmeg, 1/8 teaspoon cloves, and 1/8 teaspoon allspice. This makes exactly 1 1/2 teaspoons. I keep a small jar of this blend on my counter during fall and use it for everything from brown butter pumpkin chocolate chip cookies to my morning oatmeal.
Ingredient Tip: If your sourdough discard has been sitting in the fridge for more than two weeks without feeding, give it a quick stir and smell it before using. It should smell pleasantly sour, not funky or like nail polish remover. A little hooch on top is fine—just pour it off or stir it in.
Equipment Needed
You don’t need a fancy bakery setup for this recipe. Here’s what you’ll actually use:
- 9×5-inch loaf pan — A standard metal or glass loaf pan works great. If you’re using a dark non-stick pan, reduce the oven temperature by 25°F to prevent over-browning. Ceramic pans work too but may need a few extra minutes of baking time.
- Mixing bowls — One medium bowl for dry ingredients and one large bowl for wet ingredients. Nothing fancy needed.
- Whisk — For combining your dry ingredients evenly. A fork works in a pinch.
- Spatula — A rubber spatula is ideal for folding the batter together without overmixing. I love my GIR spatulas—they’re one piece and don’t trap bacteria.
- Parchment paper — Lining your loaf pan makes removal so much easier. You can also grease the pan generously with butter, but parchment is foolproof.
- Cooling rack — Essential for letting the bread cool evenly. If you don’t have one, you can use the inverted loaf pan to prop the bread up slightly.
- Kitchen scale (optional but helpful) — For measuring your sourdough discard accurately. I resisted getting one for years, and honestly, it makes baking so much more consistent.
Budget-Friendly Tip: If you don’t have a loaf pan, you can bake this in an 8×8-inch square pan and adjust the time to about 30-35 minutes. It won’t have the classic bread shape, but it’ll taste just as good.
Preparation Method
Alright, let’s get baking. This recipe comes together quickly, so have all your ingredients measured and ready before you start. Trust me on this one—it makes the whole process smoother.
Step 1: Preheat and Prep
Preheat your oven to 350°F (175°C). Line your 9×5-inch loaf pan with parchment paper, leaving some overhang on the long sides. This creates little handles that make lifting the bread out so much easier later. Lightly grease the parchment with butter or cooking spray.
Step 2: Mix the Dry Ingredients
In a medium bowl, whisk together the all-purpose flour, baking powder, baking soda, salt, and pumpkin pie spice. Whisk for about 15 seconds to make sure everything is evenly distributed. Set this bowl aside while you work on the wet ingredients.
Step 3: Combine the Wet Ingredients
In a large bowl, add your sourdough discard, pumpkin puree, egg, maple syrup, melted butter, and vanilla extract. Whisk everything together until it’s smooth and well combined. The mixture should be a beautiful orange color and smell amazing already. Don’t worry if there are a few small lumps of sourdough—they’ll work themselves out.
Sensory Cue: The wet mixture should look like a thick, smooth pumpkin soup. If your pumpkin puree was particularly watery, you might notice it’s a bit loose—that’s okay, the flour will absorb it.
Step 4: Combine Wet and Dry
Pour the dry ingredients into the wet ingredients. Using a rubber spatula, fold everything together gently. You want to mix just until you don’t see any more streaks of flour. A few lumps are totally fine—overmixing will make your bread tough and dense.
This is the most important step in the whole recipe. Stop mixing the second the flour disappears. I know it’s tempting to keep going, but trust me, a lumpy batter makes a tender loaf.
Step 5: Transfer to Pan
Scrape the batter into your prepared loaf pan. Use the spatula to spread it evenly, making sure it reaches the corners. Give the pan a gentle tap on the counter to release any air bubbles. The batter will be thick but spreadable—that’s exactly what you want.
Step 6: Add the Topping
Sprinkle the pepitas and turbinado sugar evenly over the top of the batter. Press them in very gently with your fingertips so they stick. This step is optional, but it adds such a lovely texture and visual appeal that I rarely skip it.
Step 7: Bake
Place the pan in the center of your preheated oven. Bake for 45-55 minutes, or until a toothpick inserted into the center comes out clean or with just a few moist crumbs. The top should be golden brown and spring back lightly when you press it.
Visual Cue: At around 30 minutes, check the top. If it’s browning too quickly, tent the pan loosely with aluminum foil for the remaining baking time. Every oven runs differently, so start checking at the 40-minute mark just to be safe.
Step 8: Cool
Let the bread cool in the pan for 10 minutes. Then, using the parchment handles, lift it out and transfer it to a cooling rack. Let it cool completely before slicing—about 1-2 hours. I know it’s hard to wait, but slicing warm bread will give you gummy, uneven pieces. Trust me, I’ve made that mistake more times than I’d like to admit.
Time Estimate: Total active time is about 15 minutes. Total time from start to slicing is about 4-5 hours including cooling. Most of that is hands-off.
Cooking Tips & Techniques
After testing this recipe multiple times and making every mistake in the book, I’ve gathered some tips that will help you nail it on your first try.
Don’t Overmix the Batter — This is the number one mistake I see people make with quick breads. The more you mix, the more gluten develops, and the tougher your bread gets. Mix until just combined, even if there are a few small lumps. Your bread will be tender and soft instead of dense and chewy.
Room Temperature Ingredients Matter — I know it seems fussy, but room temperature egg and melted butter that’s cooled slightly make a real difference. Cold ingredients don’t emulsify as well, which can lead to a greasy or uneven texture. If you’re in a rush, warm your egg in a bowl of warm water for 5 minutes.
Check Your Baking Powder — This is the main leavener in the recipe since we’re using sourdough discard that might not be active. To test if your baking powder is still good, drop a teaspoon into hot water. If it bubbles vigorously, you’re good to go. If it fizzles weakly or not at all, toss it and buy fresh.
Rotate the Pan Halfway Through — About 25 minutes into baking, rotate the pan 180 degrees. This helps the bread bake evenly, especially if your oven has hot spots. I learned this the hard way after many lopsided loaves.
Let It Cool Completely — I cannot stress this enough. If you slice into this bread while it’s still warm, the interior will be gummy and it’ll fall apart. The bread continues to set as it cools, and the flavors develop beautifully overnight. If you can wait until the next day, you’ll be rewarded with the best texture.
My Biggest Failure: The first time I made this, I was so excited that I pulled it out of the oven after only 35 minutes because it looked done on top. It was raw in the middle. I tried to salvage it by putting it back in, but it was too late. Now I always use a toothpick test and trust the timer, not just the look of the crust.
Variations & Adaptations
One of the best things about this recipe is how flexible it is. Here are some ways to make it your own:
Gluten-Free Version
Substitute the all-purpose flour with a 1:1 gluten-free baking flour blend that contains xanthan gum. I’ve tested this with Bob’s Red Mill 1:1 and it worked beautifully. The texture is slightly more crumbly, but the flavor is spot on. Add an extra tablespoon of pumpkin puree to help with moisture.
Dairy-Free Version
Use melted coconut oil or a neutral vegetable oil instead of butter. For the topping, skip the butter wash (if you use one) and just sprinkle the pepitas and sugar directly on the batter. The bread will be just as moist and delicious.
Add-In Variations
- Chocolate Chip Pumpkin — Fold in 1/2 cup of dark chocolate chips with the dry ingredients. The chocolate pairs beautifully with the pumpkin and spice.
- Nutty Pumpkin — Add 1/2 cup of toasted chopped walnuts or pecans. Toast them first in a dry pan for 3-4 minutes until fragrant—it makes a huge difference in flavor.
- Dried Fruit — Fold in 1/3 cup of dried cranberries or chopped dried apricots for little bursts of sweetness.
Spice It Up
If you want a more intense pumpkin flavor, add an extra 1/2 teaspoon of pumpkin pie spice. For a savory-sweet twist, try adding 1/4 teaspoon of black pepper or a pinch of cayenne. It sounds weird, but it really brings out the warmth of the spices.
Mini Loaves or Muffins
Divide the batter into 3 mini loaf pans or 12 muffin cups. Bake mini loaves for 25-30 minutes and muffins for 18-22 minutes. Check for doneness with a toothpick. This is perfect for gifting or freezing individual portions.
I personally love the chocolate chip version. I made it for a friend’s fall brunch and someone asked if they could take the rest home. That’s always a good sign.
Serving & Storage Suggestions
This bread is wonderful in so many ways. Here’s how to enjoy it at its best:
Serving Temperature: I love this bread at room temperature, but it’s also incredible lightly toasted. Pop a slice in the toaster or toast it in a dry skillet for 2 minutes per side. Spread with salted butter, cream cheese, or a drizzle of honey. For an extra treat, try it with apple butter or pumpkin butter.
What to Serve With It: This bread is perfect alongside a hot cup of coffee or chai tea in the morning. It also makes a lovely addition to a fall brunch spread with creamy tomato basil bisque for a cozy lunch. For dessert, serve it warm with a scoop of vanilla ice cream and a drizzle of caramel sauce.
Storage Instructions: Store the bread wrapped tightly in plastic wrap or in an airtight container at room temperature for up to 3 days. The pumpkin keeps it moist, so it stays fresh longer than regular quick breads. If your kitchen is very warm, you can refrigerate it, but bring slices to room temperature before serving for the best texture.
Freezing Instructions: This bread freezes beautifully. Wrap the completely cooled loaf (or individual slices) tightly in plastic wrap, then in aluminum foil. Freeze for up to 3 months. To thaw, leave it at room temperature for a few hours or pop a frozen slice in the toaster directly from the freezer.
Flavor Development: Honestly, this bread tastes even better on day two. The spices meld together and the pumpkin flavor becomes more pronounced. If you can resist eating it all on day one, you’ll be rewarded with an even more delicious loaf the next day.
Nutritional Information & Benefits
Here’s the approximate nutritional breakdown for one slice (based on 10 slices per loaf):
| Nutrient | Amount per Slice |
|---|---|
| Calories | 185 |
| Total Fat | 5g |
| Saturated Fat | 3g |
| Cholesterol | 25mg |
| Sodium | 210mg |
| Total Carbohydrates | 32g |
| Dietary Fiber | 2g |
| Sugars | 9g |
| Protein | 4g |
Health Benefits: Pumpkin is packed with vitamin A (beta-carotene), which supports eye health and immune function. It’s also a good source of fiber, which helps with digestion and keeps you feeling full longer. The sourdough fermentation process can make bread easier to digest for some people, and the maple syrup is a more natural sweetener than refined sugar.
Dietary Considerations: This recipe can easily be made dairy-free and gluten-free with the substitutions mentioned above. It’s vegetarian as written. If you’re watching your sugar intake, you can reduce the maple syrup to 3 tablespoons and add an extra tablespoon of pumpkin puree to maintain moisture.
I love that this bread feels like a treat but isn’t loaded with sugar or processed ingredients. It’s the kind of thing I feel good about eating for breakfast or packing in a lunchbox.
Conclusion
This cozy small-batch pumpkin sourdough discard bread has become my go-to fall recipe for so many reasons. It uses up ingredients I already have, comes together with minimal effort, and fills my kitchen with the most incredible smell. Every time I make it, I’m reminded that baking doesn’t have to be complicated to be special.
Whether you’re a seasoned sourdough baker or someone who’s never worked with discard before, this recipe is for you. It’s forgiving, it’s flexible, and it delivers every single time. The pumpkin keeps it moist, the spices make it taste like autumn, and the sourdough gives it that little tang that keeps you coming back for another slice.
I’d love to hear how yours turns out. Did you add chocolate chips? Try it with pecans? Slather it with butter and eat it while it’s still warm? Drop a comment below and let me know—I read every single one and I love seeing your creations. And if you’re looking for more cozy fall baking, don’t miss my apple cider donut bundt cake with maple glaze—it’s another small-batch winner that’s perfect for this time of year.
Happy baking, friends. Here’s to warm slices, full bellies, and the simple joy of homemade bread.
Frequently Asked Questions
Can I use active sourdough starter instead of discard?
Absolutely. If you have active, bubbly starter, you can use it in place of discard. The bread will have a slightly lighter texture and a more pronounced sour flavor. Just know that the baking powder is still doing most of the leavening work, so don’t expect the same rise you’d get from a traditional sourdough loaf.
Why did my bread sink in the middle?
This usually happens for one of three reasons: the batter was overmixed, the oven temperature was too low, or the bread was underbaked. Next time, mix just until combined, check your oven temperature with an oven thermometer, and make sure a toothpick comes out clean before pulling it from the oven.
Can I make this without a loaf pan?
Yes! You can bake this batter in an 8×8-inch square pan for about 30-35 minutes, or divide it into a muffin tin for pumpkin sourdough discard muffins (bake for 18-22 minutes). Just keep an eye on the baking time since different pans conduct heat differently.
How do I know when the bread is done baking?
Use the toothpick test—insert a toothpick or skewer into the center of the loaf. If it comes out clean or with just a few moist crumbs, it’s done. You can also check the internal temperature with a thermometer; it should read around 200°F (93°C) in the center.
Can I double this recipe?
Absolutely. Double all the ingredients and bake in two loaf pans, or use a larger 10-inch bundt pan (bake for 50-60 minutes). Just don’t try to bake it all in one loaf pan—the batter will overflow and you’ll end up with a mess in your oven. Speaking from experience here.
Pin This Recipe!
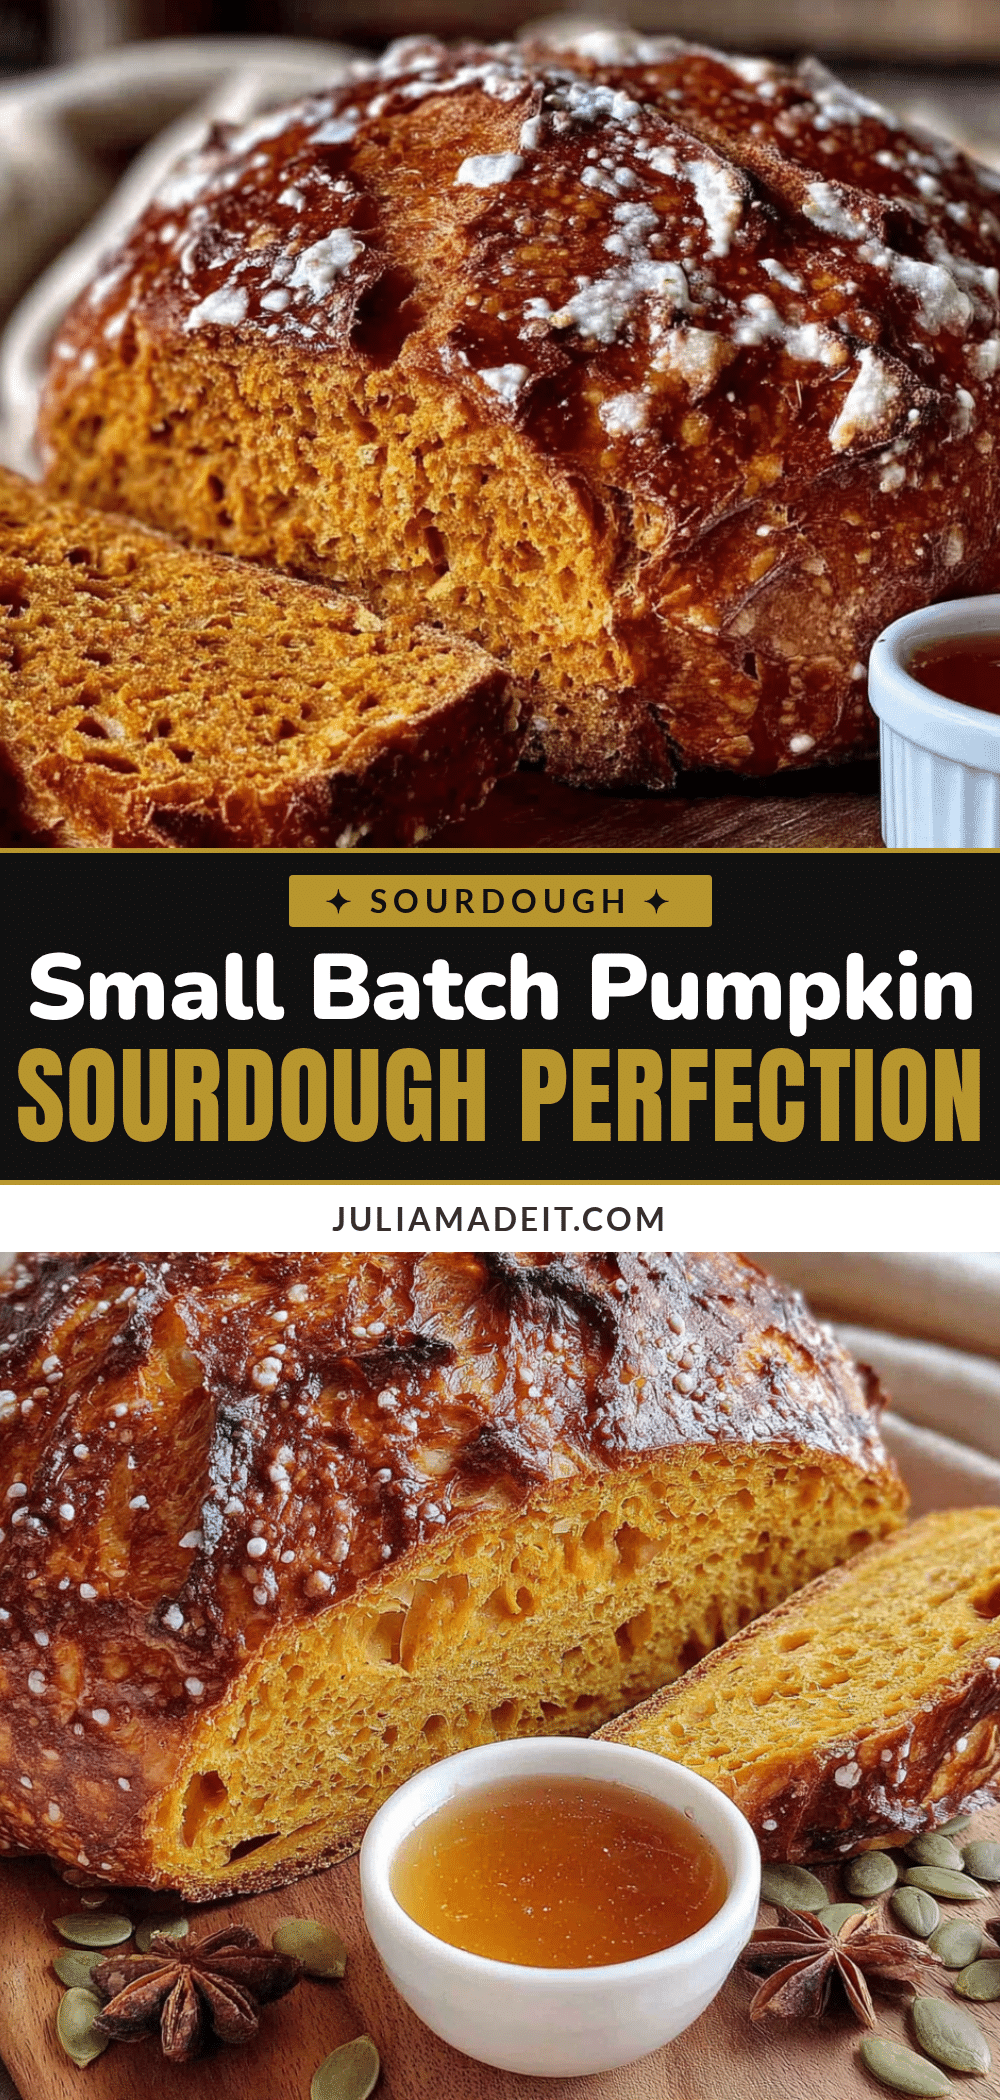
Cozy Small-Batch Pumpkin Sourdough Discard Bread
This small-batch pumpkin sourdough discard bread is a forgiving, cozy fall recipe that uses up sourdough discard and pumpkin puree. It’s quick enough for a weekday, requires no complicated techniques, and delivers a perfectly balanced flavor with a tender crumb.
- Prep Time: 15 minutes
- Cook Time: 50 minutes
- Total Time: 4-5 hours (including cooling)
- Yield: 10 servings 1x
- Category: Bread
- Cuisine: American
Ingredients
- 1 cup (240g) sourdough discard
- 1 cup (240g) pumpkin puree
- 1 large egg, room temperature
- 1/4 cup (60ml) maple syrup
- 2 tablespoons (28g) unsalted butter, melted and cooled
- 1 teaspoon vanilla extract
- 1 1/2 cups (190g) all-purpose flour
- 1 teaspoon baking powder
- 1/2 teaspoon baking soda
- 1/2 teaspoon salt
- 1 1/2 teaspoons pumpkin pie spice
- 1 tablespoon pepitas (pumpkin seeds) for topping
- 1 teaspoon turbinado sugar for topping
Instructions
- Preheat oven to 350°F (175°C). Line a 9×5-inch loaf pan with parchment paper, leaving overhang on the long sides. Lightly grease the parchment.
- In a medium bowl, whisk together flour, baking powder, baking soda, salt, and pumpkin pie spice.
- In a large bowl, whisk together sourdough discard, pumpkin puree, egg, maple syrup, melted butter, and vanilla extract until smooth.
- Pour dry ingredients into wet ingredients. Fold with a rubber spatula until just combined (a few lumps are fine). Do not overmix.
- Scrape batter into prepared loaf pan and spread evenly. Tap pan gently on counter to release air bubbles.
- Sprinkle pepitas and turbinado sugar evenly over top; press in gently.
- Bake for 45-55 minutes, until a toothpick inserted in center comes out clean or with a few moist crumbs. If browning too quickly, tent with foil at 30 minutes.
- Cool in pan for 10 minutes, then lift out using parchment handles and transfer to a wire rack. Cool completely before slicing (about 1-2 hours).
Notes
Don’t overmix the batter; mix until just combined. Room temperature ingredients help with emulsification. Check baking powder freshness by testing in hot water. Rotate pan halfway through baking. Let bread cool completely before slicing to avoid gummy texture. Bread tastes even better on day two.
Nutrition
- Serving Size: 1 slice
- Calories: 185
- Sugar: 9
- Sodium: 210
- Fat: 5
- Saturated Fat: 3
- Carbohydrates: 32
- Fiber: 2
- Protein: 4
Keywords: pumpkin sourdough discard bread, small batch sourdough, pumpkin bread, sourdough discard recipe, fall baking, easy sourdough bread