I did not trust store-bought pie crust in a hand pie. Honestly, I thought the whole concept was a shortcut destined for sogginess—a sad, leaky pocket of filling that would fall apart before you even got to take a picture for Instagram. My friend Sarah, who is usually a from-scratch purist like me, swore by these for her annual Halloween party. “Just try them,” she said, handing me a warm, bandaged-looking pastry wrapped in a napkin. I took a bite, fully prepared to be polite. The crust shattered. It was buttery and flaky, not tough or greasy. The filling inside—a simple mix of spiced pumpkin and cream cheese—was warm and didn’t soak through. I actually stopped mid-conversation to look at the thing. It was a mummy. A delicious, non-soggy, perfectly portable mummy. And I had to admit, the shortcut worked. These Spooky Mummy Hand Pies for Halloween became my new party trick, and I haven’t looked back since.
What I love most about this recipe is how it manages to be both ridiculously cute and genuinely satisfying. You get all the cozy, spiced flavors of a classic fall pie, but in a handheld format that won’t require a plate and fork. Plus, the “mummy” look is deceptively simple to achieve—you just wrap strips of dough around a filling dollop, leaving a little gap for the “eyes.” It’s the kind of project that gets kids involved without causing a flour explosion in your kitchen. And let’s face it, during the chaos of Halloween week, we could all use a recipe that looks like it took hours but actually came together in about 30 minutes of active work.
These little pies have become a staple for our family’s Halloween movie marathon. They’re the perfect treat to pass around while watching Hocus Pocus for the tenth time. They aren’t overly sweet, so they pair beautifully with a mug of hot apple cider. Honestly, if you’re looking for a Halloween treat that’s more “charming” than “challenging,” this is it. Trust me—if I can be converted, anyone can.
Why You’ll Love This Recipe
After making these for three Halloweens straight, I’ve perfected the method. Here is why this recipe earns a permanent spot in your holiday rotation:
- Quick & Easy: Using refrigerated pie crusts cuts the prep time down to about 15 minutes. From start to finish, you’re looking at under an hour, which is a lifesaver on a busy school night or before a party.
- Simple Ingredients: You likely have most of these in your pantry right now. No need to hunt down specialty baking items at the grocery store during the Halloween rush.
- Perfect for Parties: These are the ultimate Halloween party finger food. They are portable, not messy, and they look incredible on a platter next to a bowl of Easy Crispy Mummy Hot Dogs.
- Crowd-Pleaser: Kids go absolutely wild for the mummy design, and adults appreciate the sophisticated pumpkin flavor. I’ve never seen a single one left on the tray.
- Unbelievably Delicious: The combination of a spiced pumpkin cream cheese filling inside a flaky, buttery crust is next-level comfort food. It’s the perfect balance of creamy, crunchy, sweet, and savory.
What makes this recipe different from the rest is the technique. Instead of just slapping two pieces of dough together, we blind-bake the crust strips for a few minutes. This ensures the bottom stays crisp and the top gets that gorgeous golden-brown color without becoming soggy from the filling. It’s a tiny extra step that makes a world of difference. And that filling? It’s not just pumpkin puree. The cream cheese adds a tangy richness that cuts through the sweetness, making each bite feel balanced and intentional.
This isn’t just another Halloween dessert—it’s the one that makes you close your eyes after the first bite. It’s comfort food reimagined for a spooky occasion, and it delivers the same soul-soothing satisfaction as a slice of pie, without the stress of a lattice top.
What Ingredients You Will Need
This recipe uses simple, wholesome ingredients to deliver bold flavor and satisfying texture without the fuss. Most of these are pantry staples, especially during fall baking season.
For the Filling
- Pumpkin puree (½ cup): Make sure you grab 100% pure pumpkin puree, not pumpkin pie filling. The pie filling has added sugar and spices that will throw off the balance. I prefer Libby’s for its consistent texture.
- Cream cheese (4 oz), softened: This is the secret to the creamy, tangy filling. Let it sit on the counter for about 30 minutes before you start. Using it cold will result in lumps.
- Powdered sugar (¼ cup): It dissolves more easily than granulated sugar, giving you a silky smooth filling.
- Pumpkin pie spice (1 teaspoon): You can buy it pre-mixed or make your own with cinnamon, nutmeg, ginger, and cloves. I usually make a big batch at the start of fall.
- Vanilla extract (½ teaspoon): Pure vanilla is best, but imitation works fine here.
- Pinch of salt: Don’t skip this—it balances the sweetness and brightens the pumpkin flavor.
For the Crust & Assembly

- Refrigerated pie crusts (1 box, 2 crusts): I use Pillsbury, and I’ve never had a bad batch. Let them sit at room temperature for about 15 minutes so they’re easier to roll out.
- Egg wash (1 egg + 1 tablespoon water): This gives the pies that beautiful golden sheen. You could also use milk or cream in a pinch.
- Candy eyes (about 24): These are the edible sugar eyes you find in the baking aisle around Halloween. If you can’t find them, you can pipe a dot of white frosting and a smaller dot of black frosting.
Substitution Guidance
If you want to make these dairy-free, swap the cream cheese for a vegan version (I like Kite Hill) and use a plant-based pie crust. For a gluten-free option, look for a gluten-free pie crust mix or pre-made crust. The texture will be slightly different, but the flavor will still be fantastic. If you’re not a pumpkin fan (gasp!), you can swap in sweet potato puree or even apple butter for a different fall flavor.
Equipment Needed
You don’t need a ton of fancy tools for this recipe. Here’s what you’ll want on hand:
- Baking sheets (2): Line them with parchment paper or a silicone baking mat for easy cleanup. I’ve used both, and silicone mats give you a slightly crisper bottom.
- Pizza cutter or sharp knife: For cutting the dough into strips. A pizza cutter makes the job go faster and gives you cleaner edges.
- Small cookie scoop or spoon: For portioning the filling evenly. A #60 scoop (about 1 tablespoon) is perfect.
- Pastry brush: For applying the egg wash. A silicone brush is easier to clean than a natural bristle one.
- Rolling pin: Even if you’re using pre-made crusts, a light roll helps even out the thickness.
- Ruler (optional): If you want perfectly uniform strips, a ruler helps. But honestly, I just eyeball it now.
Preparation Method
- Preheat and prep. Preheat your oven to 375°F (190°C). Line two baking sheets with parchment paper or silicone mats. This is non-negotiable—the pies will stick without it.
- Make the filling. In a medium bowl, beat the softened cream cheese with a hand mixer until it’s smooth and fluffy, about 2 minutes. Add the pumpkin puree, powdered sugar, pumpkin pie spice, vanilla, and salt. Mix until everything is well combined and creamy. Taste it. You should get a nice balance of sweet, tangy, and spiced. If it seems too thick, add a tablespoon of milk. Set it aside.
- Prepare the crusts. Unroll the pie crusts onto a lightly floured surface. Use a rolling pin to gently roll them out to about 1/8-inch thickness. This helps even out any thick spots and makes the crust more tender. Using a pizza cutter or sharp knife, cut each crust into strips about 1 inch wide. You should get about 8-10 strips per crust.
- Blind-bake the strips (optional but recommended). Place half of the strips on one of the prepared baking sheets. Bake for 5 minutes. This gives them a head start on cooking, so they won’t get soggy when you add the filling. Let them cool for 2 minutes. I learned this trick after my first batch came out with sad, pale bottoms.
- Assemble the mummies. Take the par-baked strips and place them on your work surface. Spoon about 1 tablespoon of the pumpkin filling onto the center of each strip. Don’t overfill—you want about a 2-inch diameter dollop. Take a second strip (unbaked) and lay it across the filling, perpendicular to the first strip. Gently press the strips together at the top and bottom to seal the filling inside. Now, wrap the remaining unbaked strips around the filling, alternating directions, until the filling is mostly covered but you leave a small gap for the “eyes.” Think of it like wrapping a mummy—you want some bandages, not a solid shell.
- Transfer and brush. Carefully lift each assembled mummy hand pie onto your prepared baking sheets, spacing them about 2 inches apart. Brush the tops lightly with the egg wash. This is what gives them that gorgeous golden color. Don’t forget to brush the exposed filling too—it helps the eyes stick.
- Bake. Bake for 12-15 minutes, or until the crust is golden brown and the filling is set and slightly puffed. The edges should be crispy and flaky. Let them cool on the baking sheet for 5 minutes before transferring to a wire rack.
- Add the eyes. While the pies are still warm (but not hot), gently press the candy eyes into the exposed filling. If you wait until they’re completely cool, the eyes might not stick. If you don’t have candy eyes, pipe a small dot of white frosting and a smaller dot of black frosting on top.
Sensory Cue: When the pies are done, your kitchen will smell like a fall bakery. The crust should be a deep golden brown, and you should be able to see the filling gently bubbling through the gaps. The pies will feel firm to the touch, not squishy.
Cooking Tips & Techniques
After making these for a few years, I’ve collected a few hard-won lessons. Here are the tricks that make the difference between a good mummy and a great one:
- Don’t overwork the dough. Pie crust gets tough when you handle it too much. Keep your movements quick and gentle. If the dough gets sticky, dust it lightly with flour, but don’t knead it.
- Cold filling is your friend. If your filling is too warm, it will make the crust soggy. I like to pop the bowl of filling in the fridge for 10 minutes while I’m cutting the strips. It firms up and is easier to work with.
- Watch the edges. The thin strips of dough can burn quickly. If you notice the edges getting too dark before the center is cooked, tent the whole baking sheet loosely with foil for the last 3-4 minutes of baking.
- Seal, seal, seal. Make sure the strips are pressed together firmly where they meet. If there’s a gap, the filling will leak out during baking. I use my fingertips to pinch the dough together at the top and bottom of each mummy.
- Batch size matters. Don’t crowd the baking sheet. The pies need room for the hot air to circulate, or they’ll steam instead of bake. I do two batches if I’m making the full recipe.
One time, I got distracted and left the pies in the oven for an extra 3 minutes. The bottoms were a little dark, but the tops were still fine. If that happens to you, just scrape the dark bits off with a knife before serving. No one will know.
Variations & Adaptations
- Savory Mummies: Swap the pumpkin filling for a savory option like cream cheese mixed with chopped black olives, sun-dried tomatoes, and Italian seasoning. These are fantastic for a Halloween appetizer table.
- Apple Cinnamon Mummies: Replace the pumpkin puree with apple butter and add a pinch of cinnamon and nutmeg. Top with a drizzle of caramel sauce after baking. These taste like little handheld apple pies.
- Chocolate Pumpkin Mummies: Add 2 tablespoons of cocoa powder to the filling and reduce the powdered sugar by 1 tablespoon. The chocolate-pumpkin combo is unexpectedly amazing.
- Vegan Mummies: Use a vegan pie crust (like Wholly Wholesome) and a vegan cream cheese. The filling will be a bit softer, so freeze it for 15 minutes before assembling.
- Gluten-Free Mummies: Use a gluten-free pie crust mix and follow the package directions. The dough will be more fragile, so handle it gently.
I once tried a version with a Nutella filling, and while it was delicious, it was a mess to work with—the chocolate kept oozing out. Stick with the cream cheese base for the best results!
Serving & Storage Suggestions
These mummy hand pies are best served warm, right out of the oven. The contrast between the flaky, buttery crust and the creamy, spiced filling is absolutely perfect. I like to arrange them on a platter with a few extra candy eyes scattered around for a fun, spooky presentation.
For a complete Halloween spread, pair them with a bowl of Creamy 5-Ingredient Lazy Chicken Tortilla Soup for a savory-sweet combo, or serve them alongside a pitcher of Perfect Pastel Halloween Candy Bark for a full dessert table. They also go beautifully with a hot cup of apple cider or a pumpkin spice latte.
Storage: Store any leftover pies in an airtight container at room temperature for up to 2 days. The crust will soften slightly, but they’ll still be delicious. For longer storage, freeze them on a baking sheet until solid, then transfer to a freezer bag. They’ll keep for up to 2 months. To reheat, pop them in a 350°F oven for 5-7 minutes, or until warmed through. Avoid the microwave—it will make the crust soggy.
Flavor development: Interestingly, the filling flavors meld together even more after a day in the fridge. If you’re making these for a party, you can assemble them a day ahead and bake them fresh the day of. Just keep the unbaked pies in the fridge, covered with plastic wrap.
Nutritional Information & Benefits
Per serving (1 hand pie):
- Calories: 210
- Fat: 12g
- Carbohydrates: 24g
- Fiber: 1g
- Sugar: 10g
- Protein: 3g
While these are definitely a treat, they’re not totally devoid of redeeming qualities. Pumpkin is packed with vitamin A and fiber, and cream cheese provides a small amount of calcium and protein. Plus, by making them at home, you control exactly what goes in—no artificial preservatives or high-fructose corn syrup like you’d find in store-bought versions.
If you’re watching your sugar intake, you can reduce the powdered sugar to 2 tablespoons without sacrificing too much sweetness. And if you’re gluten-sensitive, the gluten-free variation is just as delicious. Just be mindful that the candy eyes contain sugar and food coloring, so they’re not exactly a health food!
Conclusion
These Spooky Mummy Hand Pies for Halloween are more than just a cute dessert—they’re a testament to the fact that you don’t need to be a professional baker to create something impressive. The recipe is forgiving, the ingredients are simple, and the result is always a hit. Whether you’re hosting a costume party, making treats for a school event, or just looking for a fun weekend project with the kids, these little mummies deliver.
I love how they bring people together. There’s something about the act of wrapping those little dough strips around the filling that feels almost meditative. And when you pull them out of the oven, all golden and slightly puffed, with those tiny eyes staring back at you? Pure joy.
So go ahead—give them a try. Experiment with different fillings, play with the wrapping technique, and make them your own. And when you do, I’d love to hear about it. Drop a comment below and tell me how your mummies turned out. Did you try a savory version? Did your kids help? Share your photos and tag me on social media—I can’t wait to see your spooky creations!
Happy Halloween, and happy baking!
Frequently Asked Questions
Can I make these ahead of time?
Absolutely! You can assemble the hand pies up to 24 hours in advance and keep them covered in the fridge. Bake them fresh the day you plan to serve. You can also freeze the unbaked pies for up to 2 months—just bake directly from frozen, adding 3-5 minutes to the baking time.
Can I use homemade pie crust?
Yes, homemade crust works beautifully! Just make sure it’s rolled to about 1/8-inch thickness and cut into strips. The blind-baking step becomes even more important with homemade crust, as it tends to be more delicate.
My filling leaked out during baking. What went wrong?
This usually happens for one of two reasons: either the filling was too thin (add more cream cheese next time) or the strips weren’t sealed properly. Make sure to pinch the strips together firmly where they meet, and don’t overfill the pies.
Can I use a different filling?
Definitely! This method works with almost any thick, creamy filling. Try apple butter, sweet potato puree, or even a savory option like spinach and feta. Just make sure the filling isn’t too runny, or it will leak.
How do I get the crust extra golden?
The egg wash is key. Brush it on generously before baking. If you want an even deeper color, add a pinch of turmeric or a drop of yellow food coloring to the egg wash. And don’t skip the blind-baking step—it helps the crust start cooking before the filling releases moisture.
Pin This Recipe!
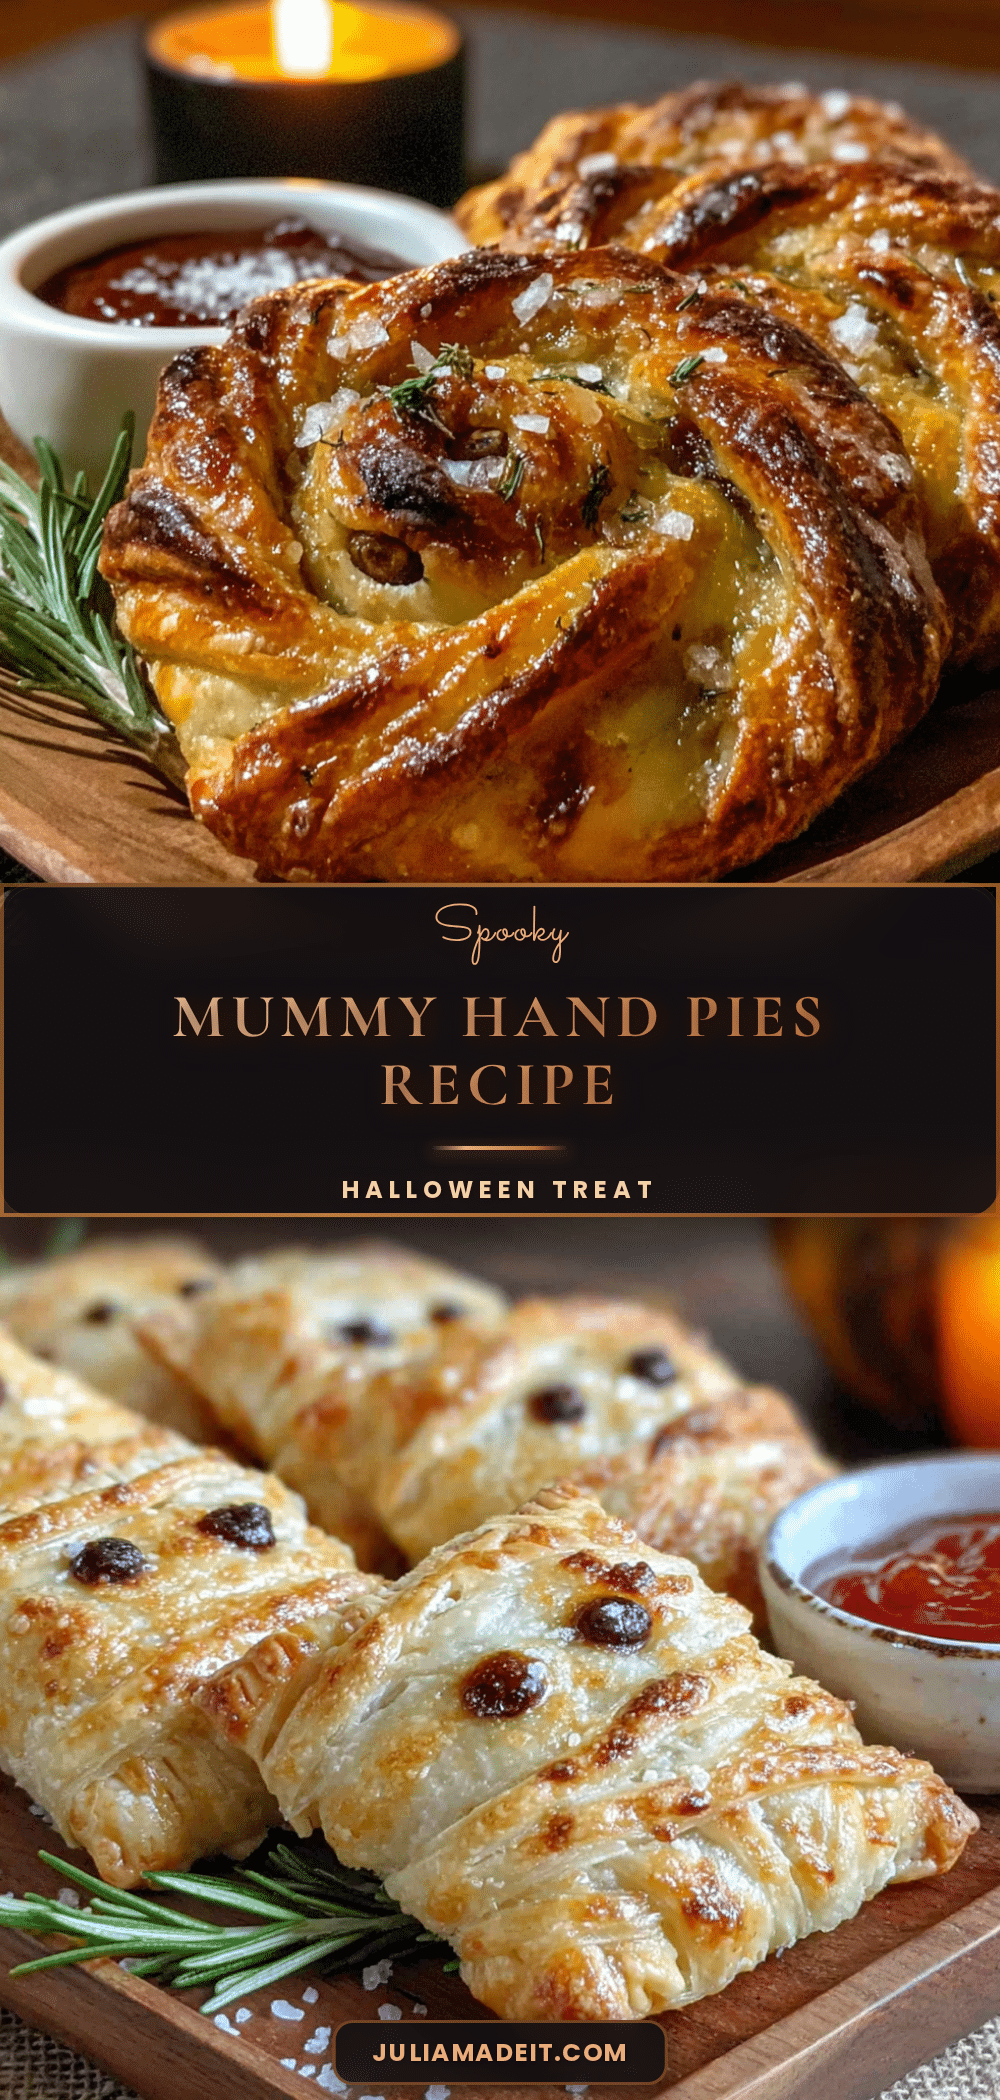
Spooky Mummy Hand Pies: Easy Halloween Recipe

These Spooky Mummy Hand Pies are a fun and easy Halloween treat featuring a flaky, buttery crust filled with a spiced pumpkin cream cheese filling. They’re perfect for parties and are sure to be a crowd-pleaser.
- Prep Time: 15 minutes
- Cook Time: 20 minutes
- Total Time: 35 minutes
- Yield: 8 servings 1x
- Category: Dessert
- Cuisine: American
Ingredients
- ½ cup pumpkin puree (100% pure, not pie filling)
- 4 oz cream cheese, softened
- ¼ cup powdered sugar
- 1 teaspoon pumpkin pie spice
- ½ teaspoon vanilla extract
- Pinch of salt
- 1 box (2 crusts) refrigerated pie crusts (e.g., Pillsbury)
- 1 egg (for egg wash)
- 1 tablespoon water (for egg wash)
- About 24 candy eyes (or white and black frosting for piping)
Instructions
- Preheat oven to 375°F (190°C). Line two baking sheets with parchment paper or silicone mats.
- Make the filling: In a medium bowl, beat softened cream cheese with a hand mixer until smooth and fluffy, about 2 minutes. Add pumpkin puree, powdered sugar, pumpkin pie spice, vanilla, and salt. Mix until well combined and creamy. Set aside.
- Prepare the crusts: Unroll pie crusts onto a lightly floured surface. Roll out to about 1/8-inch thickness. Cut each crust into strips about 1 inch wide (about 8-10 strips per crust).
- Blind-bake the strips (optional but recommended): Place half of the strips on one prepared baking sheet. Bake for 5 minutes. Let cool for 2 minutes.
- Assemble the mummies: Place par-baked strips on work surface. Spoon about 1 tablespoon of filling onto the center of each strip. Lay a second strip (unbaked) across the filling, perpendicular to the first. Press strips together at top and bottom to seal. Wrap remaining unbaked strips around the filling, alternating directions, leaving a small gap for the ‘eyes’.
- Transfer assembled pies to prepared baking sheets, spacing 2 inches apart. Brush tops lightly with egg wash (1 egg beaten with 1 tablespoon water).
- Bake for 12-15 minutes, until crust is golden brown and filling is set and slightly puffed. Let cool on baking sheet for 5 minutes.
- While still warm, gently press candy eyes into the exposed filling. If using frosting, pipe white dots with smaller black dots on top.
Notes
For best results, chill the filling for 10 minutes before assembling to prevent sogginess. If edges brown too quickly, tent with foil for the last 3-4 minutes of baking. Store leftovers in an airtight container at room temperature for up to 2 days, or freeze for up to 2 months.
Nutrition
- Serving Size: 1 hand pie
- Calories: 210
- Sugar: 10
- Sodium: 200
- Fat: 12
- Saturated Fat: 6
- Carbohydrates: 24
- Fiber: 1
- Protein: 3
Keywords: Halloween, hand pies, mummy, pumpkin, cream cheese, easy, fall, party food