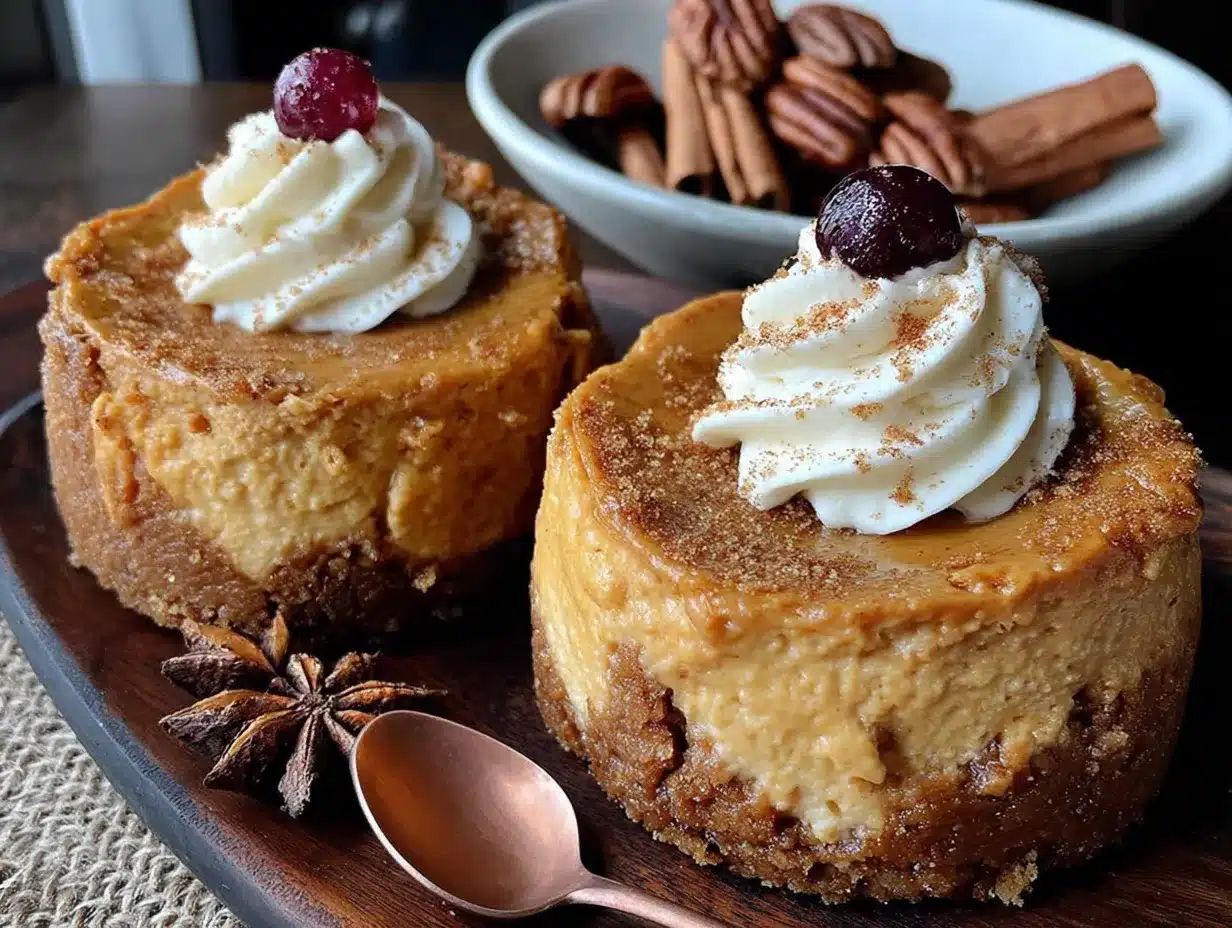
The way the surface of the cheesecake trembles—just slightly, like a held breath—is what I wait for. Not the first bite, not the cinnamon hitting the air, but that moment when you run a knife around the edge and the whole thing shivers, telling you it’s ready. That jiggle in the center is the only honesty you’ll get from baking; everything else is just waiting. I made this small-batch pumpkin cheesecake for two because sometimes you want the ritual without the leftovers.
I’d been staring at half a can of pumpkin purée in my fridge for three days, and you know how that goes. It sits there, judging you every time you open the door for something else. I couldn’t face another pumpkin smoothie or a sad spoonful stirred into oatmeal. What I actually wanted was the full experience—the crackly crust, the creamy middle, the whole cozy fall thing—but for just two people. So I downsized everything until it fit a 6-inch springform pan, and honestly? It might be better than the full-size version.
There’s something about making a dessert that’s meant to be finished in one sitting. No Tupperware Tetris, no “will this still be good on day four?” anxiety. Just you, one other person, and a perfect little cake that knows its purpose. This cozy small-batch pumpkin cheesecake for two has become my quiet Friday night tradition, the kind of thing you make when you want to feel like you did something special without it being a whole production. And that first slice, with the gingersnap crust holding firm and the filling so smooth it barely needs teeth—that’s the part that makes you close your eyes.
Why You’ll Love This Recipe
Let me tell you why this recipe works, because I’ve tested it four times to get the bake time just right. A full cheesecake takes forever in the water bath, but this small version bakes in about 35 minutes with no fuss. The texture comes out silky every time, and that’s not luck—that’s a tested ratio of cream cheese to pumpkin that doesn’t split or crack.
- Perfect for Two: No leftovers tempting you at midnight. Just one beautiful cheesecake meant to be shared (or not, I won’t tell).
- No Water Bath Needed: I tried it both ways, and this small pan doesn’t need the extra steam. Just bake it low and slow, and you’re golden.
- Simple Ingredients: You probably have everything except the cream cheese and pumpkin. No weird stabilizers or specialty flours.
- Quick Prep Time: Fifteen minutes to mix, thirty-five to bake. That’s faster than driving to the bakery.
- Customizable Crust: Gingersnaps give it that fall spice kick, but graham crackers work too. I’ve done both, and honestly? The gingersnap version wins every time.
- Make-Ahead Friendly: It actually tastes better after a night in the fridge. The flavors meld, the texture firms up perfectly, and you get that clean slice every time.
This isn’t just another pumpkin dessert. The ratio of pumpkin to cream cheese is carefully balanced so you taste both—the earthy sweetness of the squash and the tangy richness of the cheese. No one dominates. It’s the kind of recipe that makes you feel like a pastry chef even though you just stirred everything in one bowl. And when you pull that little 6-inch cake out of the oven, perfectly set with just a whisper of a jiggle in the center, you’ll understand why I kept testing until I got it right.
What Ingredients You Will Need
This recipe uses simple, wholesome ingredients that work together to create that classic cheesecake texture with a cozy fall twist. Most of these are pantry staples, especially if you’ve been baking through pumpkin season like I have.
For the Gingersnap Crust
- 3/4 cup gingersnap cookie crumbs (about 12 cookies, crushed fine—I pulse them in the food processor until they look like wet sand)
- 2 tablespoons granulated sugar (just enough to help the crust hold together)
- 3 tablespoons unsalted butter, melted (use salted butter if that’s all you have, just skip the pinch of salt)
- Pinch of salt (optional if your cookies are already salty, but I like the contrast)
For the Pumpkin Cheesecake Filling
- 8 ounces cream cheese, softened to room temperature (full-fat is best here—low-fat gets a weird texture when baked small-batch)
- 1/4 cup granulated sugar (not too sweet, just enough to balance the tang)
- 1/4 cup packed light brown sugar (adds that molasses depth that plays so well with pumpkin)
- 1/2 cup pumpkin purée (not pumpkin pie filling—make sure it’s 100% pumpkin. I like Libby’s for consistent texture)
- 1 large egg, room temperature (cold egg will make your filling lumpy, trust me on this)
- 1 teaspoon vanilla extract (pure vanilla, not imitation, though I’ve used both in a pinch)
- 1/2 teaspoon ground cinnamon (I use Ceylon cinnamon for its delicate sweetness, but Saigon works too)
- 1/4 teaspoon ground ginger (reinforces the crust flavor—sneaky but effective)
- 1/8 teaspoon ground nutmeg (freshly grated if you have it, pre-ground is fine)
- 1/8 teaspoon ground cloves (go easy, cloves are bossy)
- Pinch of salt (brings everything into focus)
For the cream cheese, let it sit on the counter for at least an hour before you start. I’ve made the mistake of microwaving it to speed things up, and the filling ended up with little lumps that no amount of mixing could fix. Room temperature ingredients are non-negotiable for a silky cheesecake. Same goes for the egg—drop it in a bowl of warm water for five minutes if you forgot to take it out.
The pumpkin purée matters more than you’d think. Some brands are watery, and that extra moisture can make your cheesecake weep in the fridge. I pat my pumpkin with a paper towel before measuring—just a quick press to remove any surface liquid. It makes a noticeable difference in the final texture.
Equipment Needed
You don’t need a fancy kitchen for this recipe, but a few specific tools make the process smoother. Here’s what you’ll need:
- 6-inch springform pan (the star of the show. I got mine for eight dollars at a kitchen supply store, and it’s perfect for small-batch baking)
- Electric hand mixer or stand mixer (you can mix by hand if your arm is strong, but the cream cheese needs to be really smooth, and a mixer does it in two minutes)
- Food processor or zip-top bag and rolling pin (for crushing the gingersnaps. The bag method is oddly satisfying—just smash away your frustrations)
- Medium mixing bowls (one for crust, one for filling)
- Rubber spatula (for scraping every last bit of filling into the pan—don’t waste a drop)
- Measuring cups and spoons (accuracy matters in small batches; even an extra tablespoon of sugar changes things)
- Baking sheet (place the springform pan on a sheet to catch any butter drips from the crust)
- Cooling rack (for letting the cheesecake cool gradually before refrigerating)
If you don’t have a springform pan, you can use a 4-inch round cake pan lined with parchment paper. The slices won’t be as clean, but the taste is the same. I’ve also made this in small mason jars for individual servings—just reduce the bake time by about 8 minutes and watch them closely.
Preparation Method
Take the cream cheese out of the fridge at least one hour before you start. This is not optional. Cold cream cheese makes lumpy cheesecake, and we’re not doing that today.
- Preheat your oven to 325°F. Position the rack in the center of the oven. Line your baking sheet with foil or parchment for easy cleanup.
- Make the crust. Pulse the gingersnap cookies in a food processor until they become fine crumbs. You need about 3/4 cup. Transfer to a medium bowl, add the sugar and salt, then pour in the melted butter. Stir with a fork until every crumb is moistened—it should look like wet sand that holds together when you squeeze it.
- Press the crust into the pan. Dump the crumb mixture into your 6-inch springform pan. Use the bottom of a flat measuring cup or a glass to press it firmly into an even layer. Go up the sides about half an inch if you want a crust edge—I do this because I love the contrast of crunchy crust against creamy filling. Bake the crust for 8 minutes, then set it aside to cool while you make the filling.
- Beat the cream cheese. In a large mixing bowl, beat the softened cream cheese with an electric mixer on medium speed until completely smooth—about 2 minutes. Scrape the bowl and beaters halfway through. There should be zero lumps.
- Add the sugars. Add both sugars and beat on medium-low until combined, about 1 minute. Don’t go too fast or you’ll incorporate too much air, which can cause cracks later.
- Mix in the pumpkin and egg. Add the pumpkin purée, egg, vanilla, and all the spices. Beat on low speed just until combined—maybe 30 seconds. Scrape the bowl and give it one more quick stir by hand with your spatula. The filling should be smooth, thick, and a beautiful burnt orange color.
- Pour and tap. Pour the filling into the cooled crust. Spread it evenly with your spatula. Tap the pan gently on the counter three or four times to release any air bubbles trapped in the filling.
- Bake the cheesecake. Place the springform pan on your prepared baking sheet and bake for 32 to 38 minutes. At 32 minutes, start checking. The edges should be set and slightly puffed, but the center should still wobble when you gently shake the pan. That jiggle is exactly what you want—it will firm up as it cools.
- Cool gradually. Turn off the oven, crack the door open, and let the cheesecake sit inside for 30 minutes. This gradual cooling prevents the dreaded crack across the surface. After 30 minutes, transfer the pan to a wire rack and let it cool completely—about another hour.
- Chill overnight. Once the cheesecake is at room temperature, cover it with plastic wrap and refrigerate for at least 4 hours, but overnight is better. The texture improves dramatically after a full night’s rest.
Here’s the thing about the jiggle—it’s your best friend. When you pull the cheesecake out, the center should look like a relaxed wave, not a slosh. If it’s still liquidy in the middle, give it 3 more minutes and check again. If it’s completely firm, you’ve gone too far and it might be dry. That sweet spot takes practice, but you’ll learn to recognize it after one or two tries.
Cooking Tips & Techniques
I’ve made this recipe enough times to know exactly where things can go wrong. Let me save you the trouble.
The biggest mistake is overmixing the filling. I did this on my second test batch, and the cheesecake rose like a soufflé, then collapsed into a sad crater. You want to mix just until everything comes together—no more. Overmixing incorporates too much air, which expands in the oven and then deflates, leaving you with cracks and a dense texture.
Room temperature ingredients are your insurance policy. I know it’s annoying to wait, but cold cream cheese creates lumps that no amount of beating can fully eliminate. And a cold egg can seize the mixture, making it grainy. Set everything out on the counter an hour before you start. Set a timer if you have to—I’ve forgotten and paid the price.
The water bath debate. For a 6-inch cheesecake, I’ve found you don’t need one. The smaller volume bakes evenly enough without the extra humidity. But if you’re nervous about cracking, you can place the springform pan inside a larger baking dish and pour hot water halfway up the sides. Just wrap the bottom of your pan in foil first so water doesn’t seep in. I’ve done it both ways, and honestly? The texture is nearly identical. Skip the water bath and save yourself the hassle.
Use a sharp knife for clean slices. Run the blade under hot water, wipe it dry, then slice. Wipe the blade between each cut. This gives you those gorgeous, bakery-style slices that make people think you worked harder than you did.
Pat your pumpkin dry. I mentioned this earlier, but it bears repeating. Extra moisture in the pumpkin can make your cheesecake weep during chilling. Spread the pumpkin on a paper towel-lined plate, cover with another paper towel, and press gently. You’d be surprised how much liquid comes out.
Don’t skip the cooling steps. The gradual cool in the oven, then on the counter, then in the fridge—each step matters. Rushing this process is why cheesecakes crack. I learned this the hard way when I was impatient for a midnight snack and ended up with a fissure straight through the middle.
Variations & Adaptations
This recipe is flexible, and I’ve tried several variations depending on what I have in the pantry. Here are my favorites:
Gluten-Free Version: Use gluten-free gingersnap cookies or gluten-free graham crackers for the crust. Everything else in the recipe is naturally gluten-free, so this is an easy swap. I’ve used Schär’s gluten-free graham crackers, and the texture was spot-on.
Dairy-Free Adaptation: Substitute the cream cheese with a high-quality dairy-free version like Kite Hill or Miyoko’s. Use vegan butter for the crust. The texture will be slightly softer, but the flavor is still fantastic. I tested this for a friend with dairy sensitivity, and she said it was better than the “real” thing.
Maple Pecan Twist: Add 2 tablespoons of maple syrup to the filling (reduce the granulated sugar by 1 tablespoon to balance sweetness). Top the finished cheesecake with candied pecans and a drizzle of maple syrup. This version is dangerously good and has become my Thanksgiving go-to.
Chocolate Swirl Variation: Melt 2 ounces of dark chocolate and swirl it into the filling before baking. Use a knife to create gentle figure-eight patterns. The chocolate and pumpkin combination is underrated—it’s like a pumpkin-chocolate marbled dream.
Mini Mason Jar Version: Divide the crust and filling among 4 small (4-ounce) mason jars. Bake for 18 to 22 minutes instead of 32 to 38. These are perfect for gifting or for when you want individual portions. I made these for a fall picnic and they were a huge hit—no slicing required.
Spice It Up: If you like a stronger spice profile, add 1/4 teaspoon of cardamom and a pinch of white pepper. The white pepper adds warmth without heat, and cardamom gives it an almost floral note that pairs beautifully with the pumpkin. This version is my personal favorite when I want something a little different.
If you love cozy fall flavors, you might also enjoy my moist pumpkin cream cheese muffins with cinnamon streusel—they use a similar spice blend and are perfect for breakfast. And for another small-batch treat that serves two, try my cozy skillet brown sugar peach cobbler, which bakes up in a tiny cast iron pan.
Serving & Storage Suggestions
This cheesecake is best served chilled, straight from the fridge. The texture is firmer, the flavors are more pronounced, and the slices are cleaner. But if you’re impatient like me, a slightly warmer slice is still delicious.
Serving ideas: Top each slice with a dollop of lightly sweetened whipped cream and a dusting of cinnamon. For extra indulgence, drizzle with caramel sauce or a spoonful of maple syrup. I’ve also served it with a side of roasted pears or sautéed apples for a more composed dessert.
What to drink with it: A warm cup of spiced chai or a bold dark roast coffee balances the sweetness perfectly. For a special occasion, a glass of late-harvest Riesling or a bourbon old fashioned is a lovely pairing.
Storage instructions: Cover the cheesecake tightly with plastic wrap or store it in an airtight container in the refrigerator. It will keep for up to 5 days, though it rarely lasts that long in my house. The flavor actually improves after day two—the spices meld and the texture becomes even creamier.
Freezing instructions: You can freeze the cheesecake for up to 2 months. Wrap it tightly in plastic wrap, then a layer of foil. Thaw overnight in the refrigerator before serving. I’ve frozen individual slices for quick desserts, and they thaw beautifully.
Reheating note: Don’t microwave this cheesecake—it will turn into a sad puddle. If you want it warm, let a slice sit at room temperature for 20 minutes. The texture stays creamy without becoming runny.
One thing I’ve noticed: the crust stays crunchier if you store the cheesecake uncovered for the first hour in the fridge. The airflow prevents the crust from absorbing moisture from the filling. After an hour, cover it up. This little trick has saved many a soggy-bottomed cheesecake in my kitchen.
Nutritional Information & Benefits
This cheesecake is a treat, so let’s be honest about that. But it does offer some nutritional perks worth mentioning. Here’s the breakdown per serving (based on 4 servings from this small-batch recipe):
| Nutrient | Amount Per Serving |
|---|---|
| Calories | 385 |
| Total Fat | 24g |
| Saturated Fat | 14g |
| Cholesterol | 105mg |
| Sodium | 320mg |
| Total Carbohydrates | 38g |
| Dietary Fiber | 2g |
| Sugars | 26g |
| Protein | 6g |
| Vitamin A | 120% DV |
| Calcium | 8% DV |
| Iron | 6% DV |
Pumpkin is packed with vitamin A, which supports eye health and immune function. It’s also a good source of fiber, which helps keep you full. The cream cheese provides calcium and protein, though yes, it’s also high in saturated fat. This is a dessert, not a health food—but it’s made with real ingredients, no preservatives, and no artificial flavors. That counts for something.
If you’re watching your sugar intake, you can reduce the granulated sugar to 3 tablespoons total (use 2 tablespoons white and 1 tablespoon brown). The cheesecake will be less sweet but still delicious. I’ve done this for friends who prefer less sweetness, and they didn’t miss the extra sugar at all.
For a lower-calorie option, serve smaller slices with extra fruit on the side. The pumpkin flavor is so satisfying that a thin slice often feels like enough.
Conclusion
This small-batch pumpkin cheesecake for two has become one of my most-requested recipes, and I think I finally understand why. It’s not just the creamy texture or the warm spices—it’s the feeling of making something special without the pressure of a full-sized dessert. You get all the satisfaction of a from-scratch cheesecake with none of the leftovers.
I love that this recipe meets you where you are. Whether you’re a seasoned baker or someone who’s never made cheesecake before, the steps are straightforward, the ingredients are forgiving, and the result is genuinely impressive. The first time I made it, I was skeptical that such a small cake could deliver the same experience as a full one. But that first bite—creamy, spiced, with that crunchy gingersnap crust—proved me wrong.
Try it for a quiet date night, a cozy evening in, or just because you deserve a treat that’s perfectly portioned. And when you make it, I’d love to hear how it turned out. Did you add the maple pecan twist? Swirl in some chocolate? Leave a comment below and tell me about your version. I read every single one, and your ideas often inspire my next recipe.
Happy baking, friends. Here’s to small batches and big flavors.
Frequently Asked Questions
Can I make this pumpkin cheesecake without a springform pan?
Absolutely. Use a 4-inch round cake pan lined with parchment paper, or divide the mixture among 4 small mason jars. The bake time will be shorter for individual portions—start checking at 18 minutes. The texture is the same, just different presentation.
Why did my cheesecake crack on top?
Cracks usually happen from overbaking or rapid temperature changes. Make sure you’re pulling the cheesecake out when the center still has a gentle jiggle. Also, don’t skip the gradual cooling step—letting it sit in the turned-off oven with the door cracked open prevents that sudden temperature drop that causes cracks.
Can I use pumpkin pie filling instead of pumpkin purée?
I don’t recommend it. Pumpkin pie filling already has sugar and spices added, which will throw off the balance of this recipe. Look for 100% pumpkin purée—it’s usually in the same aisle, just make sure the label says “pumpkin” and not “pumpkin pie mix.”
How do I get clean slices without the cheesecake sticking to the knife?
Run your knife under hot water, wipe it dry, then cut. Wipe the blade clean between each slice. For extra-clean cuts, chill the cheesecake for at least 6 hours or overnight. The longer it sets, the cleaner the slices.
Can I double this recipe for a larger pan?
Yes, but you’ll need to adjust the bake time significantly. For a 9-inch springform pan, double all ingredients and bake at 325°F for 50 to 60 minutes. Use the same jiggle test—the center should wobble slightly when done. You may also want to use a water bath for the larger version to ensure even baking.
Pin This Recipe!
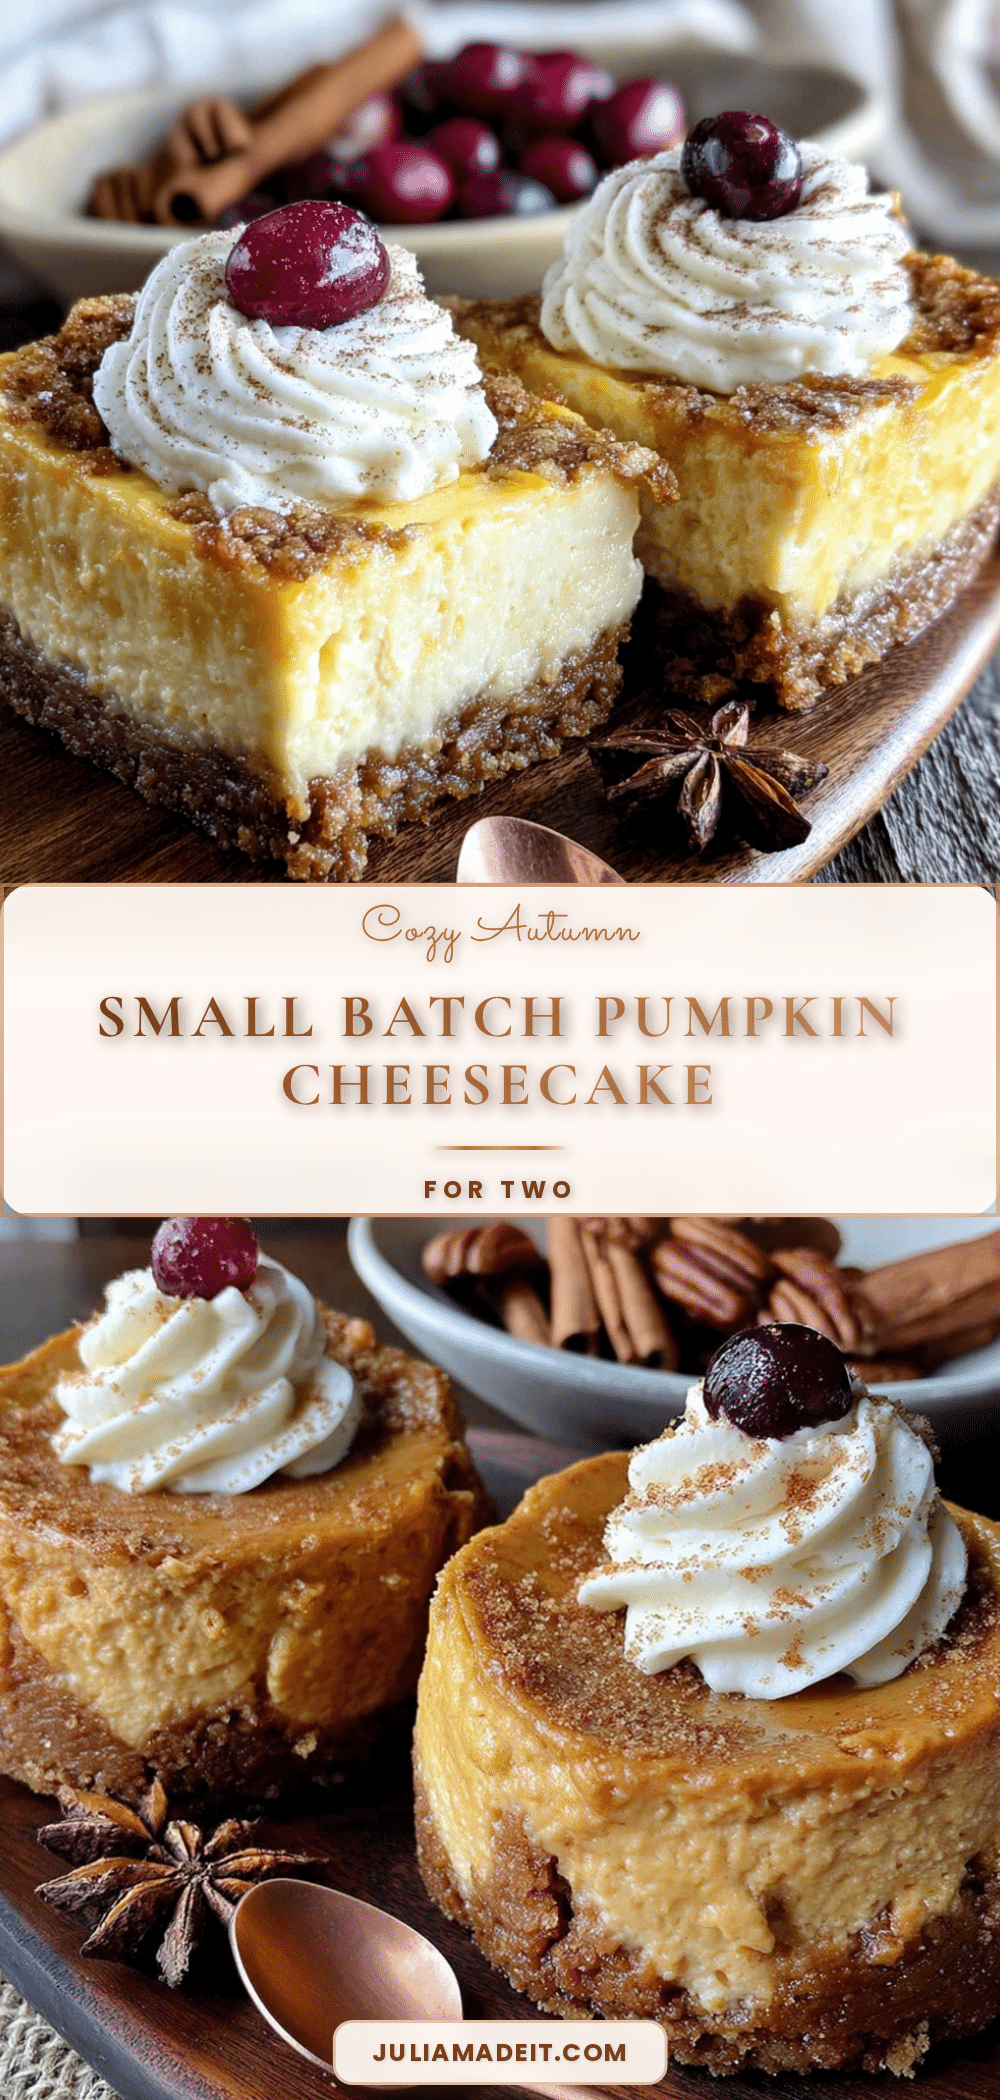
Cozy Small-Batch Pumpkin Cheesecake for Two
A perfectly portioned pumpkin cheesecake for two with a gingersnap crust, creamy filling, and warm fall spices. No leftovers, no water bath needed, and ready in under an hour.
- Prep Time: 15 minutes
- Cook Time: 35 minutes
- Total Time: 50 minutes (plus chilling time)
- Yield: 4 servings 1x
- Category: Dessert
- Cuisine: American
Ingredients
- 3/4 cup gingersnap cookie crumbs (about 12 cookies, crushed fine)
- 2 tablespoons granulated sugar
- 3 tablespoons unsalted butter, melted
- Pinch of salt (optional)
- 8 ounces cream cheese, softened to room temperature
- 1/4 cup granulated sugar
- 1/4 cup packed light brown sugar
- 1/2 cup pumpkin purée (not pumpkin pie filling)
- 1 large egg, room temperature
- 1 teaspoon vanilla extract
- 1/2 teaspoon ground cinnamon
- 1/4 teaspoon ground ginger
- 1/8 teaspoon ground nutmeg
- 1/8 teaspoon ground cloves
- Pinch of salt
Instructions
- Preheat your oven to 325°F. Position the rack in the center of the oven. Line your baking sheet with foil or parchment for easy cleanup.
- Make the crust: Pulse the gingersnap cookies in a food processor until they become fine crumbs. Transfer to a medium bowl, add the sugar and salt, then pour in the melted butter. Stir with a fork until every crumb is moistened—it should look like wet sand that holds together when you squeeze it.
- Press the crust into the pan: Dump the crumb mixture into your 6-inch springform pan. Use the bottom of a flat measuring cup or a glass to press it firmly into an even layer. Go up the sides about half an inch if you want a crust edge. Bake the crust for 8 minutes, then set it aside to cool while you make the filling.
- Beat the cream cheese: In a large mixing bowl, beat the softened cream cheese with an electric mixer on medium speed until completely smooth—about 2 minutes. Scrape the bowl and beaters halfway through.
- Add the sugars: Add both sugars and beat on medium-low until combined, about 1 minute. Don’t go too fast or you’ll incorporate too much air.
- Mix in the pumpkin and egg: Add the pumpkin purée, egg, vanilla, and all the spices. Beat on low speed just until combined—maybe 30 seconds. Scrape the bowl and give it one more quick stir by hand with your spatula.
- Pour and tap: Pour the filling into the cooled crust. Spread it evenly with your spatula. Tap the pan gently on the counter three or four times to release any air bubbles.
- Bake the cheesecake: Place the springform pan on your prepared baking sheet and bake for 32 to 38 minutes. At 32 minutes, start checking. The edges should be set and slightly puffed, but the center should still wobble when you gently shake the pan.
- Cool gradually: Turn off the oven, crack the door open, and let the cheesecake sit inside for 30 minutes. After 30 minutes, transfer the pan to a wire rack and let it cool completely—about another hour.
- Chill overnight: Once the cheesecake is at room temperature, cover it with plastic wrap and refrigerate for at least 4 hours, but overnight is better.
Notes
Room temperature ingredients are essential for a smooth filling. Pat pumpkin purée dry with a paper towel to remove excess moisture. The jiggle test is key: center should wobble slightly when done. Gradual cooling prevents cracks. For best texture, chill overnight.
Nutrition
- Serving Size: 1 slice (1/4 of chee
- Calories: 385
- Sugar: 26
- Sodium: 320
- Fat: 24
- Saturated Fat: 14
- Carbohydrates: 38
- Fiber: 2
- Protein: 6
Keywords: pumpkin cheesecake, small batch, for two, fall dessert, gingersnap crust, easy cheesecake