The way the bread squishes down, just slightly, under your thumb—that’s the whole reason I keep making these. That soft, pillowy give before the flaky exterior cracks a little, revealing the melted cheese stretching between layers of turkey and bread. It’s not fancy. It’s not complicated. But that first compression when you press down on a warm slider? Honestly, it’s kind of perfect.
I started making these mini turkey and cheese sliders for lunchboxes out of pure desperation. My kid was in that phase where everything I packed came back uneaten (you know the one). Sandwiches got soggy. Wraps fell apart. Cold pasta? Forget it. I needed something that could survive a few hours in a lunchbox and still taste like actual food, not sad cafeteria leftovers.
The first time I made these, I used leftover dinner rolls and whatever deli meat I had in the fridge. I brushed the tops with butter because—well, why wouldn’t you? By lunchtime, the bread had soaked up just enough of that buttery goodness without getting mushy. The cheese had fused itself to the turkey in this way that made everything taste intentional, not thrown together. It was the kind of lunch that made you want to trade with your kid.
These sliders have become my lunchbox MVP. They’re the thing I can throw together on a Sunday afternoon and grab all week. And honestly? They work just as well for a quick dinner when you’re too tired to cook. That’s the thing about a good recipe—it doesn’t stay in one category. It just shows up wherever you need it.
Why You’ll Love This Recipe
Let me tell you why these little sandwiches have earned permanent status in my weekly rotation. I’ve tested these through soggy lunchboxes, forgotten lunch bags, and even a few dropped-on-the-floor incidents. They hold up.
- Quick & Easy : These come together in about 15 minutes of active prep. Pop them in the oven for 10 minutes, and you’ve got a week’s worth of lunches ready to go.
- Simple Ingredients : You need rolls, deli turkey, cheese slices, and a few pantry staples. No special trips to fancy grocery stores.
- Perfect for Meal Prep : Make a batch on Sunday, and grab them all week. They actually taste better on day two or three.
- Crowd-Pleaser : Kids love them. Adults love them. I’ve brought these to playdates and watched parents hover near the snack table.
- Endlessly Customizable : Swap the cheese, change the meat, add veggies—the formula works no matter what you throw in.
What makes these different from every other slider recipe out there? It’s the butter topping. I know that sounds simple, but the ratio matters. Too much butter and the bread gets greasy. Too little and the tops stay pale and sad. I’ve messed this up enough times to know exactly where the sweet spot is—and I’m sharing it.
These sliders are the kind of thing that makes you feel like you’ve got your life together, even on chaotic mornings. They’re warm, comforting, and just familiar enough to make everyone happy. No drama. No fuss. Just really good mini turkey and cheese sliders that do exactly what they’re supposed to do.
What Ingredients You Will Need
This recipe uses simple, straightforward ingredients that you probably already have in your kitchen. The magic is in how they come together.
- 12-count package of Hawaiian sweet rolls (or any soft dinner rolls) — These are non-negotiable for the best texture. The slight sweetness balances the savory turkey and cheese perfectly. King’s Hawaiian is my go-to, but any soft slider bun works.
- 1 pound deli-sliced turkey breast — Look for oven-roasted or honey-roasted turkey for the best flavor. I prefer Boar’s Head or Applegate for cleaner ingredients. Ask for it sliced medium-thin—too thick and the sliders get bulky, too thin and they disappear.
- 8 slices of Swiss cheese — Swiss melts beautifully and has that mild nuttiness that pairs perfectly with turkey. You can also use provolone, mozzarella, or even cheddar if that’s what you have.
- 4 tablespoons unsalted butter, melted — This is the glue that holds everything together, literally and figuratively. Use good butter—it makes a difference.
- 1 tablespoon Dijon mustard — Adds just enough tang to cut through the richness. You can use yellow mustard or honey mustard if you prefer something milder.
- 1 teaspoon Worcestershire sauce — This is the secret ingredient. It adds that savory depth that makes people ask, “What’s in these?”
- 1 tablespoon poppy seeds — Optional, but I love the little crunch they add. Sesame seeds work too.
- 1 teaspoon garlic powder — Don’t skip this. It wakes up the whole dish.
- 1 teaspoon onion powder — Rounds out the savory notes without being overpowering.
- Salt and black pepper to taste
For the filling (optional add-ins):
- Fresh spinach leaves — Adds color and a little nutrition boost. They wilt slightly when baked, so don’t worry about them being bulky.
- Thinly sliced red onion — For a little bite. Soak the slices in cold water for 10 minutes to mellow the sharpness.
- Roasted red peppers — Adds sweetness and moisture. Pat them dry first so they don’t make the bread soggy.
When you’re shopping for the rolls, look for packages where the rolls are connected in one solid sheet. They’re easier to slice through all at once, and they hold together better during baking. If you can’t find Hawaiian rolls, brioche slider buns are a good backup—they have that same soft, slightly sweet quality.
Equipment Needed
You don’t need much for this recipe, which is part of the appeal. Here’s what you’ll need:
- 9×13-inch baking dish — A glass or ceramic dish works best. Metal pans can sometimes overcook the bottoms. I use a Pyrex dish and it’s perfect every time.
- Sharp knife or serrated bread knife — You’ll be slicing through a whole sheet of rolls, and a dull knife will just squish them. A serrated knife gives you clean cuts without crushing the bread.
- Small bowl for the butter mixture — Any small mixing bowl works. I use a glass measuring cup so I can pour the butter directly.
- Pastry brush — For brushing that glorious butter mixture over the tops. A silicone brush is easier to clean, but a regular bristle brush works fine.
- Aluminum foil — For covering the sliders during the first part of baking. This keeps the tops from browning too quickly while the cheese melts.
- Cutting board — For assembling and later slicing the sliders apart.
If you don’t have a pastry brush, you can drizzle the butter mixture over the tops and spread it around with the back of a spoon. It won’t be as even, but it’ll still taste great. I’ve done this more times than I’d like to admit, and nobody has ever complained.
For storage, you’ll want an airtight container that fits the sliders in a single layer. I use a glass meal prep container with a snap-on lid. Stacking them can make the bread soggy, so give them some breathing room.
Preparation Method
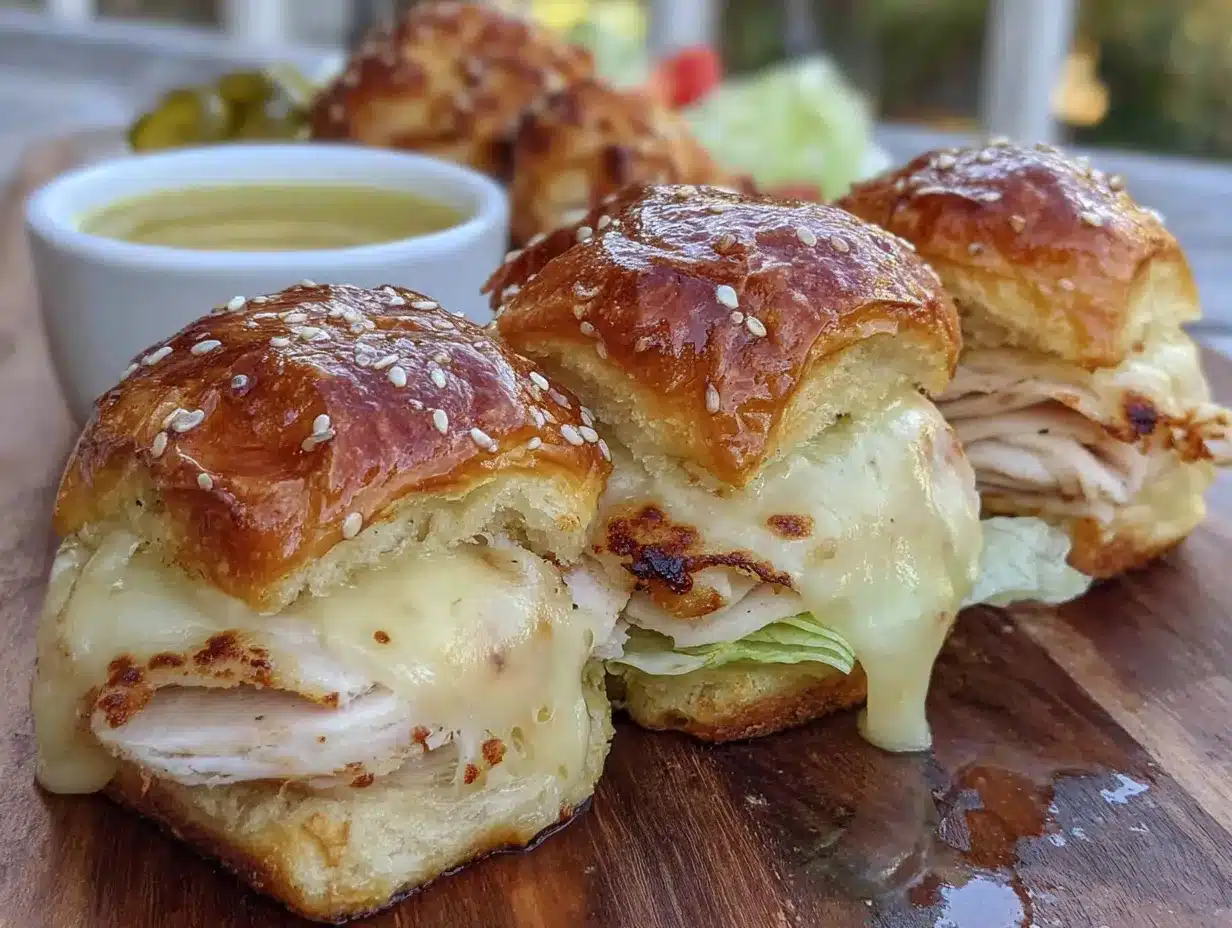
Let me walk you through this. I’ve made these probably fifty times, so I know exactly where things can go wrong—and how to avoid it.
- Preheat your oven to 350°F (175°C). Get this going first so the oven is ready when you are. While it’s heating, grease your 9×13 baking dish with a little butter or non-stick spray.
- Prepare the rolls. Keep the entire sheet of rolls intact—don’t pull them apart yet. Using a serrated knife, carefully slice the whole sheet horizontally through the middle. You want to separate the top half from the bottom half in one clean cut. Take your time here. If you rush, you’ll end up with uneven halves. Place the bottom half in your prepared baking dish.
- Layer the turkey. Arrange half of the turkey slices evenly over the bottom layer of rolls. Don’t just pile it in the middle—spread it out so every bite gets some meat. Fold the slices slightly to create little pockets of texture. This is also where you’d add any optional veggies like spinach or roasted red peppers.
- Add the cheese. Lay the Swiss cheese slices over the turkey. If you’re using full slices, tear them in half and arrange them so they cover the surface evenly. The cheese acts as a barrier between the turkey and the top layer of bread, which helps prevent sogginess. Trust me on this one.
- Repeat the turkey layer. Add the remaining turkey slices on top of the cheese. This double layer is what makes these sliders feel substantial, not skimpy. You want a good meat-to-bread ratio.
- Cap it off. Place the top half of the rolls over the filling, pressing down gently to secure everything in place.
- Make the butter topping. In a small bowl, combine the melted butter, Dijon mustard, Worcestershire sauce, garlic powder, onion powder, and a pinch of salt and pepper. Whisk until smooth. This mixture is where the magic happens—don’t skip any of these ingredients.
- Brush it on. Using your pastry brush, generously brush the butter mixture over the tops of the rolls. Make sure you get the edges and any exposed bread surfaces. The mixture will pool slightly in the crevices, which is exactly what you want. Sprinkle poppy seeds evenly over the top.
- Cover and bake. Tent the baking dish loosely with aluminum foil and bake for 10 minutes. This initial covered baking allows the cheese to melt and the flavors to meld without the tops browning too quickly.
- Uncover and finish. Remove the foil and bake for another 8-10 minutes, until the tops are golden brown and the edges look slightly crispy. The kitchen will smell incredible at this point—that’s the Worcestershire and butter doing their thing.
- Rest before slicing. Let the sliders rest in the pan for 5 minutes. This is crucial. If you cut into them immediately, the cheese will ooze out everywhere and the structure will fall apart. Five minutes lets everything set up.
- Slice and serve. Using a sharp knife, cut along the seams of the rolls to separate them into individual sliders. Serve warm or at room temperature.
One thing I learned the hard way: don’t overbake these. The line between perfectly golden and dried out is surprisingly thin. Start checking at the 8-minute mark after you remove the foil. The tops should be golden, not dark brown, and the cheese should be fully melted but not bubbling out everywhere.
Cooking Tips & Techniques
After making these more times than I can count, here’s what I’ve learned:
The bread matters more than you think. I tried this recipe with regular dinner rolls once, and the texture just wasn’t right. Hawaiian rolls have a softness that regular rolls don’t, and their slight sweetness balances the savory filling. If you can’t find Hawaiian rolls, brioche buns work—but don’t use crusty rolls or anything too dense.
Don’t skip the resting step. I know it’s tempting to cut into these immediately, especially when they smell that good. But the resting time lets the cheese set up just enough that the sliders hold their shape. Cut too early and you’ll have a delicious but messy situation on your hands.
Make extra butter topping. I always double the butter mixture and save half for brushing on top after baking. It adds an extra layer of flavor and keeps the tops from drying out during storage. Just warm it up slightly before brushing.
Watch your oven temperature. Every oven runs differently. If your sliders are browning too quickly on top but the cheese isn’t melted inside, reduce the temperature to 325°F and extend the covered baking time. I had to learn this the hard way when I moved to a new apartment with a wildly inconsistent oven.
Use room temperature cheese. Cold cheese straight from the fridge takes longer to melt, which means you might overbake the bread trying to get the cheese gooey. Let the cheese sit out for 15-20 minutes before assembling. It makes a noticeable difference.
The right way to reheat. If you’re making these ahead, reheat them in a 300°F oven for about 5-7 minutes. The microwave works in a pinch, but it can make the bread chewy. For lunchboxes, these are actually delicious at room temperature—the flavors are still there even without the warmth.
Variations & Adaptations
This recipe is basically a template that you can adapt to whatever you have on hand. Here are some of my favorite variations:
Ham and Swiss Sliders: Swap the turkey for honey ham and keep the Swiss cheese. Add a thin layer of honey mustard between the cheese and ham for extra flavor. This is my go-to when I have leftover holiday ham.
Italian Turkey Sliders: Use provolone instead of Swiss, add a layer of salami or pepperoni, and spread a little marinara sauce on the bottom rolls. Bake as directed and serve with extra sauce for dipping. These taste like mini pizza subs.
Vegetarian Version: Replace the turkey with roasted portobello mushrooms or grilled eggplant slices. The cheese and butter topping are already vegetarian-friendly. I’ve also used thinly sliced tofu marinated in soy sauce and liquid smoke—surprisingly good.
Spicy Southwest Sliders: Use pepper jack cheese instead of Swiss, add sliced jalapeños, and mix a little chipotle powder into the butter topping. These have a nice kick without being overwhelming. If you love spicy food, these pickled jalapeños would be incredible on top.
Breakfast Sliders: Use the same formula but swap turkey for scrambled eggs and breakfast sausage. Keep the cheese (cheddar works great here) and brush with the same butter mixture. These are perfect for weekend brunch or grab-and-go breakfasts.
Low-Carb Option: Skip the rolls entirely and use large lettuce leaves as wraps. Layer turkey, cheese, and any veggies, then roll up tightly. The butter topping won’t work here, but a drizzle of ranch dressing or mustard makes a good substitute.
I’ve made the spicy southwest version more times than I can count. There’s something about that combination of melty pepper jack, turkey, and spicy butter that just works. My husband requests them every time I ask what he wants for lunch.
Serving & Storage Suggestions
These sliders are versatile enough to work for almost any occasion. Here’s how to serve and store them:
Serving temperature: These are best served warm, right out of the oven. But honestly, they’re also fantastic at room temperature—the flavors actually deepen as they cool. For lunchboxes, I pack them at room temperature and they’re perfect by lunchtime.
What to serve with them: These sliders pair beautifully with a simple side salad, this BLT pasta salad, or a bowl of thermos tomato soup for a complete meal. For lunchboxes, add some carrot sticks, apple slices, or a handful of grapes on the side.
Storage: Store leftover sliders in an airtight container in the refrigerator for up to 5 days. Layer them in a single container with parchment paper between layers if you need to stack them. They actually get better on day two—the flavors meld together beautifully overnight.
Freezing: These freeze surprisingly well. Wrap each slider individually in plastic wrap, then place them in a freezer-safe bag. They’ll keep for up to 3 months. To thaw, transfer to the refrigerator overnight. Reheat in a 300°F oven for 5-7 minutes, or microwave for 30-45 seconds.
Reheating: The oven is your best bet for maintaining texture. Wrap the sliders in foil and heat at 300°F for about 5 minutes. The microwave works in a pinch but can make the bread slightly chewy. If you’re packing these for lunch, just leave them at room temperature—they’re still delicious.
Flavor development: These sliders taste better the next day. The butter mixture soaks into the bread overnight, creating this incredible soft-yet-slightly-crisp texture. The flavors meld together in a way that makes them taste more cohesive. I actually prefer day-old sliders over fresh ones.
Nutritional Information & Benefits
Here’s the approximate nutritional breakdown per slider (based on 12 sliders):
- Calories: 240
- Protein: 16g
- Carbohydrates: 22g
- Fat: 10g
- Saturated Fat: 5g
- Fiber: 1g
- Sugar: 6g
- Sodium: 580mg
These sliders offer a good balance of protein from the turkey and cheese, which helps keep you full and satisfied. Turkey is a lean protein source that’s rich in B vitamins and selenium. The Swiss cheese adds calcium and vitamin D, though it’s worth noting the sodium content if you’re watching your intake.
For a lunchbox option, these sliders provide sustained energy without the sugar crash that comes from processed snacks. The protein and fat combination helps stabilize blood sugar levels, making them a smart choice for kids and adults alike.
If you’re looking to reduce the sodium, look for low-sodium deli turkey and use unsalted butter. You can also reduce the added salt in the butter mixture. The Worcestershire sauce and mustard provide plenty of flavor on their own.
For those with dietary restrictions, these sliders are not gluten-free (the rolls contain wheat), but you can use gluten-free slider buns if needed. They’re also not dairy-free due to the cheese and butter, though dairy-free cheese and plant-based butter would work in a pinch.
Conclusion
These mini turkey and cheese sliders have become one of those recipes I just can’t stop making. They’re simple enough for a busy weekday but good enough to serve at parties. They work for lunchboxes, quick dinners, game day snacks, and everything in between.
What I love most about this recipe is how forgiving it is. You can use whatever cheese you have, swap the meat, add veggies—it always works. The butter topping is the constant, and honestly, that’s what makes these special. It’s the kind of recipe that makes you look like you put in way more effort than you actually did.
I’d love to hear how these turn out for you. Did you try a variation? Add something unexpected? Leave a comment below and let me know—I’m always looking for new ideas to try. And if you make these for your family’s lunchboxes, tag me in your photos. There’s nothing that makes me happier than seeing these sliders out in the wild, making someone’s lunch a little better.
Go ahead and give these a try. Your lunchbox game is about to level up in the most delicious way possible.
Frequently Asked Questions
Can I make these sliders ahead of time?
Absolutely! Assemble the sliders completely, cover them tightly, and refrigerate for up to 24 hours before baking. Add an extra 5 minutes to the covered baking time if baking straight from the fridge. You can also bake them fully and reheat as needed.
Can I use a different type of bread?
Hawaiian sweet rolls are ideal for their soft texture and slight sweetness, but you can use brioche slider buns, potato rolls, or even regular dinner rolls. Avoid crusty breads or anything too dense—they won’t absorb the butter mixture the same way.
How do I keep the sliders from getting soggy in lunchboxes?
The cheese layer acts as a barrier between the turkey and bread, which helps prevent sogginess. Let the sliders cool completely before packing them. If you’re really worried, pack them with a paper towel in the container to absorb any excess moisture.
Can I freeze these sliders?
Yes! Freeze them after baking and cooling. Wrap each slider individually in plastic wrap, then place them in a freezer-safe bag. They’ll keep for up to 3 months. Thaw in the refrigerator overnight and reheat in a 300°F oven for 5-7 minutes.
What other meats work well in this recipe?
Ham, roast beef, chicken, and even salami or pepperoni all work beautifully. The formula is flexible—just keep the meat to about 1 pound total and layer it evenly. For a fun twist, try using turkey club pinwheel wraps filling inside these sliders instead.
Pin This Recipe!
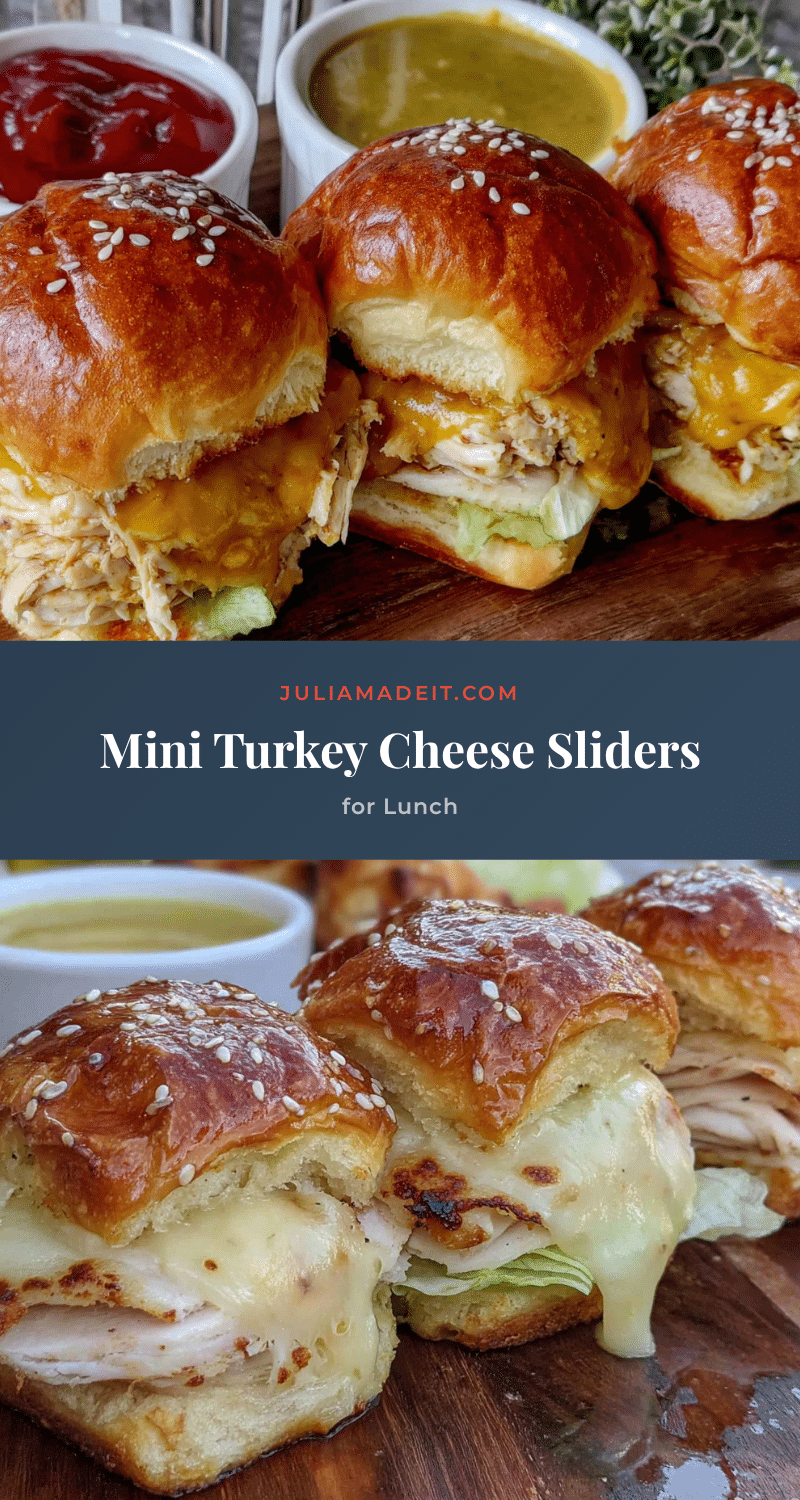
Easy Mini Turkey and Cheese Sliders: Best Lunchbox Recipe

These mini turkey and cheese sliders are soft, buttery, and perfect for lunchboxes or quick dinners. Made with Hawaiian sweet rolls, deli turkey, Swiss cheese, and a savory butter topping, they come together in about 25 minutes and taste even better the next day.
- Prep Time: 15 minutes
- Cook Time: 18-20 minutes
- Total Time: 33-35 minutes
- Yield: 12 sliders 1x
- Category: Main Course
- Cuisine: American
Ingredients
- 12-count package of Hawaiian sweet rolls (or any soft dinner rolls)
- 1 pound deli-sliced turkey breast (oven-roasted or honey-roasted)
- 8 slices of Swiss cheese
- 4 tablespoons unsalted butter, melted
- 1 tablespoon Dijon mustard
- 1 teaspoon Worcestershire sauce
- 1 tablespoon poppy seeds (optional)
- 1 teaspoon garlic powder
- 1 teaspoon onion powder
- Salt and black pepper to taste
- Fresh spinach leaves (optional)
- Thinly sliced red onion (optional)
- Roasted red peppers (optional)
Instructions
- Preheat your oven to 350°F (175°C). Grease a 9×13-inch baking dish with butter or non-stick spray.
- Keep the entire sheet of rolls intact. Using a serrated knife, carefully slice the whole sheet horizontally through the middle to separate the top half from the bottom half. Place the bottom half in the prepared baking dish.
- Arrange half of the turkey slices evenly over the bottom layer of rolls. Add any optional veggies (spinach, red onion, roasted red peppers) at this point.
- Lay the Swiss cheese slices over the turkey, tearing them in half if needed to cover evenly.
- Add the remaining turkey slices on top of the cheese.
- Place the top half of the rolls over the filling, pressing down gently.
- In a small bowl, combine the melted butter, Dijon mustard, Worcestershire sauce, garlic powder, onion powder, and a pinch of salt and pepper. Whisk until smooth.
- Brush the butter mixture generously over the tops of the rolls, getting the edges and any exposed bread surfaces. Sprinkle poppy seeds evenly over the top.
- Cover the baking dish loosely with aluminum foil and bake for 10 minutes.
- Remove the foil and bake for another 8-10 minutes, until the tops are golden brown and the edges look slightly crispy.
- Let the sliders rest in the pan for 5 minutes before slicing.
- Using a sharp knife, cut along the seams of the rolls to separate them into individual sliders. Serve warm or at room temperature.
Notes
Don’t overbake; start checking at 8 minutes after removing foil. Let sliders rest 5 minutes before slicing to prevent cheese from oozing out. For best texture, use room temperature cheese. Sliders taste even better the next day. To reheat, wrap in foil and warm at 300°F for 5 minutes.
Nutrition
- Serving Size: 1 slider
- Calories: 240
- Sugar: 6
- Sodium: 580
- Fat: 10
- Saturated Fat: 5
- Carbohydrates: 22
- Fiber: 1
- Protein: 16
Keywords: turkey sliders, mini sliders, lunchbox recipe, easy sliders, turkey and cheese sliders, Hawaiian roll sliders, meal prep lunch