For years, I just accepted that candy corn-flavored things were going to be a little… disappointing. You know the drill—those waxy little kernels are great for snacking straight from the bag, but turning them into a dessert always felt forced. I had been looking for a Halloween treat that actually tasted like the real thing, not some sad, artificially-sweetened knockoff. It took a few failed attempts (and one particularly tragic jello situation that ended up looking like a science experiment gone wrong) before I realized the trick was in the layers themselves. Not the flavoring—the way the colors stack, the way they set, the way each bite pulls apart cleanly. This Easy Candy Corn Layered Jello Cups recipe isn’t complicated. It’s just three ingredients, a little patience, and a payoff that honestly surprises everyone who tries it. The first time I pulled a perfectly layered cup out of the fridge, I actually laughed. It looked too good to be true. But that’s the thing about this recipe—it delivers exactly what it promises.
Why You’ll Love This Recipe
These jello cups are the kind of dessert that makes people do a double-take. They look like you spent hours in the kitchen, but the reality is way simpler. Here’s why they work so well:
- Only 3 Ingredients : You need exactly three things—orange jello, yellow jello, and sweetened condensed milk. That’s it. No gelatin sheets, no special molds, no complicated techniques.
- Foolproof Layers : Each layer sets clearly without bleeding into the next. The secret is letting each color fully firm up before adding the next, and the sweetened condensed milk layer creates that signature creamy white stripe.
- Perfect for Halloween Parties : These cups are portable, individual-sized, and instantly recognizable. They fit right in at any fall gathering or spooky celebration.
- Kid-Friendly to Make : My nieces love helping with this one. They get to watch the layers form in real-time, and there’s no baking or hot sugar involved.
- Nostalgic Without Being Cloying : The flavor is light and fruity, not heavy. It reminds me of the jello salads from childhood potlucks, but way cuter.
What makes this recipe different from other layered jello desserts is the timing. Most recipes rush the process, and you end up with muddy colors. I’ve tested the chilling times down to the minute, so you get clean, sharp lines every single time. It’s the kind of treat you can make ahead and just pull out when guests arrive—zero stress, maximum impact.
What Ingredients You Will Need
This recipe relies on simple, pantry-friendly ingredients that work together to create those iconic candy corn stripes. No fancy shopping trips required—you probably already have most of these on hand.
- 1 box (3 oz) orange gelatin dessert mix (like Jell-O brand) — This forms the bottom layer of your candy corn. I prefer the standard orange flavor, but any brand works as long as it’s the same size box.
- 1 box (3 oz) yellow gelatin dessert mix (lemon or pineapple flavor) — This creates the top layer. Lemon gives a slightly brighter taste, but pineapple works well too.
- 1 can (14 oz) sweetened condensed milk — This is the magic ingredient for the creamy white middle layer. It adds richness and structure that plain water just can’t match. I use Eagle Brand or store-brand—both work fine.
- Boiling water (for dissolving gelatin) — You’ll need about 2 cups total, divided between the layers.
- Cold water (for setting the gelatin) — About 1 cup total, divided.
Ingredient Tips: If you want to make this recipe sugar-free, you can use sugar-free gelatin mixes. Just note that sugar-free gelatin sets a little softer, so you’ll want to chill each layer an extra 15-20 minutes. The sweetened condensed milk doesn’t have a great sugar-free substitute—it’s really the backbone of that creamy layer. For a dairy-free option, you could try full-fat coconut milk mixed with a tablespoon of sugar, but the texture won’t be quite as firm.
Equipment Needed
You don’t need any fancy gear for this recipe. Here’s what you’ll need:
- Small mixing bowls (at least 3) — One for each color of gelatin and one for the condensed milk mixture. Glass or ceramic works best because they hold temperature well.
- Measuring cups — A 1-cup measure for boiling water and a 1/2-cup measure for cold water.
- Whisk or fork — For stirring the gelatin until completely dissolved. A whisk works faster, but a fork gets the job done.
- Clear plastic cups (7-9 oz size) — These are essential for showing off the layers. I use 9-oz clear plastic cups from the party supply store. You’ll need about 8-10 cups depending on how full you fill them.
- Liquid measuring cup with spout — For easy pouring into the cups without spilling.
- Refrigerator space — You need a flat, level spot in your fridge where the cups can sit undisturbed for at least 4 hours total.
Budget-Friendly Tip: If you don’t have clear cups, you can use small glass jars or even ramekins. The layers won’t be as visible, but the taste is exactly the same. I’ve also used silicone muffin cups in a pinch—just make sure they’re sturdy enough to hold liquid.
Preparation Method
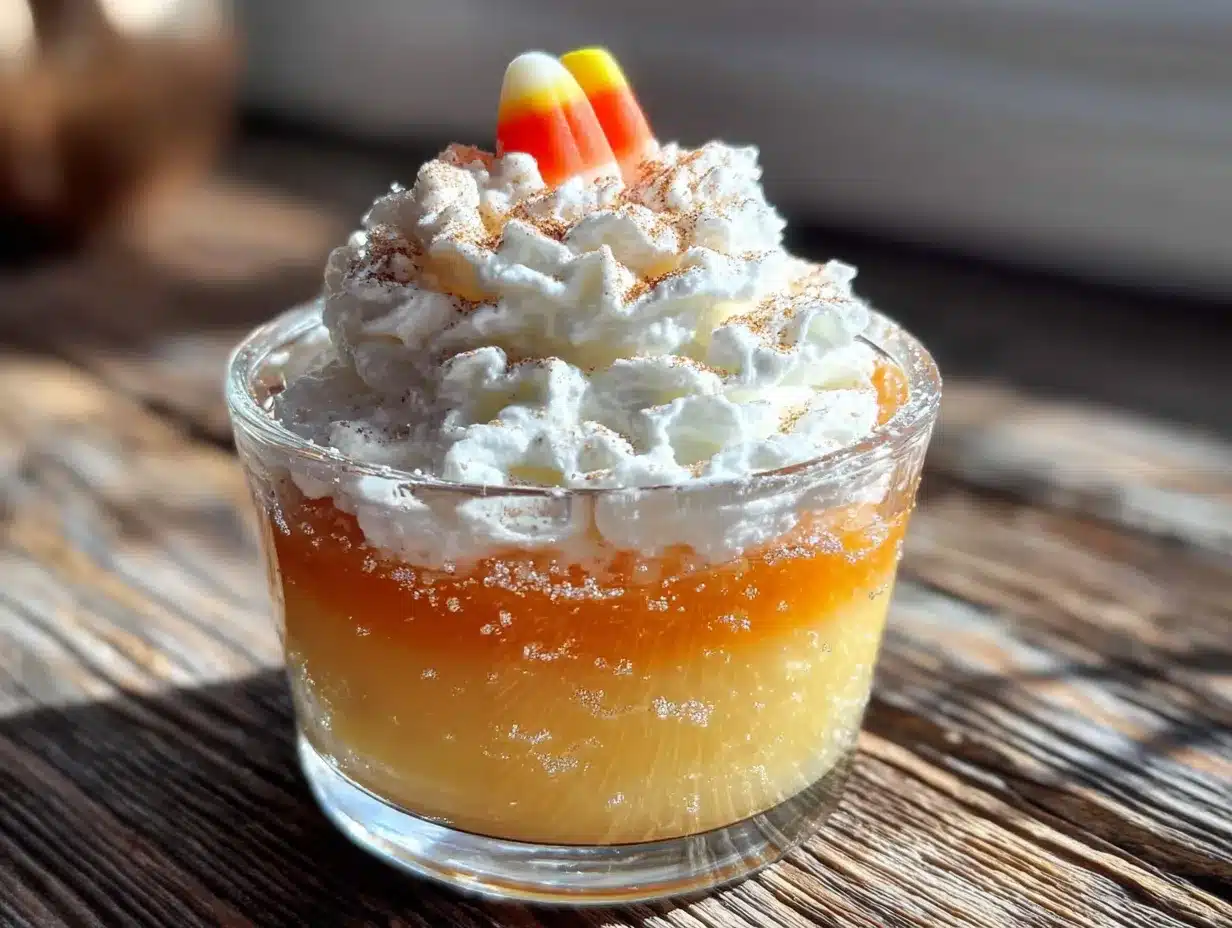
Let me walk you through this step by step. The key is patience—each layer needs time to set before you add the next one. But I promise, the wait is worth it.
Step 1: Prepare the Orange Layer (Bottom)
In a small bowl, empty the entire box of orange gelatin. Pour in 1 cup of boiling water and whisk until the powder is completely dissolved—about 2 minutes. No grains should remain. Stir in 1/2 cup of cold water. Pour the mixture evenly into your clear cups, filling each about one-third of the way. Place the cups in the refrigerator and chill for at least 1 hour, or until the gelatin is fully set and firm to the touch. Time estimate: 1 hour chill time.
Step 2: Prepare the Creamy White Layer (Middle)
While the orange layer sets, get the white layer ready. In a separate bowl, sprinkle one packet of unflavored gelatin over 1/4 cup of cold water. Let it sit for about 5 minutes—this is called blooming. Then, pour in 1/4 cup of boiling water and stir until the gelatin is fully dissolved. Whisk in the entire can of sweetened condensed milk until smooth and creamy. Let this mixture cool to room temperature—about 15 minutes. You don’t want it hot when you pour it over the set orange layer, or it might melt the bottom layer. Once the orange layer is firm, gently spoon the white mixture over it, filling each cup about two-thirds full. Return to the fridge and chill for another 1.5 hours. Time estimate: 1 hour 45 minutes (including cooling and chill time).
Step 3: Prepare the Yellow Layer (Top)
When the white layer is completely set, it’s time for the top. In a clean bowl, dissolve the yellow gelatin in 1 cup of boiling water, stirring until no granules remain. Add 1/2 cup of cold water and stir. Let this mixture cool for about 10 minutes—it should be lukewarm, not hot. Carefully pour the yellow gelatin over the set white layer, filling each cup to the top. Return to the fridge and chill for at least 2 hours, or until the top layer is fully firm. Time estimate: 2 hours 10 minutes (including cooling and chill time).
Step 4: Serve and Enjoy
Once all three layers are set, your Easy Candy Corn Layered Jello Cups are ready. The total chill time is about 4-5 hours, so plan accordingly. I usually make them the night before and let them sit overnight—they’re even better the next day. To serve, you can eat them straight from the cup with a spoon, or gently run a knife around the edge and invert onto a plate for a more dramatic presentation. The layers hold together surprisingly well.
Cooking Tips & Techniques
After making these cups more times than I can count, I’ve learned a few things the hard way. Here’s what I wish someone had told me:
- Don’t rush the chilling — I know it’s tempting, but if you pour warm gelatin over a layer that isn’t fully set, the colors will bleed together. You’ll end up with a muddy mess instead of clean stripes. Set a timer and walk away.
- Cool the gelatin before pouring — Let each batch of gelatin cool to room temperature before adding it to the cups. Hot liquid will melt the layer below it. I learned this after ruining an entire batch—the white layer just dissolved into the orange.
- Use a spoon, not a pitcher — Pouring directly from a measuring cup can disturb the set layer below. Instead, use a spoon to gently transfer the gelatin into each cup. It takes a little longer, but the layers stay perfect.
- Level your fridge shelf — Before you start, make sure the shelf where the cups will sit is perfectly level. Otherwise, your layers will set at an angle, and the candy corn effect won’t look right. I use a small level, but eyeballing it works too.
- Make extra white mixture — The sweetened condensed milk layer is the trickiest to measure. I always make a little extra (about 1/4 cup more than I think I need) to account for any spills or uneven pouring.
Variations & Adaptations
This recipe is super flexible. Here are some ways to switch it up:
- Halloween Colors — Swap the yellow layer for green gelatin to make Frankenstein cups. Use lime flavor for a bright green top layer. The orange and white stay the same.
- Thanksgiving Twist — Use orange, yellow, and white layers to mimic fall leaves. Add a tiny pinch of cinnamon to the white layer for a subtle spice note.
- Dairy-Free Version — Replace the sweetened condensed milk with full-fat coconut cream mixed with 2 tablespoons of sugar. The texture will be slightly softer, so add an extra 30 minutes to the chill time for the white layer.
- Boozy Adult Version — Replace the cold water in any layer with an equal amount of vodka or rum. Just note that alcohol prevents gelatin from setting as firmly, so you’ll need to double the gelatin amount for that layer. I’ve done this for Halloween parties, and it’s always a hit.
- Mini Cups — Use 2-oz shot glasses or small condiment cups for bite-sized treats. Reduce the chill time for each layer to about 45 minutes since the cups are smaller.
I tried a version last year where I added a thin layer of crushed graham crackers between the white and yellow layers. It added a nice crunch, but it made the layers less stable. Stick with the original if you want clean stripes.
Serving & Storage Suggestions
These cups are best served cold, straight from the fridge. The gelatin holds its shape for about 30 minutes at room temperature before it starts to soften, so don’t leave them out too long during a party. I like to arrange them on a platter with some fake spiderwebs or mini pumpkins around the base for a festive look.
Storage: Cover the cups with plastic wrap or their original lids if they came with them. They’ll keep in the fridge for up to 5 days. The layers will stay clean and separate for about 3 days—after that, the colors might start to bleed slightly, but they’re still perfectly edible. I don’t recommend freezing these; gelatin gets watery and grainy when thawed.
Reheating: These are meant to be served cold, so no reheating needed. If you want to unmold them, dip the cup in warm water for about 10 seconds, then invert onto a plate. The layers will slide out in one piece.
One thing I love about this recipe is that the flavors actually meld together a bit after a day in the fridge. The orange and yellow layers start to taste more cohesive, and the creamy white layer balances the sweetness. They’re good right away, but they’re even better the next day.
Nutritional Information & Benefits
Here’s the honest truth—these are a treat, not a health food. But they’re made with simple ingredients, and you can feel good about serving them at a party. Here’s the breakdown per serving (one cup):
- Calories: Approximately 180-200
- Fat: 4g (mostly from the sweetened condensed milk)
- Carbohydrates: 35g
- Sugar: 32g
- Protein: 4g
Health Benefits: Gelatin is a good source of collagen, which supports joint health and skin elasticity. The sweetened condensed milk provides calcium and protein, though it’s also high in sugar. If you’re watching your sugar intake, you can use sugar-free gelatin and a reduced-sugar condensed milk alternative. These cups are naturally gluten-free and contain no artificial colors if you use natural gelatin brands. Just be aware that the standard Jell-O brand does contain artificial dyes.
Frequently Asked Questions
Can I use sugar-free gelatin for this recipe?
Yes, you can. Just note that sugar-free gelatin sets a bit softer than regular. Add an extra 15-20 minutes of chill time per layer to make sure they’re fully firm.
Why did my layers bleed together?
This usually happens when you pour warm gelatin over a layer that hasn’t set completely. Make sure each layer is fully firm to the touch before adding the next one. Also, let your gelatin cool to room temperature before pouring.
Can I make these in a large dish instead of individual cups?
Absolutely. Use an 8×8-inch glass dish and triple the recipe. Just increase the chill time for each layer to about 2 hours. Slice into squares to serve.
How far in advance can I make these?
You can make them up to 5 days ahead. Store them covered in the fridge. The layers will stay clean for about 3 days, then they might start to bleed slightly, but they’re still safe to eat.
Can I use different flavors for the layers?
Yes! Try strawberry for the bottom, vanilla pudding for the middle, and lemon for the top. Just make sure the middle layer is always creamy (sweetened condensed milk or pudding) to mimic the candy corn look.
Conclusion
These Easy Candy Corn Layered Jello Cups are the kind of recipe that makes you look like a kitchen wizard without any of the stress. Three ingredients, a little patience, and you’ve got a Halloween treat that’s as fun to look at as it is to eat. I love watching people’s faces when they realize the layers are actually clean and separate—it always gets a surprised laugh. If you’re looking for a dessert that’s simple, nostalgic, and guaranteed to impress, this is it. Make them for your next Halloween party, or just because you want something pretty in your fridge. And hey, if you try them, let me know how they turn out. I’d love to hear about your layer game!
If you enjoyed this recipe, you might also love my cozy pumpkin sugar cookie bars with orange cream cheese frosting for another easy fall dessert. And for a savory Halloween snack, these crispy mummy hot dog crescent rolls are always a crowd-pleaser. Happy Halloween, and happy layering!
Pin This Recipe!
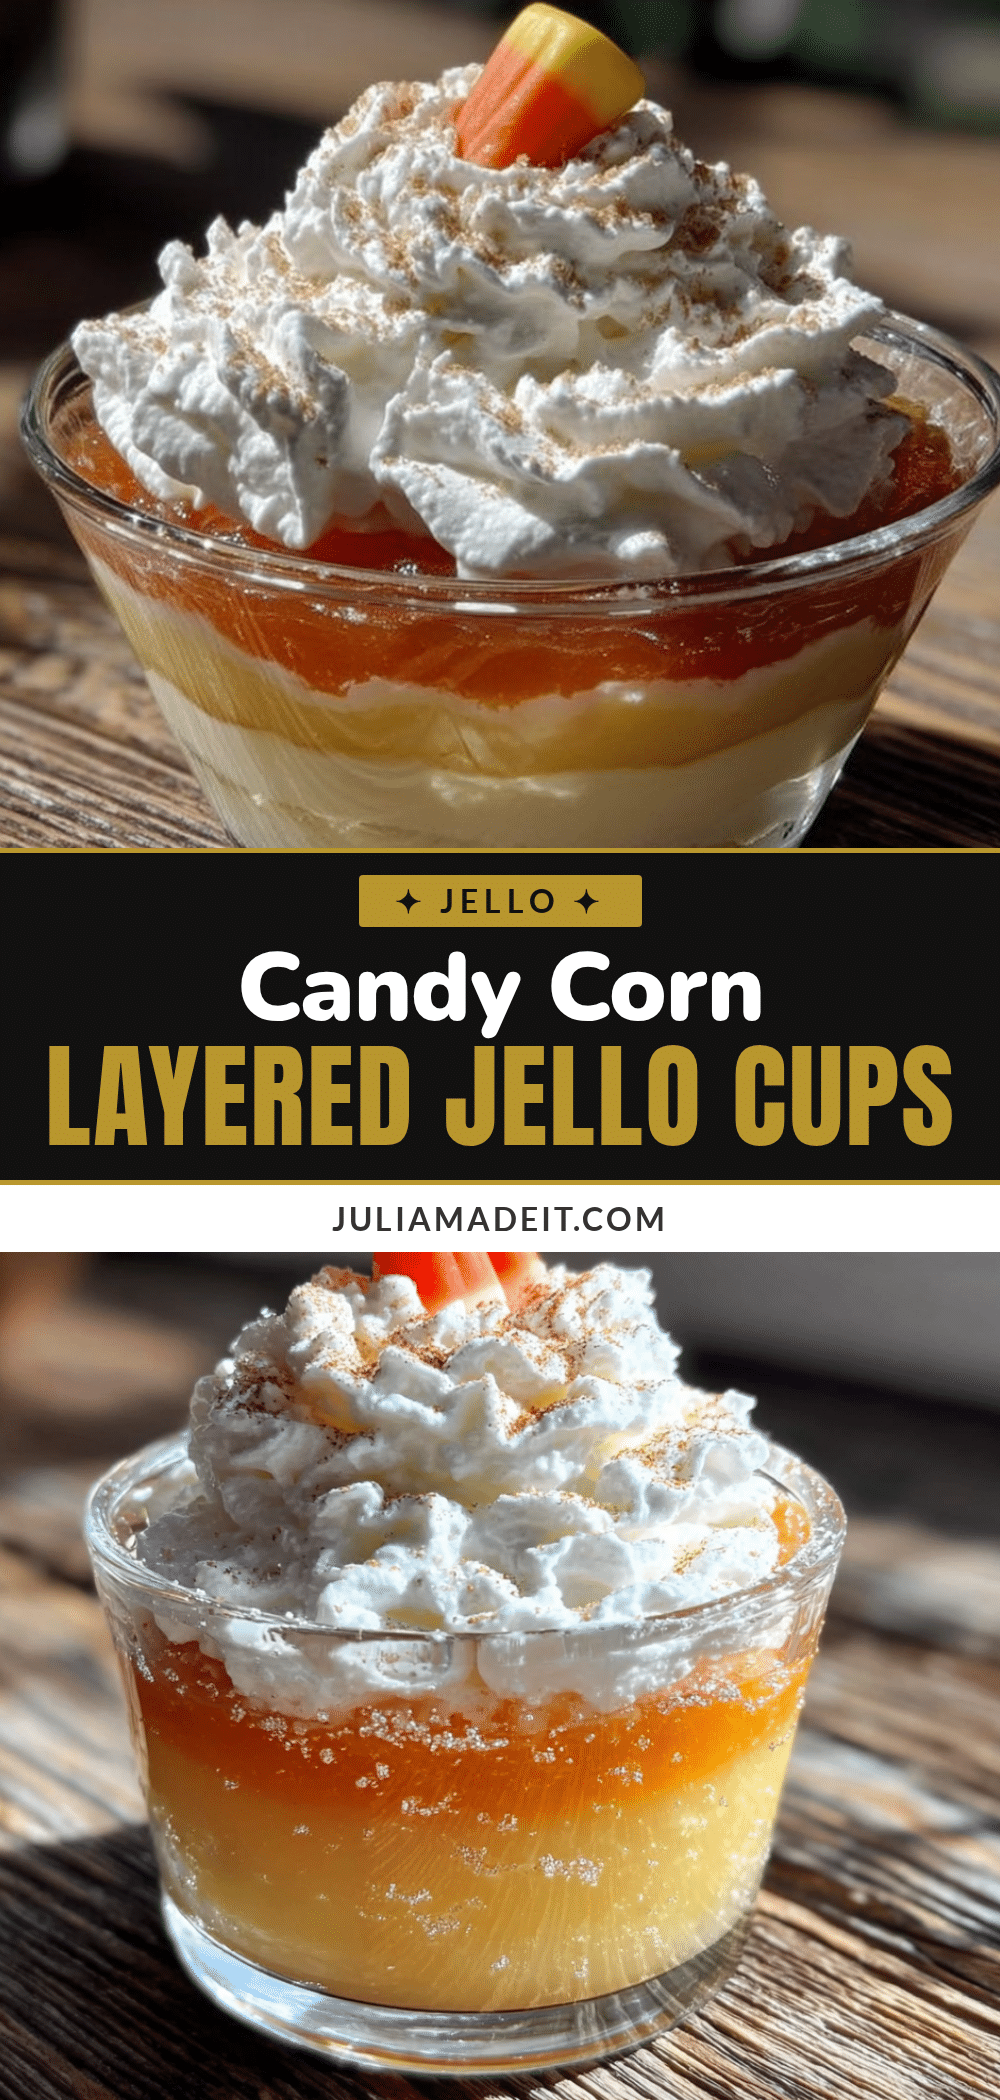
Easy Candy Corn Layered Jello Cups: Best 3-Ingredient Treat
These Easy Candy Corn Layered Jello Cups are a simple, three-ingredient Halloween treat that delivers clean, colorful layers and a nostalgic, fruity flavor. Perfect for parties and kid-friendly to make.
- Prep Time: 15 minutes
- Cook Time: 0 minutes
- Total Time: 4 hours 30 minutes
- Yield: 8-10 servings 1x
- Category: Dessert
- Cuisine: American
Ingredients
- 1 box (3 oz) orange gelatin dessert mix
- 1 box (3 oz) yellow gelatin dessert mix (lemon or pineapple flavor)
- 1 can (14 oz) sweetened condensed milk
- Boiling water (about 2 cups, divided)
- Cold water (about 1 cup, divided)
Instructions
- Prepare the Orange Layer (Bottom): In a small bowl, empty the entire box of orange gelatin. Pour in 1 cup of boiling water and whisk until the powder is completely dissolved—about 2 minutes. Stir in 1/2 cup of cold water. Pour the mixture evenly into clear cups, filling each about one-third of the way. Refrigerate for at least 1 hour, or until fully set.
- Prepare the Creamy White Layer (Middle): While the orange layer sets, sprinkle one packet of unflavored gelatin over 1/4 cup of cold water. Let it sit for about 5 minutes to bloom. Then, pour in 1/4 cup of boiling water and stir until the gelatin is fully dissolved. Whisk in the entire can of sweetened condensed milk until smooth. Let cool to room temperature (about 15 minutes). Once the orange layer is firm, gently spoon the white mixture over it, filling each cup about two-thirds full. Refrige…
- Prepare the Yellow Layer (Top): When the white layer is completely set, dissolve the yellow gelatin in 1 cup of boiling water, stirring until no granules remain. Add 1/2 cup of cold water and stir. Let cool for about 10 minutes until lukewarm. Carefully pour the yellow gelatin over the set white layer, filling each cup to the top. Refrigerate for at least 2 hours, or until fully firm.
- Serve and Enjoy: Once all three layers are set (total chill time about 4-5 hours), the cups are ready. Serve straight from the cup with a spoon, or gently run a knife around the edge and invert onto a plate for a more dramatic presentation.
Notes
Don’t rush the chilling—each layer must be fully set before adding the next to prevent colors from bleeding. Cool gelatin to room temperature before pouring to avoid melting the layer below. Use a spoon to gently transfer gelatin into cups to avoid disturbing set layers. Make extra white mixture to account for spills. For sugar-free version, use sugar-free gelatin and add extra chill time. For dairy-free, substitute sweetened condensed milk with full-fat coconut cream mixed with 2 tablespoons sugar.
Nutrition
- Serving Size: 1 cup
- Calories: 180200
- Sugar: 32
- Sodium: 100
- Fat: 4
- Saturated Fat: 2.5
- Carbohydrates: 35
- Protein: 4
Keywords: candy corn, jello cups, Halloween dessert, layered jello, 3-ingredient treat, easy dessert, kid-friendly