Sunday morning, 6:47 AM, and the kitchen is still dark except for the light above the stove. The bananas on the counter have gone from spotty to almost black, and honestly, they’re past the point of anyone eating them plain. But that’s exactly when they’re perfect for this. I pulled out a mixing bowl before I even turned on the coffee maker, because some recipes don’t need caffeine to get started. They just need a fork, a bowl, and a quiet house.
This easy one-bowl banana bread (no mixer needed) came from a very specific kind of desperation. I wanted something warm and sweet, but I didn’t want to haul out the stand mixer or deal with a pile of dishes. I wanted the kind of baking that feels less like a project and more like a small act of care for yourself. So I started mixing everything in one bowl, by hand, and never looked back.
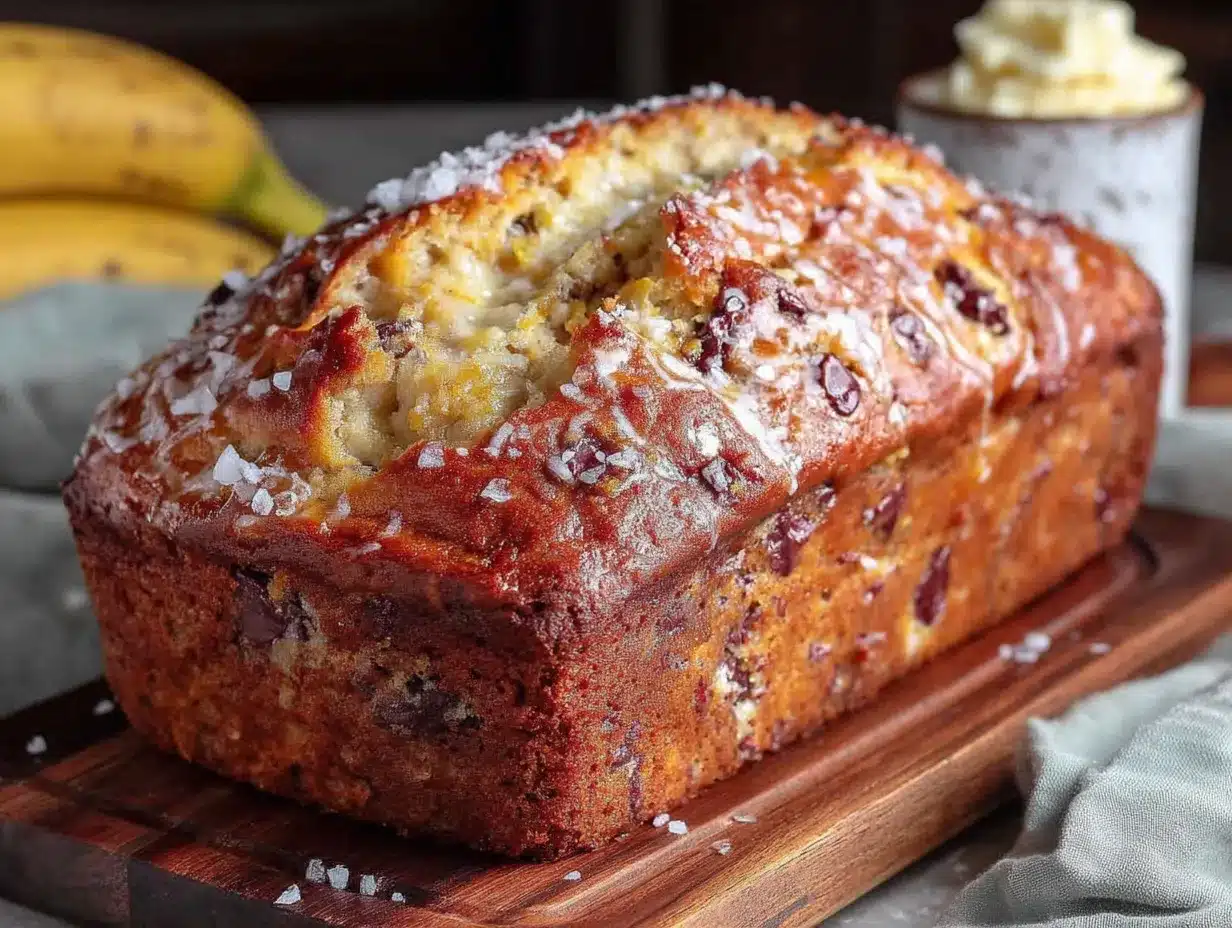
The first time I made it this way, I was skeptical. Would it be as fluffy? Would the texture hold up without creaming the butter and sugar first? But the loaf came out golden, domed, and so tender it practically fell apart under the knife. That’s when I knew I’d stumbled onto something worth keeping.
There’s something about the simplicity of this recipe that makes it feel almost private. You don’t need to impress anyone. You just need ripe bananas, a few pantry staples, and maybe a quiet moment to yourself while it bakes.
Why You’ll Love This Recipe
I’ve tested this banana bread more times than I care to admit. Some batches were too dense, others too sweet, and a few just plain dry. But this version? It’s the one I keep coming back to. Here’s why I think you’ll feel the same way:
- One bowl, no mixer – You mix everything by hand with a fork or whisk. Less cleanup means more time to actually enjoy the bread.
- Pantry-friendly ingredients – No buttermilk, no sour cream, no weird extracts. Just butter, sugar, eggs, flour, and bananas.
- Perfect for busy mornings – It comes together in about 10 minutes of active work. The oven does the rest.
- Foolproof texture – The inside is moist and tender, the crust is golden and slightly crisp. Every single time.
- Crowd-approved – I’ve brought this to brunches, dropped it off for neighbors, and packed it in lunchboxes. It disappears fast.
What makes this recipe different from the dozens of banana breads out there? It’s the technique. Melting the butter instead of creaming it, mashing the bananas until they’re almost liquid, and letting the batter rest for just a few minutes before baking. These small choices add up to a loaf that’s consistently moist without being greasy.
Honestly, this is the kind of recipe that makes you feel like a good baker even on days when you don’t have the energy for one. It’s forgiving, it’s fast, and it tastes like something you’d pay good money for at a bakery.
What Ingredients You Will Need
This recipe keeps things simple. You probably have most of these in your kitchen right now. Here’s what you’ll need and a few notes on each one:
- 3 large ripe bananas – The riper the better. You want them heavily spotted or even black. They’ll be sweeter and easier to mash. If your bananas aren’t ripe enough, roast them in the oven at 300°F for 15 minutes.
- 1/3 cup unsalted butter, melted – I use unsalted so I can control the salt level. Let it cool slightly after melting so it doesn’t cook the eggs.
- 3/4 cup granulated sugar – Regular white sugar works great. You can also use coconut sugar for a deeper flavor, but the texture will be slightly denser.
- 1 large egg, room temperature – Cold eggs can seize the melted butter. Let yours sit out for 15 minutes or place it in warm water for a few minutes.
- 1 teaspoon vanilla extract – Pure vanilla adds warmth. Imitation works in a pinch, but pure is noticeably better here.
- 1 1/2 cups all-purpose flour – Spoon and level your flour. Scooping directly from the bag packs it down and leads to dry bread.
- 1 teaspoon baking soda – This is your leavener. Make sure it’s fresh (test it by dropping a bit into vinegar; it should fizz).
- 1/4 teaspoon salt – Balances the sweetness and brings out the banana flavor.
- 1/2 teaspoon cinnamon (optional) – I add this about half the time. It’s not traditional, but it pairs beautifully with banana.
That’s it. No fancy ingredients, no trips to a specialty store. If you’ve got ripe bananas and basic baking staples, you’re ready to go.
One thing I’ve learned the hard way: don’t skip the salt. Even a small pinch makes a big difference in how the flavors come together. And if you’re using salted butter, reduce the added salt to just a pinch.
Equipment Needed
You don’t need much for this recipe. That’s kind of the whole point.
- One large mixing bowl – Any bowl works. I use a ceramic one because it feels sturdy, but glass or metal is fine.
- A fork or potato masher – For mashing the bananas. A fork works perfectly; a masher is slightly faster.
- A whisk or wooden spoon – For mixing the batter. A whisk helps break up lumps, but a spoon gets the job done.
- A 9×5-inch loaf pan – Standard size. If you use an 8×4 pan, your bread will be taller and可能需要 bake a few minutes longer.
- Parchment paper or butter – For greasing the pan. Parchment paper with overhang makes lifting the loaf out so much easier.
- Cooling rack – Optional but helpful. If you don’t have one, let the bread cool in the pan for 10 minutes, then transfer to a plate.
I’ve made this with a whisk I bought at a dollar store and it turned out just fine. Don’t overthink the equipment. If you have a bowl and something to stir with, you’re set.
Preparation Method
Preheat your oven to 350°F (175°C). Grease your loaf pan with butter or line it with parchment paper, leaving some overhang on the long sides. Set it aside.
- Mash the bananas. In your large mixing bowl, add the peeled bananas. Mash them with a fork until they’re mostly smooth with a few small lumps. You want some texture, but not big chunks. This should take about a minute.
- Add the melted butter. Pour the cooled melted butter over the mashed bananas. Stir until combined. The mixture will look a bit separated at first, but keep stirring and it will come together.
- Mix in the sugar, egg, and vanilla. Add the sugar and stir well. Then crack in the egg and add the vanilla. Whisk until everything is smooth and glossy. This takes about 30 seconds of steady mixing.
- Add the dry ingredients. Sprinkle the flour, baking soda, salt, and cinnamon (if using) over the wet mixture. Stir gently with a wooden spoon or spatula until just combined. Do not overmix. A few streaks of flour are okay. Overmixing develops gluten and makes the bread tough.
- Let the batter rest. This is a trick I picked up from a pastry chef friend. Let the batter sit in the bowl for 5 minutes. It gives the flour time to hydrate and the baking soda time to activate. You’ll see tiny bubbles forming on the surface.
- Pour and bake. Scrape the batter into your prepared loaf pan and spread it even. Bake for 50 to 60 minutes, or until a toothpick inserted in the center comes out clean or with just a few moist crumbs. If the top is browning too quickly around the 40-minute mark, tent it loosely with foil.
- Cool properly. Let the bread cool in the pan for 10 minutes. Then lift it out using the parchment overhang and transfer to a wire rack. Let it cool completely before slicing, if you can wait that long. Warm banana bread is amazing, but it slices much cleaner when fully cool.
One more thing: if your kitchen runs hot or your oven runs cool, start checking at 50 minutes. Ovens vary more than you’d think, and nobody wants a burnt bottom.
Cooking Tips & Techniques
I’ve made this recipe dozens of times, and I’ve made plenty of mistakes along the way. Here’s what I’ve learned so you don’t have to repeat my errors.
Don’t overmix the batter. This is the number one mistake people make. Once you add the flour, mix just until you can’t see dry flour anymore. A few lumps are fine. Overmixing creates a tough, rubbery texture that no amount of butter can fix.
Use room temperature ingredients. I know, it’s annoying to wait. But cold eggs can cause melted butter to seize, creating little hard bits in your batter. If you forgot to take the egg out, place it in a bowl of warm water for 5 minutes.
Check your baking soda. Baking soda loses potency over time. If your banana bread comes out flat and dense, your baking soda might be old. Test it by dropping a pinch into vinegar; if it bubbles vigorously, it’s still good.
Let it cool before slicing. I know the smell is intoxicating. But cutting into hot banana bread releases steam and makes the interior gummy. Let it cool for at least 20 minutes. I promise it’s worth the wait.
Use a toothpick to test doneness. The top might look golden and set, but the center could still be raw. Insert a toothpick into the thickest part. If it comes out clean or with a few moist crumbs, it’s done. If it’s wet batter, give it 5 more minutes.
One time, I forgot the sugar entirely. The bread was edible but sad and bland. Double-check your ingredients before you start mixing. It sounds obvious, but we’ve all been there.
Variations & Adaptations
This recipe is a great base for experimentation. Here are a few ways I’ve changed it up depending on what I have on hand or who I’m baking for.
Chocolate chip banana bread. Fold in 1/2 cup of semisweet or dark chocolate chips after mixing the batter. The chocolate melts into little pockets of richness. My kids fight over the pieces with the most chocolate.
Nutty banana bread. Add 1/2 cup of chopped walnuts or pecans. Toast them first in a dry pan for 3 minutes for extra flavor. The crunch contrasts beautifully with the soft crumb.
Gluten-free option. Swap the all-purpose flour for a 1:1 gluten-free baking flour blend. I’ve used Bob’s Red Mill and King Arthur brands with good results. The texture is slightly more crumbly but still delicious.
Vegan version. Replace the egg with a flax egg (1 tablespoon ground flaxseed mixed with 3 tablespoons water, let sit for 5 minutes). Use melted coconut oil or vegan butter instead of dairy butter. The bread will be a bit denser but still very good.
Spiced banana bread. Add 1/2 teaspoon of nutmeg and 1/4 teaspoon of ground ginger along with the cinnamon. It gives the bread a warm, almost holiday-like flavor. I make this version in the fall and it never lasts long.
I once tried adding shredded coconut and it was a happy accident. Toasted coconut on top before baking adds a nice texture and a subtle tropical note. Give it a try if you’re feeling adventurous.
Serving & Storage Suggestions
This banana bread is wonderful on its own, but a few small additions can make it feel extra special.
Serving. Serve slices warm or at room temperature. For a treat, spread a slice with salted butter and let it melt in. A drizzle of honey or a sprinkle of flaky sea salt is also fantastic. It pairs beautifully with a cup of coffee, a glass of cold milk, or a hot cup of tea.
Storage. Store leftover banana bread in an airtight container at room temperature for up to 3 days. The moisture from the bananas keeps it soft. If your kitchen is very warm, you can refrigerate it, but the texture will be slightly firmer.
Freezing. This bread freezes beautifully. Wrap the cooled loaf tightly in plastic wrap, then in aluminum foil. Freeze for up to 3 months. To thaw, leave it on the counter overnight or warm individual slices in the microwave for 20 seconds. You can also freeze slices individually for quick breakfasts or snacks.
Reheating. For that just-baked warmth, pop a slice in a toaster oven at 350°F for 5 minutes, or microwave it for 15 seconds. The microwave is faster, but the toaster oven keeps the crust slightly crisp.
The flavors actually get better on the second day. The banana flavor deepens and the texture evens out. If you can resist eating it all on day one, you’re in for a treat on day two.
Nutritional Information & Benefits
Here’s the approximate nutritional breakdown for one slice (based on 10 slices per loaf):
- Calories: 210
- Fat: 8g
- Carbohydrates: 33g
- Fiber: 1.5g
- Sugar: 17g
- Protein: 3.5g
Bananas are a good source of potassium, vitamin B6, and vitamin C. They also provide natural sweetness, which means you can use slightly less sugar than in other baked goods. The butter adds richness, but you can reduce it to 1/4 cup if you prefer a lighter loaf.
This recipe is not low-carb or keto-friendly due to the bananas and sugar. But it is a whole-food based treat made with real ingredients. If you’re looking for a more nutrient-dense option, try swapping half the white flour for whole wheat pastry flour. It adds fiber without making the bread too dense.
As with all treats, moderation is key. One slice with your morning coffee is a lovely way to start the day without overdoing it.
Conclusion
This easy one-bowl banana bread has become a staple in my kitchen for good reason. It’s forgiving, it’s fast, and it consistently delivers a moist, tender loaf that feels like a warm hug. Whether you’re baking for a crowd, a school lunch, or just because you have bananas that need using up, this recipe will not let you down.
I love that it doesn’t require any special skills or equipment. Anyone can make it, and everyone who tries it seems to smile. That’s the kind of recipe worth keeping close.
If you give this a try, I’d love to hear how it goes. Did you add chocolate chips? Walnuts? Did you sneak a slice while it was still warm? Leave a comment below or tag me in your photos. Happy baking, friend.
Frequently Asked Questions
Can I use frozen bananas for this recipe?
Absolutely. Thaw them completely, then drain off any excess liquid before mashing. Frozen bananas are actually sweeter and easier to mash, making them perfect for banana bread.
Why did my banana bread sink in the middle?
This usually happens when the batter is overmixed or the oven temperature is too low. Overmixing incorporates too much air, which collapses during baking. Make sure your oven is fully preheated to 350°F.
Can I reduce the sugar?
You can reduce the sugar to 1/2 cup, but the bread will be less sweet and slightly denser. The bananas provide natural sweetness, so it will still taste good. Just don’t go below 1/2 cup or the texture suffers.
How do I know when the banana bread is done?
Insert a toothpick into the center of the loaf. If it comes out clean or with a few moist crumbs, it’s done. If it’s wet with batter, bake for 5 more minutes and test again. The top should also be golden brown and spring back when lightly pressed.
Can I make this into muffins instead?
Yes! Divide the batter among a 12-cup muffin tin lined with paper cups. Bake at 350°F for 18 to 22 minutes, or until a toothpick inserted in the center comes out clean. Muffins bake faster, so start checking at 18 minutes.
Pin This Recipe!
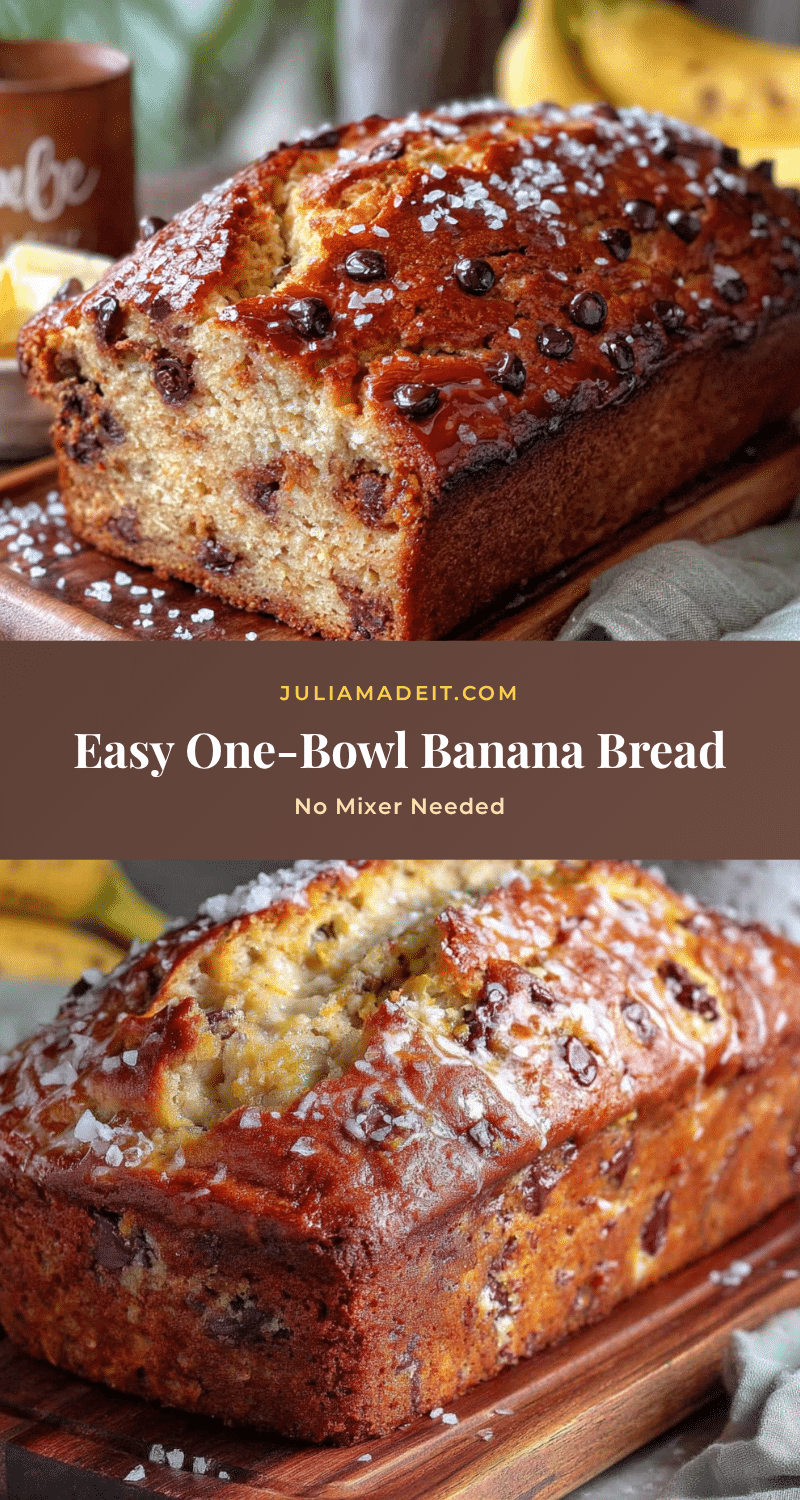
Easy One-Bowl Banana Bread Recipe (No Mixer Needed)
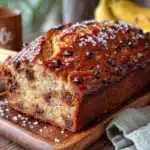
This easy one-bowl banana bread requires no mixer and comes together in about 10 minutes of active work. Made with ripe bananas and pantry staples, it yields a moist, tender loaf with a golden crust that’s perfect for busy mornings.
- Prep Time: 10 minutes
- Cook Time: 55 minutes
- Total Time: 1 hour 5 minutes
- Yield: 10 servings 1x
- Category: Dessert
- Cuisine: American
Ingredients
- 3 large ripe bananas (heavily spotted or black)
- 1/3 cup unsalted butter, melted and cooled slightly
- 3/4 cup granulated sugar
- 1 large egg, room temperature
- 1 teaspoon vanilla extract
- 1 1/2 cups all-purpose flour (spooned and leveled)
- 1 teaspoon baking soda
- 1/4 teaspoon salt
- 1/2 teaspoon cinnamon (optional)
Instructions
- Preheat oven to 350°F (175°C). Grease a 9×5-inch loaf pan with butter or line with parchment paper, leaving overhang on the long sides.
- In a large mixing bowl, mash the peeled bananas with a fork until mostly smooth with a few small lumps.
- Pour the cooled melted butter over the mashed bananas and stir until combined.
- Add the sugar and stir well. Then add the egg and vanilla, whisking until smooth and glossy (about 30 seconds).
- Sprinkle the flour, baking soda, salt, and cinnamon (if using) over the wet mixture. Stir gently with a wooden spoon or spatula until just combined. Do not overmix; a few streaks of flour are okay.
- Let the batter rest in the bowl for 5 minutes to allow the flour to hydrate and the baking soda to activate.
- Pour the batter into the prepared loaf pan and spread evenly. Bake for 50 to 60 minutes, or until a toothpick inserted in the center comes out clean or with a few moist crumbs. If the top browns too quickly, tent loosely with foil after 40 minutes.
- Let the bread cool in the pan for 10 minutes, then lift it out using the parchment overhang and transfer to a wire rack. Cool completely before slicing.
Notes
Use very ripe bananas for best sweetness and texture. Do not overmix the batter to avoid a tough loaf. Let the batter rest for 5 minutes before baking for a better texture. For chocolate chip version, fold in 1/2 cup chocolate chips. For nutty version, add 1/2 cup chopped walnuts or pecans. For gluten-free, use a 1:1 gluten-free baking flour blend. For vegan, replace egg with a flax egg and use melted coconut oil or vegan butter. Store in an airtight container at room temperature for up to 3 days, or freeze for up to 3 months.
Nutrition
- Serving Size: 1 slice
- Calories: 210
- Sugar: 17
- Sodium: 180
- Fat: 8
- Saturated Fat: 4.5
- Carbohydrates: 33
- Fiber: 1.5
- Protein: 3.5
Keywords: banana bread, easy banana bread, one bowl banana bread, no mixer banana bread, moist banana bread, homemade banana bread