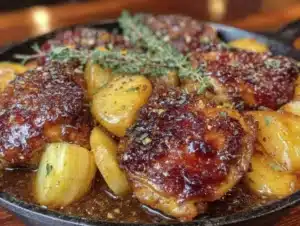
Last Tuesday, I was staring into my fridge, wondering what magic I could pull off with a pack of chicken thighs, a head of garlic, and some leftover rice. My neighbor, an older woman named Rosa who I’d only ever exchanged hellos with, happened to be watering her plants by the fence. She watched me for a second—probably saw the defeated look on my face—and then she just laughed. “You’re overthinking it,” she said, wiping her hands on her apron. “Garlic, butter, chicken, rice. One pan. That’s all you need.”
She didn’t give me a recipe card or a list of measurements. She just described the feeling of it: the sizzle when the butter hits the pan, the way the garlic makes the whole kitchen smell like someone’s grandmother is cooking, and how the rice soaks up all that golden, savory goodness. I nodded, thanked her, and went back inside to figure it out. Honestly, my first attempt was a little dry. I mean, I forgot to check the rice-to-liquid ratio and ended up with something closer to a pilaf than a cozy dinner. But Rosa’s words stuck with me, and the next time—well, let’s just say I got it right.
That’s the thing about this Cozy One-Pan Garlic Butter Chicken and Rice. It’s not about fancy techniques or exotic ingredients. It’s about trusting the process and letting simple things do the heavy lifting. The butter browns just enough to get nutty, the garlic infuses everything, and the chicken stays so tender it practically falls apart. Maybe you’ve been there—standing in your kitchen, tired, hungry, and not sure what to make. This is the recipe that answers that question. It’s the one I keep coming back to, week after week, because it feels like a warm hug on a plate.
Why You’ll Love This Recipe
Let me tell you why this one-pan wonder has become my go-to for those nights when I need comfort without the hassle. I’ve tested this recipe at least a dozen times, tweaking the liquid ratio, the garlic amount, and the cooking time until it was just right. It’s the kind of dish that feels like you spent hours on it, but really, it’s almost hands-off after the initial sear.
- Quick & Easy: From start to finish, this comes together in about 40 minutes. Perfect for a busy Tuesday or a lazy Sunday when you want something hearty without the cleanup.
- Simple Ingredients: You probably have garlic, butter, rice, and chicken in your kitchen right now. No fancy grocery trips needed—just pantry staples and a little patience.
- Perfect for Cozy Nights: Whether it’s cold outside or you just need some comfort, this dish delivers. It’s the kind of meal that makes you want to curl up on the couch with a blanket.
- Crowd-Pleaser: I’ve made this for picky eaters and foodie friends alike, and everyone goes back for seconds. The garlic butter flavor is universally loved.
- Unbelievably Delicious: The rice comes out fluffy and infused with chicken drippings and garlic, while the chicken skin gets perfectly crispy. It’s next-level comfort food, I promise.
What makes this different from other one-pan chicken and rice recipes? It’s the technique. Instead of just dumping everything in, you sear the chicken first to build that deep, savory fond on the bottom of the pan. Then you sauté the garlic in butter until it’s fragrant—not burnt—and deglaze with a splash of broth. The rice absorbs all that flavor, not just plain liquid. Trust me, this isn’t just another version. It’s the best version.
This recipe isn’t just good—it’s the kind that makes you close your eyes after the first bite. It’s comfort food reimagined: simple, soul-soothing, and exactly what you need after a long day. Perfect for impressing guests without stress, or turning a simple Tuesday into something memorable.
What Ingredients You Will Need
This recipe uses simple, wholesome ingredients to deliver bold flavor and satisfying texture without the fuss. Most of these are pantry staples, so you might not even need a shopping trip. Here’s what you’ll need and why each one matters:
- Chicken thighs (bone-in, skin-on, about 2 lbs): I prefer bone-in, skin-on thighs for this recipe because they stay juicy and the skin gets beautifully crispy. If you use boneless breasts, reduce the cooking time by about 10 minutes and watch them closely so they don’t dry out.
- Unsalted butter (4 tablespoons): Butter is the star here. It creates that rich, nutty base for the garlic and rice. I use unsalted so I can control the salt level. If you only have salted, just reduce the added salt by half.
- Garlic (1 whole head, minced): Don’t skimp on the garlic. A whole head might sound like a lot, but it mellows as it cooks and infuses the entire dish. Fresh garlic is non-negotiable here—the jarred stuff just won’t give you the same depth.
- Long-grain white rice (1 ½ cups): Basmati or jasmine work beautifully. They stay fluffy and separate, unlike short-grain rice which can get sticky. Rinse the rice under cold water until the water runs clear—this removes excess starch and prevents clumping.
- Chicken broth (3 cups), low-sodium: The broth adds flavor while the rice cooks. Low-sodium lets you control the salt. If you only have regular broth, skip the added salt until the end.
- Yellow onion (1 medium, diced): Onion adds a subtle sweetness that balances the garlic. You can use shallots for a milder flavor if you prefer.
- Dried thyme (1 teaspoon): Thyme is classic with chicken and rice. It adds an earthy, slightly floral note. Fresh thyme works too—just use 1 tablespoon of leaves.
- Paprika (1 teaspoon): Paprika gives the chicken a beautiful color and a hint of smokiness. Smoked paprika is even better if you have it.
- Salt and black pepper (to taste): Simple seasonings that make everything pop. I use about 1 teaspoon of salt and ½ teaspoon of pepper for the chicken, then adjust at the end.
- Fresh parsley (for garnish, optional): A sprinkle of fresh parsley adds color and a fresh finish. It’s optional, but it makes the dish look restaurant-worthy.
I recommend using Kitchen Basics or Swanson chicken broth for consistent flavor. For the rice, Royal or Tilda basmati rice has never let me down. If you’re looking for a gluten-free option, this recipe is naturally gluten-free as long as your broth is certified gluten-free. For a dairy-free version, swap the butter with a high-quality vegan butter or ghee (which is lactose-free).
Equipment Needed
You don’t need a lot of fancy gear for this one—that’s the beauty of it. Here’s what you’ll need:
- Large oven-safe skillet or Dutch oven (12-inch): I use a cast-iron skillet because it holds heat beautifully and gives the chicken an amazing crust. A stainless steel or enameled Dutch oven works too. Just make sure it has a tight-fitting lid.
- Sharp chef’s knife: For mincing garlic and dicing onion. A dull knife makes this job frustrating and dangerous.
- Cutting board: Any sturdy board will do. I prefer wood because it’s gentler on knives.
- Measuring cups and spoons: Accuracy matters for the rice-to-liquid ratio. Eyeballing it can lead to mushy or undercooked rice.
- Tongs: For flipping the chicken without tearing the skin. Silicone-tipped tongs are great for non-stick pans.
- Wooden spoon or spatula: For stirring the rice and scraping up the browned bits from the bottom of the pan.
- Aluminum foil (optional): If your lid doesn’t fit perfectly, foil helps trap the steam.
If you don’t have an oven-safe skillet, you can transfer the mixture to a baking dish after searing the chicken. It’s one extra step, but it works fine. Budget-friendly tip: A Lodge cast-iron skillet is affordable and lasts forever. I’ve had mine for years, and it only gets better with use.
Preparation Method
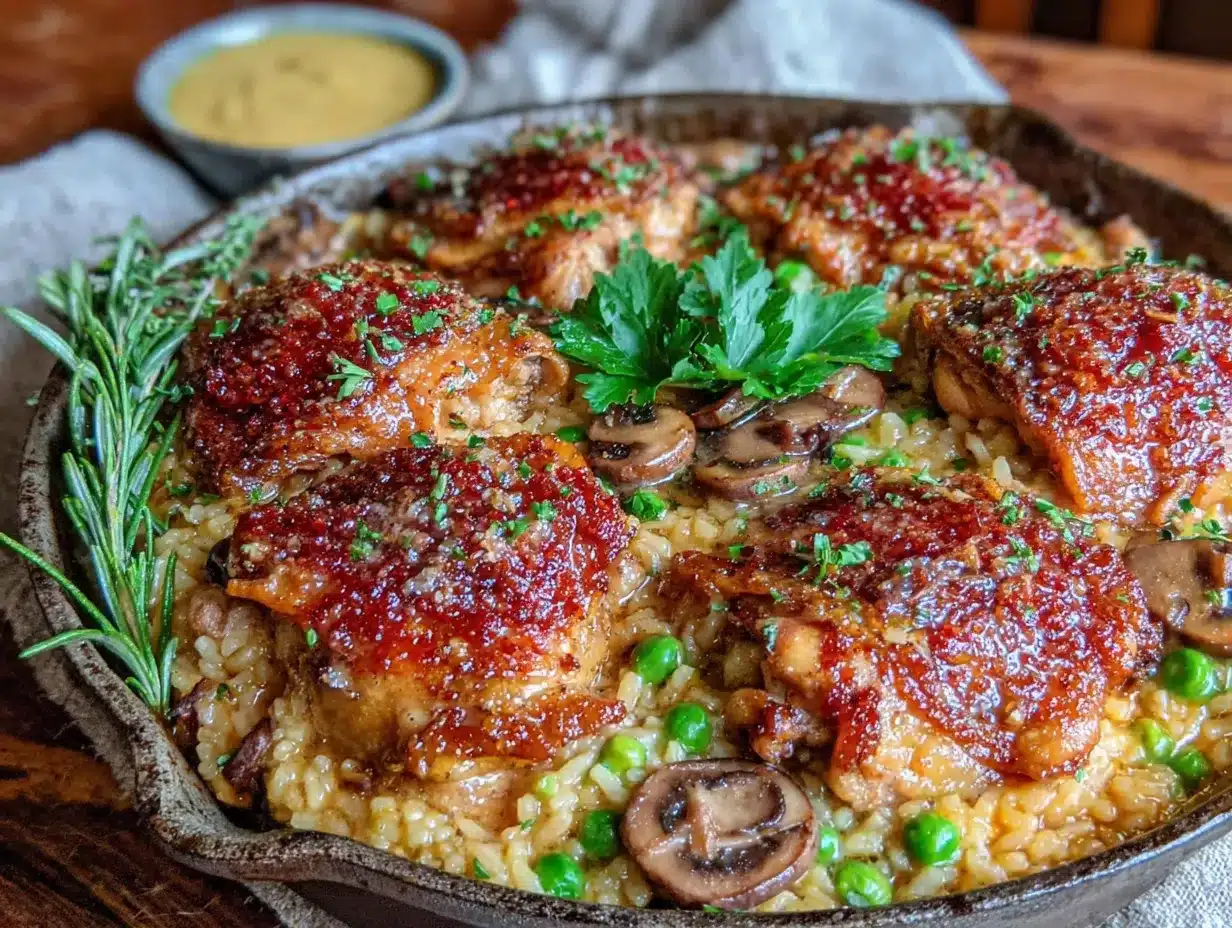
- Preheat your oven to 375°F (190°C). While it’s heating, pat the chicken thighs dry with paper towels. This is crucial for crispy skin. Season both sides generously with salt, pepper, and paprika.
- Sear the chicken. Place your skillet over medium-high heat and add 1 tablespoon of butter. Once it’s melted and shimmering, place the chicken skin-side down. Let it cook without moving for 5-6 minutes until the skin is golden brown and crispy. Flip and cook for another 3 minutes. Transfer the chicken to a plate—it won’t be cooked through yet, and that’s fine.
- Sauté the aromatics. Reduce the heat to medium. Add the remaining 3 tablespoons of butter to the pan. Once melted, add the diced onion and cook for 2-3 minutes until softened. Add the minced garlic and cook for 30 seconds—just until fragrant. Stir constantly so the garlic doesn’t burn. You’ll smell it immediately, and your kitchen will start to smell amazing.
- Toast the rice. Add the rinsed and drained rice to the pan. Stir it around for 1-2 minutes until the grains are coated in butter and starting to turn translucent at the edges. This step helps the rice stay fluffy and prevents it from getting mushy.
- Deglaze the pan. Pour in the chicken broth and add the dried thyme. Use your wooden spoon to scrape up all those browned bits from the bottom of the pan—that’s pure flavor. Bring the liquid to a gentle simmer.
- Return the chicken. Nestle the chicken thighs back into the pan, skin-side up, on top of the rice. Don’t push them down—just let them sit on the surface. The rice will cook around them.
- Cover and bake. Put the lid on your skillet (or cover tightly with foil). Transfer to the preheated oven and bake for 25-30 minutes. The rice should be tender and have absorbed most of the liquid. If the rice still looks wet, give it 5 more minutes.
- Rest and serve. Remove the skillet from the oven and let it sit, covered, for 5 minutes. This allows the rice to finish absorbing steam. Uncover, fluff the rice gently with a fork, and garnish with fresh parsley. Serve hot, straight from the pan.
A quick note: If you’re using a glass or ceramic dish, reduce the oven temperature to 350°F (175°C) to avoid thermal shock. Also, if the rice seems undercooked after the baking time, add 2-3 tablespoons of broth and bake for another 5 minutes. The rice should look fluffy and separate, not wet or clumpy.
Cooking Tips & Techniques
I’ve made this recipe enough times to know where things can go wrong. Here are my best tips to get it right every time:
- Don’t skip the sear. That golden crust on the chicken isn’t just for looks—it adds layers of flavor to the whole dish. The browned bits left in the pan (called fond) are what make the rice taste so rich. If you skip this step, you’ll lose a lot of depth.
- Rinse your rice. I know it’s an extra step, but rinsing removes excess starch that can turn your rice gluey. Run it under cold water in a fine-mesh strainer until the water runs clear. This takes about 30 seconds.
- Watch the garlic. Garlic burns fast. Once it turns dark brown, it becomes bitter and will ruin the dish. Keep it at medium heat and stir constantly when you add it to the pan.
- Use a tight-fitting lid. Steam is what cooks the rice evenly. If your lid is loose, wrap the skillet with foil before putting the lid on. You want as little steam escaping as possible.
- Let it rest. I know you’re hungry, but those 5 minutes of resting time are non-negotiable. It lets the rice finish absorbing moisture and makes the chicken juicier. Trust me, I’ve dug in early before, and it wasn’t the same.
One time, I forgot to rinse the rice and ended up with a sticky, clumpy mess. It still tasted good, but the texture was off. Now I never skip that step. Also, if your chicken skin isn’t crispy enough, pop the skillet under the broiler for 2-3 minutes at the end. Keep an eye on it so it doesn’t burn.
Variations & Adaptations
This recipe is incredibly flexible. Here are some ways to make it your own:
- Vegetarian version: Swap the chicken for a can of drained chickpeas or firm tofu (pressed and cubed). Sear the chickpeas in butter until they’re golden, then proceed with the recipe. Use vegetable broth instead of chicken broth. It’s still hearty and satisfying.
- Spicy kick: Add ½ teaspoon of red pepper flakes along with the garlic, or stir in a diced jalapeño with the onion. The heat cuts through the richness of the butter beautifully.
- Lemony herb twist: Add the zest of one lemon and 2 tablespoons of fresh lemon juice along with the broth. Stir in 1 tablespoon of fresh dill or basil at the end. It brightens up the dish and makes it feel lighter.
- Dairy-free option: Use a high-quality vegan butter or ghee. Ghee is clarified butter, so it’s lactose-free but still has that rich, nutty flavor. I’ve used Miyoko’s vegan butter with great results.
- Rice swap: Brown rice works, but you’ll need to increase the liquid to 3 ½ cups and bake for 45-50 minutes. Quinoa is also a great option—use 1 ½ cups quinoa and 2 ½ cups broth, and bake for 20-25 minutes.
I once tried adding sliced mushrooms to the pan with the onion, and it was fantastic. The mushrooms soak up all that garlic butter goodness. Give it a try if you’re a mushroom lover.
Serving & Storage Suggestions
This dish is best served hot, straight from the pan. The contrast between the crispy chicken skin and the fluffy, buttery rice is pure magic. I like to serve it with a simple side salad dressed with lemon vinaigrette to cut through the richness. Steamed green beans or roasted broccoli also pair wonderfully.
For leftovers, let the dish cool completely before transferring to an airtight container. Store it in the refrigerator for up to 4 days. The flavors actually deepen overnight, so it might taste even better the next day.
To reheat, I recommend using a skillet over medium-low heat with a splash of broth or water to loosen the rice. Cover and heat for 5-7 minutes, stirring occasionally. You can also use the microwave, but the chicken skin won’t be crispy. If you’re reheating in the oven, place it in a covered dish at 350°F (175°C) for 15 minutes.
You can freeze this dish for up to 3 months. Portion it into freezer-safe containers, leaving a little room for expansion. Thaw overnight in the refrigerator before reheating. The rice might be slightly softer after freezing, but it’s still delicious.
Nutritional Information & Benefits
Here’s an approximate nutritional breakdown per serving (based on 4 servings):
| Nutrient | Amount |
|---|---|
| Calories | 520 |
| Protein | 35g |
| Carbohydrates | 42g |
| Fat | 22g |
| Saturated Fat | 10g |
| Fiber | 1g |
| Sodium | 680mg |
This dish is a good source of protein from the chicken, which supports muscle health and keeps you full. Garlic is known for its anti-inflammatory properties and can support immune health. Butter provides fat-soluble vitamins like A, D, and E. If you’re watching your sodium, use low-sodium broth and go easy on the added salt. This recipe is naturally gluten-free and can be made dairy-free with simple swaps. It’s not low-carb due to the rice, but it’s a balanced meal that satisfies both your taste buds and your body.
Conclusion
This Cozy One-Pan Garlic Butter Chicken and Rice is more than just a weeknight dinner—it’s a reminder that simple food, made with care, can be the most comforting. Rosa’s casual advice changed the way I cook on busy nights. Now, when I’m tired and hungry, I know exactly what to do. I hope this recipe becomes that for you too.
Don’t be afraid to tweak it to your taste. Add more garlic if you’re a garlic lover. Throw in some vegetables. Make it spicy. The beauty of this dish is that it’s forgiving and adaptable. I’d love to hear how it turns out for you. Leave a comment below with your variations, or share a photo of your creation. It always makes my day to see others enjoying this recipe as much as I do. Happy cooking, friend!
Frequently Asked Questions
Can I use chicken breasts instead of thighs?
Yes, you can. Use boneless, skinless chicken breasts and reduce the searing time to 3 minutes per side. Bake for 20-25 minutes, or until the internal temperature reaches 165°F (74°C). Watch them closely so they don’t dry out.
Why is my rice mushy?
Mushy rice usually happens when there’s too much liquid or the rice wasn’t rinsed. Make sure to rinse your rice until the water runs clear, and measure your broth accurately. Also, don’t stir the rice too much after adding the liquid—that releases starch and makes it sticky.
Can I make this in a slow cooker?
I don’t recommend it for this recipe. The rice can become overcooked and mushy in a slow cooker. The one-pan oven method gives you the best texture and flavor. If you’re set on using a slow cooker, add the rice in the last 45 minutes of cooking.
How do I get the chicken skin extra crispy?
Pat the chicken very dry before seasoning. Sear it skin-side down without moving it for a full 5-6 minutes. If it’s still not crispy after baking, pop the skillet under the broiler for 2-3 minutes. Just watch it so the garlic doesn’t burn.
Can I add vegetables to this dish?
Absolutely. Add diced carrots, bell peppers, or zucchini along with the onion. You can also stir in a cup of frozen peas in the last 5 minutes of baking. Just keep the total volume of add-ins to about 1 cup so the rice-to-liquid ratio stays balanced.
PrintCozy One-Pan Garlic Butter Chicken and Rice

A comforting one-pan meal featuring juicy chicken thighs and fluffy rice infused with garlic butter. Perfect for busy weeknights, this easy recipe delivers rich flavor with minimal cleanup.
- Prep Time: 10 minutes
- Cook Time: 30 minutes
- Total Time: 40 minutes
- Yield: 4 servings 1x
- Category: Main Course
- Cuisine: American
Ingredients
- 2 lbs bone-in, skin-on chicken thighs
- 4 tablespoons unsalted butter
- 1 whole head garlic, minced
- 1 ½ cups long-grain white rice (basmati or jasmine), rinsed
- 3 cups low-sodium chicken broth
- 1 medium yellow onion, diced
- 1 teaspoon dried thyme
- 1 teaspoon paprika
- Salt and black pepper to taste
- Fresh parsley for garnish (optional)
Instructions
- Preheat oven to 375°F (190°C). Pat chicken thighs dry with paper towels. Season both sides generously with salt, pepper, and paprika.
- Place a large oven-safe skillet or Dutch oven over medium-high heat. Add 1 tablespoon butter. Once melted and shimmering, place chicken skin-side down. Cook without moving for 5-6 minutes until golden brown and crispy. Flip and cook for another 3 minutes. Transfer chicken to a plate.
- Reduce heat to medium. Add remaining 3 tablespoons butter. Add diced onion and cook for 2-3 minutes until softened. Add minced garlic and cook for 30 seconds, stirring constantly, until fragrant.
- Add rinsed and drained rice to the pan. Stir for 1-2 minutes until grains are coated in butter and starting to turn translucent.
- Pour in chicken broth and add dried thyme. Use a wooden spoon to scrape up browned bits from the bottom of the pan. Bring to a gentle simmer.
- Nestle chicken thighs back into the pan, skin-side up, on top of the rice.
- Cover skillet with a tight-fitting lid or foil. Transfer to preheated oven and bake for 25-30 minutes, until rice is tender and liquid is absorbed.
- Remove from oven and let rest, covered, for 5 minutes. Fluff rice with a fork, garnish with fresh parsley, and serve hot.
Notes
For extra crispy chicken skin, pat chicken very dry before seasoning and sear without moving. If rice seems undercooked after baking, add 2-3 tablespoons broth and bake 5 more minutes. Let dish rest 5 minutes before serving for best texture.
Nutrition
- Serving Size: 1 serving (about 1/4
- Calories: 520
- Sugar: 2
- Sodium: 680
- Fat: 22
- Saturated Fat: 10
- Carbohydrates: 42
- Fiber: 1
- Protein: 35
Keywords: one-pan chicken and rice, garlic butter chicken, easy weeknight dinner, comfort food, chicken thighs, one pot meal