My neighbor, Mrs. Gable, watched me fumbling with a bag of candy corn one October afternoon. I was trying to separate the orange pieces from the yellow ones for some overly complicated project I’d found online. She just shook her head, laughed, and walked back into her house without a word. Five minutes later, she came back holding a baking sheet covered in what looked like stained glass made of white chocolate and candy corn. “This,” she said, setting it down on my porch railing, “is what you actually make with that bag.”
I’ll be honest—I was skeptical at first. Candy corn has always been one of those divisive treats, you know? People either love it or they pretend they’re too sophisticated for it. But Mrs. Gable’s Easy Candy Corn Bark was something else entirely. The white chocolate mellowed out the sweetness, and the crunch of the candy corn against the smooth chocolate was honestly perfect. I broke off a piece, and then another, and suddenly half the pan was gone. She just smiled and said, “Told you.”
That was three years ago, and I haven’t stopped making this Easy Candy Corn Bark since. It’s become my secret weapon for Halloween parties, fall gatherings, and honestly any time I need a treat that looks impressive but takes almost zero effort. The best part? You can make it in under twenty minutes, and it disappears just as fast. Maybe you’ve been there—standing in the party aisle, overwhelmed by all the complicated recipes, wishing there was something simple that still wowed people. Well, this is it.
This candy bark recipe stayed with me because it taught me something important: the best recipes aren’t always the most complicated ones. Sometimes they’re the ones a neighbor hands you over a porch railing, no fuss, no pretense, just pure deliciousness. And now I’m passing it on to you.
Why You’ll Love This Recipe
Let me tell you why this Easy Candy Corn Bark has earned a permanent spot in my fall recipe rotation. I’ve tested this recipe at least a dozen times—different chocolates, different mix-ins, different chilling methods—and this version is hands down the best. It’s the kind of treat that makes people close their eyes after the first bite, and then immediately ask for the recipe.
- Incredibly Quick: From start to finish, this comes together in about 15 minutes of active time. The hardest part is waiting for the chocolate to set in the fridge. Perfect for those last-minute party invites or when you suddenly remember you promised to bring something.
- Simple Ingredients: You only need three main ingredients—white chocolate chips, candy corn, and a touch of coconut oil or shortening to help the chocolate melt smoothly. Chances are you already have most of these in your pantry.
- Perfect for Halloween & Fall Parties: This bark screams autumn without being overly themed. It works for Halloween parties, Thanksgiving dessert tables, or just a fun weekend treat. The colors are gorgeous—those bright oranges and yellows against the creamy white chocolate.
- Crowd-Pleaser: I’ve brought this to potlucks, office parties, and family gatherings, and it always gets rave reviews. Even the candy corn skeptics end up going back for seconds. There’s something about the combination that just works.
- Unbelievably Delicious: The texture is what gets me every time. You get that smooth, creamy white chocolate that melts on your tongue, followed by the slightly chewy crunch of candy corn. It’s sweet, but not overwhelmingly so—the white chocolate actually balances out the candy corn’s intense sweetness.
What makes this recipe different from all the other candy bark recipes out there? It’s the technique. I’ve learned that adding a tiny bit of coconut oil to the white chocolate makes it melt more smoothly and sets up with a beautiful shine. Plus, I’ve figured out the perfect ratio of candy corn to chocolate—enough to get candy corn in every bite, but not so much that the bark falls apart when you break it. This isn’t just another version; it’s the version I’d serve to anyone I wanted to impress.
This recipe is comfort food reimagined—faster, simpler, but with the same soul-soothing satisfaction. It’s perfect for impressing guests without stress, or turning a simple Tuesday night into something a little more special.
What Ingredients You Will Need
This Easy Candy Corn Bark uses just a handful of simple ingredients to deliver that perfect combination of creamy and crunchy. The beauty of this recipe is that you probably already have most of these in your kitchen, especially if you’re a regular baker. Let me walk you through each one and share a few tips I’ve picked up along the way.
- White chocolate chips, 12 ounces (about 2 cups): This is the base of our bark, so quality matters here. I personally recommend Ghirardelli white chocolate chips for their smooth melting and creamy flavor. Avoid white chocolate morsels that are labeled “white baking chips” or “white morsels”—these often don’t contain cocoa butter and can have a waxy texture. Look for real white chocolate with cocoa butter listed in the ingredients. (Pro tip: If you can find white chocolate bars or melting wafers, those work even better for a smoother finish.)
- Candy corn, 1 ½ cups (about 8 ounces): The star of the show! You can use regular candy corn or the autumn-themed harvest mix that includes little pumpkins and other shapes. I’ve tried both, and honestly, either works great. The classic Brach’s candy corn is my go-to because it holds its shape well and doesn’t get too sticky when mixed into the warm chocolate. (If you’re feeling fancy, you can also use the candy corn with the chocolate tips—those add another layer of flavor.)
- Coconut oil or vegetable shortening, 1 teaspoon: This is my secret ingredient for perfectly smooth white chocolate. White chocolate can be finicky—it tends to seize up or get grainy if overheated. A tiny bit of coconut oil helps it melt more evenly and gives the finished bark a beautiful, glossy shine. Don’t skip this! (If you don’t have coconut oil, vegetable shortening works just as well. Avoid butter, as it contains water that can cause the chocolate to seize.)
- Optional: Sprinkles or festive decorations, 2 tablespoons: While not necessary, these add a fun pop of color and make the bark look even more festive. I love using orange and black sprinkles for Halloween, or autumn leaf-shaped sprinkles for a fall gathering. (If you’re making this for a non-Halloween party, you can skip these or use seasonal sprinkles that match your theme.)
- Optional: Flaky sea salt, ¼ teaspoon: This might sound strange, but trust me on this one. A light sprinkle of flaky sea salt over the top before the chocolate sets creates a sweet-and-salty combination that takes this bark to another level. The salt cuts through the sweetness and makes each bite more complex. (I use Maldon sea salt flakes for this—they’re perfect.)
Ingredient Selection Tips: When shopping for white chocolate, look for chips that are creamy white in color, not bright white. Bright white chips often have more additives and less cocoa butter. For the candy corn, check the expiration date—fresher candy corn is softer and chewier, while older candy corn can be hard and stale. If your candy corn feels hard in the bag, it might be too old to use in this recipe.
Substitution Guidance: Need a dairy-free option? Use dairy-free white chocolate chips and coconut oil. The coconut oil will help the dairy-free chocolate melt smoothly too. For a nut-free version, skip any optional toppings that might contain nuts and make sure your white chocolate chips are processed in a nut-free facility if allergies are a concern. You can also substitute the candy corn with other seasonal candies like candy pumpkins or even M&M’s for a different color scheme.
Equipment Needed
One of the reasons I love this Easy Candy Corn Bark is that it doesn’t require any fancy equipment. You probably have everything you need already in your kitchen. Here’s what you’ll need:
- Baking sheet: A standard 13×18-inch baking sheet works perfectly. Line it with parchment paper or a silicone baking mat for easy removal. (I prefer parchment paper because it makes cleanup even easier.)
- Medium microwave-safe bowl: For melting the white chocolate. Glass or ceramic bowls work best—avoid metal bowls if you’re using a microwave, as they can cause uneven heating.
- Spatula or offset spatula: For spreading the melted chocolate into an even layer. An offset spatula gives you more control, but a regular rubber spatula works just fine.
- Parchment paper or silicone baking mat: Essential for lining your baking sheet. This prevents the bark from sticking and makes it easy to lift off the sheet once it’s set.
- Knife or hands for breaking: Once the bark is set, you can break it into pieces with your hands or use a sharp knife to cut clean edges. I personally love the rustic look of hand-broken pieces.
Budget-Friendly Options: Don’t have a silicone baking mat? No problem—parchment paper is cheap and works just as well. If you don’t have an offset spatula, the back of a spoon or a butter knife can work in a pinch. The key is just to spread the chocolate evenly. And honestly, even if it’s not perfectly even, it’ll still taste amazing.
Personal Experience: I’ve made this bark using everything from a high-end double boiler to a cheap microwave-safe cereal bowl. The microwave method is by far the easiest and most consistent. Just remember to melt the chocolate in 30-second intervals, stirring between each, to avoid burning. I learned this the hard way after ruining a batch of white chocolate by trying to melt it too quickly. Patience is key here!
Preparation Method
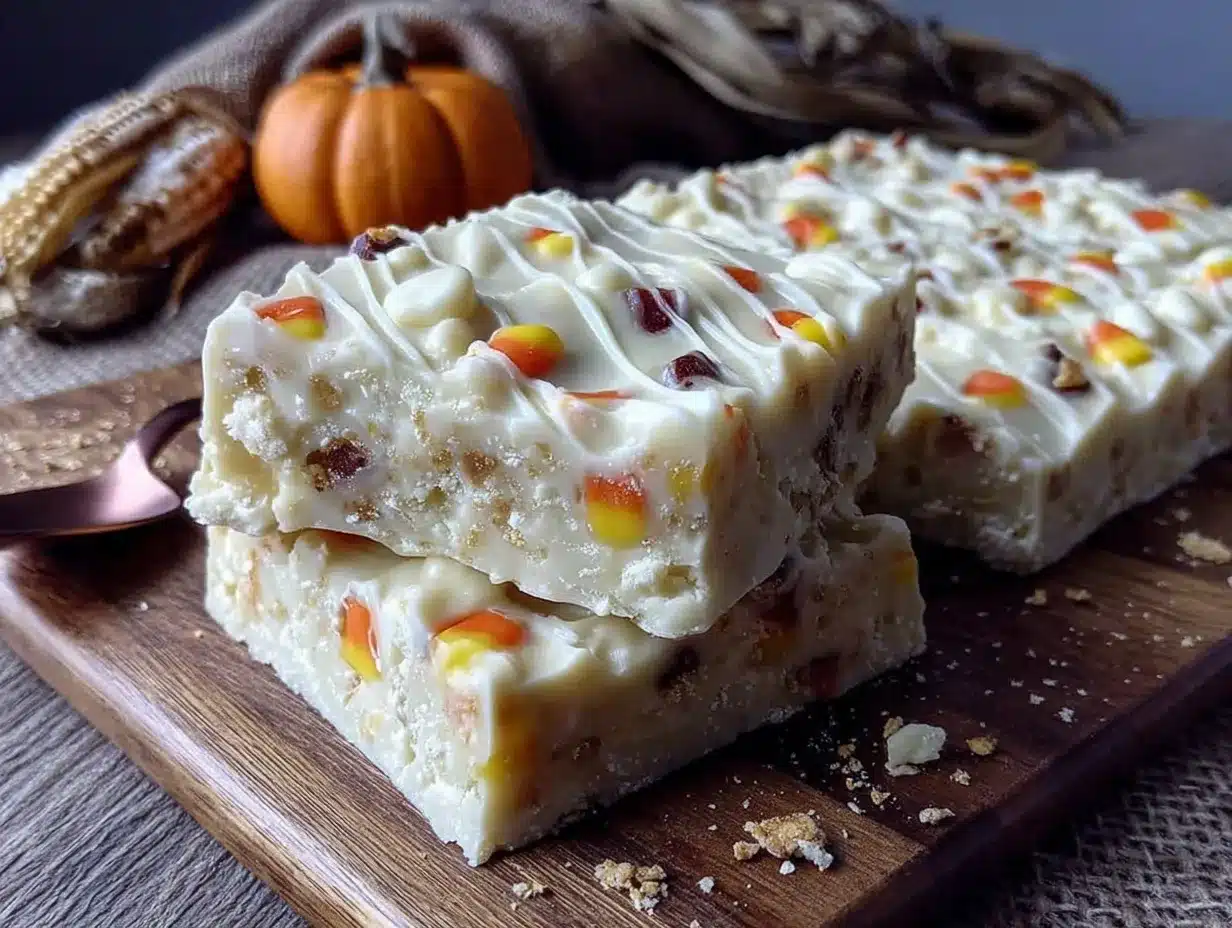
Now let’s get to the fun part—making this Easy Candy Corn Bark! I’ve broken this down into simple steps that even a beginner can follow. Take your time, and don’t rush the chocolate melting process. Trust me, it makes all the difference.
- Prep your baking sheet: Line a standard baking sheet with parchment paper or a silicone baking mat. Make sure the paper extends slightly over the edges—this will make it easier to lift the bark out later. Set the sheet aside while you prepare the chocolate.
- Melt the white chocolate: Place 12 ounces (about 2 cups) of white chocolate chips and 1 teaspoon of coconut oil or vegetable shortening in a medium microwave-safe bowl. Microwave on 50% power for 30 seconds. Remove and stir. Repeat this process—microwave for 30 seconds, then stir—until the chocolate is mostly melted with just a few small lumps remaining. This usually takes about 2-3 minutes total. (Important: Do not microwave on full power! White chocolate burns easily, and burnt white chocolate has a grainy, unpleasant texture. Low and slow is the way to go.)
- Stir until smooth: Once the chocolate is mostly melted, continue stirring gently until all the lumps disappear and the chocolate is smooth and glossy. The residual heat from the bowl will melt the remaining chips. If you need to, microwave for one more 15-second interval, but be careful not to overheat. (Sensory cue: The chocolate should look like thick, creamy sauce—smooth, shiny, and able to coat the back of a spoon.)
- Add the candy corn: Reserve about ¼ cup of candy corn for topping. Gently fold the remaining 1 ¼ cups of candy corn into the melted white chocolate. Stir just until the candy corn is evenly distributed. Don’t overmix, or the candy corn might start to melt and lose its shape. (Personal tip: I like to add the candy corn in two batches, folding gently each time, to make sure it’s evenly distributed without crushing the candy.)
- Spread the mixture: Pour the chocolate and candy corn mixture onto your prepared baking sheet. Use a spatula or offset spatula to spread it into an even layer about ¼-inch thick. Don’t worry about making it perfectly rectangular—the rustic, irregular shape is part of the charm. (Troubleshooting tip: If the mixture seems too thick to spread, the chocolate might have started to set. Pop the bowl back in the microwave for 10 seconds to loosen it up.)
- Add the toppings: While the chocolate is still wet, sprinkle the reserved ¼ cup of candy corn over the top. If you’re using sprinkles or flaky sea salt, add those now too. Gently press the toppings into the chocolate with your fingers or the back of a spoon so they stick. (Warning: Work quickly here—white chocolate sets fast, especially if your kitchen is cool.)
- Chill until set: Place the baking sheet in the refrigerator for at least 30 minutes, or until the chocolate is completely firm and no longer sticky to the touch. If you’re in a hurry, you can pop it in the freezer for 15-20 minutes, but keep an eye on it—you don’t want it to get too cold and brittle. (Sensory cue: The bark should feel firm and solid when you press on it. It should lift easily off the parchment paper.)
- Break into pieces: Once the bark is fully set, lift it off the baking sheet using the parchment paper. Place it on a cutting board and use your hands to break it into irregular pieces. If you prefer cleaner edges, use a sharp knife to cut it into squares or rectangles. (Personal preference: I love the look of hand-broken pieces—they look more rustic and homemade, which I think adds to the appeal.)
- Serve or store: Arrange the pieces on a serving platter and watch them disappear! If you’re not serving immediately, store the bark in an airtight container at room temperature or in the refrigerator.
Cooking Tips & Techniques
Over the years, I’ve learned a few tricks that make this Easy Candy Corn Bark turn out perfectly every time. Let me share some of the lessons I’ve learned—including a few mistakes I’ve made so you don’t have to repeat them.
The Chocolate Melting Secret: White chocolate is notoriously fussy. It’s more sensitive to heat than milk or dark chocolate because of its high milk solids content. I learned this the hard way when I tried to melt white chocolate on high power and ended up with a grainy, clumpy mess. The key is to always melt it at 50% power and stir frequently. If you see the chocolate starting to look thick or lumpy, stop immediately and stir vigorously—sometimes it just needs a good stir to come together.
Temperature Matters: Your kitchen temperature affects how the chocolate behaves. If your kitchen is warm (above 75°F), the chocolate might stay soft longer and take more time to set. If it’s cool, the chocolate might start setting before you’ve finished spreading it. I’ve found that a cool kitchen (around 68-70°F) is ideal. If your kitchen is warm, you can chill the baking sheet in the fridge for a few minutes before spreading the chocolate.
The Candy Corn Dilemma: Fresh candy corn is soft and chewy, which is perfect for this recipe. But if your candy corn is a bit stale or hard, it can be difficult to bite into once it’s embedded in the chocolate. To revive stale candy corn, spread it on a baking sheet and warm it in a 200°F oven for 5 minutes. Let it cool completely before using. (Yes, I’ve done this, and it works like a charm.)
Timing and Multitasking: This recipe moves quickly once you start melting the chocolate. I recommend having all your ingredients measured and your baking sheet lined before you start. That way, you can focus on the chocolate without scrambling for the candy corn or sprinkles. Trust me, it’s much less stressful.
Consistency is Key: For the best texture, aim for a ¼-inch thickness when spreading the chocolate. Too thin, and the bark will be fragile and break into tiny pieces. Too thick, and it becomes difficult to bite through the candy corn. I use the edge of my spatula to check the thickness as I spread—it’s a quick way to ensure evenness.
Variations & Adaptations
One of the best things about this Easy Candy Corn Bark is how adaptable it is. Over the years, I’ve experimented with different variations, and I’ve found some real winners. Here are a few of my favorites:
Dark Chocolate Candy Corn Bark: Swap the white chocolate for dark chocolate (60-70% cacao) for a sophisticated twist. The bitterness of the dark chocolate balances the sweetness of the candy corn beautifully. Use the same melting technique, but note that dark chocolate melts at a slightly higher temperature, so you might need an extra 30 seconds in the microwave.
Autumn Harvest Bark: Replace half the candy corn with candy pumpkins, candy corn with chocolate tips, or even chopped pecans. The mix of colors and textures creates a beautiful autumn-themed bark that’s perfect for Thanksgiving. I made this last November, and it was a hit at the family dinner.
Halloween Sprinkle Bark: Add 2 tablespoons of Halloween-themed sprinkles (orange, black, and purple) to the melted chocolate along with the candy corn. The sprinkles add a fun pop of color and make the bark look even more festive. This is my go-to version for Halloween parties.
Peppermint Candy Corn Bark: For a holiday twist, replace the candy corn with crushed peppermint candies or candy canes. Add a drop of peppermint extract to the melted chocolate for extra flavor. This version is perfect for Christmas parties or winter gatherings.
Nutty Candy Corn Bark: Add ½ cup of chopped salted peanuts or almonds along with the candy corn. The saltiness of the nuts cuts through the sweetness and adds a satisfying crunch. This is my personal favorite variation—I love the sweet-and-salty combination.
Dietary Adaptations: For a vegan version, use dairy-free white chocolate chips and coconut oil. For a gluten-free version, make sure your candy corn and any additional toppings are certified gluten-free (most candy corn is naturally gluten-free, but it’s always good to check the label).
Serving & Storage Suggestions
This Easy Candy Corn Bark is incredibly versatile when it comes to serving. Here’s how I like to present it and keep it fresh:
Serving Temperature: Serve the bark at room temperature for the best texture. If you’ve stored it in the refrigerator, let it sit out for about 10 minutes before serving. This allows the chocolate to soften slightly, making it easier to bite through the candy corn.
Presentation Ideas: Arrange the broken pieces on a decorative platter or in a glass jar for a beautiful presentation. For Halloween parties, I like to serve it on a black or orange platter to make the colors pop. You can also place individual pieces in small treat bags tied with ribbon for party favors or gift-giving.
Complementary Dishes: This bark pairs wonderfully with a cup of hot apple cider, pumpkin spice latte, or even a glass of cold milk. If you’re serving it at a party, consider offering it alongside other easy treats like popcorn balls, caramel apples, or chocolate-covered pretzels.
Storage Instructions: Store the bark in an airtight container at room temperature for up to 1 week. If your kitchen is warm, you can store it in the refrigerator for up to 2 weeks. Just make sure the container is tightly sealed to prevent the bark from absorbing any odors from the fridge.
Freezing Instructions: This bark freezes beautifully! Place the pieces in a single layer in a freezer-safe container or zip-top bag, separating layers with parchment paper. Freeze for up to 3 months. To serve, thaw at room temperature for about 15 minutes. (Note: The candy corn might become slightly softer after freezing, but it’s still delicious.)
Flavor Development: Interestingly, this bark actually tastes better after a day or two. The flavors meld together, and the candy corn softens slightly, making each bite more cohesive. So if you can resist eating it all right away, it’s worth making it a day ahead of your event.
Nutritional Information & Benefits
Let’s be real—this Easy Candy Corn Bark is a treat, not a health food. But that doesn’t mean it can’t fit into a balanced lifestyle. Here’s a quick look at the nutritional information and a few benefits of the ingredients:
Estimated Nutritional Values (per 1-ounce serving, about 2-3 pieces):
- Calories: 140-160
- Fat: 8-10g
- Saturated Fat: 5-7g
- Carbohydrates: 18-22g
- Sugar: 16-20g
- Protein: 1-2g
- Sodium: 20-30mg
Health Benefits of Key Ingredients:
- White chocolate: While it’s not as rich in antioxidants as dark chocolate, white chocolate does contain calcium and a small amount of iron. It also provides a quick source of energy, making it a great treat for a midday pick-me-up.
- Candy corn: Okay, candy corn doesn’t have any real health benefits. But it does bring joy, and that counts for something, right? In moderation, it’s a fun way to celebrate the season without going overboard.
- Coconut oil: If you use coconut oil, you’re getting a small amount of medium-chain triglycerides (MCTs), which are a type of healthy fat that can support brain health and energy metabolism.
Dietary Considerations: This recipe is naturally gluten-free (check your candy corn and white chocolate labels to be sure). For a vegan version, use dairy-free white chocolate. For a lower-sugar option, you can reduce the amount of candy corn or use a sugar-free white chocolate alternative, though the texture will be slightly different.
Potential Allergens: This recipe contains dairy (white chocolate) and may contain soy (often found in white chocolate chips). Candy corn is typically free of major allergens, but always check the label if you’re serving someone with allergies.
Personal Wellness Perspective: I believe in enjoying treats in moderation. This bark is something I make for special occasions, not everyday snacking. And honestly, sharing it with friends and family makes it even more enjoyable. Food is about connection and celebration, and this bark delivers on both fronts.
Conclusion
So there you have it—my Easy Candy Corn Bark recipe that’s become a fall tradition in my house. It’s simple, it’s delicious, and it’s guaranteed to make you the star of any Halloween party or autumn gathering. Whether you’re making it for a potluck, a family dinner, or just because you need a little sweetness in your life, this bark delivers every single time.
What I love most about this recipe is how forgiving it is. You don’t need to be a pastry chef to pull it off. You don’t need fancy equipment or hard-to-find ingredients. You just need a bag of candy corn, some white chocolate, and about twenty minutes of your time. And honestly, the payoff is huge. People will think you spent hours on it. Let them wonder.
I encourage you to make this your own. Add your favorite toppings, experiment with different chocolates, or double the batch for a crowd. The beauty of this recipe is that it’s a canvas for your creativity. And if you come up with a variation you love, I’d love to hear about it! Drop a comment below and share your creation. Tag me on social media—I’m always excited to see what you come up with.
Thank you for stopping by and giving this recipe a try. I hope it brings as much joy to your table as it has to mine. Happy baking, and here’s to many more delicious moments shared with the people we love!
Frequently Asked Questions
Can I use milk chocolate instead of white chocolate?
Absolutely! Milk chocolate works beautifully in this recipe. It will create a richer, creamier bark with a more pronounced chocolate flavor. Just use the same melting technique—microwave at 50% power in 30-second intervals, stirring between each. Keep in mind that milk chocolate is slightly softer than white chocolate, so the bark might be a bit more delicate once set.
My white chocolate seized up and became grainy. What went wrong?
This happens to the best of us! White chocolate seizes when it comes into contact with even a tiny amount of water or when it’s overheated. To prevent this, make sure your bowl and spatula are completely dry. Always melt at 50% power and stir frequently. If your chocolate does seize, you can try adding a teaspoon of coconut oil or vegetable shortening and stirring vigorously—sometimes this helps bring it back together. If it’s too far gone, unfortunately, it’s best to start over with fresh chocolate.
How far in advance can I make this bark?
You can make this bark up to 2 weeks in advance if stored properly in an airtight container in the refrigerator. For best results, I recommend making it 1-3 days ahead of your event. The flavors meld together beautifully, and the candy corn softens slightly, making each bite more cohesive. Just remember to let it sit at room temperature for about 10 minutes before serving.
Can I add other mix-ins to this bark?
Definitely! This recipe is incredibly versatile. Some of my favorite additions include chopped nuts (pecans, almonds, or peanuts), dried cranberries or cherries, crushed pretzels for a salty crunch, or even a drizzle of melted dark chocolate over the top. Just be mindful not to overload the chocolate—you want enough to hold everything together. Start with about ½ cup of additional mix-ins and see how it goes.
Is this recipe safe for people with nut allergies?
This recipe itself doesn’t contain nuts, but you need to be careful with your ingredient choices. Check the labels on your white chocolate chips and candy corn to make sure they’re processed in a nut-free facility if you’re serving someone with severe allergies. Many brands clearly label this information on the packaging. Also, avoid any optional toppings that might contain nuts. When in doubt, always ask your guests about their allergies before serving.
Pin This Recipe!
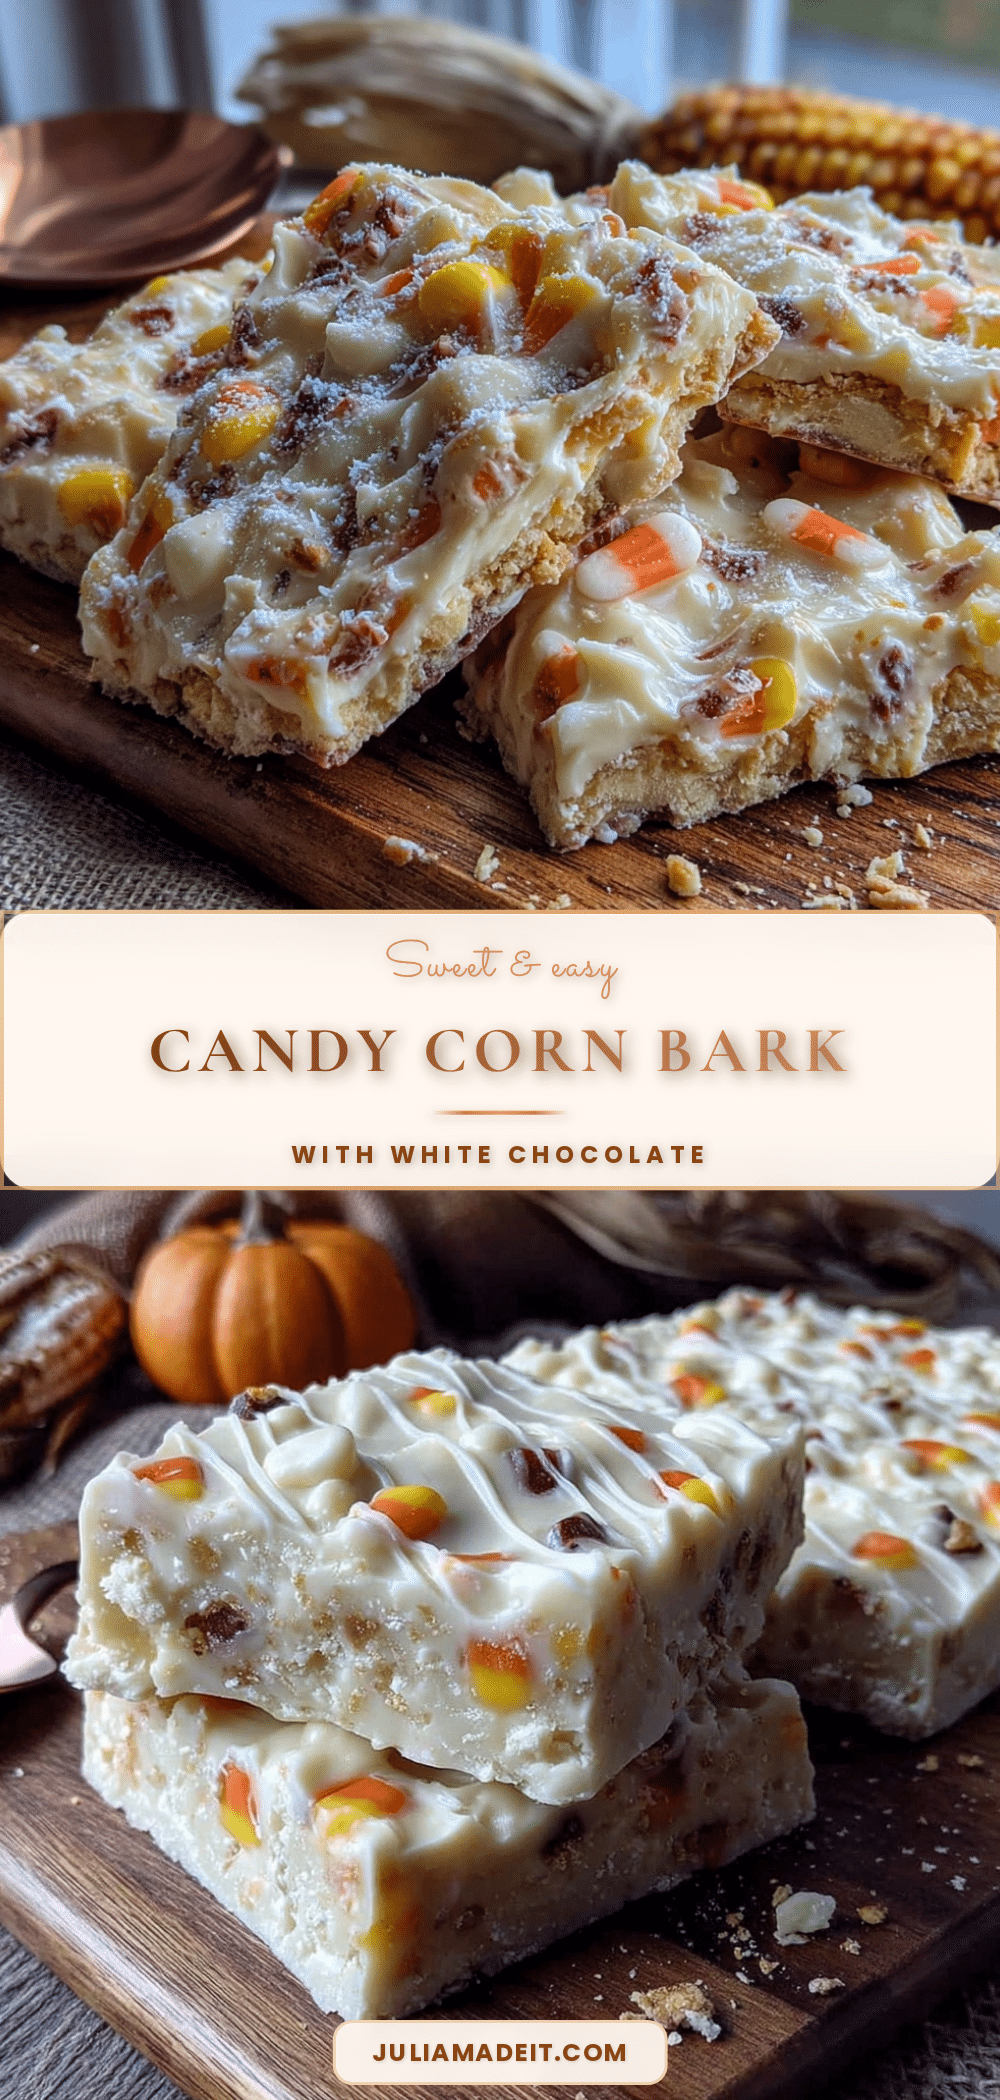
Easy Candy Corn Bark: The Best White Chocolate Party Treat

This Easy Candy Corn Bark is a quick and simple treat that combines creamy white chocolate with crunchy candy corn, perfect for Halloween parties and fall gatherings. Made with just three main ingredients, it comes together in under 20 minutes and is guaranteed to impress.
- Prep Time: 15 minutes
- Cook Time: 0 minutes
- Total Time: 45 minutes (including chilling time)
- Yield: 12 servings
- Category: Dessert
- Cuisine: American
Ingredients
- White chocolate chips, 12 ounces (about 2 cups)
- Candy corn, 1 ½ cups (about 8 ounces)
- Coconut oil or vegetable shortening, 1 teaspoon
- Optional: Sprinkles or festive decorations, 2 tablespoons
- Optional: Flaky sea salt, ¼ teaspoon
Instructions
- Prep your baking sheet: Line a standard baking sheet with parchment paper or a silicone baking mat. Make sure the paper extends slightly over the edges—this will make it easier to lift the bark out later. Set the sheet aside while you prepare the chocolate.
- Melt the white chocolate: Place 12 ounces (about 2 cups) of white chocolate chips and 1 teaspoon of coconut oil or vegetable shortening in a medium microwave-safe bowl. Microwave on 50% power for 30 seconds. Remove and stir. Repeat this process—microwave for 30 seconds, then stir—until the chocolate is mostly melted with just a few small lumps remaining. This usually takes about 2-3 minutes total.
- Stir until smooth: Once the chocolate is mostly melted, continue stirring gently until all the lumps disappear and the chocolate is smooth and glossy. The residual heat from the bowl will melt the remaining chips. If you need to, microwave for one more 15-second interval, but be careful not to overheat.
- Add the candy corn: Reserve about ¼ cup of candy corn for topping. Gently fold the remaining 1 ¼ cups of candy corn into the melted white chocolate. Stir just until the candy corn is evenly distributed. Don’t overmix, or the candy corn might start to melt and lose its shape.
- Spread the mixture: Pour the chocolate and candy corn mixture onto your prepared baking sheet. Use a spatula or offset spatula to spread it into an even layer about ¼-inch thick. Don’t worry about making it perfectly rectangular—the rustic, irregular shape is part of the charm.
- Add the toppings: While the chocolate is still wet, sprinkle the reserved ¼ cup of candy corn over the top. If you’re using sprinkles or flaky sea salt, add those now too. Gently press the toppings into the chocolate with your fingers or the back of a spoon so they stick.
- Chill until set: Place the baking sheet in the refrigerator for at least 30 minutes, or until the chocolate is completely firm and no longer sticky to the touch. If you’re in a hurry, you can pop it in the freezer for 15-20 minutes, but keep an eye on it—you don’t want it to get too cold and brittle.
- Break into pieces: Once the bark is fully set, lift it off the baking sheet using the parchment paper. Place it on a cutting board and use your hands to break it into irregular pieces. If you prefer cleaner edges, use a sharp knife to cut it into squares or rectangles.
- Serve or store: Arrange the pieces on a serving platter and watch them disappear! If you’re not serving immediately, store the bark in an airtight container at room temperature or in the refrigerator.
Notes
For best results, use real white chocolate with cocoa butter. Melt chocolate at 50% power to prevent seizing. Fresh candy corn works best; if stale, warm in a 200°F oven for 5 minutes to revive. The bark can be stored in an airtight container at room temperature for up to 1 week or in the refrigerator for up to 2 weeks. It also freezes well for up to 3 months.
Nutrition
- Serving Size: 1 ounce (about 2-3 p
- Calories: 150
- Sugar: 18
- Sodium: 25
- Fat: 9
- Saturated Fat: 6
- Carbohydrates: 20
- Protein: 1.5
Keywords: candy corn bark, white chocolate bark, Halloween treat, fall dessert, easy candy recipe, no-bake dessert, party treat