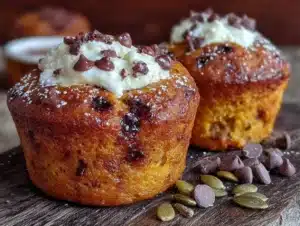
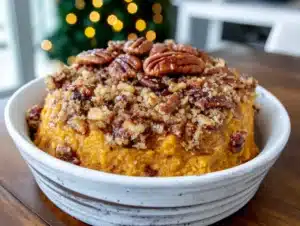
I was standing in my neighbor Carol’s driveway last October, holding a warm pumpkin spice latte and watching her kids tear through a pile of leaves, when the smell hit me. It wasn’t the coffee. It was something deeper, earthier—cinnamon and nutmeg and something sweet baking from her open kitchen window. And suddenly I was seven years old, sitting cross-legged on the linoleum floor of my Aunt Jo’s tiny apartment, watching her pull a pan of pumpkin oatmeal bars out of an oven that had seen better days. She’d let me lick the spatula, and I remember thinking, honestly, that this was the best thing I’d ever tasted.
Aunt Jo moved to Florida a few years back, and we don’t talk as much as we should. But every fall, I find myself chasing that exact flavor combination—the warmth of pumpkin, the chew of oats, the way the spices wrap around you like a favorite sweater. I’ve tried dozens of recipes over the years, and let me tell you, most of them just miss the mark. Too dry. Too mushy. Not enough of that cozy, soul-hugging feeling. Maybe you’ve been there, staring at a sad, crumbly muffin and thinking, this is not what I was hoping for.
These baked pumpkin oatmeal cups are the ones that finally got it right. They’re not fussy, they don’t require a trip to a specialty store, and they come together in about thirty minutes of actual work. I’ve made them for brunches, for post-soccer game snacks, for Thanksgiving morning when the turkey is still hours away and everyone is hungry and cranky. They disappear every single time. And every time I make them, I think of Aunt Jo’s linoleum floor and that perfect, sticky-sweet spatula moment. That’s why I keep making them—because some flavors are worth chasing.
Why You’ll Love This Recipe
Let’s be honest—when you’re hosting a gathering, the last thing you need is a complicated recipe that demands your full attention. These baked pumpkin oatmeal cups are the opposite of that. They’re forgiving, flexible, and built for a crowd. Here’s why they’ll become your go-to fall recipe:
- Quick & Easy: From start to finish, you’re looking at about 35 minutes. Mix the wet ingredients, stir in the dry, scoop into a pan, and bake. That’s it. No stand mixer required, no chilling time, no complicated folds.
- Simple Ingredients: You probably have most of these in your pantry right now. Canned pumpkin, rolled oats, eggs, milk, maple syrup, and basic spices. No weird flours or hard-to-find extracts.
- Perfect for Gatherings: These are a host’s best friend. They’re portable, they hold up well at room temperature, and they look pretty on a platter without any extra effort. Serve them at brunch, a potluck, or even as a grab-and-go breakfast during a busy holiday morning.
- Crowd-Pleaser: Kids love them because they’re sweet and muffin-like. Adults love them because they’re not overly sugary and have that satisfying oat texture. I’ve watched a plate of these disappear at a party where half the guests claimed they “didn’t really like oatmeal.”
- Unbelievably Delicious: The texture is what gets people. The edges get slightly crisp, the inside stays tender and moist, and the pumpkin flavor is warm without being overwhelming. It’s comfort food you can feel good about eating.
What makes these different from every other pumpkin oatmeal recipe out there? It’s the ratio. I spent a few weekends testing batches—some too wet, some too dry, some that fell apart the second you looked at them—until I landed on the perfect balance. The oats soak up just enough liquid to become tender without turning mushy, and the pumpkin adds moisture without making the cups dense. Plus, I add a touch of vanilla and a pinch of salt to deepen the flavors. It’s a small thing, but it makes a big difference.
This is the kind of recipe that makes you close your eyes after the first bite. It’s fall in a handheld form, and it’s meant to be shared.
What Ingredients You Will Need
This recipe uses simple, wholesome ingredients that work together to create something greater than the sum of their parts. Most of these are pantry staples, especially once fall rolls around. Here’s what you’ll need and why each one matters.
- Rolled oats (old-fashioned), 2 cups (180g): Don’t use quick oats here—they’ll turn mushy. Rolled oats give the cups structure and a satisfying chew. I prefer Bob’s Red Mill or Quaker for consistent results.
- Pumpkin puree, 1 cup (245g): Make sure you’re buying 100% pumpkin puree, not pumpkin pie filling. The pie filling has added sugar and spices that will throw off the balance. Libby’s is my go-to brand.
- Milk, 1 cup (240ml): Any milk works here—dairy, almond, oat, or soy. I usually use whole milk for richness, but I’ve made them with unsweetened almond milk and they turned out great. Just avoid anything flavored or sweetened.
- Large eggs, 2: Eggs bind everything together and help the cups rise slightly. If you need an egg substitute, flax eggs (1 tablespoon ground flax mixed with 3 tablespoons water per egg) work well.
- Maple syrup, 1/3 cup (80ml): Real maple syrup adds a deep, caramel-like sweetness that complements the pumpkin. Honey or agave will also work, but the flavor will be slightly different.
- Coconut sugar or brown sugar, 1/4 cup (50g): This adds a bit of molasses-y depth. Brown sugar is easier to find, but coconut sugar is less processed and has a lower glycemic index. Both work perfectly.
- Coconut oil or butter, 3 tablespoons (42g), melted: This adds moisture and helps the edges get golden and slightly crisp. I’ve used both and prefer butter for flavor, but coconut oil keeps them dairy-free.
- Vanilla extract, 1 teaspoon: A must for rounding out the flavors. Use pure vanilla extract if you have it—it really does make a difference.
- Pumpkin pie spice, 2 teaspoons: If you don’t have a pre-mixed blend, make your own: 1 teaspoon cinnamon, 1/2 teaspoon ginger, 1/4 teaspoon nutmeg, 1/4 teaspoon cloves, and a tiny pinch of allspice. I actually prefer making my own because I can adjust the cinnamon-to-nutmeg ratio.
- Cinnamon, 1 teaspoon: Yes, there’s already cinnamon in the pumpkin pie spice, but an extra teaspoon really makes the flavor pop. Trust me on this one.
- Baking powder, 1 teaspoon: This gives the cups a little lift so they’re not dense hockey pucks.
- Salt, 1/2 teaspoon: Don’t skip this. Salt balances the sweetness and makes all the warm spices sing.
- Optional mix-ins: 1/2 cup chopped pecans or walnuts, 1/3 cup chocolate chips, or 1/4 cup dried cranberries. I love adding pecans for texture and a little healthy fat.
For substitutions: If you’re gluten-free, use certified gluten-free rolled oats. If you’re vegan, use flax eggs and a plant-based milk and coconut oil. The texture will be slightly different—a bit denser—but still delicious.
Equipment Needed
You don’t need a fancy kitchen to make these, which is part of the appeal. Here’s what you’ll need:
- Muffin tin (12-cup): A standard non-stick tin works great. If yours is prone to sticking, use paper liners or grease it well with butter or cooking spray.
- Two mixing bowls: One large, one medium. I use stainless steel bowls because they’re lightweight and easy to clean.
- Whisk: For mixing the wet ingredients. A fork works in a pinch.
- Spatula: For folding the dry ingredients in without overmixing. A rubber spatula is ideal.
- Measuring cups and spoons: For accuracy. Baking is a science, even when it’s forgiving.
- Ice cream scoop or cookie scoop: This is optional but highly recommended for portioning the batter evenly. It makes the cups uniform in size and they’ll bake more consistently.
- Cooling rack: For letting the cups cool without getting soggy bottoms. If you don’t have one, a clean kitchen towel works.
I bought a cheap muffin tin from a discount store years ago, and honestly, it still works fine. You don’t need expensive equipment for good results. Just make sure whatever you use is clean and dry before you start.
Preparation Method
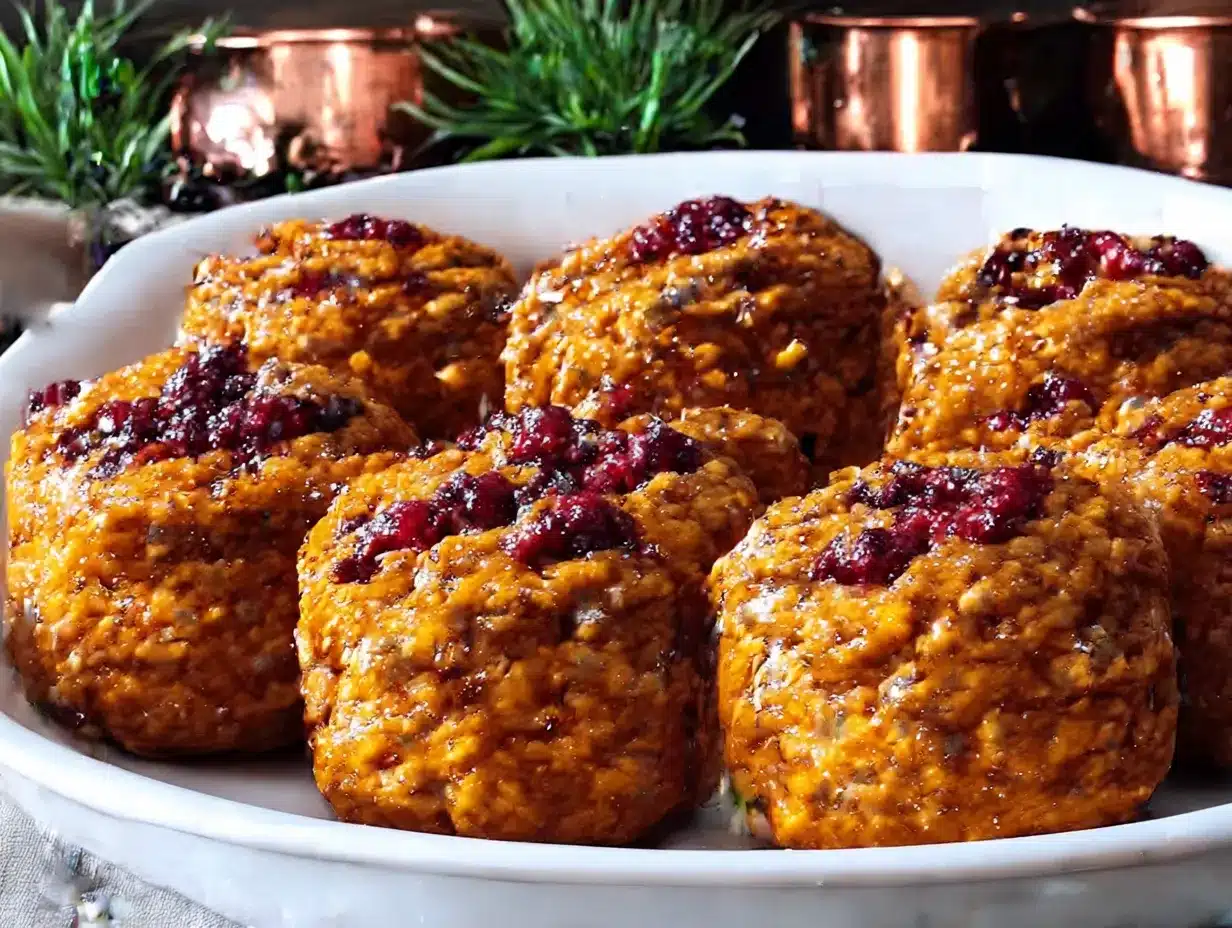
These baked pumpkin oatmeal cups come together in about 35 minutes from start to finish. Here’s how to do it, step by step.
- Preheat your oven to 375°F (190°C). Position the rack in the middle. While it’s heating, grease your muffin tin or line it with paper liners. I prefer greasing because the edges get a little crispier, but liners make cleanup a breeze.
- In a large bowl, whisk together the wet ingredients: 1 cup pumpkin puree, 1 cup milk, 2 large eggs, 1/3 cup maple syrup, 1/4 cup coconut sugar or brown sugar, 3 tablespoons melted coconut oil or butter, and 1 teaspoon vanilla extract. Whisk until everything is smooth and well combined. The mixture should look like a thick, creamy orange liquid. If it looks separated, keep whisking—it’ll come together.
- In a separate medium bowl, stir together the dry ingredients: 2 cups rolled oats, 2 teaspoons pumpkin pie spice, 1 teaspoon cinnamon, 1 teaspoon baking powder, and 1/2 teaspoon salt. Give it a good stir so the spices are evenly distributed throughout the oats. If you’re adding mix-ins like pecans or chocolate chips, stir them in now.
- Pour the dry ingredients into the wet ingredients. Use a spatula to fold them together gently. Stir just until there are no dry patches of oats left. Overmixing will make the cups tough, so stop as soon as everything is combined. The batter will be thick and scoopable, not runny.
- Let the batter rest for 5 minutes. This is a small step that makes a big difference. The oats need a few minutes to absorb some of the liquid so the cups hold together better. While you wait, take a deep breath and admire how good your kitchen smells already.
- Scoop the batter into the prepared muffin tin. Use an ice cream scoop or a spoon to fill each cup almost to the top—about 3/4 full. These don’t rise much, so you want a generous portion. If you’re using a 12-cup tin, you should get exactly 12 cups. If you have leftover batter, you can fill a small ramekin or two.
- Bake for 22-25 minutes. The cups are done when the edges are golden brown and the tops look set and slightly firm to the touch. A toothpick inserted into the center should come out mostly clean, with a few moist crumbs attached. If it’s wet batter, give them another 2-3 minutes.
- Let the cups cool in the tin for 5 minutes. This helps them set so they don’t fall apart when you remove them. After 5 minutes, transfer them to a cooling rack. If you used paper liners, just lift them out. If you greased the tin, run a knife around the edges gently to loosen them.
- Serve warm or at room temperature. They’re amazing fresh out of the oven, but they’re also delicious cooled. I’ve been known to eat two in one sitting, and I’m not ashamed.
A quick note: If you’re making these for a gathering, you can prep the dry ingredients the night before and store them in a zip-top bag. In the morning, just whisk the wet ingredients, combine, and bake. It saves about 10 minutes, which feels like a lot when you’re hosting.
Cooking Tips & Techniques
I’ve made these pumpkin oatmeal cups more times than I can count, and I’ve learned a few things along the way. Here are the tips that make the biggest difference.
Don’t skip the rest time. I know it’s tempting to just scoop and bake, but letting the batter sit for 5 minutes allows the oats to absorb liquid. If you skip this step, the cups will be looser and more likely to fall apart. I learned this the hard way when I was rushing to get breakfast on the table before a holiday brunch. They still tasted good, but they were a mess to eat.
Use room temperature eggs and milk. Cold ingredients can cause the melted coconut oil or butter to solidify into little chunks. If you forget to take them out of the fridge, just place the eggs in a bowl of warm water for 5 minutes and microwave the milk for 15 seconds. It’s a small thing, but it helps the batter come together smoothly.
Watch the edges, not the tops. The tops of these cups don’t brown much because of the pumpkin. So don’t wait for them to turn golden on top—you’ll end up overbaking them. Instead, look at the edges. When they’re golden and the cups look set, they’re done.
For a crispy top, broil for 1 minute at the end. If you want that slightly caramelized, crunchy top, turn on the broiler for the last 60 seconds of baking. Keep a close eye on them—they can go from perfect to burnt in seconds. I’ve lost a batch this way, and it’s heartbreaking.
Double the recipe for a crowd. This recipe makes 12 cups, which is perfect for a small gathering. If you’re feeding a bigger group, just double everything and use two muffin tins. They bake at the same temperature, but you might need an extra 2-3 minutes. Rotate the pans halfway through for even baking.
Make ahead and reheat. These cups freeze beautifully. Bake them, let them cool completely, then pop them in a freezer-safe bag. To reheat, microwave one for 20-30 seconds or warm them in a 350°F oven for 5-7 minutes. They taste almost as good as fresh.
Variations & Adaptations
One of the best things about this recipe is how flexible it is. Here are some variations I’ve tried and loved.
Vegan version: Replace the eggs with two flax eggs (2 tablespoons ground flaxseed mixed with 6 tablespoons water, let sit for 5 minutes). Use a plant-based milk and coconut oil instead of butter. The texture will be a bit more tender, but the flavor is spot on.
Gluten-free version: Use certified gluten-free rolled oats. That’s it. Oats are naturally gluten-free, but they’re often processed in facilities that also process wheat, so look for the certified label if you’re sensitive.
Chocolate chip pumpkin oatmeal cups: Add 1/3 cup dark chocolate chips to the batter. The combination of pumpkin and chocolate is surprisingly good—the bitterness of the dark chocolate balances the sweetness of the maple syrup. I made these for a Halloween party and they were gone in 20 minutes.
Savory-sweet twist: Reduce the maple syrup to 2 tablespoons and add 1/4 cup crumbled feta cheese and 2 tablespoons chopped fresh rosemary. This sounds weird, I know, but trust me—the salty, herby feta against the sweet pumpkin is incredible. Serve these as a side dish with soup or chili.
Nut-free option: If you’re serving a crowd that includes people with nut allergies, skip the pecans or walnuts and use sunflower seeds or pumpkin seeds instead. They add the same crunch without the allergen risk.
Apple-pumpkin combo: Finely dice one small apple (about 1/2 cup) and fold it into the batter along with the oats. The apple adds little bursts of sweetness and moisture. I did this by accident one morning when I had an apple that was about to go bad, and it turned out to be one of my favorite versions.
My personal favorite variation is the chocolate chip version with a sprinkle of flaky sea salt on top before baking. The salt enhances the sweetness and makes the chocolate taste even richer. It’s a little thing, but it feels special—like something you’d serve at a fancy brunch.
Serving & Storage Suggestions
These baked pumpkin oatmeal cups are incredibly versatile when it comes to serving. Here’s how to make the most of them.
Serving temperature: They’re delicious warm, at room temperature, or even cold straight from the fridge. For a gathering, I usually let them cool completely and arrange them on a large platter. They look beautiful with a dusting of powdered sugar or a drizzle of maple syrup on top.
What to serve alongside: These cups are hearty enough to be a standalone breakfast, but they also pair beautifully with other dishes. Serve them with scrambled eggs and bacon for a full brunch spread, or alongside a bowl of yogurt and fresh fruit for a lighter meal. For a fall-themed party, I’ve set them out next to a warm apple cider and a cheese board. They’re also great with a hot cup of coffee or chai tea.
Storage: Store leftover cups in an airtight container at room temperature for up to 2 days, or in the refrigerator for up to 5 days. If you refrigerate them, they’ll firm up a bit, but they’ll soften again when reheated.
Freezing: These freeze like a dream. Place the cooled cups in a single layer on a baking sheet and freeze for 1 hour, then transfer them to a freezer-safe bag or container. They’ll keep for up to 3 months. To thaw, leave them at room temperature for about 30 minutes, or microwave one for 20-30 seconds.
Reheating: The best way to reheat is in a 350°F oven for 5-7 minutes. This brings back the slightly crisp edges. The microwave works in a pinch, but the texture will be softer. If you’re reheating a large batch for a gathering, the oven is definitely the way to go.
Flavor development: Honestly, these taste even better the next day. The spices have time to meld together, and the oats absorb any remaining moisture, creating a more cohesive texture. So if you’re making them for an event, feel free to bake them a day ahead.
Nutritional Information & Benefits
These pumpkin oatmeal cups are a healthier option compared to most baked goods, but let’s be real—they’re still a treat. Here’s a rough estimate of the nutritional breakdown per cup (based on 12 servings, without mix-ins):
- Calories: Approximately 185
- Total Fat: 6g
- Saturated Fat: 3.5g
- Cholesterol: 35mg
- Sodium: 180mg
- Total Carbohydrates: 28g
- Dietary Fiber: 4g
- Sugars: 11g
- Protein: 5g
These numbers will vary based on your specific ingredients and any mix-ins you add.
Health benefits: Pumpkin is packed with vitamin A, which is great for eye health and immune function. Oats are a good source of soluble fiber, which can help lower cholesterol and keep you feeling full longer. The eggs provide high-quality protein, and the maple syrup is a less refined sweetener than white sugar. Plus, the cinnamon and ginger have anti-inflammatory properties. So while these aren’t a health food, they’re definitely a smarter choice than a typical muffin or pastry.
Dietary considerations: This recipe can easily be made gluten-free, dairy-free, and vegan with the substitutions mentioned earlier. It’s naturally nut-free if you skip the pecans. The main allergens to be aware of are eggs, milk, and gluten (if using standard oats).
I like to think of these as a breakfast that fuels you for the morning without the sugar crash that comes from a lot of baked goods. They’re satisfying in a way that lasts.
Conclusion
These baked pumpkin oatmeal cups are the kind of recipe that makes you look like a kitchen hero without actually having to work that hard. They’re forgiving, they’re flexible, and they deliver that cozy fall flavor everyone craves. Whether you’re hosting a big brunch, feeding a hungry family, or just want something warm and comforting on a cool morning, these cups deliver every time.
I love that I can customize them based on what I have in the pantry or who I’m serving. Some batches are studded with chocolate chips, others are packed with pecans and cranberries, and every single version has been a hit. That’s the beauty of a simple, solid base recipe—you can make it your own.
So go ahead, give these a try. Make them for your next gathering, or just for a quiet weekend breakfast. And when you do, come back and let me know how they turned out. Did you add something unexpected? Did your guests ask for the recipe? I’d love to hear your stories. Drop a comment below, share a photo, or tag me on social media. Happy baking, friends—you’ve got this.
Frequently Asked Questions
Can I use quick oats instead of rolled oats?
You can, but the texture will be different. Quick oats are more finely chopped, so they absorb liquid faster and create a softer, more uniform texture. The cups won’t have the same chewy bite. If you only have quick oats, reduce the rest time to 2-3 minutes and check for doneness a few minutes earlier.
Can I make these without eggs?
Yes! Use two flax eggs (2 tablespoons ground flaxseed mixed with 6 tablespoons water, let sit for 5 minutes until gel-like). The cups will be a bit more delicate, so handle them gently when removing from the tin. They’re still delicious and hold together well once cooled.
How do I know when they’re done baking?
Look at the edges—they should be golden brown. The tops will look set and feel slightly firm to the touch. A toothpick inserted into the center should come out with a few moist crumbs, not wet batter. If the toothpick is wet, bake for another 2-3 minutes and check again.
Can I freeze these pumpkin oatmeal cups?
Absolutely. Let them cool completely, then place them in a single layer on a baking sheet and freeze for 1 hour. Transfer to a freezer-safe bag or container and freeze for up to 3 months. To reheat, microwave for 20-30 seconds or warm in a 350°F oven for 5-7 minutes.
What can I use instead of maple syrup?
Honey or agave nectar work well as substitutes. Keep in mind that honey has a stronger flavor, so it will slightly change the taste. You can also use 1/3 cup packed brown sugar mixed with 2 tablespoons water, but the texture will be a bit denser. Avoid using artificial sweeteners, as they don’t provide the same moisture and structure.
Pin This Recipe!
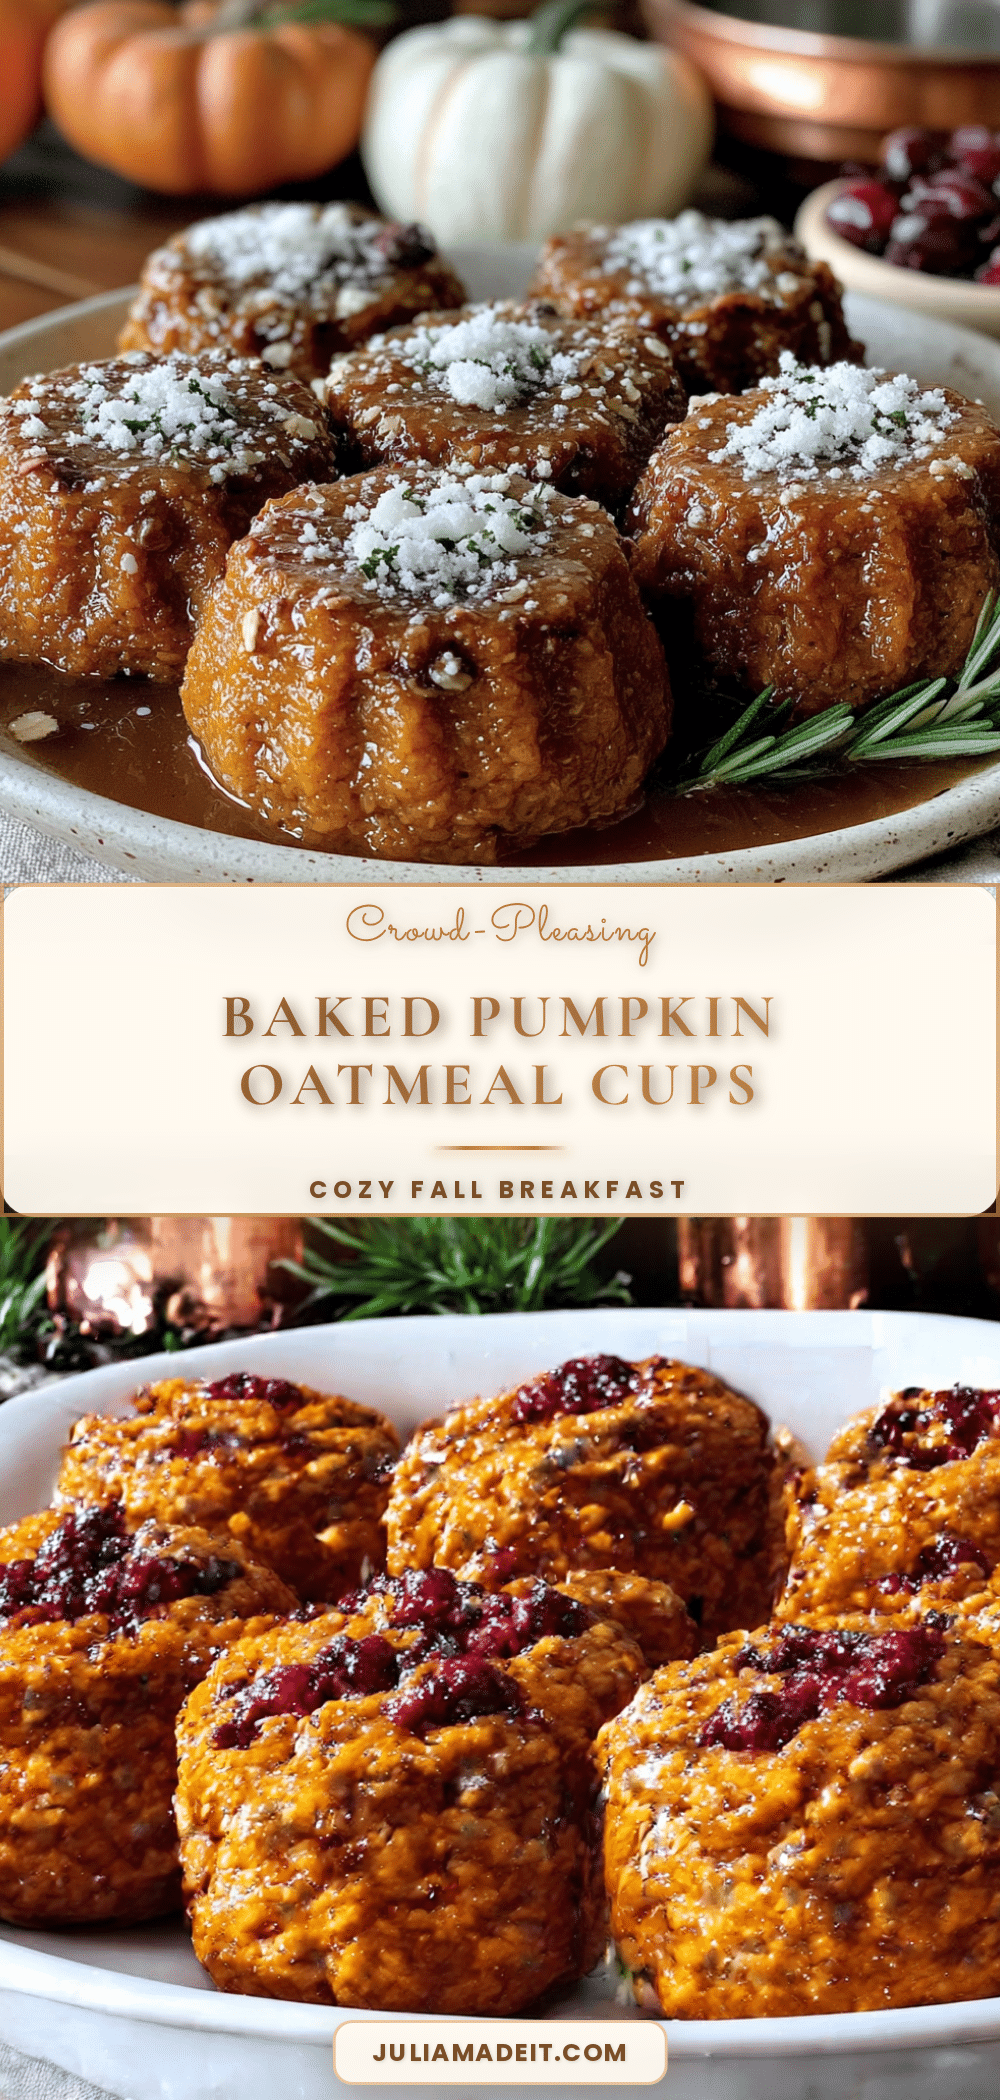
Best Baked Pumpkin Oatmeal Cups (Easy Crowd-Pleasing Recipe)
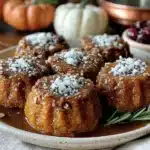
These baked pumpkin oatmeal cups are forgiving, flexible, and deliver that cozy fall flavor everyone craves. They come together in about 35 minutes and are perfect for brunches, post-soccer game snacks, or Thanksgiving morning.
- Prep Time: 10 minutes
- Cook Time: 25 minutes
- Total Time: 35 minutes
- Yield: 12 servings 1x
- Category: Breakfast
- Cuisine: American
Ingredients
- 2 cups (180g) rolled oats (old-fashioned)
- 1 cup (245g) pumpkin puree (100% pure, not pie filling)
- 1 cup (240ml) milk (dairy or plant-based)
- 2 large eggs
- 1/3 cup (80ml) maple syrup
- 1/4 cup (50g) coconut sugar or brown sugar
- 3 tablespoons (42g) coconut oil or butter, melted
- 1 teaspoon vanilla extract
- 2 teaspoons pumpkin pie spice
- 1 teaspoon cinnamon
- 1 teaspoon baking powder
- 1/2 teaspoon salt
- Optional mix-ins: 1/2 cup chopped pecans or walnuts, 1/3 cup chocolate chips, or 1/4 cup dried cranberries
Instructions
- Preheat your oven to 375°F (190°C). Grease a 12-cup muffin tin or line with paper liners.
- In a large bowl, whisk together the wet ingredients: 1 cup pumpkin puree, 1 cup milk, 2 large eggs, 1/3 cup maple syrup, 1/4 cup coconut sugar or brown sugar, 3 tablespoons melted coconut oil or butter, and 1 teaspoon vanilla extract until smooth.
- In a separate medium bowl, stir together the dry ingredients: 2 cups rolled oats, 2 teaspoons pumpkin pie spice, 1 teaspoon cinnamon, 1 teaspoon baking powder, and 1/2 teaspoon salt. If using mix-ins, stir them in now.
- Pour the dry ingredients into the wet ingredients and fold together with a spatula until just combined. Do not overmix.
- Let the batter rest for 5 minutes to allow the oats to absorb liquid.
- Scoop the batter into the prepared muffin tin, filling each cup almost to the top (about 3/4 full).
- Bake for 22-25 minutes, until the edges are golden brown and the tops are set and slightly firm to the touch. A toothpick inserted into the center should come out mostly clean with a few moist crumbs.
- Let the cups cool in the tin for 5 minutes, then transfer to a cooling rack. Serve warm or at room temperature.
Notes
For a crispy top, broil for 1 minute at the end of baking. These cups freeze beautifully; bake, cool completely, then freeze in a freezer-safe bag for up to 3 months. Reheat in a 350°F oven for 5-7 minutes or microwave for 20-30 seconds.
Nutrition
- Serving Size: 1 cup
- Calories: 185
- Sugar: 11
- Sodium: 180
- Fat: 6
- Saturated Fat: 3.5
- Carbohydrates: 28
- Fiber: 4
- Protein: 5
Keywords: pumpkin oatmeal cups, baked oatmeal cups, pumpkin breakfast, fall breakfast, easy oatmeal cups, crowd-pleasing recipe