“You seriously made this at home?” was the first thing my coworker blurted out when I pulled out a bag of this easy homemade teriyaki beef jerky at our afternoon break. Honestly, I wasn’t sure if I could pull it off myself at first—it felt like one of those fancy snacks you buy, not make. But after a chaotic week packed with meetings and takeout dinners, I wanted something different, something I could munch on without guilt or mystery ingredients. I grabbed a lean cut of beef on a whim, tossed it in a homemade teriyaki marinade, and let it slow-dry overnight. The next day, the smell alone was a game-changer—sweet, salty, with that unmistakable umami punch.
What caught me off guard was how this jerky had that perfect chewiness, not too tough, not too soft, and the flavors? Let’s just say it quickly became my go-to snack for late work sessions and even a quick bite before a weekend hike. No more wondering what’s in the store-bought stuff, no more sacrificing flavor for convenience. This recipe stuck because it’s straightforward, uses everyday ingredients, and honestly, because it’s a little piece of homemade comfort in snack form. It’s the kind of recipe that makes you pause, savor, and maybe even share a few pieces with friends who can’t believe you made it yourself.
So here’s the thing: if you’ve ever thought about making beef jerky but felt overwhelmed by complicated steps, this easy homemade teriyaki beef jerky recipe might be just what you need. It’s proof that with a bit of patience and love, you can create a snack that’s both satisfying and surprisingly simple. No fancy gear, no weird preservatives, just pure flavor—and that’s why it’s stayed in my snack rotation ever since.
Why You’ll Love This Easy Homemade Teriyaki Beef Jerky Recipe
After testing countless marinades and drying times, this recipe emerged as the one that hits all the right notes. It’s not just about making jerky; it’s about making jerky that you’ll crave again and again.
- Quick & Easy: From marinade to drying, it takes about 5 steps and a little patience, perfect for busy snackers who want something homemade without fuss.
- Simple Ingredients: No need to hunt down exotic spices—soy sauce, ginger, garlic, and a touch of honey do the trick. These are staples I always have on hand.
- Perfect for On-the-Go: Whether it’s for a hiking trip, afternoon desk snack, or a movie night, this jerky keeps well and satisfies those savory cravings.
- Crowd-Pleaser: I’ve brought this to office potlucks and casual get-togethers, and it’s always the first to disappear—kids and adults alike can’t get enough.
- Unbelievably Delicious: The balance of sweet, salty, and garlicky flavors with that tender chewiness makes it next-level comfort food that you can feel good about.
What sets this easy homemade teriyaki beef jerky recipe apart is its simplicity paired with authentic flavor. Instead of a complicated spice blend, the marinade is perfectly balanced to enhance the beef’s natural taste while adding that signature teriyaki gloss. Plus, the drying method keeps the meat tender rather than brittle, which I learned after a few too many batches of jerky that ended up like shoe leather.
This recipe isn’t just a snack; it’s a little kitchen victory that makes you appreciate homemade goodness. I often pair it with a fresh salad or a quick batch of turkey lettuce wrap tacos for a balanced, satisfying meal that doesn’t skimp on flavor. Honestly, once you try this jerky, store-bought just won’t cut it anymore.
What Ingredients You Will Need
This recipe uses simple, wholesome ingredients to deliver bold flavor and satisfying texture without the fuss. Most are pantry staples, and the rest are easy to find at any grocery store. Here’s what you’ll need:
- Beef: 1.5 pounds (680 grams) of lean beef (top round, flank steak, or sirloin tip work best for jerky)
- Soy Sauce: ½ cup (120 ml) – I prefer low sodium for better control over saltiness
- Honey: 2 tablespoons (30 ml) – adds natural sweetness and helps with caramelization
- Brown Sugar: 1 tablespoon (15 grams) – use packed for deeper flavor
- Rice Vinegar: 1 tablespoon (15 ml) – balances the sweetness with a subtle tang
- Garlic: 3 cloves, minced – fresh is best for that sharp aromatic punch
- Fresh Ginger: 1 teaspoon (5 grams), grated – adds warmth and slight spice
- Ground Black Pepper: ½ teaspoon (1 gram) – freshly cracked preferred
- Sesame Oil: 1 teaspoon (5 ml) – optional, but adds a lovely nutty depth
- Red Pepper Flakes: ¼ teaspoon (optional) – for a little heat if you like
For best results, look for beef that’s lean and firm. I recommend brands like Certified Angus Beef or local butcher cuts if you want a fresher option. If you’re in a pinch, frozen beef thawed well also works fine. You can swap honey with maple syrup or brown sugar with coconut sugar as healthier alternatives. For a gluten-free version, use tamari instead of soy sauce.
Equipment Needed
- Sharp Knife: Essential for slicing the beef thinly and evenly. I use a serrated-edge knife for clean cuts.
- Cutting Board: Preferably large and sturdy to handle the beef slices safely.
- Mixing Bowl: For marinating the beef. Glass or stainless steel is best to avoid any reaction with marinade acids.
- Baking Sheet and Wire Rack: If you don’t have a dehydrator, a wire rack on a baking sheet works well for oven drying.
- Dehydrator (Optional): Makes drying easier and more consistent. Brands like Nesco offer affordable options, but you can totally skip this if you prefer the oven method.
- Plastic Wrap or Zip-Top Bag: For marinating and keeping the beef sealed overnight.
Personally, I started with just the oven method and a trusty wire rack. It’s budget-friendly and gets the job done without fancy gadgets. If you plan to make jerky often, investing in a dehydrator is worth it (plus, it frees up your oven). Just remember to keep your knives sharp and your workspace clean—that’s half the battle in homemade jerky success.
Preparation Method
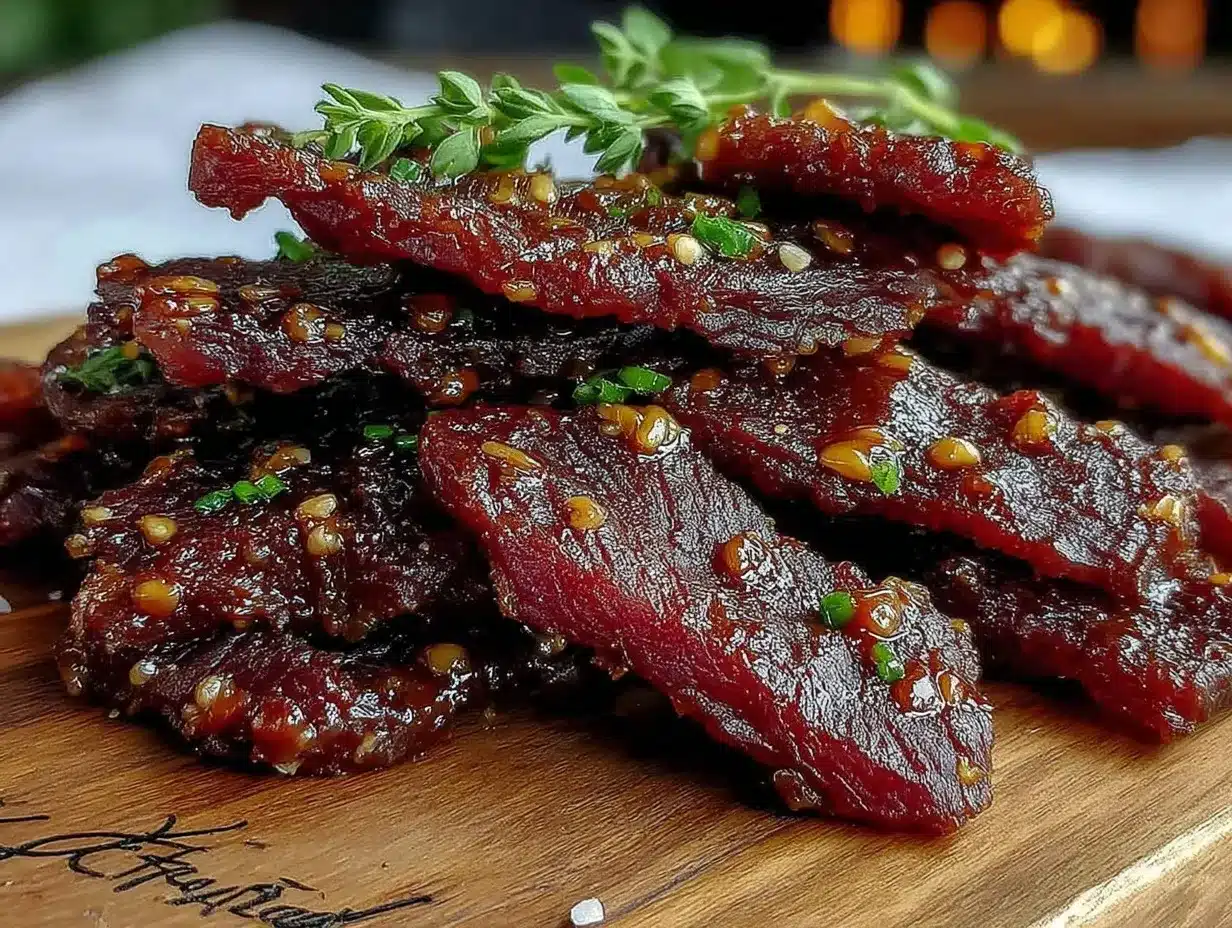
- Slice the Beef: Trim any visible fat from the beef, then slice it thinly—about 1/8 inch (3 mm) thick. For easier slicing, place the beef in the freezer for 30-45 minutes beforehand; this firms it up and helps get uniform slices. Aim for strips about 4-6 inches (10-15 cm) long for manageable jerky pieces.
- Prepare the Marinade: In a mixing bowl, combine ½ cup (120 ml) soy sauce, 2 tablespoons (30 ml) honey, 1 tablespoon (15 grams) brown sugar, 1 tablespoon (15 ml) rice vinegar, minced garlic, grated ginger, ½ teaspoon (1 gram) black pepper, 1 teaspoon (5 ml) sesame oil, and red pepper flakes if using. Whisk everything until sugar dissolves and the mixture looks glossy.
- Marinate the Beef: Add the beef slices to the marinade, toss to coat evenly, then cover with plastic wrap or seal in a zip-top bag. Refrigerate for at least 6 hours, ideally overnight. The longer it marinates, the deeper the flavor—just don’t go past 24 hours to avoid mushy texture.
- Dry the Beef: Preheat your oven to 175°F (80°C) or set your dehydrator to the same temperature. Place the beef strips in a single layer on a wire rack over a baking sheet (to catch drips) or directly on dehydrator trays. Leave space between strips for air circulation.
- Dehydrate: Let the beef dry for 4-6 hours, flipping halfway through if using the oven. Jerky is done when it’s dry to the touch but still flexible—if it snaps immediately without bending, it’s overdone. A good test is to bend a piece; it should crack slightly but not break.
Note: Oven drying times vary depending on thickness and humidity, so start checking at 4 hours. For best results, keep the oven door slightly ajar with a wooden spoon to allow moisture to escape.
Cooking Tips & Techniques
Getting the texture right is the trickiest part of jerky making, and I’ve had my share of chewy failures and brittle jerky disasters. Here are some tips that saved me from wasting good beef:
- Slice Against the Grain: This makes the jerky easier to chew. With the grain, it gets tougher and stringier.
- Marinate Overnight: Don’t rush this step. The flavors really develop and tenderize the meat, making all the difference.
- Keep Temperature Low: Drying at too high a heat cooks the beef rather than slowly drying it, resulting in a harder texture.
- Use a Wire Rack: This allows air to circulate around the beef strips, drying them evenly and preventing soggy spots.
- Flip Halfway: When oven drying, flipping helps both sides dry evenly and speeds up the process.
- Test for Doneness: Jerky should be pliable with no wet spots. Overdrying makes it brittle and less pleasant to eat.
One time, I got impatient and pulled the jerky too soon—it was chewy but lacked flavor. Lesson learned: patience is key. Also, don’t be shy about adjusting seasoning in the marinade after your first batch; maybe a splash more soy sauce or a pinch more brown sugar depending on your taste buds. Jerky is forgiving and fun to tweak.
Variations & Adaptations
This easy homemade teriyaki beef jerky recipe is a great base to customize, whether you want to spice it up, lighten it, or cater to dietary needs.
- Spicy Kick: Add more red pepper flakes or a dash of Sriracha to the marinade for a fiery twist.
- Low-Sodium: Use reduced-sodium soy sauce and cut back on added salt. You can also swap soy sauce with coconut aminos for a milder, gluten-free option.
- Sweet & Smoky: Stir in a teaspoon of smoked paprika or liquid smoke to the marinade for a campfire vibe without the grill.
- Turkey Jerky: Swap beef for turkey breast slices for a leaner, high-protein snack. Adjust drying time as turkey tends to dry faster.
- Herb Infusion: Toss fresh chopped cilantro or green onion into the marinade before drying for a fresh herbal note.
One variation I love is mixing in a bit of pineapple juice with the soy sauce—it adds a tropical sweetness that makes the jerky feel like a mini vacation snack. If you want to experiment with different textures, try slicing the beef thinner for crisper jerky or thicker for chewier bites. The possibilities are endless, and each batch can reflect your personal flavor cravings.
Serving & Storage Suggestions
This jerky is best served at room temperature, which allows the flavors and chewiness to shine. I like to serve it alongside crunchy veggies or a light salad for a balanced snack. It’s also a fantastic companion to the creamy texture of dishes like pink Himalayan salt cured egg yolk toast—the contrast in textures is delightful!
For storage, keep your jerky in an airtight container or zip-top bag. It stays fresh in the refrigerator for up to two weeks. If you want to keep it longer, freeze it for up to three months—just thaw at room temperature before snacking. Reheating isn’t necessary, but if you prefer a warm snack, a quick 30-second zap in the microwave softens it slightly without drying it out.
Over time, the flavors deepen, making the jerky even more addictive. Just remember to check for any signs of spoilage if kept for extended periods—though honestly, it rarely lasts that long in my house!
Nutritional Information & Benefits
Per serving (about 1 ounce or 28 grams):
| Calories | 70-80 |
|---|---|
| Protein | 10-12 grams |
| Fat | 1-2 grams |
| Carbohydrates | 4-5 grams (mostly from honey and sugar) |
| Sodium | 250-350 mg (varies with soy sauce) |
This beef jerky is a protein-packed snack that supports muscle repair and keeps hunger at bay between meals. Using lean cuts of beef keeps fat content low, and the natural ginger and garlic add antioxidants and anti-inflammatory benefits. For those watching carbs, you can reduce the honey and sugar or swap for sugar-free alternatives.
Note that soy sauce contains gluten unless you use tamari, so adjust accordingly for gluten sensitivities. Overall, this jerky fits well into many diets, whether you’re following low-carb, paleo, or just want a satisfying homemade snack without preservatives.
Conclusion
This easy homemade teriyaki beef jerky recipe is proof that delicious snacks don’t have to be complicated or full of mystery ingredients. It’s approachable, flavorful, and reliably satisfying—especially if you appreciate a little kitchen confidence boost. I love how it’s become my secret weapon for quick energy boosts, and it’s fun to share with friends who can’t believe it’s homemade.
Feel free to tweak the marinade and drying times to suit your taste and texture preferences. Whether you keep it classic or experiment with spicy or smoky twists, this jerky recipe is a great starting point for anyone curious about DIY snacks. And hey, once you’ve mastered this, you might find yourself trying out other easy homemade recipes like the Mediterranean chicken sheet pan dinner for a full homemade meal experience!
Give it a try and share your jerky adventures—I’d love to hear your favorite variations or any tips you discover along the way. Happy snacking!
Frequently Asked Questions
How long does homemade teriyaki beef jerky last?
When stored properly in an airtight container, it lasts up to two weeks in the refrigerator and up to three months in the freezer.
Can I use other meats besides beef?
Yes! Turkey breast or venison work well. Just adjust drying time as leaner meats may dry faster.
Do I need a dehydrator to make this jerky?
Nope. An oven with a wire rack works just fine. Keep the temperature low and the door slightly open to let moisture escape.
How thin should I slice the beef?
About 1/8 inch (3 mm) thick is ideal for chewy but tender jerky. Thinner slices dry faster but can be crispier.
Can I make this gluten-free?
Absolutely. Swap regular soy sauce for tamari or coconut aminos to keep it gluten-free without losing flavor.
Pin This Recipe!
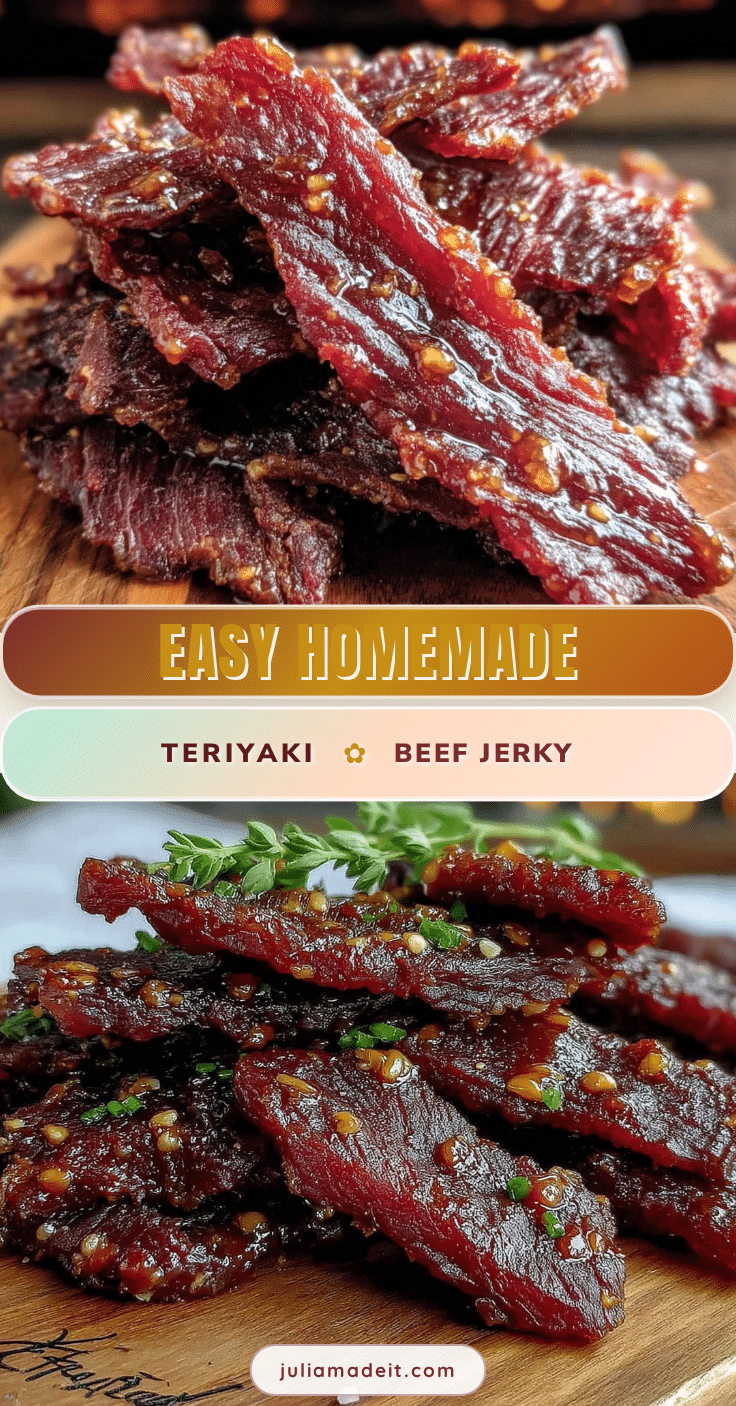
Easy Homemade Teriyaki Beef Jerky
A simple and flavorful homemade teriyaki beef jerky recipe that delivers perfect chewiness and a balanced sweet, salty, and garlicky flavor. Ideal for a healthy, protein-packed snack.
- Prep Time: 15 minutes
- Cook Time: 4-6 hours
- Total Time: 6 hours 15 minutes
- Yield: About 12 servings (1 ounce per serving) 1x
- Category: Snack
- Cuisine: American
Ingredients
- 1.5 pounds lean beef (top round, flank steak, or sirloin tip)
- ½ cup soy sauce (low sodium preferred)
- 2 tablespoons honey
- 1 tablespoon brown sugar (packed)
- 1 tablespoon rice vinegar
- 3 cloves garlic, minced
- 1 teaspoon fresh ginger, grated
- ½ teaspoon ground black pepper
- 1 teaspoon sesame oil (optional)
- ¼ teaspoon red pepper flakes (optional)
Instructions
- Trim any visible fat from the beef, then slice it thinly about 1/8 inch thick. For easier slicing, freeze the beef for 30-45 minutes beforehand. Cut strips about 4-6 inches long.
- In a mixing bowl, combine soy sauce, honey, brown sugar, rice vinegar, minced garlic, grated ginger, black pepper, sesame oil, and red pepper flakes if using. Whisk until sugar dissolves and mixture is glossy.
- Add beef slices to the marinade, toss to coat evenly, then cover with plastic wrap or seal in a zip-top bag. Refrigerate for at least 6 hours, ideally overnight but no longer than 24 hours.
- Preheat oven to 175°F (80°C) or set dehydrator to the same temperature. Arrange beef strips in a single layer on a wire rack over a baking sheet or dehydrator trays, leaving space between strips for air circulation.
- Dry the beef for 4-6 hours, flipping halfway through if using the oven. Jerky is done when dry to the touch but still flexible. Test by bending a piece; it should crack slightly but not break.
Notes
Slice beef against the grain for easier chewing. Keep oven temperature low and door slightly ajar to allow moisture to escape. Marinate overnight for best flavor. Test jerky flexibility to avoid overdrying. Adjust seasoning after first batch to taste. For gluten-free, use tamari or coconut aminos instead of soy sauce.
Nutrition
- Serving Size: 1 ounce (28 grams)
- Calories: 7080
- Sodium: 250350
- Fat: 12
- Carbohydrates: 45
- Protein: 1012
Keywords: beef jerky, teriyaki, homemade snack, protein snack, easy jerky recipe, healthy snack, low fat, gluten-free option