“Hey, can you whip up something festive for the Fourth?” my friend texted me just hours before the barbecue. Honestly, I was staring at my fridge, which was more empty than full, and feeling the usual party-host panic. I wanted something that felt special but wouldn’t demand an oven preheated for hours or last-minute dashes to the grocery store. That’s when the idea of an Easy No-Bake Strawberry Flag Cheesecake with Creamy Layers popped into my head—something light, quick, and oh-so-appealing visually. I’d seen a similar dessert once, but it always seemed complicated or too fussy for a casual get-together.
So, armed with just a handful of ingredients and a little patience, I set to work layering creamy cheesecake filling and fresh strawberries into a clear dish. The result? A dessert that looked like a little piece of summer patriotism on a plate, with layers so silky you almost forget you didn’t bake it. And the best part? It made the party—no stress, no mess, just sweet smiles and a lot of second helpings. That night, I realized that this no-bake cheesecake recipe wasn’t just a last-minute hack; it became my go-to for easy entertaining, perfect for when you want creamy layers without turning on the oven.
It’s funny how a simple request turned into a recipe that now gets asked for every summer. This cheesecake has that kind of magic that whispers “celebration” with every bite, and honestly, it’s stuck with me because it’s as delicious as it is effortless. If you’re craving a dessert that’s visually stunning but won’t have you sweating over a hot stove, this strawberry flag cheesecake is quietly waiting in your recipe arsenal.
Why You’ll Love This Recipe
After making this Easy No-Bake Strawberry Flag Cheesecake more times than I can count, I can vouch for why it’s a crowd magnet every single time. It’s not just about the pretty layers or the patriotic theme—it’s truly about what’s under the hood (or in this case, inside the dish).
- Quick & Easy: The whole dessert comes together in under an hour, including chilling time, which is perfect for those impromptu get-togethers or when you just don’t feel like turning on the oven.
- Simple Ingredients: You likely have cream cheese, whipped topping, and fresh strawberries in your kitchen or can grab them easily without hunting for specialty items.
- Perfect for Summer Parties: It’s ideal for Independence Day celebrations, picnics, or just any sunny day when you want a light but indulgent treat.
- Crowd-Pleaser: Kids love the vibrant colors and creamy texture, and adults appreciate the fresh strawberry brightness balanced by smooth cheesecake layers.
- Unbelievably Delicious: The creamy layers are silky smooth, with just the right tang from cream cheese and a gentle sweetness that lets the strawberry flavor shine through.
What sets this cheesecake apart is the way the creamy layers are so perfectly balanced with fresh fruit, creating a dessert that’s not overly sweet or heavy. Unlike traditional baked cheesecakes that can sometimes be dense or dry, this one stays light, fluffy, and refreshingly cool. I even recommend trying it after making my Creamy Diploma Cream Puffs for a celebration menu that’s all about effortless elegance and creamy indulgence.
There’s a special kind of satisfaction in serving a dessert that looks like you spent hours fussing over it, but honestly, you just layered and chilled. It’s that quiet kind of win that keeps this recipe on my favorites list.
What Ingredients You Will Need
This recipe uses simple, wholesome ingredients to deliver bold flavor and satisfying creamy texture without any fuss. Most of these items are pantry staples or fresh market finds, making this dessert as approachable as it is impressive.
- For the Crust:
- Graham cracker crumbs (about 1 ½ cups / 150 g) – I like the fine crumbs for a sturdy yet tender base
- Unsalted butter, melted (6 tablespoons / 85 g) – brings richness and helps the crust hold together
- Granulated sugar (2 tablespoons / 25 g) – adds just a hint of sweetness
- For the Creamy Cheesecake Layers:
- Cream cheese, softened (16 oz / 450 g) – use full-fat for best texture; brands like Philadelphia work well
- Powdered sugar (¾ cup / 90 g) – dissolves smoothly for silky sweetness
- Vanilla extract (1 teaspoon) – enhances the creamy flavor
- Heavy whipping cream (1 cup / 240 ml), chilled – whipped to soft peaks, adds lightness
- For the Strawberry Flag Topping:
- Fresh strawberries (about 2 cups / 300 g), hulled and sliced – ripe and firm berries give the best color and texture
- Blueberries (½ cup / 75 g) – for the blue section of the flag
If strawberries are out of season, frozen-thawed can work, but fresh always wins for that vibrant flavor and texture. For a dairy-free twist, swap cream cheese for a plant-based alternative and use coconut cream instead of heavy cream — though it will shift the flavor slightly.
Equipment Needed
You don’t need fancy gadgets for this recipe. Here’s what I usually have on hand:
- 8×8-inch (20×20 cm) square baking dish or a similar sized clear glass dish – the transparency really shows off the layers beautifully.
- Mixing bowls – at least two, one for the crust and one for the cheesecake filling.
- Electric mixer or stand mixer – I find whipping the cream and blending cream cheese is way easier with a hand mixer, but a whisk works if you’re patient.
- Spatula – for folding the whipped cream gently into the cream cheese mixture.
- Measuring cups and spoons – accuracy matters for that perfect balance of flavors.
If you don’t have a mixer, a sturdy whisk and some elbow grease can get the whipped cream ready, but it’ll take a little longer. For budget-conscious cooks, a glass dish from the dollar store works just as well and makes the presentation pop.
Preparation Method
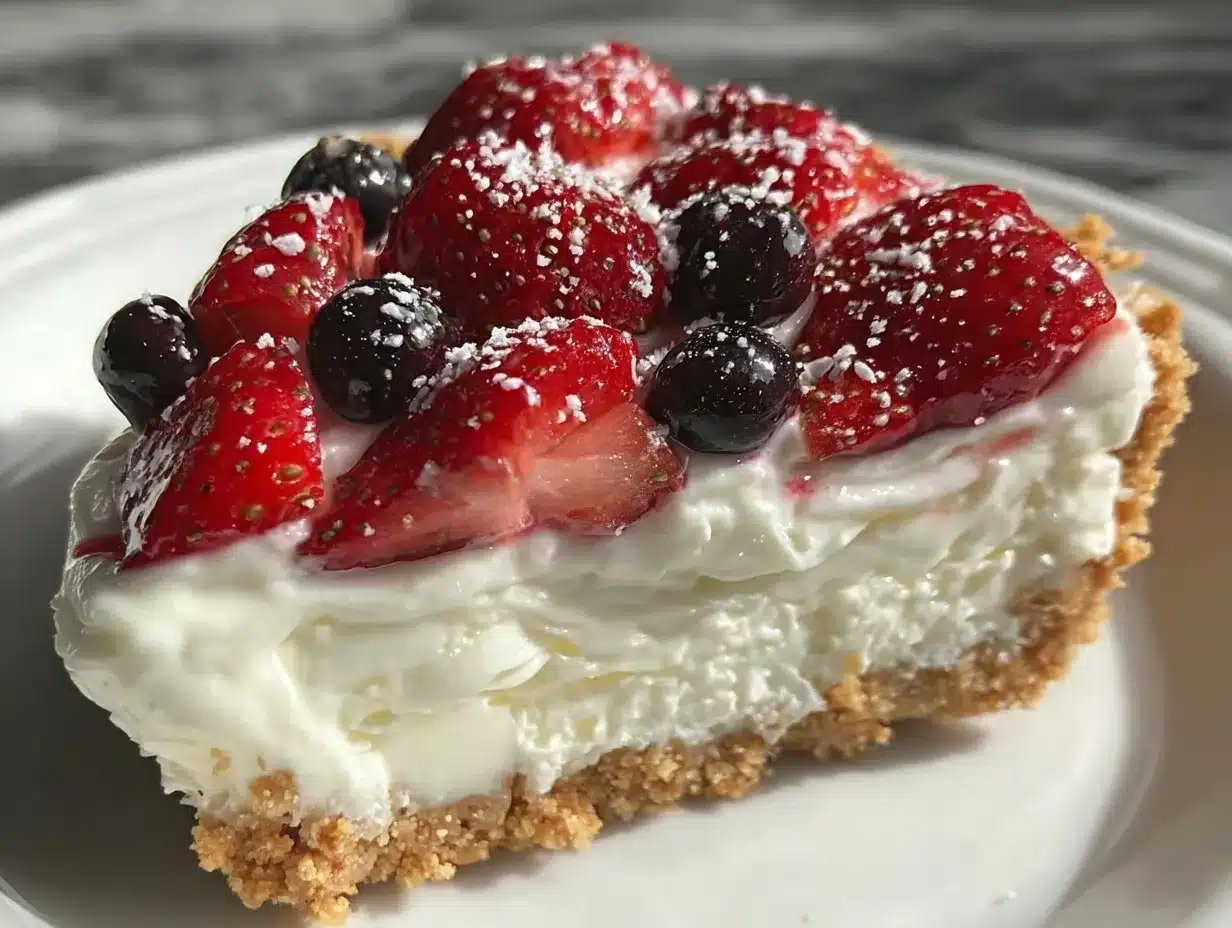
- Prepare the crust: In a medium bowl, mix 1 ½ cups (150 g) graham cracker crumbs with 6 tablespoons (85 g) melted butter and 2 tablespoons (25 g) sugar until the mixture resembles wet sand. Press this firmly into the bottom of your 8×8-inch (20×20 cm) dish. I like using the bottom of a glass or measuring cup to get an even, compact crust. Chill it in the fridge while you prepare the filling (about 10 minutes).
- Make the cheesecake filling: In a large bowl, beat 16 oz (450 g) softened cream cheese until smooth and creamy. Add ¾ cup (90 g) powdered sugar and 1 teaspoon vanilla extract, mixing until fully combined. In a separate bowl, whip 1 cup (240 ml) heavy cream to soft peaks. Gently fold the whipped cream into the cream cheese mixture in batches, taking care not to deflate the airy texture. The mixture should be light and fluffy with no lumps.
- Assemble the creamy layers: Spoon about a third of the cheesecake mixture over the chilled crust, smoothing it into an even layer with a spatula. Refrigerate for 15 minutes to help it set. Repeat this step two more times, creating three creamy layers in total. This technique builds those luscious, creamy layers that make this no-bake cheesecake stand out.
- Decorate with the strawberry flag: Arrange sliced strawberries in rows to mimic the stripes of the flag across the top layer. Use fresh blueberries in the top-left corner for the stars’ section. Take your time here to get a neat, colorful pattern — it’s the showstopper! If your strawberries are large, slice them thinner for a cleaner look.
- Chill before serving: Cover the dish loosely with plastic wrap and refrigerate for at least 4 hours, preferably overnight. This chilling step allows the flavors to meld and the layers to firm up beautifully. The cheesecake will slice cleanly and hold its shape when well chilled.
- Serving: Use a warm knife (dip it in hot water and wipe dry) to slice neat squares. Serve chilled for that perfect creamy, refreshing bite.
Cooking Tips & Techniques
One of the trickiest parts of no-bake cheesecakes is getting the texture just right, and I’ve learned a few things along the way:
- Soften cream cheese to room temperature before mixing. Cold cream cheese leads to lumps and a less creamy filling.
- Whip heavy cream to soft peaks, not stiff. Overwhipping can make folding difficult and cause the filling to become grainy.
- Gently fold the whipped cream into the cream cheese mixture using a spatula and a light hand. This keeps the filling airy and silky.
- Press the crust firmly but don’t over-pack. Too dense a crust can become hard and detract from the creamy filling.
- Use a warm knife to slice the cheesecake. This melts through the layers cleanly so your flag design stays intact.
- Patience with chilling is key. Skipping or shortening the chill time can lead to runny layers that don’t hold their shape.
I once tried rushing the chilling part — big mistake! The layers collapsed, and the strawberries sank. Lesson learned: chill well, and your cheesecake will hold those creamy layers perfectly.
Variations & Adaptations
This recipe is super versatile, and I’ve enjoyed tweaking it depending on the occasion or what’s in season:
- Berry Mix-Up: Swap strawberries for raspberries, blackberries, or a mix of fresh berries for a colorful twist that still looks beautiful on top.
- Gluten-Free Option: Use gluten-free graham crackers or crushed gluten-free cookies for the crust to make this dessert safe for gluten-sensitive guests.
- Chocolate Twist: Add a layer of melted chocolate or cocoa powder mixed into one of the creamy layers for a subtle chocolate flavor contrast.
- Vegan Version: Use plant-based cream cheese alternatives and coconut cream whipped to stiff peaks. Opt for a vegan cookie crust to keep it fully dairy-free.
- Mini Cheesecakes: Make individual servings using small jars or ramekins for a fun party presentation. I tried this for a 4th of July picnic, and everyone loved having their own creamy flag dessert!
Serving & Storage Suggestions
Serve this Easy No-Bake Strawberry Flag Cheesecake chilled, straight from the fridge. The creamy layers taste best cold, with the fresh fruit adding a juicy burst in every bite. For a party, pair it with sparkling lemonade or iced tea to keep things light and refreshing.
Leftovers keep well in the refrigerator for up to 3 days, covered tightly with plastic wrap or in an airtight container. The flavors deepen overnight, making it even tastier the next day. I usually slice it into squares before storing so it’s ready to grab as a quick treat.
If you want to prepare ahead, you can assemble the cheesecake up to 24 hours in advance. Just keep it chilled and add the fruit topping last to maintain freshness. Reheating isn’t recommended—this cheesecake is best enjoyed cold.
Nutritional Information & Benefits
This no-bake cheesecake offers a reasonable balance of indulgence and nutrition. Each serving provides a good source of calcium and protein from the cream cheese and heavy cream. Fresh strawberries add vitamin C and antioxidants, making the dessert a bit more wholesome than your average sweet treat.
While it’s not a low-calorie dessert, the no-bake method avoids extra fats often introduced by baking crusts or heavy toppings. The recipe can be adapted to be gluten-free or dairy-free to fit dietary needs. If you’re mindful about sugar, you can reduce the powdered sugar slightly without sacrificing flavor.
I appreciate how this dessert feels like comfort food but still includes fresh fruit and wholesome ingredients—great for a balanced approach to holiday treats.
Conclusion
This Easy No-Bake Strawberry Flag Cheesecake with Creamy Layers is one of those recipes that makes you look like a dessert pro without needing hours in the kitchen. The fresh fruit topping and soft cheesecake layers come together to create a dessert that’s as pretty as it is delicious. It’s perfect for summer parties, simple family dinners, or whenever you want a little holiday spirit on your plate.
Feel free to customize the fruit or experiment with crust flavors to make it your own. I love how forgiving and flexible this cheesecake is—plus that creamy texture keeps everyone coming back for more. If you enjoyed this recipe, you might want to try my Perfect Mini Champagne Raspberry Cheesecakes for another show-stopping no-bake option.
Give this a try, and I’d love to hear how you made it your own or what occasions you served it for. Here’s to creamy layers, fresh strawberries, and easy desserts that bring everyone together!
FAQs
- Can I use frozen strawberries for this cheesecake?
Yes, but thaw and drain them well to avoid excess moisture that can make the cheesecake watery. - How long should I chill the cheesecake before serving?
At least 4 hours, but overnight chilling gives the best texture and flavor melding. - Can I make this cheesecake ahead of time?
Absolutely, you can assemble it up to 24 hours in advance. Just add the fresh fruit topping right before serving for the best look and taste. - What can I use instead of graham cracker crumbs for the crust?
Crushed digestive biscuits, vanilla wafers, or gluten-free cookies work well as alternatives. - Is it possible to freeze this no-bake cheesecake?
Freezing can alter the texture of the creamy layers, so it’s best enjoyed fresh or refrigerated only.
Pin This Recipe!
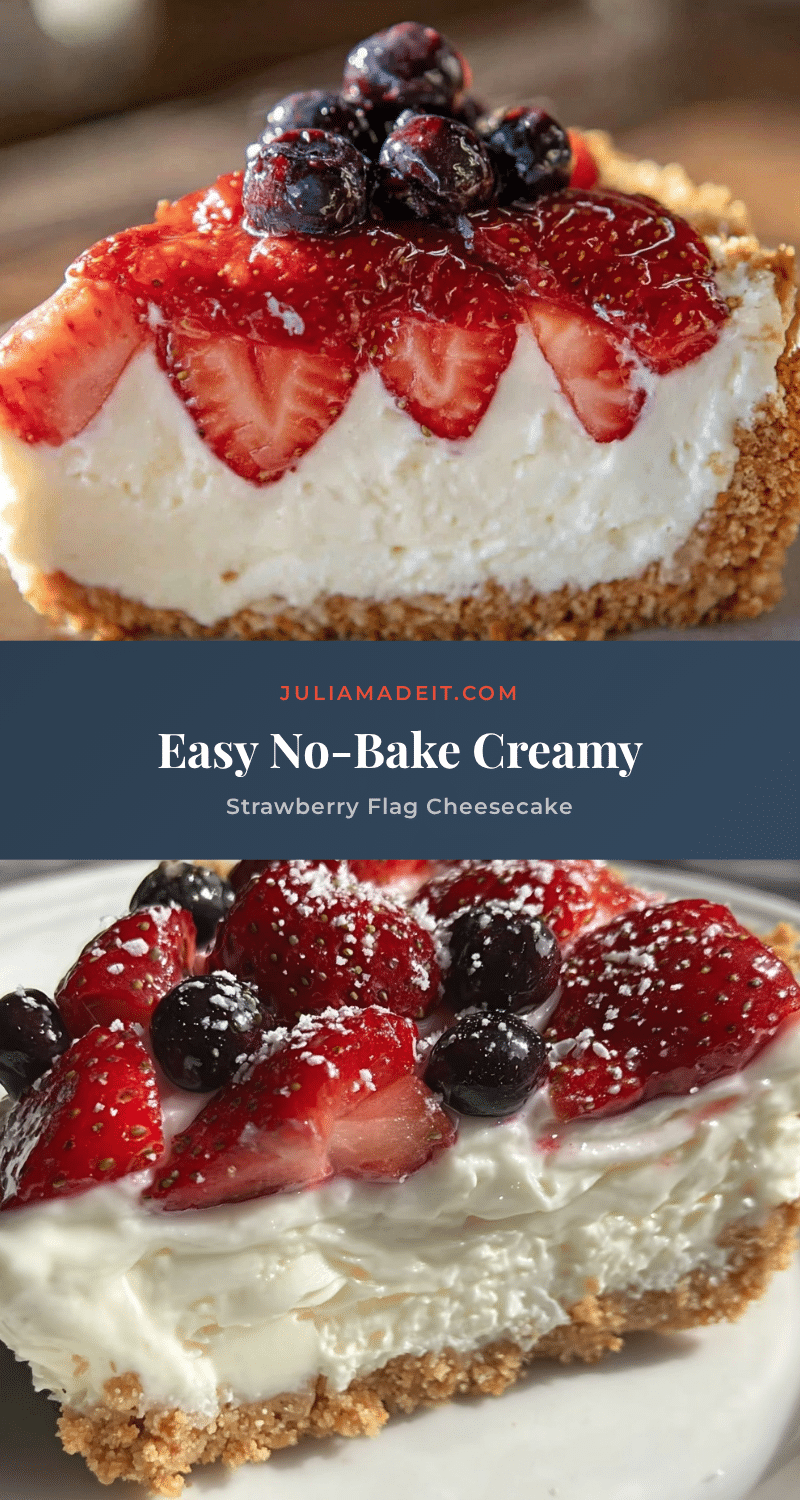
Easy No-Bake Strawberry Flag Cheesecake Recipe for Perfect Creamy Layers
A quick and visually stunning no-bake cheesecake featuring creamy layers and a patriotic strawberry and blueberry flag topping. Perfect for summer parties and easy entertaining without using an oven.
- Prep Time: 20 minutes
- Cook Time: 0 minutes
- Total Time: 4 hours 20 minutes
- Yield: 9 servings 1x
- Category: Dessert
- Cuisine: American
Ingredients
- 1 ½ cups graham cracker crumbs (about 150 g)
- 6 tablespoons unsalted butter, melted (about 85 g)
- 2 tablespoons granulated sugar (about 25 g)
- 16 oz cream cheese, softened (about 450 g)
- ¾ cup powdered sugar (about 90 g)
- 1 teaspoon vanilla extract
- 1 cup heavy whipping cream, chilled (about 240 ml)
- 2 cups fresh strawberries, hulled and sliced (about 300 g)
- ½ cup blueberries (about 75 g)
Instructions
- Prepare the crust: In a medium bowl, mix graham cracker crumbs, melted butter, and sugar until the mixture resembles wet sand. Press firmly into the bottom of an 8×8-inch (20×20 cm) dish. Chill in the fridge for about 10 minutes.
- Make the cheesecake filling: Beat softened cream cheese until smooth. Add powdered sugar and vanilla extract, mixing until combined. Whip heavy cream to soft peaks and gently fold into the cream cheese mixture until light and fluffy.
- Assemble the creamy layers: Spoon one-third of the cheesecake mixture over the chilled crust, smooth with a spatula, and refrigerate for 15 minutes. Repeat two more times to create three layers.
- Decorate with the strawberry flag: Arrange sliced strawberries in rows to mimic flag stripes and place blueberries in the top-left corner for the stars section.
- Chill before serving: Cover loosely with plastic wrap and refrigerate for at least 4 hours or overnight to allow flavors to meld and layers to firm up.
- Serve: Use a warm knife to slice neat squares and serve chilled.
Notes
Soften cream cheese to room temperature before mixing to avoid lumps. Whip heavy cream to soft peaks, not stiff, to maintain airy texture. Use a warm knife to slice for clean cuts. Chill the cheesecake well to ensure layers hold their shape. Frozen strawberries can be used if thawed and drained properly.
Nutrition
- Serving Size: 1 square (approximat
- Calories: 320
- Sugar: 15
- Sodium: 210
- Fat: 24
- Saturated Fat: 14
- Carbohydrates: 20
- Fiber: 1
- Protein: 5
Keywords: no-bake cheesecake, strawberry cheesecake, patriotic dessert, summer dessert, easy cheesecake, flag dessert, Fourth of July dessert