“Can you make that buffalo chicken thing again?” My roommate texted me that on a Tuesday afternoon, and honestly, I hadn’t thought about it as a “thing” until then. I’d just been throwing shredded chicken into containers with some veggies and calling it lunch. But she was right—it had become a thing. A very delicious, very addictive thing.
I started making these Easy Buffalo Chicken Meal Prep Bowls back when I was trying to survive a chaotic season of late nights and early mornings. I needed something I could grab from the fridge and actually look forward to eating. Not sad desk salads. Not another sad sandwich. Something with actual personality—something that bit back a little.
The first batch was an accident, honestly. I had leftover chicken from a game day platter and a bottle of Frank’s RedHot staring at me from the pantry door. I mixed them together, added some blue cheese crumbles because that’s what you do, and threw it over rice. It was so good I made it again the next week. And the week after that. Somewhere around week four, I realized I’d accidentally created my most-requested meal prep recipe.
These bowls are the kind of thing you make on a Sunday and actually get excited about eating on a Wednesday. They keep beautifully, the flavors get better as they sit, and they solve the eternal question of what to eat when you want something satisfying but don’t have time to cook every single night.
So here it is—my Easy Buffalo Chicken Meal Prep Bowls recipe, perfected through many, many lunches.
Why You’ll Love This Recipe
Let me tell you why these bowls have become a staple in my kitchen and probably will in yours too:
- Quick & Easy : From start to finish, you’re looking at about 30 minutes of active time. The oven does most of the work while you prep your other ingredients. Perfect for Sunday meal prep sessions when you’d rather be doing literally anything else.
- Simple Ingredients : Chicken breasts or thighs, buffalo sauce, rice, and your favorite veggies—that’s really all you need. No fancy grocery store trips required. You probably have most of this stuff already.
- Perfect for Busy Weeks : These bowls are designed for those weeks when you know you won’t have time to cook. Make them Sunday night, and you’ve got lunch or dinner sorted for the next four days.
- Crowd-Pleaser : I’ve made these for friends, family, and even picky eaters who claimed they “didn’t like buffalo sauce.” Spoiler alert: they loved them. The heat is adjustable, so everyone can find their sweet spot.
- Unbelievably Delicious : There’s something about the combination of spicy buffalo chicken, cool ranch or blue cheese dressing, and fresh crunchy veggies that just works. It’s comfort food that doesn’t leave you feeling heavy.
What makes this recipe different from all the other buffalo chicken bowls out there? It’s the balance. I’ve tested this dozens of times to get the spice level just right—not too hot that you can’t taste the other ingredients, but definitely not boring. The chicken stays incredibly moist because we’re baking it with a butter-buffalo sauce mixture that locks in all that flavor. And the toppings? They’re not an afterthought. Every component has a purpose, from the creamy avocado to the crisp celery and carrot ribbons.
This is the kind of meal that makes you close your eyes after the first bite. It’s meal prep that actually feels like a treat.
What Ingredients You Will Need
This recipe uses simple, wholesome ingredients that come together to create something truly special. Most of these are pantry staples or easy to find at any grocery store.
For the Buffalo Chicken
- 2 lbs boneless, skinless chicken breasts (about 3-4 medium breasts) – I prefer organic or air-chilled chicken for the best texture and flavor. If you’re using frozen, make sure they’re fully thawed before cooking.
- 1/2 cup buffalo sauce – Frank’s RedHot is my go-to for that classic buffalo flavor. It has the perfect balance of heat and tang. You can use your favorite brand, just check the sodium content if you’re watching your salt intake.
- 2 tablespoons unsalted butter, melted – This adds richness and helps the sauce cling to the chicken. You can use salted butter, just reduce the added salt later.
- 1 tablespoon olive oil – For searing the chicken before baking. It helps create that beautiful golden crust.
- 1 teaspoon garlic powder – Don’t skip this. It adds depth without being overpowering.
- 1/2 teaspoon onion powder – Complements the garlic and rounds out the flavor profile.
- Salt and black pepper to taste – Go easy on the salt since buffalo sauce already has plenty.
For the Bowl Base
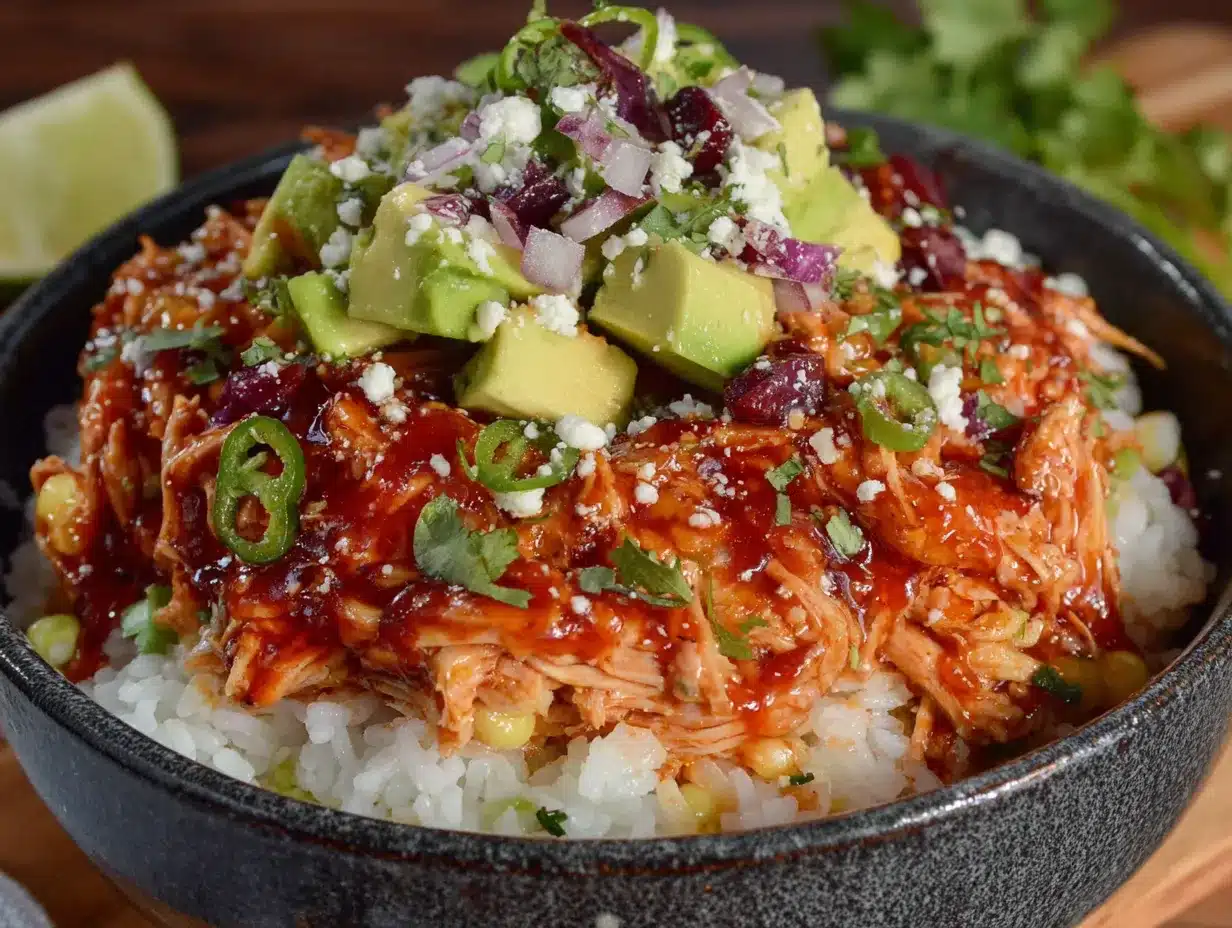
- 2 cups cooked white or brown rice – I use jasmine rice for its fragrant, fluffy texture. Brown rice works great too and adds more fiber. For a low-carb option, try cauliflower rice or quinoa.
- 1 cup black beans, drained and rinsed – Adds protein and fiber. You can substitute pinto beans or chickpeas.
- 1 cup corn kernels – Fresh, frozen (thawed), or canned (drained). Corn adds sweetness that balances the heat beautifully.
For the Toppings
- 1 large avocado, sliced – The creaminess is essential for cooling down the spice. Make sure it’s ripe but not mushy.
- 1/2 cup cherry tomatoes, halved – Adds freshness and acidity.
- 1/2 cup shredded carrots – For crunch and color. You can also use carrot ribbons made with a vegetable peeler.
- 1/2 cup diced celery – Classic buffalo wing pairing. Adds that essential crunch.
- 1/4 cup crumbled blue cheese or ranch dressing – This is non-negotiable in my book. The tangy, creamy element ties everything together. Use your favorite brand or make your own.
- 2 tablespoons chopped fresh cilantro or green onions – For garnish and freshness.
- Lime wedges for serving – A squeeze of lime brightens up the whole bowl.
Equipment Needed
You don’t need a ton of fancy equipment for this recipe, which is part of why I love it. Here’s what you’ll need:
- Baking sheet or oven-safe skillet – I use a rimmed baking sheet lined with parchment paper for easy cleanup. A cast iron skillet works beautifully too if you want to sear and bake in the same pan.
- Mixing bowls – You’ll need a medium bowl for the buffalo sauce mixture and a large bowl for shredding the chicken.
- Sharp knife and cutting board – For prepping your veggies. A good chef’s knife makes all the difference.
- Two forks or a hand mixer – For shredding the chicken. I prefer using two forks because it gives me more control over the texture, but a hand mixer on low speed works in seconds if you’re short on time.
- Meal prep containers – Glass containers with tight-fitting lids are my favorite. They don’t stain, they’re microwave-safe, and they keep everything fresh. Look for ones with dividers if you want to keep components separate.
- Small saucepan – For cooking your rice or quinoa.
- Measuring cups and spoons – For accuracy, especially with the buffalo sauce mixture.
If you don’t have a baking sheet, you can use a 9×13 baking dish. Just keep an eye on the cooking time since glass dishes can cook differently than metal ones. And if you’re using a hand mixer to shred the chicken, be careful not to overdo it—you want shreds, not paste.
Preparation Method
Let me walk you through this step by step. I promise it’s easier than it looks.
- Preheat your oven to 400°F (200°C). While it’s heating up, start your rice according to package directions. I usually cook 1 cup of dry rice with 2 cups of water and a pinch of salt. Bring to a boil, cover, reduce heat to low, and simmer for 15-18 minutes. Fluff with a fork and set aside.
- Prepare the buffalo sauce mixture. In a small bowl, whisk together the buffalo sauce and melted butter. Set aside about 2 tablespoons of this mixture for later—you’ll use it to coat the shredded chicken after baking.
- Season the chicken. Pat your chicken breasts dry with paper towels. This step is crucial for getting a good sear. Season both sides with garlic powder, onion powder, salt, and pepper. Don’t be shy with the seasoning—it’s the foundation of flavor.
- Sear the chicken. Heat the olive oil in an oven-safe skillet over medium-high heat. Once the oil is shimmering (you’ll see it ripple), carefully place the chicken breasts in the pan. Cook for 3-4 minutes per side until golden brown. You’re not trying to cook them through here, just get that beautiful color. The chicken should release easily from the pan when it’s ready to flip—if it’s sticking, give it another minute.
- Bake the chicken. Pour the remaining buffalo sauce mixture (not the reserved 2 tablespoons) over the seared chicken. Transfer the skillet to the preheated oven. Bake for 20-25 minutes, or until the internal temperature reaches 165°F (74°C) when checked with a meat thermometer. The exact time will depend on the thickness of your breasts. I always recommend using a thermometer—it’s the only way to guarantee perfectly cooked chicken.
- Rest and shred. Remove the chicken from the oven and let it rest for 5 minutes. This is important—resting allows the juices to redistribute, keeping the chicken moist. After resting, transfer the chicken to a large bowl and shred using two forks. The chicken should be tender enough to pull apart easily. If it’s tough, it might need a few more minutes in the oven.
- Combine with reserved sauce. Pour the reserved 2 tablespoons of buffalo sauce mixture over the shredded chicken and toss to coat evenly. Taste and adjust seasoning if needed. You can add more buffalo sauce here if you like it extra spicy.
- Prepare your toppings. While the chicken is baking, prep your veggies. Slice the avocado just before serving to prevent browning. Halve the cherry tomatoes. Shred the carrots if you’re using whole ones. Dice the celery. Chop your cilantro or green onions. Having everything ready makes assembly a breeze.
- Assemble the bowls. Divide the cooked rice evenly among your meal prep containers. Top with shredded buffalo chicken, black beans, corn, and your prepared veggies. Add a generous drizzle of ranch or a sprinkle of blue cheese crumbles. Garnish with cilantro or green onions.
- Store properly. If you’re meal prepping for the week, store the avocado and any dressing separately until you’re ready to eat. This prevents sogginess and keeps everything fresh. The bowls will keep in the refrigerator for up to 4 days.
One thing I learned the hard way—don’t skip the searing step. I tried baking the chicken straight from raw one time, and while it was technically cooked, it just didn’t have that same depth of flavor. The sear adds a layer of complexity that makes these bowls taste like they took way more effort than they actually did.
Cooking Tips & Techniques
After making these Easy Buffalo Chicken Meal Prep Bowls more times than I can count, I’ve picked up a few tricks that make a real difference:
Use a meat thermometer. I cannot stress this enough. Chicken breasts are notoriously easy to overcook, and dry chicken ruins the whole bowl. Pull them out of the oven at exactly 165°F (74°C). If you don’t have a thermometer, you’re guessing—and I’ve guessed wrong plenty of times.
Don’t skip the butter. I know it’s tempting to use just buffalo sauce to save calories, but the butter is what gives the sauce that silky texture and helps it cling to the chicken. It also mellows out the heat just enough so you can actually taste the other ingredients.
Shred while warm. Chicken shreds so much more easily when it’s still warm. If you let it cool completely, it tends to clump together and become harder to work with. Trust me on this one—I’ve made the mistake of getting distracted and coming back to cold, stubborn chicken more than once.
Layer strategically. When assembling your meal prep containers, put the rice on the bottom, then the chicken, then the beans and corn. This keeps the rice from getting mushy and the toppings from getting soggy. The heartier ingredients on top act as a barrier.
Adjust the heat level. If you’re sensitive to spice, start with less buffalo sauce and add more to taste. You can also use a mild buffalo sauce or mix it with a little extra melted butter to tone down the heat. For spice lovers, add a teaspoon of cayenne pepper to the sauce mixture or use a hot buffalo sauce like Frank’s RedHot Xtra Hot.
Make extra sauce. I always make a little more buffalo sauce than I think I’ll need. It’s great for drizzling over the bowls right before eating, and it keeps in the fridge for up to a week. You can also use it as a dip for celery sticks or carrot chips.
Variations & Adaptations
One of the best things about these Easy Buffalo Chicken Meal Prep Bowls is how customizable they are. Here are some variations I’ve tried and loved:
Low-Carb / Keto Version: Skip the rice and use cauliflower rice instead. Increase the healthy fats by adding extra avocado and a drizzle of olive oil. You can also serve the buffalo chicken over a bed of mixed greens for a hearty salad version.
Vegetarian Buffalo Bowl: Substitute the chicken with extra-firm tofu or tempeh. Press the tofu to remove excess moisture, then cube it and toss it in the buffalo sauce mixture before baking. Chickpeas also work surprisingly well—roast them with buffalo sauce until crispy for a crunchy, protein-packed alternative.
Baked Buffalo Chicken Bowl: For a warmer, more comforting version, assemble the bowls and bake them at 350°F (175°C) for 10-15 minutes before serving. Top with shredded cheese during the last 5 minutes for a melty, gooey finish. This is my go-to on cold winter nights.
Extra Veggie Version: Bulk up the bowls with roasted sweet potatoes, bell peppers, or zucchini. Roast them alongside the chicken for efficiency. The sweetness of roasted sweet potatoes is a fantastic counterpoint to the spicy buffalo sauce.
Dairy-Free Version: Use a dairy-free ranch dressing or make a quick cashew cream sauce. Omit the blue cheese crumbles and use nutritional yeast for a cheesy flavor without the dairy. The bowls are still incredibly satisfying without the dairy.
I once tried a version with grilled pineapple chunks on top, and honestly? It was amazing. The sweetness of the pineapple with the spicy buffalo chicken was a flavor combination I didn’t know I needed. Don’t be afraid to experiment—that’s half the fun.
Serving & Storage Suggestions
These bowls are designed to be served cold or reheated, depending on your preference. I personally love them cold straight from the fridge on a hot day, but they’re equally delicious warmed up.
Serving Temperature: If you’re reheating, microwave the bowl (without the avocado and dressing) for 1-2 minutes until heated through. Add the avocado and dressing after reheating. You can also reheat in a skillet over medium heat with a splash of water to prevent drying out.
What to Serve With: These bowls are a complete meal on their own, but they pair beautifully with a side of tortilla chips and fresh salsa or a simple side salad. For drinks, an ice-cold beer or a tangy lemonade is perfect for balancing the heat.
Storage Instructions: Store assembled bowls (without avocado and dressing) in airtight containers in the refrigerator for up to 4 days. Keep the avocado and dressing separate and add them just before serving to maintain freshness. If you’re using blue cheese crumbles, you can add them at the time of assembly—they hold up fine.
Freezer Instructions: You can freeze the buffalo chicken separately for up to 3 months. Thaw overnight in the refrigerator before using. I don’t recommend freezing fully assembled bowls because the texture of the rice and veggies suffers. But having pre-cooked buffalo chicken in the freezer is a game-changer for quick meals.
Flavor Development: Here’s a secret—these bowls actually taste better on day two or three. The flavors meld together as they sit, and the chicken absorbs more of that delicious buffalo sauce. It’s one of those rare meal prep recipes that gets better with time.
Nutritional Information & Benefits
These Easy Buffalo Chicken Meal Prep Bowls are not just delicious—they’re packed with nutrition too. Here’s a rough breakdown per serving (based on 4 servings):
- Calories: Approximately 550-650 calories per bowl
- Protein: 45-50 grams (thanks to the chicken and black beans)
- Carbohydrates: 45-55 grams (from rice, beans, and corn)
- Fat: 20-25 grams (healthy fats from avocado and olive oil)
- Fiber: 10-12 grams (black beans, corn, and veggies)
Health Benefits: Chicken breast is a lean source of protein that supports muscle repair and keeps you feeling full. Black beans add fiber and plant-based protein, which helps with digestion and blood sugar regulation. Avocado provides heart-healthy monounsaturated fats and potassium. The veggies (carrots, celery, tomatoes) are packed with vitamins A, C, and K plus antioxidants.
Dietary Considerations: This recipe is naturally gluten-free (just check your buffalo sauce label to be sure). It can be made dairy-free by using a dairy-free dressing. For a lower-carb option, swap the rice for cauliflower rice or extra veggies.
Potential Allergens: Contains dairy (butter, blue cheese/ranch). If you’re using a store-bought buffalo sauce, check the label for any hidden allergens. Some brands contain soy or wheat-based ingredients.
I love that I can eat these bowls and feel genuinely good afterward—satisfied but not stuffed, energized but not sluggish. That’s the kind of meal prep that actually supports a busy lifestyle.
Conclusion
These Easy Buffalo Chicken Meal Prep Bowls have honestly changed the way I think about meal prep. They’re not just convenient—they’re genuinely exciting to eat. The spicy, tangy buffalo chicken paired with creamy avocado, crunchy veggies, and fluffy rice creates a bowl that’s satisfying in every way.
I love that this recipe is forgiving enough for beginners but delicious enough to impress anyone. You can make it as simple or as customized as you want, and it always turns out great. Plus, knowing I have a few of these in the fridge makes my whole week feel more manageable.
I’d love to hear how yours turn out! Leave a comment below and let me know if you tried any fun variations or if you have a favorite way to customize these bowls. Don’t forget to share this recipe with a friend who needs some meal prep inspiration—we all deserve lunches we actually look forward to.
Happy cooking, and remember—the spicier, the better!
Frequently Asked Questions
Can I use chicken thighs instead of breasts?
Absolutely! Chicken thighs are actually more forgiving and stay juicier during cooking. They have a higher fat content, which adds richness to the dish. Just adjust the baking time slightly—thighs may need 25-30 minutes depending on their size. Always check for an internal temperature of 165°F (74°C).
How do I keep the avocado from browning in my meal prep?
The best trick is to store the avocado separately and slice it fresh each day. If you want to prep it ahead, brush the cut surfaces with lime or lemon juice—the acidity helps slow down oxidation. You can also store the avocado halves with the pit still in them, wrapped tightly in plastic wrap.
Can I make these bowls ahead for the whole week?
Yes! These bowls are designed for meal prep and will keep in the refrigerator for up to 4 days. Just remember to store the avocado and any dressing separately until you’re ready to eat. The flavors actually get better as they sit, so day three is often the best.
What’s the best way to reheat these bowls?
Microwave is the quickest option—heat for 1-2 minutes, stirring halfway through. For best results, remove the avocado and dressing before reheating, then add them back after. You can also reheat in a skillet over medium heat with a splash of water to prevent drying out. The bowls are also delicious cold straight from the fridge!
Is this recipe spicy? Can I make it milder?
The spice level depends on the buffalo sauce you use. Frank’s RedHot Original has a mild to medium heat that most people find manageable. To make it milder, use less buffalo sauce and add more melted butter, or mix the buffalo sauce with a little honey or maple syrup to balance the heat. For extra heat, use a hot buffalo sauce or add cayenne pepper to the mixture.
Pin This Recipe!
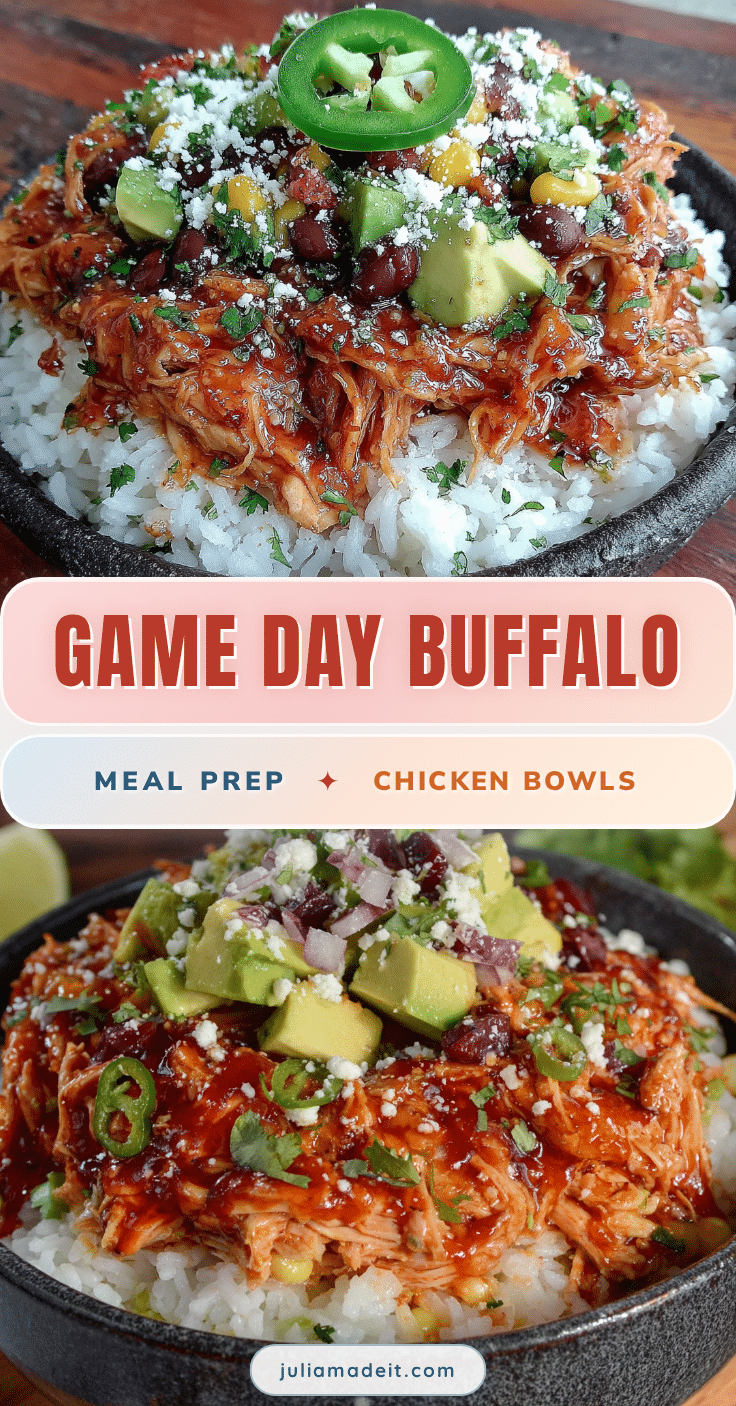
Easy Buffalo Chicken Meal Prep Bowls – Perfect for Busy Week

These Easy Buffalo Chicken Meal Prep Bowls are the perfect solution for busy weeks. Made with simple ingredients like chicken, buffalo sauce, rice, and fresh veggies, they’re quick to prepare, delicious, and keep beautifully in the fridge for up to 4 days.
- Prep Time: 15 minutes
- Cook Time: 30 minutes
- Total Time: 45 minutes
- Yield: 4 servings 1x
- Category: Main Course
- Cuisine: American
Ingredients
- 2 lbs boneless, skinless chicken breasts (about 3–4 medium breasts)
- 1/2 cup buffalo sauce (such as Frank’s RedHot)
- 2 tablespoons unsalted butter, melted
- 1 tablespoon olive oil
- 1 teaspoon garlic powder
- 1/2 teaspoon onion powder
- Salt and black pepper to taste
- 2 cups cooked white or brown rice (jasmine rice recommended)
- 1 cup black beans, drained and rinsed
- 1 cup corn kernels (fresh, frozen thawed, or canned drained)
- 1 large avocado, sliced
- 1/2 cup cherry tomatoes, halved
- 1/2 cup shredded carrots
- 1/2 cup diced celery
- 1/4 cup crumbled blue cheese or ranch dressing
- 2 tablespoons chopped fresh cilantro or green onions
- Lime wedges for serving
Instructions
- Preheat your oven to 400°F (200°C). While it’s heating up, start your rice according to package directions. I usually cook 1 cup of dry rice with 2 cups of water and a pinch of salt. Bring to a boil, cover, reduce heat to low, and simmer for 15-18 minutes. Fluff with a fork and set aside.
- Prepare the buffalo sauce mixture. In a small bowl, whisk together the buffalo sauce and melted butter. Set aside about 2 tablespoons of this mixture for later—you’ll use it to coat the shredded chicken after baking.
- Season the chicken. Pat your chicken breasts dry with paper towels. This step is crucial for getting a good sear. Season both sides with garlic powder, onion powder, salt, and pepper. Don’t be shy with the seasoning—it’s the foundation of flavor.
- Sear the chicken. Heat the olive oil in an oven-safe skillet over medium-high heat. Once the oil is shimmering (you’ll see it ripple), carefully place the chicken breasts in the pan. Cook for 3-4 minutes per side until golden brown. You’re not trying to cook them through here, just get that beautiful color. The chicken should release easily from the pan when it’s ready to flip—if it’s sticking, give it another minute.
- Bake the chicken. Pour the remaining buffalo sauce mixture (not the reserved 2 tablespoons) over the seared chicken. Transfer the skillet to the preheated oven. Bake for 20-25 minutes, or until the internal temperature reaches 165°F (74°C) when checked with a meat thermometer. The exact time will depend on the thickness of your breasts. I always recommend using a thermometer—it’s the only way to guarantee perfectly cooked chicken.
- Rest and shred. Remove the chicken from the oven and let it rest for 5 minutes. This is important—resting allows the juices to redistribute, keeping the chicken moist. After resting, transfer the chicken to a large bowl and shred using two forks. The chicken should be tender enough to pull apart easily. If it’s tough, it might need a few more minutes in the oven.
- Combine with reserved sauce. Pour the reserved 2 tablespoons of buffalo sauce mixture over the shredded chicken and toss to coat evenly. Taste and adjust seasoning if needed. You can add more buffalo sauce here if you like it extra spicy.
- Prepare your toppings. While the chicken is baking, prep your veggies. Slice the avocado just before serving to prevent browning. Halve the cherry tomatoes. Shred the carrots if you’re using whole ones. Dice the celery. Chop your cilantro or green onions. Having everything ready makes assembly a breeze.
- Assemble the bowls. Divide the cooked rice evenly among your meal prep containers. Top with shredded buffalo chicken, black beans, corn, and your prepared veggies. Add a generous drizzle of ranch or a sprinkle of blue cheese crumbles. Garnish with cilantro or green onions.
- Store properly. If you’re meal prepping for the week, store the avocado and any dressing separately until you’re ready to eat. This prevents sogginess and keeps everything fresh. The bowls will keep in the refrigerator for up to 4 days.
Notes
Don’t skip the searing step—it adds depth of flavor. Use a meat thermometer to ensure chicken reaches 165°F (74°C). Shred chicken while warm for best results. Layer rice on the bottom of containers to prevent sogginess. Store avocado and dressing separately until serving. Bowls taste even better on day two or three as flavors meld.
Nutrition
- Serving Size: 1 bowl
- Calories: 600
- Sugar: 6
- Sodium: 1200
- Fat: 22
- Saturated Fat: 6
- Carbohydrates: 50
- Fiber: 11
- Protein: 48
Keywords: buffalo chicken, meal prep, easy dinner, healthy lunch, spicy chicken, buffalo sauce, chicken bowls, meal prep bowls