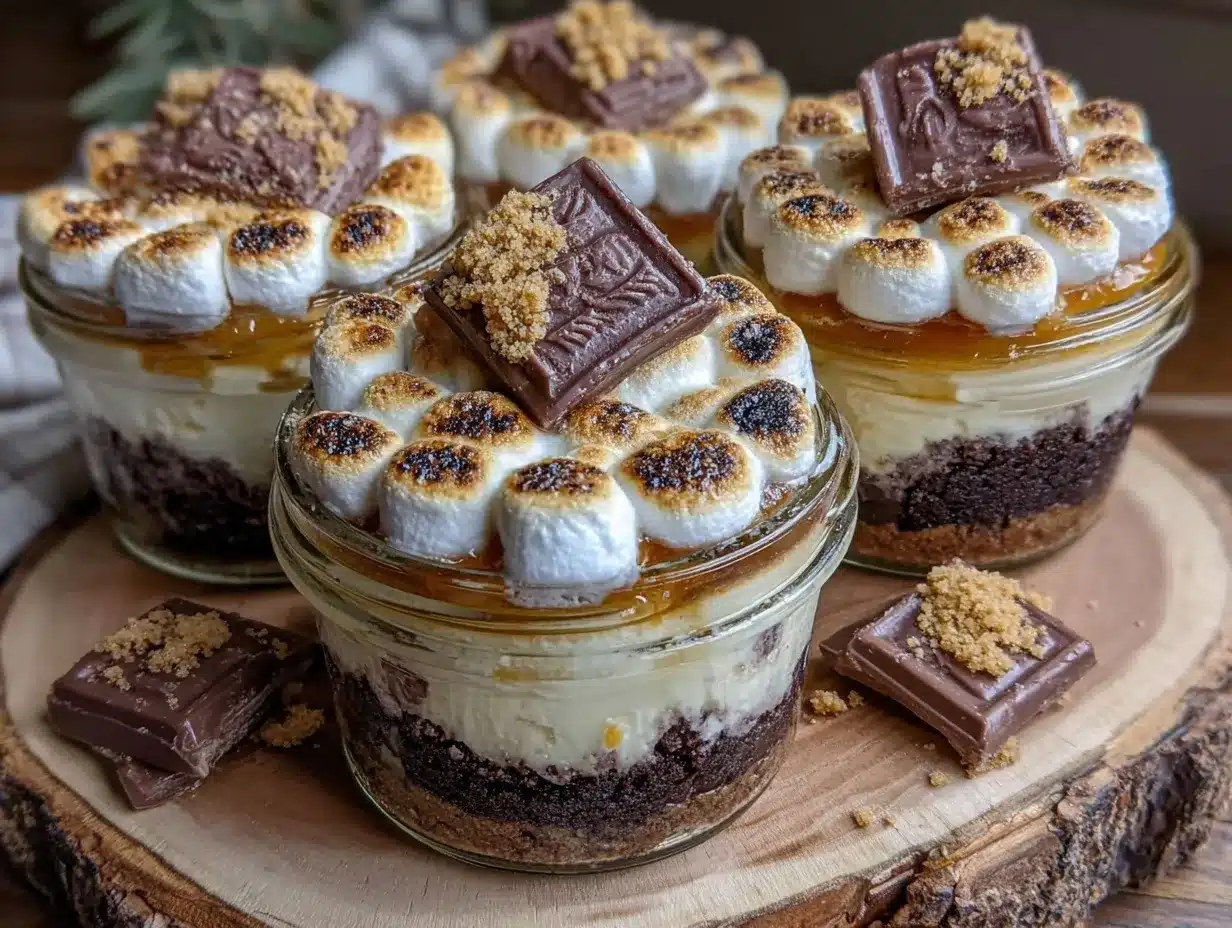
I assumed that making a no-bake cheesecake would be a straightforward affair—mix a few ingredients, chill, and voilà, dessert done. It took about an hour for that theory to completely unravel, mainly because I got distracted by the graham cracker crumbs and the chocolate drizzle. Honestly, I thought the s’mores vibe was just a gimmick, but the way the marshmallow fluff held its own against the rich cream cheese was something unexpected. When I finally scooped into those creamy no-bake s’mores cheesecake cups, the contrast between crunchy, gooey, and silky hit me like a cozy campfire on a chilly evening. The first bite was a quiet revelation—it wasn’t just a dessert; it was a comforting little moment in a cup.
What really got me was how this recipe didn’t demand a fancy oven or complicated steps. It felt like the perfect answer when I wanted something indulgent but couldn’t be bothered with baking disasters or long prep times. Plus, it’s the kind of treat that makes you feel a bit like a kid again, toasting marshmallows without the smoky mess. This recipe stuck with me because it brings that nostalgic s’mores magic indoors, wrapped up in a creamy cheesecake that’s surprisingly light and easy. I keep coming back to it when I need a quick pick-me-up or a dessert that’s cozy without being fussy.
Why You’ll Love This Recipe
This recipe for creamy no-bake s’mores cheesecake cups has become a favorite around here, and here’s why I think you’ll appreciate it too:
- Quick & Easy: You can whip these up in under 20 minutes, then just let them chill. Perfect for last-minute cravings or when you want a fuss-free cozy treat.
- Simple Ingredients: No hunting down exotic items here. You probably already have graham crackers, cream cheese, and marshmallow fluff on hand.
- Perfect for Cozy Evenings: Whether you’re curling up with a book or hosting a casual get-together, these cups hit the comfort-food spot.
- Crowd-Pleaser: Kids and adults alike tend to ask for seconds. The familiar s’mores flavors wrapped in a cheesecake form are a big hit.
- Unbelievably Delicious: The creamy texture with the crunch of graham crackers and the sweet marshmallow swirl is like campfire nostalgia meets smooth indulgence.
What sets this recipe apart is the balance it strikes. Instead of a heavy, dense cheesecake, this one stays light and airy thanks to the whipped topping and no-bake technique. I particularly like blending the cream cheese just enough to keep it silky but not overworked, which keeps the texture from turning rubbery. Plus, the marshmallow fluff layered right on top adds that gooey touch without the hassle of toasting marshmallows. If you enjoy desserts like my double chocolate chip zucchini bread or the easy no-bake Oreo cheesecake cups, you’ll find these s’mores cups just as satisfying and twice as fun.
What Ingredients You Will Need
This recipe uses simple, wholesome ingredients to bring the classic s’mores flavor into a creamy cheesecake cup. Most of these are pantry staples, with a few easy swaps if you want to tweak things a bit.
- For the Crust:
- Graham cracker crumbs (about 1 1/2 cups or 150g) – crushed finely for that essential crunch
- Unsalted butter, melted (6 tablespoons or 85g) – binds the crust, go for real butter for the best flavor
- Granulated sugar (2 tablespoons) – adds just a touch of sweetness to balance the buttery crust
- For the Cheesecake Filling:
- Cream cheese, softened (16 ounces or 450g) – the star of the creamy texture, I recommend Philadelphia brand for smoothness
- Powdered sugar (3/4 cup or 90g) – to sweeten without graininess
- Vanilla extract (1 teaspoon) – gives a warm, comforting note
- Heavy whipping cream (1 cup or 240ml) – whipped to soft peaks to keep the cheesecake light
- For the Topping:
- Marshmallow fluff (about 3/4 cup or 180g) – the gooey, sweet finish that’s key to the s’mores vibe
- Mini chocolate chips or chopped milk chocolate (1/2 cup or 90g) – melty little pockets of chocolaty goodness
- Optional: crushed graham crackers or toasted mini marshmallows for garnish
If you want to keep it dairy-free, you can swap cream cheese with a vegan cream cheese alternative and use coconut cream instead of heavy whipping cream. For a gluten-free version, almond flour or gluten-free graham crackers work well for the crust. When it comes to the marshmallow fluff, brands vary slightly in sweetness and texture, but Marshmallow Fluff classic is a reliable choice.
Equipment Needed
- Mixing bowls – at least two, one for the crust, another for the filling
- Electric mixer or stand mixer – whipping cream by hand is possible but takes a good bit of elbow grease
- Measuring cups and spoons – essential for accuracy, especially with powdered sugar and butter
- Spatula – for folding whipped cream gently into the cream cheese mixture
- Glass or plastic serving cups (about 6 to 8 small cups, 6 oz or 180 ml capacity) – perfect for individual portions and visual appeal
- Food processor or sealed bag with rolling pin – to crush the graham crackers finely
If you don’t have a food processor, no worries—just place the graham crackers in a zip-top bag and crush them with a rolling pin or even a sturdy can. For whipping cream, a hand whisk works if you’re patient, but an electric mixer cuts the time down drastically and gives better control over peak stiffness. Also, I’ve found that silicone spatulas are gentler on the whipped cream, preventing it from deflating.
Preparation Method
- Prepare the crust: In a medium bowl, combine 1 1/2 cups (150g) of finely crushed graham cracker crumbs with 2 tablespoons of granulated sugar. Pour in 6 tablespoons (85g) of melted unsalted butter and stir until the mixture looks like wet sand. This should take about 3 to 5 minutes. The texture should hold together when pressed—if it’s too dry, add a teaspoon of melted butter at a time.
- Assemble the crust layer: Spoon the crust mixture evenly into your serving cups (6 to 8 cups, about 6 oz each). Use the bottom of a small glass or your fingers to press the crumbs firmly and evenly into the base. This step usually takes around 5 minutes. You want the crust compact enough to hold but not rock-hard. Set the cups aside or pop them in the fridge while preparing the filling.
- Make the cheesecake filling: In a large bowl, beat 16 ounces (450g) of softened cream cheese with 3/4 cup (90g) powdered sugar and 1 teaspoon vanilla extract. Use an electric mixer on medium speed for about 3 minutes until the mixture is smooth and creamy with no lumps. Scrape the sides occasionally to ensure even mixing.
- Whip the cream: In a separate bowl, whip 1 cup (240ml) heavy whipping cream on high speed until soft peaks form—this means when you lift the beaters, the peaks will hold but tip over slightly. This step takes about 3 to 4 minutes. Be careful not to over-whip or it will turn grainy and start to separate.
- Fold whipped cream into the cream cheese: Gently fold one-third of the whipped cream into the cream cheese mixture using a spatula. Then fold in the remaining cream in two batches, being careful to keep the airiness intact. This folding should take about 2 minutes total. The filling should look light and fluffy, not dense.
- Layer the filling & toppings: Spoon or pipe the cheesecake filling over the graham cracker crust in each cup, filling about 3/4 full. Then, dollop about 1 tablespoon (15g) of marshmallow fluff on top of each cheesecake cup, swirling it gently with a toothpick or the back of a spoon for a marbled effect. Sprinkle mini chocolate chips or chopped milk chocolate over the fluff. This step takes around 5 minutes.
- Chill: Refrigerate the cups for at least 2 hours, preferably 4, to allow the flavors to meld and the cheesecake to firm up slightly. If you’re in a hurry, 1 hour will still yield a tasty, though softer, texture.
- Optional garnish & serve: Just before serving, you can add a final sprinkle of crushed graham crackers or lightly toasted mini marshmallows for extra texture and visual charm. Serve chilled for the best creamy, cool contrast with the crunchy base.
If the filling feels too soft after chilling, a quick tip is to freeze the cups for 15 to 20 minutes before serving—it firms up the texture nicely without making it icy.
Cooking Tips & Techniques
One thing I learned early on is to really soften the cream cheese properly—cold or lumpy cream cheese throws off the whole texture. I usually leave it out for at least 30 minutes before starting, or zap it in 10-second bursts in the microwave to get it just right. Also, don’t rush the whipping of the cream. It’s tempting to stop as soon as it starts to thicken, but that extra minute makes a big difference in lightness and stability.
Folding the whipped cream into the cream cheese mixture is a delicate dance. If you stir too vigorously, you’ll lose the air that keeps the cheesecake fluffy. Use a gentle cutting and turning motion with your spatula, and take your time. Honestly, I’ve ruined batches by being impatient here.
Another tip: when pressing the crust into the cups, a firm, even layer helps keep the cups neat and prevents the base from crumbling when eating. If you press too hard, though, it can get rock solid and hard to dig into, so find that happy medium.
Finally, if you want to add a little smoky flavor without a campfire, a pinch of smoked sea salt in the crust can be a subtle but interesting twist. It pairs surprisingly well with the sweetness and chocolate.
Variations & Adaptations
There’s room to make these creamy no-bake s’mores cheesecake cups your own. Here are a few variations I’ve tried or considered:
- Peanut Butter Swirl: Add a swirl of creamy peanut butter in the filling for a nutty twist that pairs beautifully with chocolate and marshmallow.
- Berry S’mores: Fold in a handful of fresh or frozen raspberries or strawberries into the cheesecake filling for a tart contrast.
- Vegan Version: Use dairy-free cream cheese and coconut cream, and swap butter with coconut oil. The marshmallow fluff can be replaced with a vegan marshmallow spread.
- Grilled Peach Topping: Inspired by the grilled peaches with creamy honey ricotta, try adding a layer of warm grilled peaches on top for a seasonal flair.
- Chocolate Ganache Drizzle: Melt dark chocolate with a little cream for a glossy ganache drizzle over the marshmallow topping for an extra chocolate hit.
For a different presentation, you can make this in a single 8-inch springform pan rather than cups—just increase chilling time. Or, for a fun handheld treat, spoon the mixture into sturdy waffle cones and freeze for an hour.
Serving & Storage Suggestions
Serve these cheesecake cups chilled straight from the fridge for that creamy, cool texture that contrasts beautifully with the crunchy crust. They make a lovely dessert after a casual meal or a perfect sweet bite for a cozy night in.
They pair well with warm drinks like hot chocolate or chai tea, enhancing that cozy, campfire feeling. For a fun twist, serve alongside toasted marshmallow skewers or a simple fruit salad for balance.
Store leftovers covered in the refrigerator for up to 3 days. The crust may soften slightly over time, but the flavor only gets better. Avoid freezing the assembled cups as the marshmallow topping can change texture unfavorably.
If you want to prep ahead, you can make the crust and filling separately and assemble right before serving. Reheat the marshmallow fluff briefly in the microwave to soften before topping if needed.
Nutritional Information & Benefits
Each creamy no-bake s’mores cheesecake cup (assuming 8 servings) contains roughly:
| Calories | 320 kcal |
|---|---|
| Fat | 22g |
| Carbohydrates | 28g |
| Protein | 4g |
| Sugar | 20g |
This dessert is indulgent but offers some nutritional benefits thanks to the cream cheese, which provides protein and calcium. Using real butter and cream means natural fats that can be satisfying and sustaining in moderation. If you want to lighten it up, you can swap heavy cream for a lower-fat option or reduce sugar slightly.
Keep in mind this recipe contains dairy, gluten (from graham crackers), and sugar, so it’s not suitable for those with allergies or intolerances in those areas without substitutions. The recipe can be adapted to be gluten-free or dairy-free if needed.
Conclusion
These creamy no-bake s’mores cheesecake cups are worth trying because they capture the magic of s’mores in a surprisingly simple and fuss-free way. The balance of textures and flavors makes every bite feel cozy and satisfying without the hassle of baking. I love how flexible the recipe is—you can easily tweak it for different tastes or dietary needs, making it a versatile go-to treat.
It’s the kind of dessert that turns a quiet night at home into something special and makes entertaining feel effortless. Plus, it’s a subtle reminder that sometimes the best treats come from keeping things simple and just a little bit nostalgic. I’d love to hear how you make these your own, so don’t hesitate to share your twists or stories in the comments. Here’s to many cozy moments with a cup of creamy goodness!
FAQs About Creamy No-Bake S’mores Cheesecake Cups
Can I make these cheesecake cups ahead of time?
Yes! You can prepare the crust and filling up to a day in advance and assemble the cups the day you plan to serve. Just keep everything refrigerated and add the marshmallow topping right before serving for the best texture.
How long do these cheesecake cups need to chill?
At least 2 hours in the fridge to firm up, but 4 hours or overnight is ideal for the best texture and flavor melding.
Can I use regular marshmallows instead of marshmallow fluff?
You can try melting mini marshmallows into a quick marshmallow cream, but marshmallow fluff is easier to spread and achieves the right gooey consistency without extra steps.
Are these cheesecake cups gluten-free?
Not as is, since graham crackers contain gluten. However, you can use gluten-free graham crackers or almond flour to make a gluten-free crust.
What’s the best way to soften cream cheese quickly?
Leave it out at room temperature for about 30 minutes or microwave in 10-second bursts until soft but not melted. This helps achieve a smooth, lump-free filling.
Pin This Recipe!
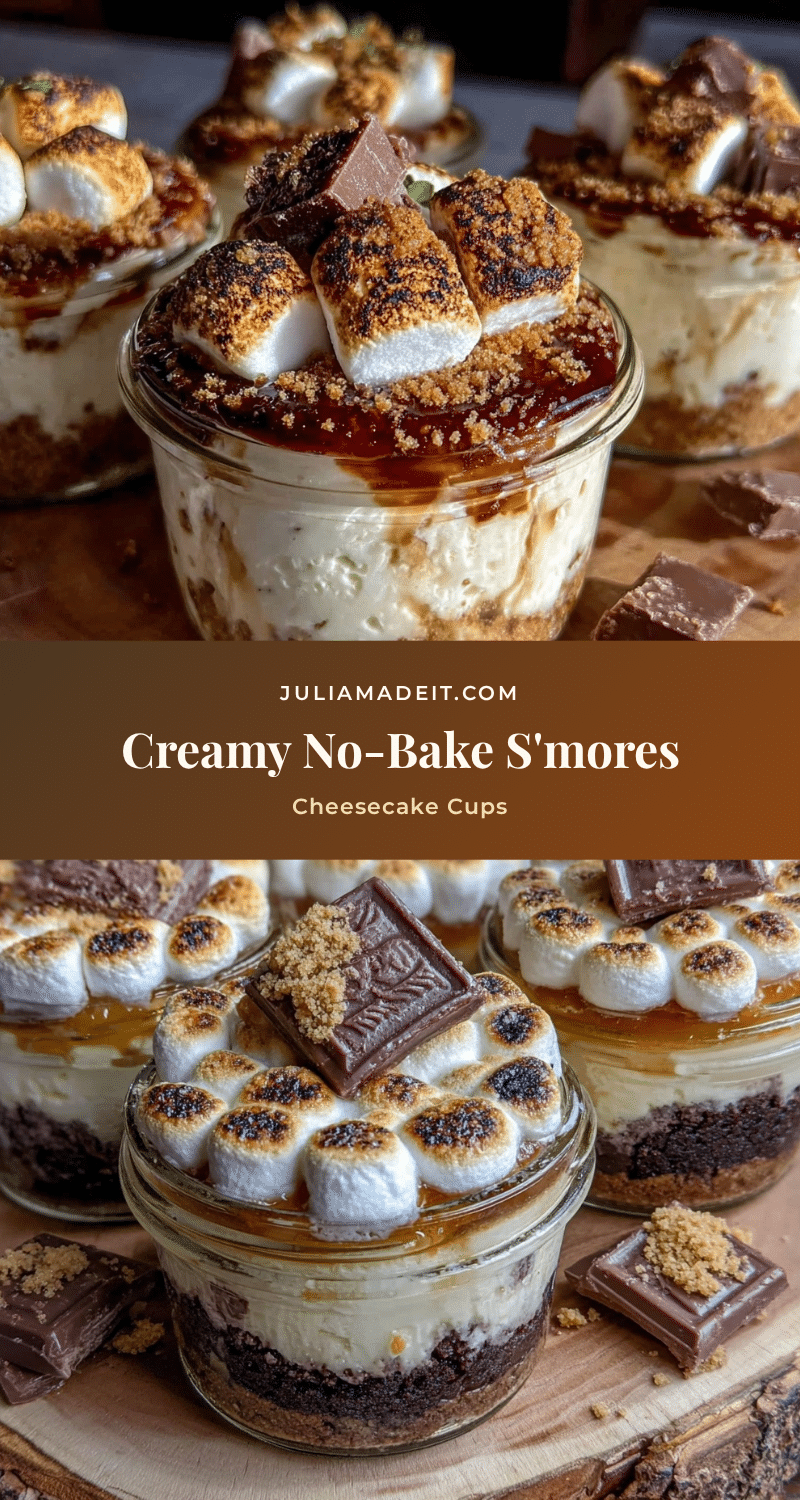
Creamy No-Bake S’mores Cheesecake Cups
A quick and easy no-bake cheesecake dessert capturing the nostalgic s’mores flavors with a creamy, light texture and crunchy graham cracker crust.
- Prep Time: 15 minutes
- Cook Time: 0 minutes
- Total Time: 2 hours 15 minutes
- Yield: 6 to 8 servings 1x
- Category: Dessert
- Cuisine: American
Ingredients
- 1 1/2 cups (150g) graham cracker crumbs
- 6 tablespoons (85g) unsalted butter, melted
- 2 tablespoons granulated sugar
- 16 ounces (450g) cream cheese, softened
- 3/4 cup (90g) powdered sugar
- 1 teaspoon vanilla extract
- 1 cup (240ml) heavy whipping cream
- 3/4 cup (180g) marshmallow fluff
- 1/2 cup (90g) mini chocolate chips or chopped milk chocolate
- Optional: crushed graham crackers or toasted mini marshmallows for garnish
Instructions
- Prepare the crust: In a medium bowl, combine graham cracker crumbs and granulated sugar. Pour in melted butter and stir until mixture resembles wet sand, about 3 to 5 minutes. Add more melted butter if too dry.
- Assemble the crust layer: Spoon crust mixture evenly into 6 to 8 serving cups (about 6 oz each). Press firmly and evenly into the base. Chill or set aside while preparing filling.
- Make the cheesecake filling: Beat softened cream cheese with powdered sugar and vanilla extract using an electric mixer on medium speed for about 3 minutes until smooth and creamy.
- Whip the cream: In a separate bowl, whip heavy cream on high speed until soft peaks form, about 3 to 4 minutes. Avoid over-whipping.
- Fold whipped cream into cream cheese mixture gently in three batches to keep mixture light and fluffy, about 2 minutes total.
- Layer filling and toppings: Spoon or pipe cheesecake filling over crust in each cup, filling about 3/4 full. Dollop about 1 tablespoon marshmallow fluff on top and swirl gently. Sprinkle mini chocolate chips or chopped chocolate over fluff.
- Chill: Refrigerate cups for at least 2 hours, preferably 4 hours, to firm up and meld flavors. One hour is acceptable for softer texture.
- Optional garnish and serve: Before serving, add crushed graham crackers or toasted mini marshmallows for extra texture. Serve chilled.
Notes
Soften cream cheese properly before mixing to avoid lumps. Whip cream to soft peaks without over-whipping. Fold whipped cream gently to keep airiness. Press crust firmly but not too hard to avoid rock-hard base. Chill at least 2 hours for best texture. Freeze for 15-20 minutes if filling is too soft before serving. Optional smoked sea salt in crust adds subtle smoky flavor.
Nutrition
- Serving Size: One cheesecake cup (
- Calories: 320
- Sugar: 20
- Fat: 22
- Carbohydrates: 28
- Protein: 4
Keywords: no-bake cheesecake, s'mores, easy dessert, creamy cheesecake cups, graham cracker crust, marshmallow fluff, quick dessert, cozy treats