“You really need to try this,” my friend texted me one evening, right when I was staring blankly into my fridge, hoping for some magic to happen. Honestly, I was tired, hungry, and absolutely not in the mood to bake anything complicated. But those words stuck with me. So, I grabbed a handful of Oreos from the pantry and whipped up these Easy No-Bake Oreo Cheesecake Cups in just minutes. To my surprise, they turned out creamy, crunchy, and indulgent—without turning on the oven or spending forever in the kitchen. The best part? They felt like a little celebration in a cup, perfect for that quick treat moment we all crave after a long day.
What made me really appreciate this recipe was how effortlessly it came together, especially on those chaotic evenings when you just want a sweet fix without the fuss. The smooth cheesecake filling, balanced with the crunchy Oreo base and topped with cookie crumbles, hits that nostalgic spot without the heavy lifting. I caught myself making this more than once that week—no shame in that! It’s become my go-to when the sweet tooth calls but patience runs out. Plus, it’s a crowd-pleaser; friends started asking for the recipe almost immediately, which never gets old.
Funny enough, it was that text message that nudged me into a new little obsession with these no-bake cups. They’re proof that sometimes the simplest ideas—like mixing cream cheese and crushed Oreos—can lead to the most satisfying desserts. So if you’re looking for a quick, fuss-free treat that feels a bit special, these Oreo cheesecake cups are exactly what you want in your dessert arsenal. No stress, just sweet, creamy goodness that you can throw together in minutes and enjoy right away.
Why You’ll Love This Recipe
Honestly, this Easy No-Bake Oreo Cheesecake Cups recipe is one of those gems that feels like cheating—in the best way possible. I’ve made plenty of cheesecake variations over the years, but this one stands out because it’s quick, accessible, and just downright delicious. Here’s what makes it stick in my kitchen rotation:
- Quick & Easy: Ready in under 5 minutes, this treat is perfect for last-minute cravings or impressing guests without the usual baking hassle.
- Simple Ingredients: You probably have everything on hand already—cream cheese, Oreos, and a few pantry staples. No fancy shopping runs needed.
- Perfect for Any Occasion: Whether it’s a casual family dessert, a potluck contribution, or a cozy night in, these cups fit right in.
- Crowd-Pleaser: Kids, adults, Oreo lovers—everyone seems to love the creamy texture with that crunchy cookie twist.
- Unbelievably Delicious: The silky cheesecake filling with the Oreo crunch feels like comfort food but without feeling too heavy.
What sets this recipe apart is the way the Oreo base and the cheesecake blend so smoothly, avoiding that dry, crumbly crust that sometimes happens. I’ve tested a few techniques, and crushing the Oreos just right—and mixing the cream cheese until ultra-smooth—makes all the difference. It’s not just another Oreo cheesecake; it’s the one you’ll find yourself making repeatedly because it’s truly fuss-free and satisfying. Plus, if you love quick and indulgent desserts like the salted caramel pretzel ice cream, this recipe fits right into your craving list.
What Ingredients You Will Need
This Easy No-Bake Oreo Cheesecake Cups recipe uses simple, pantry-friendly ingredients that come together to create a luscious, creamy dessert with just the right amount of crunch. Most of these are staples, and substitutions are easy if needed.
- Oreos: About 20 cookies, crushed (reserve a handful for topping). I prefer regular Oreos for the classic flavor, but feel free to use Golden Oreos for a twist.
- Unsalted Butter: 4 tablespoons (about 60g), melted—helps bind the Oreo crumbs into a firm base.
- Cream Cheese: 8 ounces (225g), softened for that silky smooth filling. Brands like Philadelphia work well for consistent texture.
- Powdered Sugar: 1/2 cup (60g) to sweeten the filling without graininess.
- Vanilla Extract: 1 teaspoon—just enough to add warmth and depth.
- Heavy Whipping Cream: 1 cup (240ml), cold—whipped until stiff peaks form to lighten the cheesecake filling. You can swap with coconut cream for a dairy-free option.
Optional but recommended:
- Mini Oreo Cookies: For garnish, adds charm and extra crunch.
- Chocolate Shavings or Chips: A sprinkle on top takes these cups over the edge.
In the warmer months, I like swapping the heavy cream for a lightly sweetened whipped coconut cream to keep things fresh and dairy-free. And if you want to make these gluten-free, using gluten-free sandwich cookies works just as well—just watch the base consistency as some may absorb butter differently.
Equipment Needed
- Mixing Bowls: One large for the crust and another for the filling.
- Electric Hand Mixer or Stand Mixer: Essential for whipping the cream and smoothing out the cream cheese without lumps. I tried hand whisking once—it’s possible but takes a lot of arm power and patience!
- Food Processor or Plastic Bag & Rolling Pin: For crushing the Oreos. A food processor is faster and gives more consistent crumbs, but a zip-top bag and rolling pin work great if you don’t have one.
- Measuring Cups & Spoons: For accuracy.
- Serving Cups or Jars: Any small cups, ramekins, or mason jars will do for layering the cheesecake cups.
If you don’t have a food processor and want to keep things budget-friendly, just get a sturdy zip-top bag and a rolling pin. I’ve used this method countless times and it makes cleanup easy. Also, I recommend using chilled bowls for whipping cream, which helps achieve better volume faster.
Preparation Method
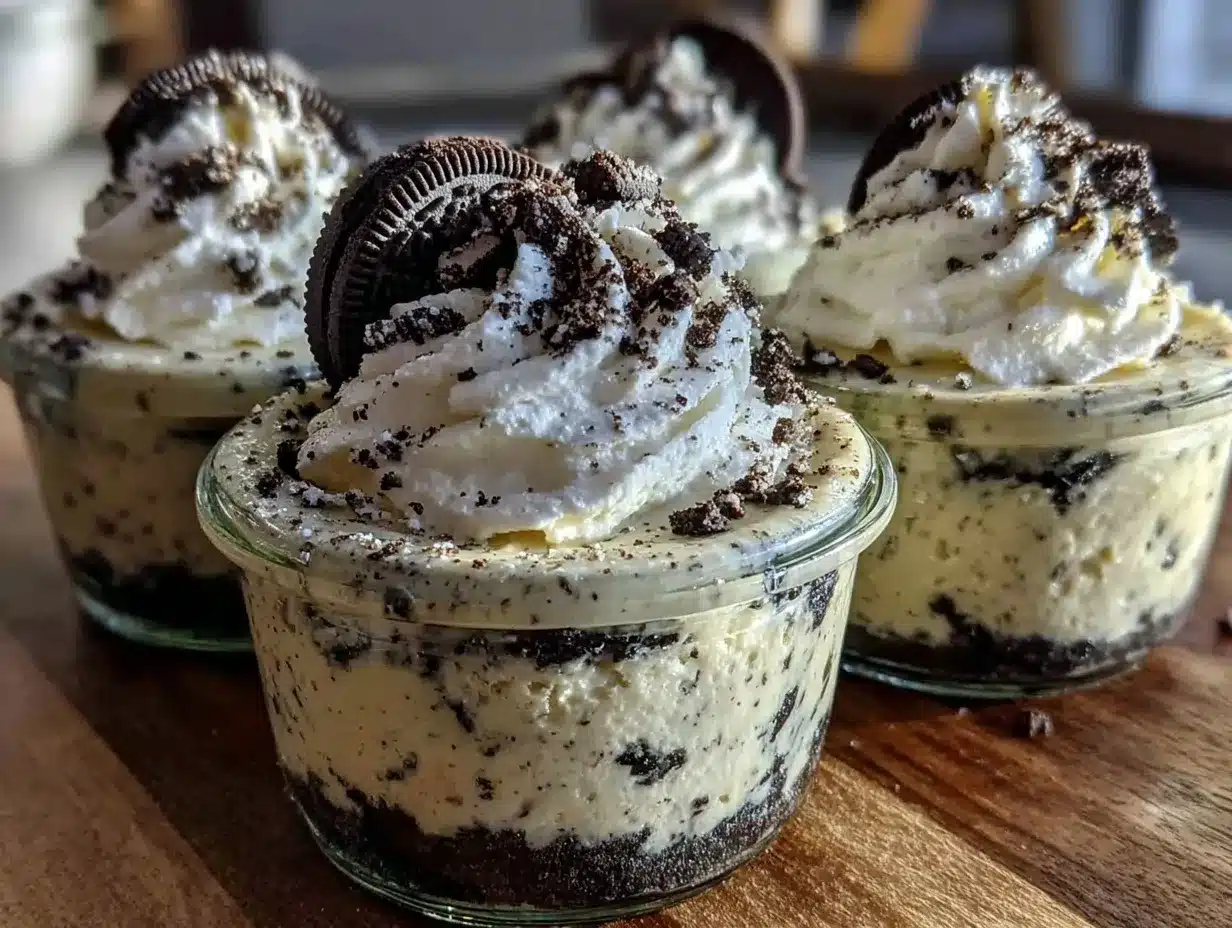
- Prepare the Oreo Crust: Place about 20 Oreos in a food processor and pulse until fine crumbs form. If using a plastic bag, crush with a rolling pin until crumbs are uniform but not powdery. You want some texture.
- Mix with Butter: Pour the melted butter over the Oreo crumbs in a bowl. Stir thoroughly until all crumbs are moistened and the mixture holds together when pressed. This usually takes about 2-3 minutes.
- Assemble the Base: Spoon the Oreo mixture evenly into the bottoms of your serving cups (about 6 small cups). Press down firmly with the back of a spoon or your fingers to compact the crust. Chill in the fridge while you prepare the filling (at least 10 minutes).
- Whip the Cream: In a chilled bowl, whip 1 cup (240ml) of heavy cream on medium-high speed until stiff peaks form. This usually takes around 3-5 minutes. Be careful not to over-whip or it will become grainy.
- Make the Cheesecake Filling: In a separate large bowl, beat 8 ounces (225g) softened cream cheese until smooth and creamy (about 2 minutes). Gradually add 1/2 cup (60g) powdered sugar and 1 teaspoon vanilla extract, beating until combined.
- Fold in Whipped Cream: Gently fold the whipped cream into the cream cheese mixture with a spatula. Use slow, folding motions to keep the filling light and airy—don’t overmix.
- Fill the Cups: Spoon or pipe the cheesecake filling on top of the Oreo crust in each cup, smoothing out the tops. Leave a little room for garnish.
- Chill: Refrigerate the cups for at least 1 hour to let the filling set properly. They’re best enjoyed within 24 hours but can last up to 3 days refrigerated.
- Garnish and Serve: Before serving, sprinkle reserved crushed Oreos or mini Oreos on top. For a fancy touch, add chocolate shavings or a drizzle of chocolate syrup.
Quick tip: If your cream cheese isn’t fully softened, microwave it in 10-second bursts to avoid lumps. Also, when folding the whipped cream, imagine you’re gently caressing the mixture—this keeps it fluffy. If you’re in a rush, you can skip the chilling step, but the texture won’t be quite as firm.
Cooking Tips & Techniques
Getting the perfect texture in these no-bake Oreo cheesecake cups is all about technique, and I’ve learned a few things over the many times I’ve made this recipe.
- Softening Cream Cheese: Don’t rush this step. Cream cheese at room temperature blends smoother and prevents lumps. A smooth base means a creamy filling.
- Whipping Cream: Use cold heavy cream and chilled bowls to whip faster and get better volume. Over-whipping can turn your cream grainy and butter-like, so watch closely once stiff peaks form.
- Crushing Oreos: For a good crust texture, don’t pulverize the Oreos into dust. Some chunkiness adds a nice crunch contrast.
- Folding Technique: When combining whipped cream with cream cheese mixture, fold gently with a spatula. This keeps the filling airy and light instead of dense.
- Chilling Time: Patience pays off here. Chilling sets the cheesecake filling and helps the crust firm up, giving you that perfect bite.
One time, I forgot to chill the cups and the filling was too soft to hold its shape—lesson learned the hard way! Also, if you want a quicker set, try popping the cups in the freezer for 20 minutes, but don’t forget to bring them back to fridge temp before serving to avoid icy textures.
Variations & Adaptations
One of the best things about this recipe is how easy it is to tweak to your taste or dietary needs. Here are a few variations I’ve tried or recommend:
- Chocolate Lover’s Twist: Add 2 tablespoons of cocoa powder to the cream cheese filling for a rich chocolate flavor. Top with mini chocolate chips for extra indulgence.
- Berry Oreo Cheesecake Cups: Stir in a handful of fresh raspberries or strawberries into the filling before chilling. This adds a fresh burst that pairs beautifully with the Oreo base. In summer, this is a fresh alternative.
- Gluten-Free Version: Use gluten-free chocolate sandwich cookies instead of Oreos. The crust texture might vary slightly, but it’s just as delicious.
- Dairy-Free Option: Swap cream cheese with a vegan cream cheese alternative and heavy cream with coconut cream. The flavor is slightly different but wonderfully creamy.
- Peanut Butter Oreo Cups: Mix 2 tablespoons of creamy peanut butter into the cream cheese filling for a nutty twist that works surprisingly well with Oreos.
I personally love the berry version, especially when paired with a light breakfast like blueberry cream cheese stuffed french toast. It feels like a sweet brunch dream come true.
Serving & Storage Suggestions
These Easy No-Bake Oreo Cheesecake Cups taste best chilled and fresh from the fridge. Serve them straight from the cups with a small dessert spoon, or layer them in clear glass jars for a pretty presentation at parties.
Pairing ideas:
- A hot cup of coffee or a creamy latte balances the sweet richness perfectly.
- Fresh berries or a simple fruit salad on the side adds a refreshing contrast.
- A scoop of homemade vanilla ice cream makes a decadent combo.
For storing, keep the cups covered in the fridge for up to 3 days. If you want to prepare in advance, they freeze well for up to a month. Just thaw overnight in the fridge before serving. Keep in mind, freezing may slightly affect the texture of whipped cream.
As these cups sit, the flavors meld and the crust softens a bit, giving a creamier bite. Some people prefer them right out of the fridge when the crust is firm; others like them a bit softer at room temperature. Either way, they’re a treat.
Nutritional Information & Benefits
Each serving of these Oreo cheesecake cups (about one small cup) roughly contains:
| Calories | 320 kcal |
|---|---|
| Fat | 22g |
| Carbohydrates | 28g |
| Protein | 4g |
The cream cheese provides a good source of calcium and protein, while the Oreos contribute sweetness and crunch but also add sugars and carbs. This recipe is definitely an indulgence, but because it’s portioned in small cups and quick to make, it’s perfect for controlled treats.
If you’re watching carbs or gluten, swapping in gluten-free cookies or using a dairy-free cream cheese alternative can make this dessert fit your dietary needs better. For those who want a similar creamy texture without extra sugar, recipes like the protein-packed chocolate peanut butter smoothie bowl might also appeal.
Conclusion
Easy No-Bake Oreo Cheesecake Cups have earned a permanent spot in my dessert lineup because they’re just that reliable for a quick, creamy, and satisfying sweet fix. Whether you’re tackling a busy weeknight or need a simple but impressive dessert for guests, these cups come through with minimal effort and maximum flavor. The balance of crunchy Oreo crust and silky cheesecake filling is comfort food made easy—and isn’t that the kind of recipe we all want?
Don’t be afraid to make it your own with the variations or tweak the ingredients to suit your pantry. I love how versatile and forgiving this recipe is, making it accessible for just about everyone. If you try making these cups, I’d love to hear how you customize them or what your favorite toppings are. Sharing recipes and little kitchen wins like this is part of what makes cooking fun.
So next time you want a quick treat that feels special but doesn’t demand hours in the kitchen, reach for this Easy No-Bake Oreo Cheesecake Cups recipe—you might just find your new favorite dessert.
FAQs About Easy No-Bake Oreo Cheesecake Cups
Can I make these Oreo cheesecake cups ahead of time?
Yes! They keep well in the fridge for up to 3 days. You can also freeze them for up to a month—just thaw overnight before serving.
What if I don’t have heavy cream?
You can whip coconut cream as a dairy-free substitute or try whipping chilled evaporated milk, but heavy cream gives the best texture and stability.
Can I use other cookies instead of Oreos?
Absolutely. Chocolate sandwich cookies work best, but you can experiment with graham crackers or gluten-free cookies for a different flavor and texture.
How do I prevent the filling from being too runny?
Make sure to whip your cream to stiff peaks and fold gently into the cream cheese mixture. Also, chilling the cups for at least an hour helps the filling set firmly.
Is there a vegan version of this recipe?
Yes, swap the cream cheese for a vegan cream cheese alternative and use coconut cream instead of heavy cream. Use vegan Oreo-style cookies to keep it fully plant-based.
Pin This Recipe!
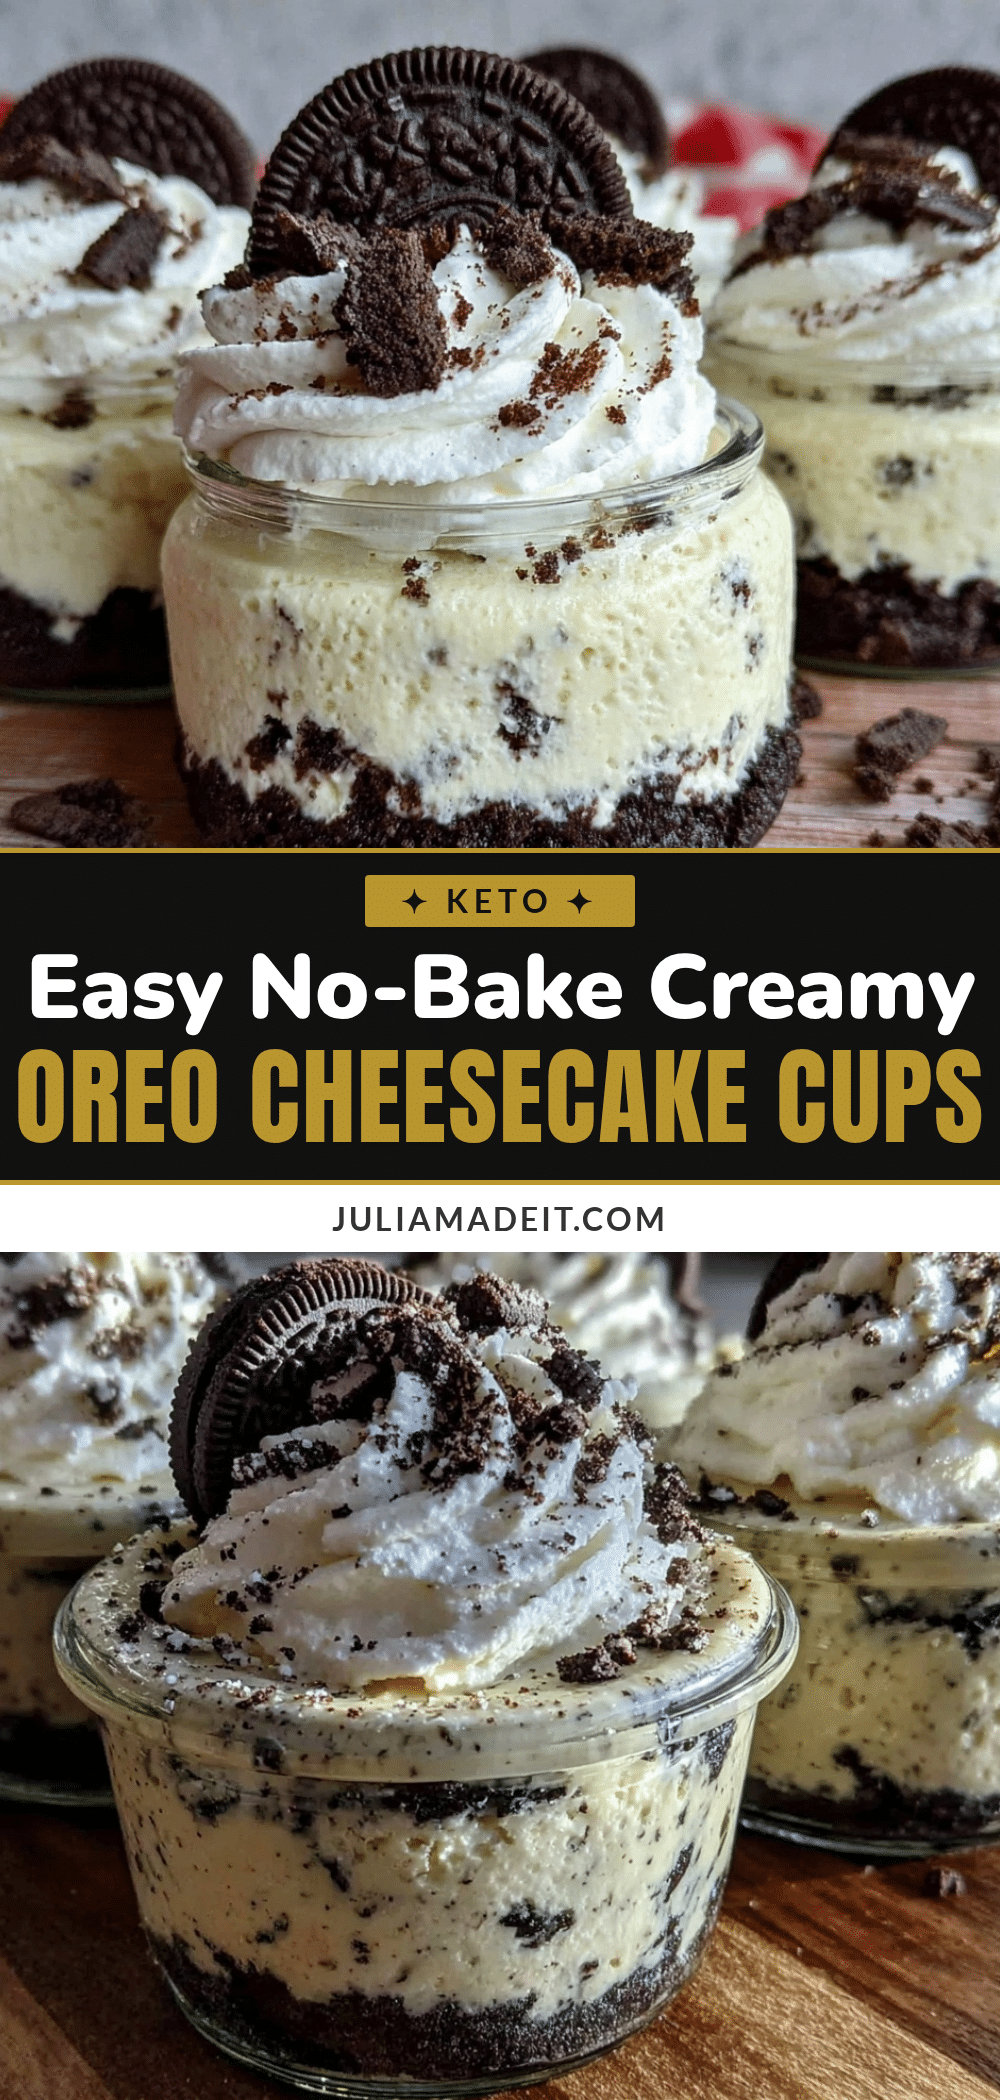
Easy No-Bake Oreo Cheesecake Cups
A quick and indulgent no-bake dessert featuring creamy cheesecake filling layered over a crunchy Oreo crust, ready in under 5 minutes.
- Prep Time: 5 minutes
- Cook Time: 0 minutes
- Total Time: 1 hour 5 minutes
- Yield: 6 servings 1x
- Category: Dessert
- Cuisine: American
Ingredients
- About 20 Oreos, crushed (reserve a handful for topping)
- 4 tablespoons (about 60g) unsalted butter, melted
- 8 ounces (225g) cream cheese, softened
- 1/2 cup (60g) powdered sugar
- 1 teaspoon vanilla extract
- 1 cup (240ml) heavy whipping cream, cold
- Optional: Mini Oreo cookies for garnish
- Optional: Chocolate shavings or chips for topping
Instructions
- Place about 20 Oreos in a food processor and pulse until fine crumbs form. If using a plastic bag, crush with a rolling pin until crumbs are uniform but not powdery.
- Pour the melted butter over the Oreo crumbs in a bowl. Stir thoroughly until all crumbs are moistened and the mixture holds together when pressed.
- Spoon the Oreo mixture evenly into the bottoms of about 6 small serving cups. Press down firmly to compact the crust. Chill in the fridge for at least 10 minutes.
- In a chilled bowl, whip 1 cup (240ml) of heavy cream on medium-high speed until stiff peaks form, about 3-5 minutes.
- In a separate large bowl, beat 8 ounces (225g) softened cream cheese until smooth and creamy, about 2 minutes. Gradually add 1/2 cup (60g) powdered sugar and 1 teaspoon vanilla extract, beating until combined.
- Gently fold the whipped cream into the cream cheese mixture with a spatula using slow folding motions to keep the filling light and airy.
- Spoon or pipe the cheesecake filling on top of the Oreo crust in each cup, smoothing out the tops and leaving room for garnish.
- Refrigerate the cups for at least 1 hour to let the filling set properly. Best enjoyed within 24 hours but can last up to 3 days refrigerated.
- Before serving, sprinkle reserved crushed Oreos or mini Oreos on top. Optionally add chocolate shavings or drizzle chocolate syrup.
Notes
Use chilled bowls for whipping cream to achieve better volume. Do not over-whip cream to avoid grainy texture. Softening cream cheese fully prevents lumps. Folding whipped cream gently keeps filling airy. Chilling for at least 1 hour helps filling set firmly. For quicker set, freeze for 20 minutes then return to fridge before serving. Dairy-free and gluten-free substitutions available.
Nutrition
- Serving Size: One small cup
- Calories: 320
- Fat: 22
- Carbohydrates: 28
- Protein: 4
Keywords: no-bake, Oreo, cheesecake, quick dessert, easy recipe, no oven, creamy, crunchy, indulgent