Standing in my kitchen with a bruised banana in one hand and a half-opened can of pumpkin puree in the other—that’s how this whole thing started. It was late October, I’d promised to bring something to a friend’s casual dinner, and I had absolutely nothing planned. The bananas were past sad, and that can of pumpkin had been sitting in my pantry since last Thanksgiving, staring at me every time I opened the door.
I almost tossed the banana. Honestly, I did. But then I thought about my go-to ultra moist one bowl banana bread and wondered what would happen if I just… mixed things up. Threw in some pumpkin. Swapped the brown butter for something warmer. It felt risky—banana and pumpkin aren’t exactly a classic duo. But the smell that filled my kitchen twenty minutes later told me I was onto something.
That first loaf came out of the oven uneven, cracked on one side, and completely perfect. The texture was this incredible hybrid—moist from the banana, tender from the pumpkin, with little pockets of walnut crunch in every slice. My friend took one bite and asked for the recipe before I even sat down. I scribbled it on a napkin that night, and I’ve been tweaking it ever since.
This isn’t one of those fussy bakery loaves that looks pretty but tastes like air. This is real bread—the kind you make on a Tuesday because you need something good in your life. The kind that makes your whole house smell like fall, even if it’s technically still summer outside.
Why You’ll Love This Recipe
I’ve tested this recipe about seven times now (my neighbors have been very patient), and every single loaf disappeared faster than the last. Here’s why this one stands out from every other pumpkin bread or banana bread you’ve tried:
- Perfectly Moist Every Time : The combination of ripe banana and pumpkin puree creates a texture that’s almost pudding-like—tender, soft, and never dry. No one wants a crumbly slice of disappointment.
- Simple Pantry Ingredients : You probably have most of this stuff already. No weird flours, no obscure extracts, no trips to three different stores. Just real ingredients that work together.
- Fall Flavor Without the Fuss : This bread tastes like autumn in slice form—warm cinnamon, nutty walnuts, that subtle pumpkin sweetness—but it comes together in one bowl with zero special equipment.
- Crowd-Pleasing Hybrid : Kids love it. Adults love it. People who swear they don’t like pumpkin? They love it too. It’s the perfect bridge between two classic quick breads.
- Freezes Beautifully : Make two loaves. Eat one now, stash one for later. It thaws like a dream and tastes just as fresh as the day you baked it.
What really sets this recipe apart is the balance. Most pumpkin breads are either too dense or too light—they fall apart the second you try to slice them. And banana bread can get gummy if you’re not careful. This version hits that sweet spot where it’s sturdy enough to hold a generous smear of butter but tender enough to melt in your mouth. Plus, the walnuts add that little crunch that keeps every bite interesting.
Honestly, this is the kind of recipe that makes you look like a hero with almost zero effort. You just mix, pour, bake, and suddenly people think you spent hours in the kitchen. Let them wonder.
What Ingredients You Will Need
This recipe uses simple, wholesome ingredients that come together to create something truly special. Most of these are pantry staples, which means you can whip up a loaf anytime the craving hits.
For the Bread
- 1 ½ cups all-purpose flour (spooned and leveled—don’t scoop straight from the bag or you’ll end up with too much)
- 1 teaspoon baking soda (make sure it’s fresh; stale baking soda is the #1 reason quick breads flop)
- 1 ½ teaspoons pumpkin pie spice (store-bought is fine, but I love making my own with extra cinnamon)
- ½ teaspoon ground cinnamon (because you can never have too much cinnamon in fall baking)
- ½ teaspoon salt (this balances the sweetness and brings out the warm spices)
- 2 large eggs (room temperature—cold eggs can seize up the batter and make the bread dense)
- ½ cup packed light brown sugar (dark brown works too if you want a deeper molasses flavor)
- ¼ cup granulated sugar (just enough to round out the sweetness without making it cloying)
- ½ cup vegetable oil (or melted coconut oil if you’re into that subtle coconut vibe)
- 1 cup mashed ripe banana (about 2 large bananas—the spottier, the better)
- ¾ cup pumpkin puree (not pumpkin pie filling—make sure you grab the 100% pure stuff)
- 1 teaspoon vanilla extract (pure vanilla if you have it, imitation in a pinch)
For the Mix-Ins & Topping
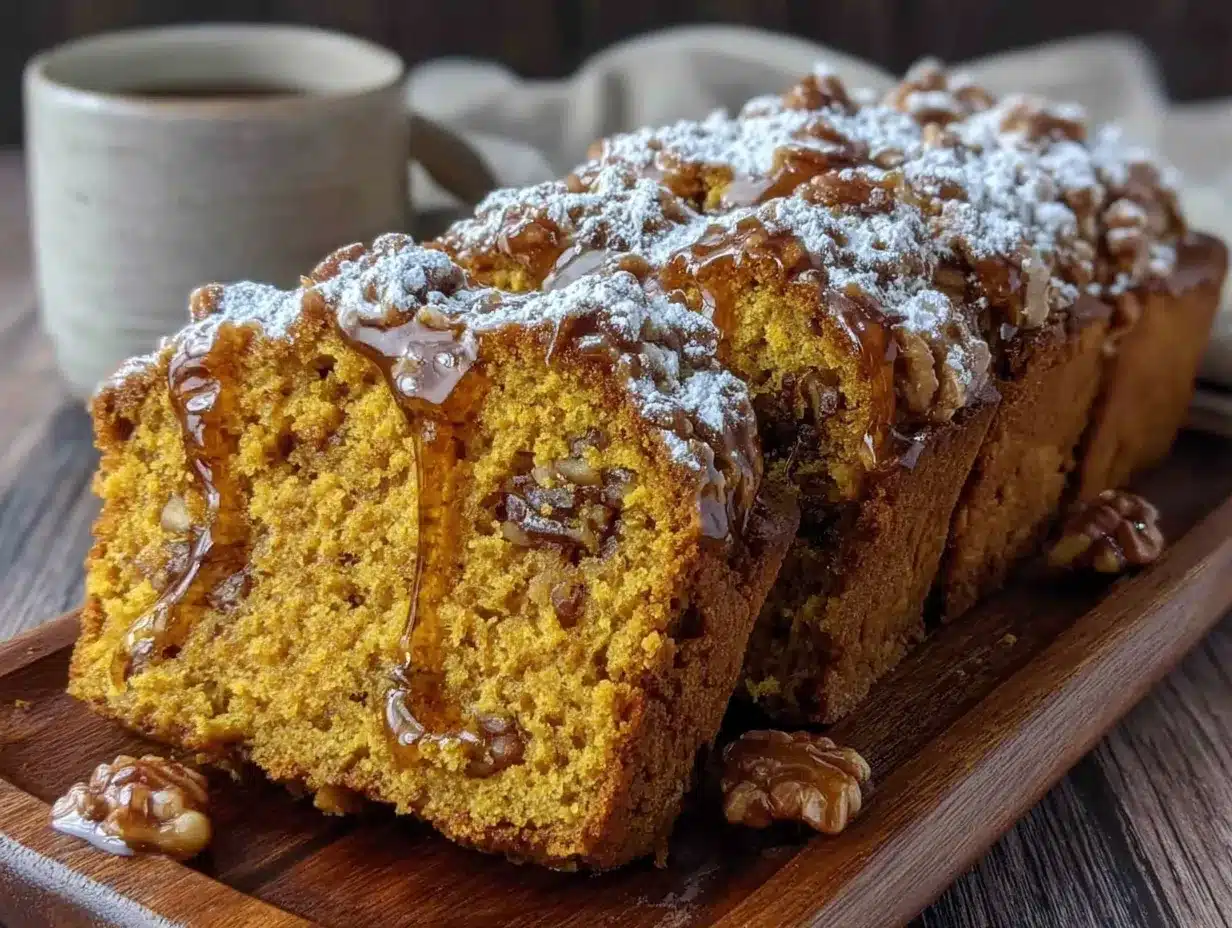
- ¾ cup chopped walnuts (toasted if you have an extra 5 minutes—it makes a huge difference)
- 2 tablespoons turbinado sugar (optional, for that sparkly, crunchy top that makes the loaf look bakery-bought)
A few quick notes on ingredients: I’ve tested this with both white whole wheat flour and a gluten-free 1:1 blend, and both work well—just expect a slightly denser crumb. If you’re out of pumpkin pie spice, mix 1 teaspoon cinnamon, ½ teaspoon nutmeg, ¼ teaspoon ginger, and ¼ teaspoon cloves. And please, please use overripe bananas. The greenish ones won’t give you that deep, sweet banana flavor that makes this bread sing.
For the walnuts, I’ve used pecans in a pinch and they’re lovely too, but walnuts have that slightly bitter, earthy edge that plays so nicely with the sweet pumpkin and banana. Toast them in a dry pan for 3-4 minutes before chopping—it wakes up their oils and makes them taste almost buttery.
Equipment Needed
You don’t need a fancy kitchen to make this bread. Here’s what you’ll need:
- 9×5-inch loaf pan (the standard size—anything smaller will overflow, anything larger will give you flat slices)
- Large mixing bowl (I use my grandmother’s old ceramic one, but any big bowl works)
- Whisk or wooden spoon (honestly, a fork works too—this batter is forgiving)
- Measuring cups and spoons (please use the dry measuring cups for flour, not a liquid measuring cup)
- Rubber spatula (for scraping every last bit of batter into the pan—waste not, want not)
- Parchment paper (my secret weapon for easy removal—just leave an overhang on two sides)
- Cooling rack (if you don’t have one, you can use the stovetop grates in a pinch)
If you don’t have a loaf pan, you can absolutely bake this in a 9×9 square pan—just reduce the baking time to about 30-35 minutes and check early. I’ve also made this as muffins before (bake at 350°F for 18-22 minutes) and they’re perfect for grab-and-go breakfasts. The only tool I’d really recommend splurging on is a good oven thermometer, because ovens lie and an extra 25 degrees can turn your beautiful loaf into a burnt brick.
Preparation Method
Alright, let’s make some bread. This is the part where I tell you exactly what to do so there are no surprises. Trust the process, and don’t overmix—that’s the only real rule here.
- Preheat your oven to 350°F (175°C). Position the rack in the center of the oven. Line your 9×5-inch loaf pan with parchment paper, leaving a couple inches overhang on the long sides. Lightly spray the exposed ends with cooking spray. This parchment sling trick makes lifting the finished loaf out so much easier—no flipping, no sticking, no tears.
- Mash your bananas. In a large bowl, mash those overripe bananas with a fork until they’re mostly smooth with a few tiny lumps. You want about 1 cup of mashed banana. If you have extra, don’t toss it—throw it in anyway. More banana never hurt anybody.
- Whisk together the wet ingredients. Add the eggs, brown sugar, granulated sugar, oil, pumpkin puree, and vanilla extract to the mashed bananas. Whisk until everything is well combined and smooth. The mixture should look thick and glossy, like a smoothie that’s about to become something amazing. Take a second to smell it—that pumpkin and vanilla combo is pure comfort.
- Mix the dry ingredients separately. In a medium bowl, whisk together the flour, baking soda, pumpkin pie spice, cinnamon, and salt. This step isn’t just for show—whisking aerates the flour and distributes the spices evenly so you don’t end up with one bite that tastes like pure cinnamon and another that tastes like nothing.
- Combine wet and dry. Pour the dry ingredients into the wet mixture. Use a rubber spatula or wooden spoon to fold everything together gently. And I mean gently. Stir just until you can’t see any more streaks of flour—about 10 to 12 folds. A few lumps are totally fine. Overmixing develops gluten and will give you a tough, rubbery bread instead of a tender, moist one. This is the most important tip in the whole recipe, so write it on your hand if you have to.
- Fold in the walnuts. Add the chopped walnuts to the batter and fold them in with just a few more strokes. You want them evenly distributed but not crushed. If you’re feeling fancy, reserve a handful to sprinkle on top before baking—it makes the loaf look gorgeous and gives you those extra-crunchy bits on the crust.
- Pour into the prepared pan. Scrape every last bit of batter into your lined loaf pan. Use the spatula to spread it into an even layer. Give the pan a gentle tap on the counter to release any air bubbles. If you’re using the turbinado sugar, sprinkle it evenly over the top now—it’ll create that beautiful, crackly crust that makes this bread look like it came from a fancy bakery.
- Bake for 50-60 minutes. Place the pan in the preheated oven and bake until a toothpick inserted into the center comes out clean or with just a few moist crumbs. The top should be golden brown and spring back when you gently press it. Start checking at 50 minutes—every oven is different, and you don’t want to overbake. If the top is browning too quickly (around the 40-minute mark), tent the pan loosely with aluminum foil.
- Cool in the pan. Let the bread cool in the pan on a wire rack for about 15 minutes. This resting time is crucial—the bread needs to set so it doesn’t fall apart when you try to remove it. Use the parchment sling to lift the loaf out and transfer it to the wire rack to cool completely. I know it’s tempting to slice into it right away, but warm bread is fragile bread. Wait at least an hour if you can stand it.
Cooking Tips & Techniques
I’ve made this bread enough times to know exactly where things can go wrong. Here are the lessons I learned the hard way so you don’t have to:
Don’t overmix the batter. I cannot stress this enough. The first time I made this, I was so excited that I kept stirring “just to make sure everything was combined.” The result was a dense, tough loaf that tasted fine but had the texture of a hockey puck. Fold gently, stop when the flour disappears, and trust that the baking soda will do its job.
Use an oven thermometer. My oven runs about 25 degrees hot, and I didn’t realize it for years. I kept wondering why my baked goods were always overdone on the outside and raw in the middle. An oven thermometer costs like eight bucks and will save you from so much heartache. Set it on the middle rack and adjust your oven temperature accordingly.
Toast your walnuts. This is one of those small steps that makes a huge difference. Spread the walnuts on a baking sheet and toast them at 350°F for 5-7 minutes until they smell fragrant and nutty. Let them cool before adding to the batter. Toasted walnuts add a depth of flavor that raw ones just can’t match—they’re crunchier, toastier, and somehow sweeter.
Check for doneness the right way. A toothpick test is reliable, but make sure you insert it into the center of the loaf—that’s the last part to cook. If the toothpick comes out with wet batter, it needs more time. If it comes out clean, you’re good. If it comes out with a few moist crumbs, that’s actually perfect—the bread will continue to cook slightly from residual heat as it cools.
Let it cool completely before slicing. I know, I know. The smell is intoxicating and you just want a warm slice with butter. But slicing warm bread compresses the crumb and makes it gummy. Plus, it tends to fall apart. Give it that full hour on the cooling rack—go for a walk, call your mom, do some dishes. The wait is worth it.
Room temperature ingredients matter. Cold eggs and cold banana can seize up the oil and create an uneven batter. Leave your eggs on the counter for 30 minutes before you start, and make sure your bananas are truly room temperature (or even a little warm from sitting out). Your batter will come together smoothly and bake more evenly.
Variations & Adaptations
One of the best things about this recipe is how flexible it is. Here are some ways to make it your own:
Chocolate Chip Version : Swap the walnuts for ¾ cup of semi-sweet chocolate chips. The combination of banana, pumpkin, and chocolate is absolutely ridiculous in the best way. I’ve also done a mix of half walnuts, half chocolate chips, and it’s basically heaven in a slice.
Gluten-Free Adaptation : Use a 1:1 gluten-free baking flour blend (I like King Arthur’s or Bob’s Red Mill). The texture will be slightly more tender and a bit crumblier, but it’s still delicious. Add an extra tablespoon of oil to help with moisture retention.
Dairy-Free Option : This recipe is already dairy-free as written, since it uses oil instead of butter. If you want to serve it with butter on top, use your favorite plant-based butter. I’ve tried this with Miyoko’s and it’s fantastic.
Lower Sugar Version : Reduce the brown sugar to ⅓ cup and the granulated sugar to 2 tablespoons. The banana and pumpkin provide plenty of natural sweetness, so you won’t miss it much. I’ve also made this with coconut sugar for a less refined option—it works, but the bread will be slightly darker and a little less sweet.
Spice It Up : Add ¼ teaspoon of ground ginger and a pinch of ground cloves to the spice mix for an even warmer, more complex flavor. Sometimes I throw in a pinch of cardamom too, especially if I’m feeling fancy. It gives the bread this subtle floral note that’s hard to place but impossible to forget.
Streusel Topping : Mix 2 tablespoons cold butter, 3 tablespoons flour, 2 tablespoons brown sugar, and ¼ teaspoon cinnamon until crumbly. Sprinkle over the batter before baking for a buttery, crunchy top that takes this bread to the next level. I did this once for a brunch party and people literally fought over the end pieces.
Pumpkin Seed Crunch : Instead of walnuts, use pepitas (shelled pumpkin seeds). They add a lovely green color and a satisfying crunch. Toast them first with a little salt for extra flavor.
Serving & Storage Suggestions
This bread is wonderful in so many ways. Here’s how to enjoy it at its best:
Serving Temperature : This bread is fantastic at room temperature, but I secretly love it slightly warm. Pop a slice in the microwave for about 10 seconds, or toast it lightly in a pan with a pat of butter. The warmth makes the spices bloom and the texture gets even more tender.
Perfect Pairings : A slice of this bread with a smear of salted butter is pure perfection. For something extra, try it with cream cheese, apple butter, or even a drizzle of honey. It’s also amazing alongside a hot cup of coffee, a chai latte, or a glass of cold milk. For a full fall breakfast, serve it next to a bowl of creamy pumpkin overnight oats with maple pecans and chia seeds for a truly cozy morning.
Storage : Store leftover bread wrapped tightly in plastic wrap or in an airtight container at room temperature for up to 4 days. The moisture from the banana and pumpkin actually helps it stay fresh longer than regular banana bread. If you live in a humid climate, keep it in the fridge to prevent mold—just let slices come to room temperature before eating.
Freezing : This bread freezes beautifully. Let it cool completely, then wrap it tightly in plastic wrap, followed by a layer of aluminum foil. Freeze for up to 3 months. To thaw, leave it on the counter overnight, or pop individual slices in the toaster straight from the freezer. I always make a double batch and freeze one loaf for emergency cravings—it’s saved me more times than I can count.
Flavor Development : Here’s a little secret—this bread actually tastes better on day two. The flavors meld together overnight, and the texture becomes even more moist and tender. If you can resist eating it all on day one, you’re in for a real treat on day two. Just wrap it tightly and let it rest on the counter.
Nutritional Information & Benefits
While this is definitely a treat, it does have some redeeming qualities. Here’s the estimated nutrition per slice (based on 10 slices):
- Calories: Approximately 290
- Fat: 16g
- Carbohydrates: 34g
- Fiber: 3g
- Sugar: 18g
- Protein: 5g
The pumpkin puree is packed with vitamin A (hello, healthy eyes and immune system) and fiber, which helps keep you full and satisfied. Bananas provide potassium and natural sweetness, so you can use less refined sugar. Walnuts are a great source of omega-3 fatty acids and healthy fats that support brain health—so really, this bread is practically a health food. (I’m only half kidding.)
If you’re watching your sugar intake, the lower-sugar variation I mentioned earlier works beautifully and cuts the sugar by about a third. And if you’re looking for a protein boost, this bread pairs wonderfully with a smear of peanut butter or a side of Greek yogurt.
This recipe is vegetarian and dairy-free as written. It can be made gluten-free with a simple flour swap. It contains nuts (walnuts) and gluten (unless modified).
Conclusion
This moist banana pumpkin walnut bread is one of those recipes that feels like a warm hug in food form. It’s the kind of bread you make when you need something comforting, when the weather turns chilly, or when you just want your kitchen to smell amazing. It comes together in one bowl with simple ingredients, and the result is always, always worth it.
I love this recipe because it’s forgiving. You can mess up the measurements a little, use slightly under-ripe bananas, forget to toast the walnuts—and it’ll still turn out delicious. It’s not precious or fussy. It’s just good, honest baking that makes people happy.
I’d love to hear how yours turns out. Did you add chocolate chips? Swap the walnuts for pecans? Forget the turbinado sugar and eat it plain? Drop a comment below and let me know—I read every single one, and your variations might just inspire my next batch. If you’re looking for more cozy fall baking, don’t miss my easy one bowl pumpkin cream cheese muffins with cinnamon sugar streusel or this moist pumpkin chocolate chip cream cheese swirl bread for more seasonal goodness.
Happy baking, friends. Go make something wonderful.
Frequently Asked Questions
Can I use frozen bananas for this recipe?
Absolutely. Thaw them completely, then drain off any excess liquid before mashing. Frozen bananas actually break down more easily and can make the bread even more moist. Just make sure they’re well-drained so you don’t end up with a soggy batter.
Can I skip the walnuts or use a different nut?
Yes! You can leave the walnuts out entirely for a nut-free version, or swap them with pecans, almonds, or even hazelnuts. If you’re avoiding nuts, try pumpkin seeds or sunflower seeds for a similar crunch.
Why did my bread sink in the middle?
This usually happens for one of three reasons: your oven wasn’t hot enough, you opened the oven door too often during baking, or you overmixed the batter. Make sure your oven is fully preheated, resist the urge to peek, and fold gently. Also, check that your baking soda is fresh—stale leavening agent is a common culprit.
Can I make this into muffins instead of a loaf?
Definitely. Grease a 12-cup muffin tin or line with paper liners. Fill each cup about ¾ full and bake at 350°F for 18-22 minutes, or until a toothpick comes out clean. You’ll get about 12-14 muffins. They’re perfect for freezing and grabbing on busy mornings.
How do I know when the bread is fully baked?
Insert a toothpick or skewer into the center of the loaf. If it comes out clean or with just a few moist crumbs (not wet batter), it’s done. The top should be golden brown and spring back when lightly pressed. If the toothpick comes out with wet batter, bake for another 5 minutes and check again.
Pin This Recipe!
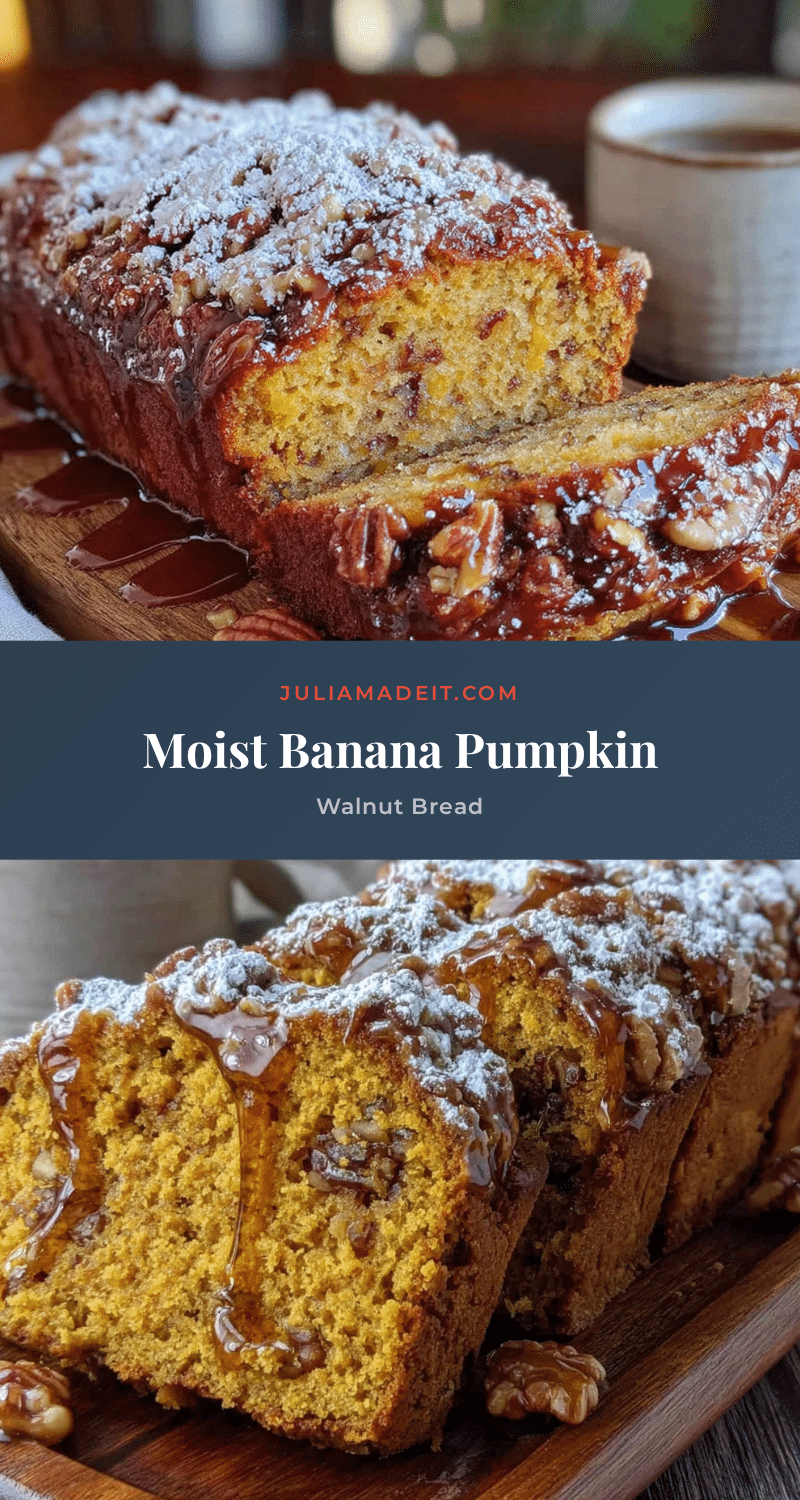
Best Moist Banana Pumpkin Walnut Bread Recipe
This moist banana pumpkin walnut bread combines ripe bananas and pumpkin puree for a tender, perfectly spiced loaf with crunchy walnut pockets. It’s an easy one-bowl recipe that tastes like autumn in every slice.
- Prep Time: 15 minutes
- Cook Time: 55 minutes
- Total Time: 1 hour 10 minutes
- Yield: 10 servings 1x
- Category: Quick Bread
- Cuisine: American
Ingredients
- 1 ½ cups all-purpose flour (spooned and leveled)
- 1 teaspoon baking soda
- 1 ½ teaspoons pumpkin pie spice
- ½ teaspoon ground cinnamon
- ½ teaspoon salt
- 2 large eggs (room temperature)
- ½ cup packed light brown sugar
- ¼ cup granulated sugar
- ½ cup vegetable oil (or melted coconut oil)
- 1 cup mashed ripe banana (about 2 large bananas)
- ¾ cup pumpkin puree (100% pure, not pie filling)
- 1 teaspoon vanilla extract
- ¾ cup chopped walnuts (toasted if possible)
- 2 tablespoons turbinado sugar (optional, for topping)
Instructions
- Preheat your oven to 350°F (175°C). Position the rack in the center of the oven. Line a 9×5-inch loaf pan with parchment paper, leaving a couple inches overhang on the long sides. Lightly spray the exposed ends with cooking spray.
- In a large bowl, mash overripe bananas with a fork until mostly smooth with a few tiny lumps (about 1 cup).
- Add eggs, brown sugar, granulated sugar, oil, pumpkin puree, and vanilla extract to the mashed bananas. Whisk until well combined and smooth.
- In a medium bowl, whisk together flour, baking soda, pumpkin pie spice, cinnamon, and salt.
- Pour dry ingredients into wet mixture. Use a rubber spatula or wooden spoon to fold gently until no streaks of flour remain (about 10-12 folds). Do not overmix.
- Fold in chopped walnuts with a few more strokes. Reserve a handful for topping if desired.
- Pour batter into prepared loaf pan and spread evenly. Tap the pan gently on the counter to release air bubbles. Sprinkle turbinado sugar on top if using.
- Bake for 50-60 minutes, until a toothpick inserted into the center comes out clean or with a few moist crumbs. If top browns too quickly, tent with foil at 40 minutes.
- Cool in the pan on a wire rack for 15 minutes. Use parchment sling to lift loaf out and transfer to wire rack to cool completely (at least 1 hour before slicing).
Notes
Don’t overmix the batter—fold gently until just combined. Use an oven thermometer for accuracy. Toast walnuts for best flavor. Let bread cool completely before slicing to avoid gummy texture. Bread tastes even better on day two. Freezes well for up to 3 months.
Nutrition
- Serving Size: 1 slice
- Calories: 290
- Sugar: 18
- Sodium: 280
- Fat: 16
- Saturated Fat: 2
- Carbohydrates: 34
- Fiber: 3
- Protein: 5
Keywords: banana pumpkin bread, pumpkin walnut bread, moist banana bread, fall baking, quick bread, one bowl recipe