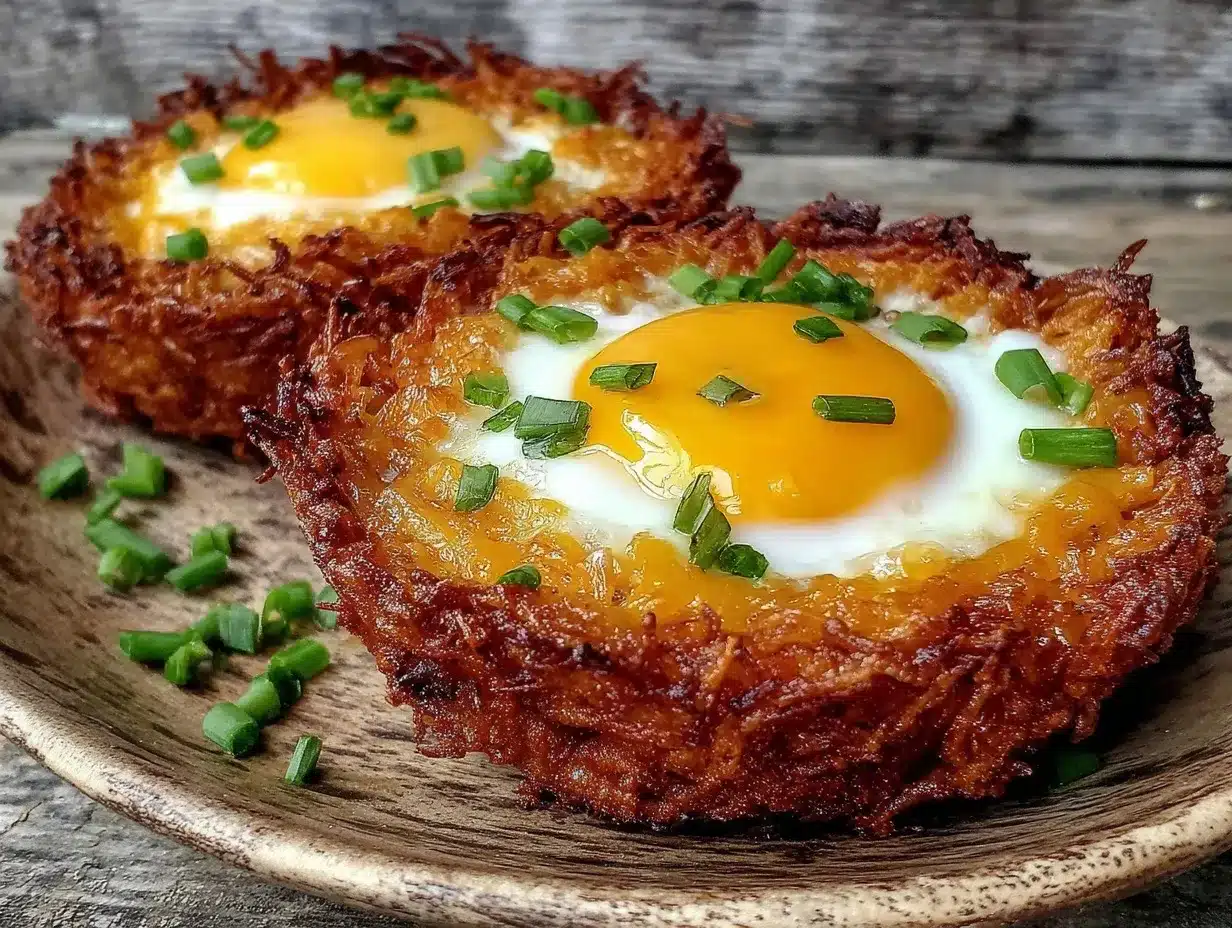
“You’re making what now?” my roommate asked while I was assembling these little crispy hash brown egg nests one groggy Sunday morning. Honestly, I wasn’t sure myself when I started, just craving a breakfast that felt special but didn’t require a full morning of fuss. I had a bag of frozen hash browns, some cheddar cheese, and a few eggs—nothing fancy. Halfway through, the kitchen smelled like a diner, with that irresistible aroma of sizzling potatoes and melting cheese. The golden nests came out perfectly crisp, each holding an egg cooked just right, with little bits of fresh chive scattered on top.
After the first bite, it was quiet for a moment. This wasn’t just a quick breakfast; it was the kind that makes you pause and appreciate the little things. Since then, these crispy hash brown egg nests with cheddar and chive have become my go-to for lazy weekends and even rushed mornings. The combo of crispy edges and creamy yolk just works—trust me, you’ll want to make these a regular.
What stuck with me is how simple ingredients and a bit of patience can turn something ordinary into a comforting, satisfying meal. It’s not complicated, and it doesn’t pretend to be. But it sure feels like a treat, every single time.
Why You’ll Love This Crispy Hash Brown Egg Nests Recipe
This recipe has been through multiple rounds of testing in my kitchen, from rushed breakfasts between Zoom meetings to slow weekend brunches with friends. It’s genuinely one of those dishes that manages to be both easy and impressive, which is rare. Here’s why you’ll want to keep this one close:
- Quick & Easy: It comes together in about 25 minutes, making it perfect for busy mornings or when you need a no-fuss meal with a little wow factor.
- Simple Ingredients: You probably have frozen hash browns, eggs, cheddar, and chives already hanging out in your kitchen. No last-minute grocery runs needed.
- Perfect for Brunch or Cozy Breakfasts: Whether it’s a laid-back weekend or a special occasion, these nests fit right in.
- Crowd-Pleaser: Kids, adults, picky eaters—they all seem to love the crispy texture paired with oozy egg yolk and sharp cheddar.
- Unbelievably Delicious: The nests have that perfect crunch on the outside, soft potatoes inside, and the chive adds a fresh burst that keeps every bite interesting.
What sets this recipe apart is the way the hash browns are pressed and baked into little nests that hold the eggs securely while crisping up beautifully. The cheddar melts inside just enough without overwhelming the potatoes, and the chives add a subtle oniony freshness that makes it feel homemade and thoughtful. I’ve tried versions with different cheeses and herbs, but cheddar and chive remain my favorites because they strike that perfect balance of comfort and brightness.
This isn’t just another breakfast idea—it’s a reliable recipe you’ll turn to when you want something easy but also crave that satisfying, just-right texture and flavor combo. If you love hearty breakfasts but don’t want to spend an hour in the kitchen, these nests have your name on them.
What Ingredients You Will Need
This recipe uses simple, wholesome ingredients to deliver bold flavor and satisfying texture without the fuss. Most are pantry or freezer staples, with a few fresh touches to brighten everything up.
- Frozen hash browns (about 3 cups/450g) – I recommend a shredded style like Ore-Ida for the best crispiness and ease of shaping.
- Cheddar cheese (1 cup/100g), shredded – Sharp or mild cheddar works, but sharp cheddar adds a nice tang that cuts through the richness.
- Large eggs (6) – Room temperature eggs help ensure even cooking when baked.
- Chives (2 tablespoons), finely chopped – Fresh chives add a subtle onion flavor; you can substitute green onions or scallions if you prefer.
- Olive oil or melted butter (2 tablespoons) – For coating the muffin tin and tossing with hash browns to get that golden crisp.
- Salt (1 teaspoon) – Enhances all the flavors.
- Black pepper (½ teaspoon) – Freshly cracked preferred for best aroma.
- Optional: garlic powder (¼ teaspoon) – Adds a gentle depth if you want a little more flavor complexity.
If you’re gluten-free, this recipe works perfectly as is. For a dairy-free option, swap cheddar with a plant-based cheese, and use olive oil instead of butter. You can also add diced bell peppers or cooked bacon bits into the nests for a heartier version. In summer, fresh herbs like parsley or tarragon can brighten the flavor even more.
Equipment Needed
- Standard muffin tin – This is essential for shaping the nests. A 12-cup tin works best to hold each nest’s shape.
- Mixing bowls – For tossing hash browns with oil and seasoning.
- Measuring cups and spoons – Accurate measurements help keep the nests consistent.
- Non-stick cooking spray or brush – To grease the muffin tin and avoid sticking.
- Cheese grater – For shredding cheddar cheese freshly, which melts better than pre-shredded.
- Spatula or spoon – For mixing and scooping.
If you don’t have a muffin tin, small oven-safe ramekins or even a mini cast-iron skillet can work as alternatives, though the shape will differ. When using a muffin tin, I find a silicone liner helps with cleanup but isn’t necessary if you grease well. I’ve tried both olive oil and melted butter for greasing, and butter gives a slightly richer flavor but olive oil crisps the nests better. Choose what feels right for your kitchen.
Preparation Method
- Preheat your oven to 400°F (200°C). This temperature crisps the hash browns nicely without overcooking the eggs.
- Grease a 12-cup muffin tin with olive oil or melted butter. Don’t skip this step to prevent sticking.
- In a large bowl, toss the frozen hash browns (about 3 cups/450g) with 2 tablespoons olive oil or melted butter, 1 teaspoon salt, ½ teaspoon black pepper, and optional ¼ teaspoon garlic powder. Make sure they’re evenly coated for best crisping.
- Add 1 cup (100g) shredded cheddar cheese to the mixture and stir gently to combine.
- Divide the hash brown mixture evenly among the muffin tin cups, pressing the potatoes against the sides and bottom to form a nest shape with a well in the center. This step is key—press firmly but don’t compact too much, or they won’t crisp properly. You want a sturdy cup that can hold the egg.
- Bake the nests for 15 minutes until the edges start turning golden and crispy.
- Carefully crack one large egg into each nest—try to avoid breaking the yolk! If you prefer your yolks more cooked, you can lightly whisk the eggs before pouring.
- Return the muffin tin to the oven and bake for 10-12 more minutes, or until the egg whites are set but yolks are still slightly runny. For firmer yolks, add a few extra minutes.
- Remove from oven and sprinkle 2 tablespoons chopped fresh chives over the top of each nest.
- Let the nests cool for 2-3 minutes before carefully removing them with a small spatula or spoon. Serve warm.
Pro tip: If your edges aren’t getting crispy enough, try preheating the muffin tin before adding the hash browns. Also, if your eggs bake unevenly, rotate the pan halfway through cooking for consistent heat. The nests should smell amazing—golden, cheesy, and herbaceous.
Cooking Tips & Techniques
One of the trickiest parts of crispy hash brown egg nests is balancing crispiness with tender eggs. From my experience, here are a few tips to keep things foolproof:
- Don’t thaw the hash browns fully. Slightly frozen works best because it holds shape better and crisps nicely. If your hash browns are watery, pat them dry with paper towels first.
- Press the hash browns firmly into the muffin tin cups. This helps the nests hold together during baking.
- Use room temperature eggs. Cold eggs can cause uneven cooking and longer bake times.
- Keep an eye on egg doneness. Oven temps vary, so check at 10 minutes after adding eggs to avoid overcooking.
- For extra crispiness, broil the nests for 1-2 minutes after baking—just watch closely to avoid burning.
- Don’t overcrowd the oven. Baking the nests spaced out allows better air circulation and crisping.
I once tried rushing this recipe by baking the nests and eggs together from the start, and it was a flop: soggy potatoes and rubbery eggs. The two-step bake is worth the extra few minutes. Also, tossing the hash browns with oil and seasoning before baking guarantees the flavor is evenly distributed. Trust me, these small details make a big difference.
Variations & Adaptations
This recipe is easy to tweak based on your mood, dietary needs, or what’s in the fridge:
- Vegetarian upgrade: Add sautéed mushrooms, spinach, or diced bell peppers to the hash brown mix for extra veggies and flavor.
- Low-carb option: Swap the hash browns for shredded cauliflower. It won’t be quite the same crunch but still tasty and lighter.
- Cheese swap: Try pepper jack or smoked gouda instead of cheddar for a different flavor twist.
- Seasonal herbs: In spring or summer, fresh dill or tarragon add a lovely brightness instead of chives.
- Meaty touch: Crumbled cooked bacon or diced ham stirred into the hash brown mixture amps up the savory factor.
Once, I mixed in some leftover Mexican street corn with the hash browns (inspired by the mexican street corn esquites cups recipe)—it was a flavor bomb and surprised everyone at brunch. Feel free to experiment with what you like!
Serving & Storage Suggestions
These crispy hash brown egg nests are best served warm, straight from the oven, when the edges are at their crispiest and the yolk is still luxuriously runny. A sprinkle of extra fresh chives or a dash of hot sauce brings everything together.
Pair them with a simple green salad or fresh fruit for a balanced brunch. I also love serving alongside a rich, creamy dish like creamy garlic butter shrimp linguine for a special weekend treat.
To store leftovers, cover tightly with plastic wrap or place in an airtight container and refrigerate for up to 3 days. Reheat gently in a 350°F (175°C) oven for 8-10 minutes to revive crispiness. Avoid microwaving if you want to keep that crunch.
Flavors actually meld nicely after a day, making leftovers even better for a quick breakfast or snack. If you want to freeze them, wrap each nest individually in foil and freeze for up to 1 month. Thaw overnight in the fridge and reheat as above.
Nutritional Information & Benefits
A serving of two crispy hash brown egg nests with cheddar and chive provides roughly 350-400 calories depending on exact portions. They offer a balanced mix of protein from the eggs and cheese, carbohydrates from the potatoes, and healthy fats from olive oil or butter.
Key benefits include:
- Eggs provide high-quality protein and essential vitamins like B12 and D.
- Chives add antioxidants and vitamin K, supporting immune health.
- Using olive oil contributes heart-healthy monounsaturated fats.
This recipe is naturally gluten-free and can be adapted for dairy-free diets as needed. It’s a satisfying, nutrient-dense breakfast that keeps you full and energized without feeling heavy or greasy.
Conclusion
These crispy hash brown egg nests with cheddar and chive aren’t just a breakfast—they’re little pockets of comfort that show how a few simple ingredients can come together for something truly satisfying. I love how effortless they are to make and how they bring a touch of joy to any morning, whether it’s a rushed weekday or a slow Sunday.
Feel free to customize with your favorite cheeses, herbs, or add-ins to make this recipe your own. And if you try it, I’d love to hear how it turned out or what variations you came up with. Cooking is always better when we share those moments.
Here’s to crispy edges, melty cheese, and the perfect egg yolk—because breakfast should always feel like a little celebration.
Frequently Asked Questions
Can I use fresh potatoes instead of frozen hash browns?
Yes, but grate and squeeze out as much moisture as possible before using. Frozen hash browns are more convenient and tend to crisp better.
How do I get the egg yolks runny but whites fully cooked?
Baking the nests first, then adding the eggs and baking again at 400°F (200°C) for 10-12 minutes usually does the trick. Keep an eye after 10 minutes to avoid overcooking.
Can these nests be made ahead of time?
Absolutely! You can assemble and bake the nests (without eggs) a day ahead, then add eggs and bake right before serving for fresh eggs.
What’s the best way to reheat leftovers without losing crispiness?
Reheat in a preheated oven at 350°F (175°C) for about 8-10 minutes. Avoid microwaving as it’ll make them soggy.
Can I add other vegetables or proteins to the nests?
Yes! Diced bell peppers, cooked bacon, mushrooms, or spinach all work well. Just mix them in with the hash browns before shaping.
Pin This Recipe!
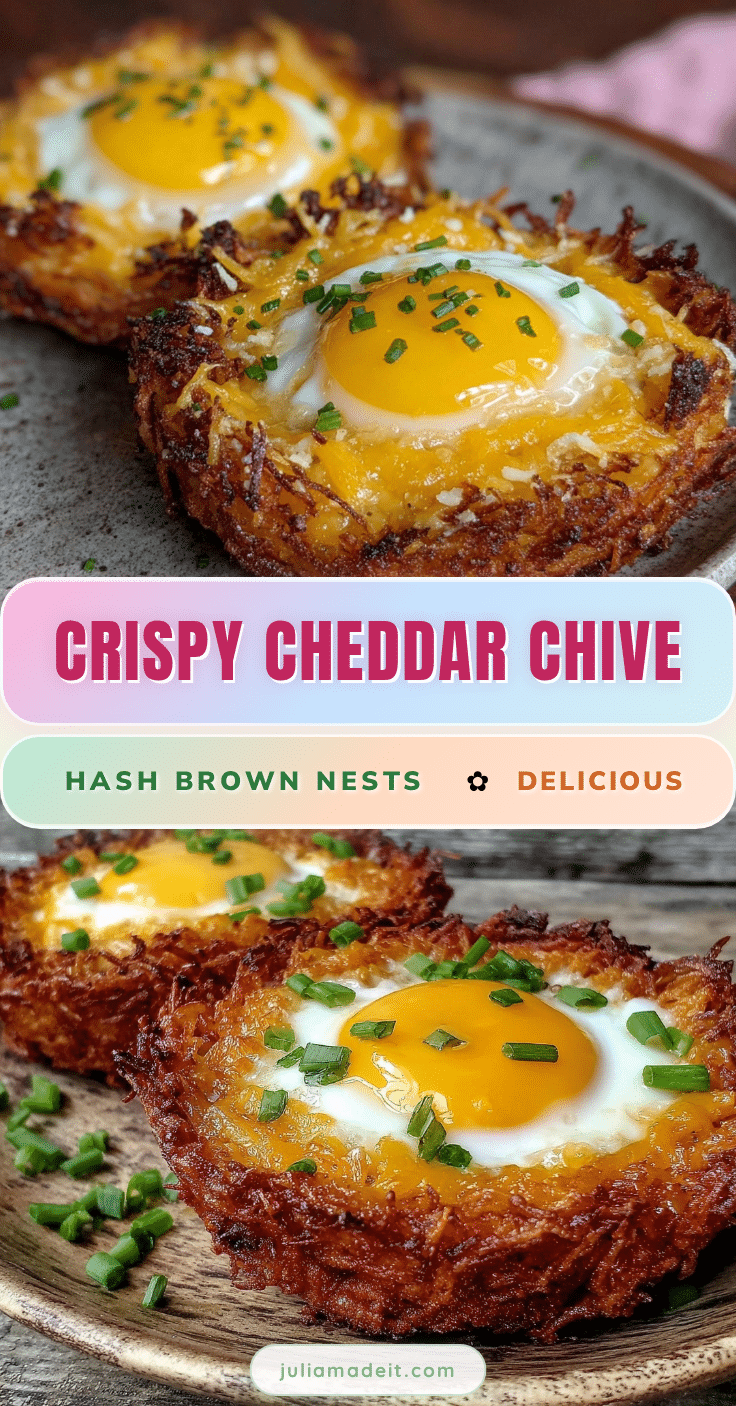
Crispy Hash Brown Egg Nests Recipe Easy Cheddar Chive Breakfast

These crispy hash brown egg nests with cheddar and chive are a quick and easy breakfast or brunch option featuring golden, crispy potato nests holding perfectly baked eggs with a fresh burst of chives.
- Prep Time: 10 minutes
- Cook Time: 25 minutes
- Total Time: 35 minutes
- Yield: 6 servings (1 nest per serving) 1x
- Category: Breakfast
- Cuisine: American
Ingredients
- 3 cups (about 10.5 oz / 300g) frozen shredded hash browns
- 1 cup (about 3.5 oz / 100g) shredded cheddar cheese
- 6 large eggs, room temperature
- 2 tablespoons finely chopped fresh chives
- 2 tablespoons olive oil or melted butter
- 1 teaspoon salt
- 1/2 teaspoon freshly cracked black pepper
- 1/4 teaspoon garlic powder (optional)
Instructions
- Preheat your oven to 400°F (200°C).
- Grease a 12-cup muffin tin with olive oil or melted butter.
- In a large bowl, toss the frozen hash browns with olive oil or melted butter, salt, black pepper, and optional garlic powder until evenly coated.
- Add shredded cheddar cheese to the mixture and stir gently to combine.
- Divide the hash brown mixture evenly among the muffin tin cups, pressing the potatoes against the sides and bottom to form a nest shape with a well in the center.
- Bake the nests for 15 minutes until the edges start turning golden and crispy.
- Carefully crack one large egg into each nest, avoiding breaking the yolk. For more cooked yolks, lightly whisk eggs before pouring.
- Return the muffin tin to the oven and bake for 10-12 more minutes, or until egg whites are set but yolks are still slightly runny. Add a few extra minutes for firmer yolks.
- Remove from oven and sprinkle chopped fresh chives over the top of each nest.
- Let the nests cool for 2-3 minutes before carefully removing them with a small spatula or spoon. Serve warm.
Notes
Do not fully thaw hash browns; slightly frozen works best for crispiness. Press hash browns firmly but not too compact to ensure nests hold shape and crisp. Use room temperature eggs for even cooking. Rotate pan halfway through baking eggs for even heat. For extra crispiness, broil nests 1-2 minutes after baking. Avoid microwaving leftovers to maintain crispiness.
Nutrition
- Serving Size: 1 egg nest
- Calories: 375
- Sugar: 1
- Sodium: 550
- Fat: 25
- Saturated Fat: 8
- Carbohydrates: 22
- Fiber: 2
- Protein: 14
Keywords: hash browns, egg nests, breakfast, brunch, cheddar cheese, chives, crispy, easy recipe