The doorbell rang at 6:47 PM on a Tuesday. I had a bag of chicken wings defrosting on the counter, a half-empty bottle of honey in the pantry, and absolutely no plan. My brother-in-law had texted “dropping by with beer” twenty minutes earlier, and I was staring at raw chicken like it was a puzzle I didn’t know how to solve.
I wanted something sticky and sweet but also that shatteringly crisp bite you only get from wings that have been treated right. No deep fryer, no buttermilk brine, no hours of waiting. Just a Tuesday night craving and a guy holding a six-pack who was about to walk through my door.
So I grabbed soy sauce, garlic, honey, and a baking sheet, and I just started cooking. These crispy honey garlic glazed chicken wings came together in a blur of panic and hope — and honestly? They were the best wings I’d ever made. The glaze caramelized into these tacky, golden edges while the skin turned audibly crunchy. We ate them straight off the sheet pan, standing in the kitchen, licking our fingers and not saying much because our mouths were full.
That’s the thing about this recipe. It doesn’t need a special occasion or a complicated technique. It just needs a hungry person and thirty minutes.
Why You’ll Love This Recipe
These aren’t your average chicken wings. I’ve tested this method about a dozen times now, tweaking the glaze ratios and the cooking temperature until everything clicked. Here’s why this version wins every single time:
- Ready in 30 Minutes: No marinating, no brine, no complicated steps. From fridge to table in half an hour flat.
- Seriously Crispy Without Frying: A simple baking powder trick gives you that golden, crunchy skin without a vat of oil. Trust me on this one.
- Pantry-Friendly Ingredients: Soy sauce, honey, garlic, butter — you probably have all of this right now. No specialty grocery runs.
- Perfect for Game Day or Tuesday Night: These wings work for Super Bowl parties, casual dinners, or those moments when someone shows up unannounced with beer.
- That Perfect Sticky-Sweet Glaze: The honey garlic coating caramelizes into this glossy, finger-licking finish that’s not too sweet and not too savory. It’s the Goldilocks of wing glazes.
What makes these wings different from every other recipe out there is the method. Most baked wings turn out soggy or dry. But by using a specific baking powder technique and a two-temperature roasting approach, you get wings that rival anything from a deep fryer. I’ve served these to people who swore they hated baked wings, and they went back for thirds.
This is the kind of recipe that makes you close your eyes after the first bite. It’s comfort food that doesn’t require a nap afterward — just maybe a few extra napkins.
What Ingredients You Will Need
This recipe relies on simple, everyday ingredients that work together to create something genuinely impressive. No fancy extracts, no obscure spices — just honest ingredients that know what they’re doing.
- Chicken Wings: 2 pounds (about 900g), separated into drumettes and flats. I prefer buying whole wings and cutting them myself — it’s cheaper and you get the wing tips for stock. Look for wings that are plump and not bruised.
- Baking Powder: 1½ teaspoons. This is the secret to crispy skin. Make sure it’s baking powder, not baking soda — they are not the same thing, and baking soda will make your wings taste metallic. I use aluminum-free baking powder for best results.
- Salt: 1 teaspoon kosher salt. The coarse kind dissolves better and seasons more evenly than fine table salt.
- Black Pepper: ½ teaspoon, freshly ground if you can manage it.
- Garlic Powder: ½ teaspoon. Not garlic salt — we’re controlling the salt ourselves here.
- Honey: ⅓ cup (about 110g). Use a good-quality honey that’s not too thick. If your honey has crystallized, warm it gently before using.
- Soy Sauce: 3 tablespoons. I use low-sodium soy sauce so I can control the saltiness. Tamari works great for a gluten-free option.
- Butter: 2 tablespoons unsalted butter. This gives the glaze richness and helps it stick to the wings instead of sliding off.
- Garlic: 4 cloves, minced fresh. Please don’t use the jarred stuff here — fresh garlic makes a noticeable difference in the glaze.
- Rice Vinegar: 1 tablespoon. A splash of acidity balances the sweetness. Apple cider vinegar works too.
- Sesame Seeds: 1 tablespoon, for garnish. Optional but pretty.
- Green Onions: 2, thinly sliced. For color and a fresh finish.
I get my chicken wings from the local butcher when I can, but grocery store packs work perfectly fine. If you’re using frozen wings, thaw them completely in the fridge overnight and pat them very dry before starting. Moisture is the enemy of crispy skin.
Equipment Needed
You don’t need much for these wings, which is part of the appeal. Here’s what you’ll want to have on hand:
- Baking Sheet: A rimmed half-sheet pan works best. The rim catches any drips while allowing air to circulate around the wings.
- Wire Rack: This fits inside your baking sheet and lifts the wings off the surface so heat can reach all sides. If you don’t have one, you can flip the wings halfway through — but the rack makes a noticeable difference in crispiness.
- Parchment Paper or Aluminum Foil: For easy cleanup. Line that baking sheet because the glaze gets sticky.
- Small Saucepan: For making the glaze. Any small pot will do.
- Mixing Bowl: A large bowl for tossing the wings with the dry ingredients.
- Tongs: For flipping the wings and tossing them in the glaze without burning your fingers.
- Pastry Brush: Optional, but helpful for applying a final glaze coat if you want extra shine.
I bought my wire rack set for about eight dollars at a kitchen supply store, and it’s one of the best investments I’ve made for crispy baked foods. If you’re on a budget, just flip the wings halfway through cooking and pat them dry halfway — it works, just not quite as perfectly.
Preparation Method
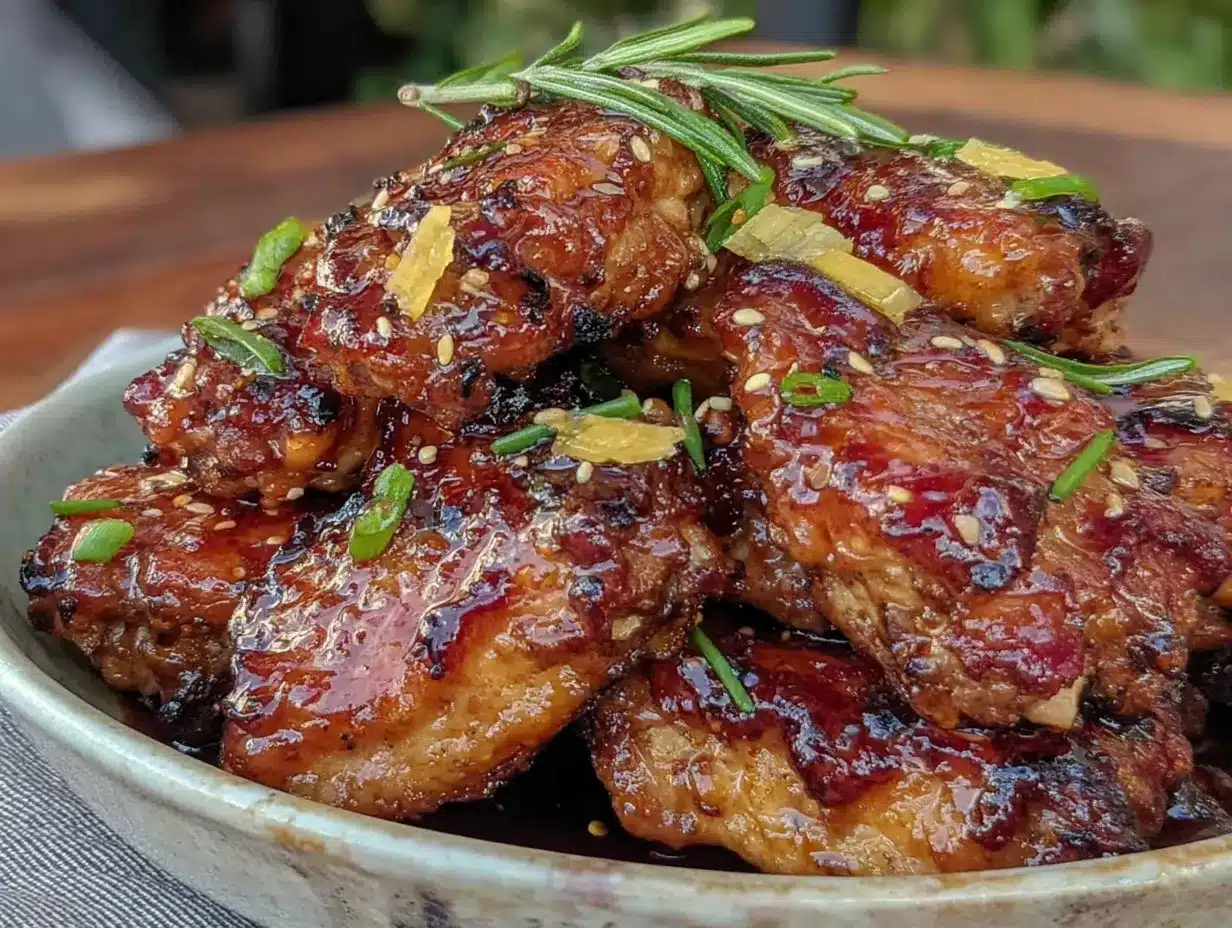
Let’s get cooking. This whole process takes about 30 minutes, and most of that is hands-off oven time.
- Preheat your oven to 400°F (200°C). Place one rack in the upper third of the oven. Line your baking sheet with foil or parchment, then place the wire rack on top. Spray the rack lightly with cooking spray so the wings don’t stick.
- Pat the wings completely dry with paper towels. This step matters more than almost anything else. Wet wings = steamed skin = sad, flabby wings. Take your time here and really get them dry. I usually go through three or four paper towels.
- In a large mixing bowl, combine the baking powder, salt, pepper, and garlic powder. Whisk them together so the baking powder is evenly distributed. Drop the dried wings into the bowl and toss them with your hands until every piece is coated in the white powder mixture. It should look dusty and uneven — that’s perfect.
- Arrange the wings on the wire rack in a single layer, leaving a little space between each piece. Don’t crowd them or they’ll steam instead of crisp. If you have to use two baking sheets, do it.
- Bake for 20 minutes at 400°F. The wings will start to brown and the skin will begin crisping. After 20 minutes, flip each wing using tongs. This is a little tedious but worth it for even crispiness.
- Increase the oven temperature to 425°F (220°C) and bake for another 10-12 minutes. The higher heat at the end helps the skin get that last bit of crunch. The wings should be golden brown and the skin should look tight and crackly.
- While the wings bake, make the glaze. In a small saucepan over medium heat, melt the butter. Add the minced garlic and cook for about 30 seconds until fragrant — don’t let it burn. Pour in the honey, soy sauce, and rice vinegar. Stir everything together and let it simmer gently for 3-4 minutes, until it thickens slightly and coats the back of a spoon. Remove from heat.
- When the wings come out of the oven, transfer them to a large clean bowl. Pour about two-thirds of the glaze over the wings and toss vigorously until every wing is coated. The hot wings will absorb the glaze beautifully.
- Brush the remaining glaze over the wings for that extra-glossy finish. Sprinkle with sesame seeds and sliced green onions. Serve immediately while they’re still hot and the glaze is sticky.
A few things to watch for: If your wings are browning too quickly, your oven might run hot. Check them at the 15-minute mark the first time you make these. Also, don’t skip the glaze simmer — raw honey and soy sauce don’t have the same cling factor as a reduced glaze.
Cooking Tips & Techniques
I’ve made these wings maybe twenty times now, and I’ve learned a few things the hard way. Here’s what I wish someone had told me:
The baking powder trick is non-negotiable. It raises the skin’s pH and helps it brown faster while creating tiny bubbles that crisp up in the heat. But here’s the catch — you have to use aluminum-free baking powder. Regular baking powder can leave a metallic aftertaste. I learned this the hard way when I grabbed the wrong container and ruined a batch.
Don’t skip the drying step. I know it’s annoying and uses a lot of paper towels, but moisture is the enemy of crispiness. If you’re really in a hurry, you can let the wings sit uncovered in the fridge for an hour — that dries the skin out even more and gives you an even better crunch.
Timing matters with the glaze. Toss the wings in the glaze while they’re still hot from the oven. If you let them cool too much, the glaze won’t adhere as well and you’ll end up with a puddle at the bottom of the bowl instead of sticky wings.
Double-glaze for maximum stickiness. I like to toss the wings in the glaze, then brush on a second thin layer right before serving. It gives them that glossy, professional look that makes people think you spent way more effort than you actually did.
Watch the garlic. Burnt garlic turns bitter, and that bitterness will ruin your sweet glaze. Keep the heat at medium and stir constantly. If your garlic starts browning faster than you’d like, add a splash of water to cool things down.
One more thing — if you’re making these for a crowd, you can bake the wings ahead of time and toss them in the glaze right before serving. The wings will stay crispy for about 15-20 minutes after glazing, so time it right.
Variations & Adaptations
This recipe is flexible, and I’ve tried quite a few twists on it. Here are some of my favorites:
- Spicy Honey Garlic Wings: Add 1-2 teaspoons of sriracha or red pepper flakes to the glaze while it simmers. The heat cuts through the sweetness beautifully. I make this version when I’m craving something with a kick, and it pairs perfectly with a cold beer.
- Air Fryer Version: Cook the wings at 380°F (190°C) in your air fryer for 12-14 minutes, shaking the basket halfway through. Then increase to 400°F (200°C) for another 3-4 minutes for extra crispiness. The air fryer version is even faster and the skin gets incredibly crunchy.
- Gluten-Free Adaptation: Use tamari or coconut aminos instead of soy sauce. Everything else in the recipe is naturally gluten-free, so this swap is easy and doesn’t change the flavor much.
- Lemon Honey Garlic Wings: Add the zest of one lemon and a tablespoon of lemon juice to the glaze. The citrus brightens everything up and makes the wings feel lighter — perfect for summer barbecues.
- Smoked Paprika Rub: Add 1 teaspoon of smoked paprika to the dry coating mixture. It gives the wings a subtle smoky depth that plays really well with the sweet honey glaze.
I once tried a version with maple syrup instead of honey, and it was good — just different. The maple flavor is more distinct and less neutral than honey, so it changes the character of the dish. Worth trying if you’re curious, but the honey version is still my favorite.
Serving & Storage Suggestions
These wings are best served hot, straight from the oven, when the glaze is at its stickiest and the skin is at its crunchiest. I like to pile them on a big platter with extra sesame seeds and green onions on top, plus a few lemon wedges on the side for squeezing.
For drinks, these wings love an ice-cold beer — a crisp lager or a hoppy IPA works beautifully. If you’re going non-alcoholic, a sparkling water with lime cuts through the richness nicely. I’ve also served these alongside a fresh smashed cucumber salad with sesame chili oil for a complete meal that balances sweet, spicy, and refreshing all at once.
For storage, let any leftover wings cool completely, then transfer them to an airtight container. They’ll keep in the refrigerator for up to 3 days. The glaze will soften the skin over time, so they won’t be as crispy the next day — but they’ll still taste amazing.
To reheat, I recommend using an air fryer at 350°F (175°C) for 4-5 minutes. A regular oven at 375°F (190°C) for 8-10 minutes works too. Skip the microwave — it turns the skin rubbery and ruins the texture. If you have leftover glaze, brush a little on before reheating to refresh the flavor.
These wings actually freeze pretty well. Freeze them in a single layer on a baking sheet, then transfer to a freezer bag. They’ll keep for about 2 months. Reheat directly from frozen in a 400°F (200°C) oven for 12-15 minutes.
Nutritional Information & Benefits
Here’s the approximate nutritional breakdown for a serving of about 4-5 wings (based on the full recipe making about 4 servings):
| Nutrient | Amount Per Serving |
|---|---|
| Calories | 380 |
| Protein | 28g |
| Fat | 22g |
| Saturated Fat | 8g |
| Carbohydrates | 18g |
| Fiber | 0g |
| Sugar | 16g |
| Sodium | 720mg |
Chicken wings are a good source of protein and contain important nutrients like selenium, phosphorus, and B vitamins. The honey provides natural sweetness with some antioxidant properties, while garlic offers anti-inflammatory benefits. That said, these are definitely a treat — not an everyday health food. The glaze adds sugar and sodium, so enjoy them in balance with lighter meals.
If you’re watching your sodium intake, use low-sodium soy sauce and reduce the added salt in the dry rub. For a lower-sugar option, you can cut the honey back to ¼ cup and add a splash more vinegar for balance. The texture will still be great, just slightly less sweet.
Frequently Asked Questions
Can I use boneless chicken thighs or breasts instead of wings?
You can, but the cooking time and texture will change. Boneless thighs will need about 20-22 minutes at 400°F, and they won’t get as crispy as wings since there’s less skin. Chicken breasts cook faster and can dry out, so I’d stick with thighs if you’re swapping. The glaze works great on any cut of chicken though.
Why did my wings turn out soggy instead of crispy?
This usually happens for one of three reasons: the wings weren’t dried properly before coating, the baking powder was old or expired, or the wings were crowded on the baking sheet. Make sure you pat them very dry with paper towels, use fresh baking powder, and leave space between each wing on the rack. Moisture is the enemy here.
Can I make these wings in advance for a party?
Absolutely. Bake the wings and let them cool completely without glazing. Store them in the fridge for up to 24 hours. When you’re ready to serve, reheat them in a 400°F (200°C) oven for 8-10 minutes, then toss with the freshly made glaze. The wings will be almost as crispy as fresh-baked.
Is there a dairy-free option for the butter in the glaze?
Yes. Use a good-quality vegan butter or coconut oil instead of regular butter. I’ve tried both, and coconut oil gives the glaze a slight coconut flavor that actually works really well with the honey and soy sauce. Just make sure your vegan butter is unsalted so you can control the seasoning.
How do I get the glaze extra thick and sticky?
Simmer the glaze for an additional 2-3 minutes until it reduces further. You want it to coat the back of a spoon and leave a clean trail when you run your finger through it. Also, letting the wings rest for 2-3 minutes after glazing helps the glaze set up and get that perfect tacky texture.
Conclusion
These crispy honey garlic glazed chicken wings are proof that you don’t need a deep fryer or a complicated recipe to make restaurant-quality wings at home. They’re sticky, sweet, savory, and genuinely crunchy — and they come together in about half an hour with ingredients you probably already have.
What I love most about this recipe is how forgiving it is. You can tweak the glaze to your taste, swap in different proteins, or change up the spice level without breaking anything. It’s a recipe that grows with you and adapts to whatever you’re craving.
If you try these wings, I’d love to hear how they turned out. Drop a comment below and let me know if you added your own twist — I’m always looking for new ideas. And if you’re in the mood for more easy, crowd-pleasing dinners, check out these honey sriracha boneless chicken thighs or this cozy thermos tomato soup with crispy parmesan croutons for a complete comfort food lineup.
Now go make some wings. Your fingers will get sticky, and you won’t care one bit.
Pin This Recipe!
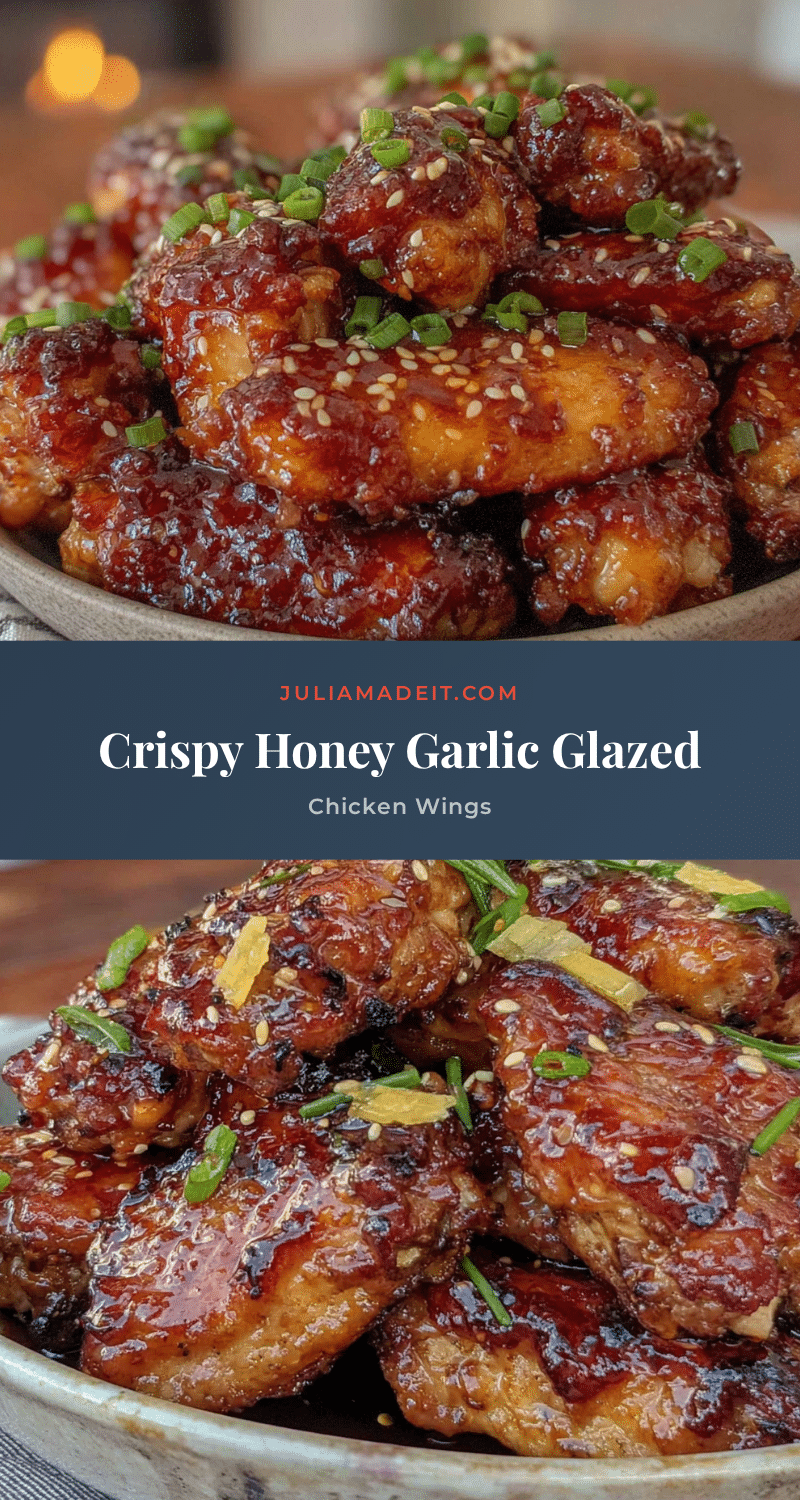
Crispy Honey Garlic Chicken Wings: Easy 30-Minute Recipe

These crispy honey garlic glazed chicken wings come together in just 30 minutes with a simple baking powder trick for shatteringly crisp skin without frying. Sticky, sweet, and savory, they’re perfect for game day or a quick weeknight dinner.
- Prep Time: 10 minutes
- Cook Time: 30 minutes
- Total Time: 40 minutes
- Yield: 4 servings 1x
- Category: Appetizer
- Cuisine: American
Ingredients
- 2 pounds (about 900g) chicken wings, separated into drumettes and flats
- 1½ teaspoons baking powder (aluminum-free)
- 1 teaspoon kosher salt
- ½ teaspoon freshly ground black pepper
- ½ teaspoon garlic powder
- ⅓ cup (about 110g) honey
- 3 tablespoons low-sodium soy sauce (or tamari for gluten-free)
- 2 tablespoons unsalted butter
- 4 cloves garlic, minced fresh
- 1 tablespoon rice vinegar (or apple cider vinegar)
- 1 tablespoon sesame seeds (for garnish, optional)
- 2 green onions, thinly sliced (for garnish)
Instructions
- Preheat your oven to 400°F (200°C). Place one rack in the upper third of the oven. Line a rimmed baking sheet with foil or parchment, then place a wire rack on top. Spray the rack lightly with cooking spray.
- Pat the chicken wings completely dry with paper towels (use 3-4 paper towels to ensure they are very dry).
- In a large mixing bowl, combine the baking powder, salt, pepper, and garlic powder. Whisk together. Add the dried wings and toss with your hands until every piece is evenly coated.
- Arrange the wings on the wire rack in a single layer, leaving space between each piece. Do not crowd them.
- Bake for 20 minutes at 400°F. After 20 minutes, flip each wing using tongs.
- Increase the oven temperature to 425°F (220°C) and bake for another 10-12 minutes, until the wings are golden brown and the skin is tight and crackly.
- While the wings bake, make the glaze: In a small saucepan over medium heat, melt the butter. Add the minced garlic and cook for about 30 seconds until fragrant. Pour in the honey, soy sauce, and rice vinegar. Stir and let simmer gently for 3-4 minutes until slightly thickened. Remove from heat.
- When the wings come out of the oven, transfer them to a large clean bowl. Pour about two-thirds of the glaze over the wings and toss vigorously until every wing is coated.
- Brush the remaining glaze over the wings for extra gloss. Sprinkle with sesame seeds and sliced green onions. Serve immediately while hot.
Notes
Use aluminum-free baking powder to avoid a metallic aftertaste. Pat wings very dry for maximum crispiness. Toss wings in glaze while still hot for best adherence. For extra stickiness, double-glaze by tossing then brushing on a second layer. If wings brown too quickly, check at 15 minutes. Leftovers can be stored in an airtight container in the fridge for up to 3 days; reheat in an air fryer at 350°F for 4-5 minutes or in a 375°F oven for 8-10 minutes. Freeze unglazed wings for up to 2 months.
Nutrition
- Serving Size: 4-5 wings
- Calories: 380
- Sugar: 16
- Sodium: 720
- Fat: 22
- Saturated Fat: 8
- Carbohydrates: 18
- Protein: 28
Keywords: crispy honey garlic chicken wings, baked chicken wings, 30-minute recipe, game day appetizer, sticky wings, easy chicken wings