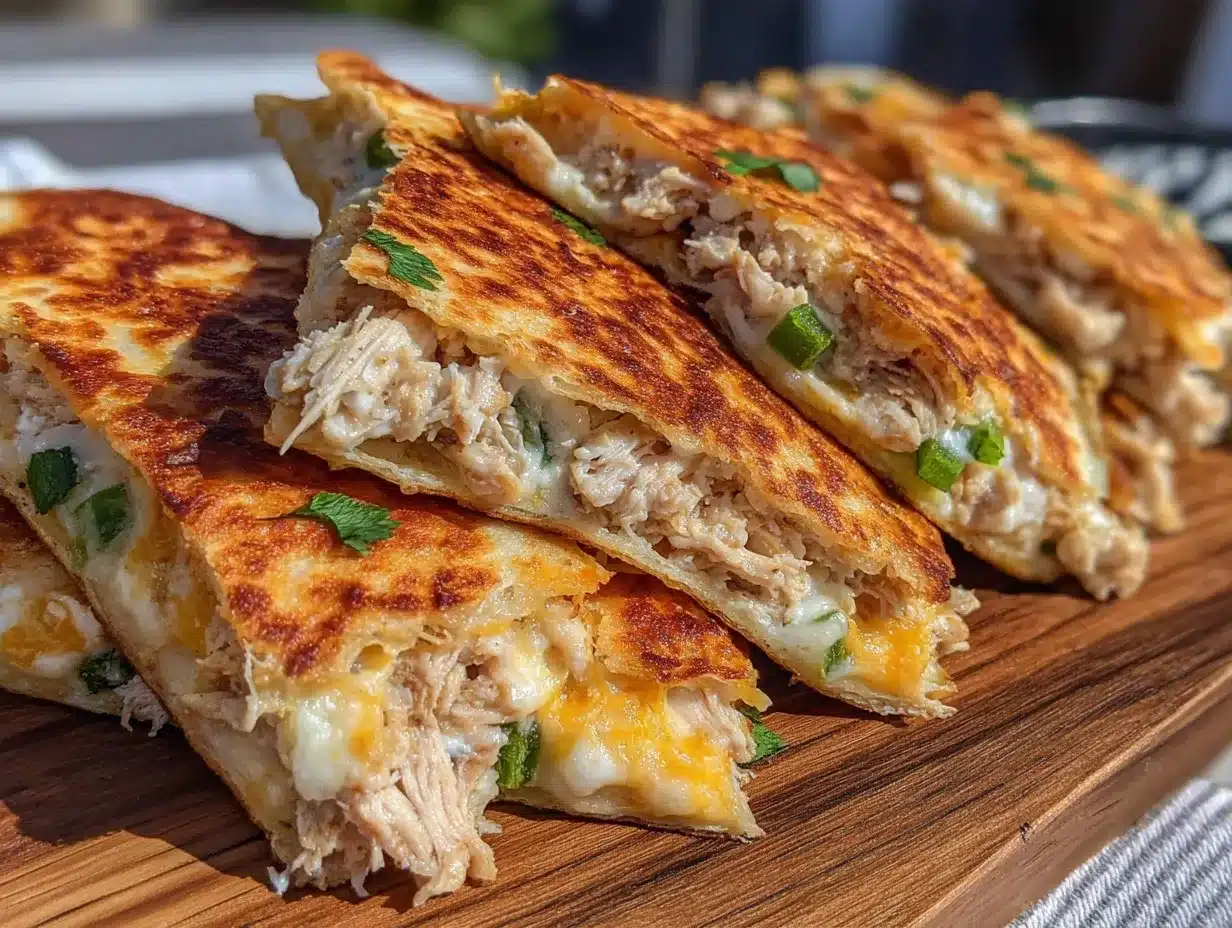
“You really have to try these,” my neighbor said over the fence one afternoon, holding up a lunchbox with neatly stacked, golden triangles peeking out. I was skeptical. Chicken quesadillas are great, sure, but crispy sheet pan chicken quesadilla triangles for lunchbox? That sounded like a lot of work for what should be a quick, grab-and-go meal. Yet, the next week, battling a pile of leftover rotisserie chicken and a fridge full of odds and ends, I gave it a shot.
Honestly, it surprised me how this sheet pan method turned what could’ve been a messy assembly into a simple, hands-off baking session. The tortillas crisped up perfectly while the melty cheese and seasoned chicken made every bite a comforting, flavorful surprise. I ended up making them three times that week—lunch for me, a snack for my kid, and even a last-minute appetizer for a friend dropping by.
It’s funny how such an easy recipe became a quiet hero in my kitchen. The way the triangles hold together so well means no dripping cheese or soggy bites in the lunchbox. Plus, the crispy edges add just enough crunch to keep things interesting without drying out the filling. It’s the kind of recipe that doesn’t just fill you up but feels like a little treat you can trust to deliver consistently.
For anyone juggling busy days and picky eaters, these crispy sheet pan chicken quesadilla triangles make lunchbox packing less of a chore and more of a pleasure. That’s why they’ve stuck around in my rotation—simple, reliable, and honestly, pretty addictive.
Why You’ll Love This Recipe
From my experience testing this recipe multiple times, it’s clear that these crispy sheet pan chicken quesadilla triangles are a lunchbox game-changer. Here’s why I keep coming back to them:
- Quick & Easy: Ready in about 30 minutes, which means you can whip them up on a busy morning or prep ahead for the week.
- Simple Ingredients: No need for fancy or hard-to-find items. Most of these are pantry staples or leftovers you already have around.
- Perfect for Lunchboxes: They hold up well without getting soggy, making them ideal for school, work, or on-the-go meals.
- Crowd-Pleaser: Kids and adults alike ask for seconds. The crispy exterior with gooey cheese inside is a winning combo.
- Unbelievably Delicious: The seasoning on the chicken adds a subtle smoky kick, and baking on a sheet pan means less mess and even cooking.
What sets this recipe apart is the hands-off baking technique. Instead of pan-frying each quesadilla or wrestling with a skillet, you bake all the triangles at once on a sheet pan for that golden, crispy finish. The chicken is seasoned just right with a mix of spices that wakes up the flavor without overpowering the cheese and tortilla. Plus, I’ve found that lightly brushing the tortillas with oil before baking gives them that perfect crunch without feeling greasy.
Honestly, this recipe hits that sweet spot between comfort food and practicality. It’s a great way to sneak in some protein, and it’s flexible enough to customize with different cheeses or add-ins. If you’re looking for a fuss-free, delicious lunchbox idea, these triangles will probably become your new go-to too.
What Ingredients You Will Need
This recipe uses simple, wholesome ingredients to deliver bold flavor and satisfying texture without any fuss. Most are pantry staples, with a few fresh touches that bring it all together beautifully.
- For the Chicken Filling:
- Cooked chicken, shredded or diced (leftover rotisserie works perfectly)
- Cheddar cheese, shredded (sharp cheddar adds great flavor)
- Monterey Jack cheese, shredded (melts beautifully)
- Minced garlic (fresh gives the best punch)
- Ground cumin (for that earthy, smoky note)
- Chili powder (adds mild heat and warmth)
- Smoked paprika (optional, for extra depth)
- Salt and black pepper to taste
- Fresh cilantro, chopped (optional, brightens the filling)
- Fresh lime juice (a squeeze adds a subtle zing)
- For the Quesadilla Assembly:
- Flour tortillas, medium size (choose sturdy ones that hold up well when crisped)
- Olive oil or melted butter (for brushing, helps crisp the tortillas)
For the chicken, I recommend using tender, juicy rotisserie chicken that you can shred easily; it adds both flavor and convenience. If you want to skip fresh garlic, a pinch of garlic powder works, but fresh always tastes better here. The cheese combo of cheddar and Monterey Jack creates a melty, flavorful filling that’s not too sharp or bland.
If you’re making these for a gluten-free lunchbox, swap the flour tortillas for gluten-free ones—just make sure they’re sturdy enough to crisp up nicely. For a dairy-free option, try dairy-free shredded cheese and brush with a neutral oil instead of butter.
Equipment Needed
- Large rimmed baking sheet (a half sheet pan works great for even crisping)
- Parchment paper or a non-stick silicone baking mat (prevents sticking and helps cleanup)
- Mixing bowl (for tossing the chicken with spices and cheese)
- Measuring spoons and cups (for precise seasoning)
- Pastry brush or small spoon (to brush tortillas with oil or butter)
- Sharp knife and cutting board (for chopping cilantro and slicing quesadillas)
If you don’t have a pastry brush, a clean spoon or paper towel dabbed in oil works fine for brushing the tortillas. I’ve tried both parchment and silicone baking mats here—while silicone mats are reusable and eco-friendly, parchment paper is super cheap and just as effective.
Investing in a sturdy rimmed baking sheet really makes a difference; thin pans tend to warp under heat and can cause uneven cooking. I personally like using my half sheet pan because it fits nicely in most ovens and gives enough space for crisping without overcrowding.
Preparation Method
- Preheat your oven to 400°F (200°C). Line a large rimmed baking sheet with parchment paper or a silicone baking mat for easy cleanup.
- Prepare the chicken filling: In a mixing bowl, combine 2 cups (about 300g) of shredded cooked chicken with 1 teaspoon ground cumin, 1 teaspoon chili powder, ½ teaspoon smoked paprika (if using), 1 clove minced garlic, salt, and pepper to taste. Add a squeeze of fresh lime juice and 2 tablespoons chopped cilantro if you like a fresh touch. Toss well to coat everything evenly.
- Add the cheeses: Mix in 1 cup (100g) shredded sharp cheddar and 1 cup (100g) shredded Monterey Jack cheese. The cheese will help bind the filling and add that gooey, melty goodness.
- Assemble the quesadillas: Lay out 6 medium flour tortillas on a flat surface. Spread the chicken-cheese mixture evenly over half of each tortilla, leaving a small border at the edge.
- Fold each tortilla in half, pressing gently to seal. Use a sharp knife to cut each quesadilla into 3 equal triangles. This makes perfect, bite-sized pieces for lunchboxes or snacks.
- Brush the tops and bottoms of each triangle lightly with olive oil or melted butter. This step is key to getting that irresistible crispy texture once baked.
- Arrange the quesadilla triangles on the prepared baking sheet in a single layer, making sure they don’t overlap. You want air circulating so each piece crisps up beautifully.
- Bake for 12–15 minutes, flipping halfway through. Watch for a golden-brown color and bubbling cheese edges. If your oven runs hot, check at 10 minutes to prevent burning.
- Remove from oven and let cool for a few minutes before packing or serving. This resting time helps the cheese set slightly, so your triangles hold together better.
Pro tip: If you’re prepping these ahead, bake the quesadillas but wait to cut them until just before packing. It keeps the edges crispier longer. Also, flipping halfway through baking ensures even crispness on both sides—don’t skip this or you might get soggy spots!
Cooking Tips & Techniques
One trick that really makes these quesadilla triangles stand out is brushing the tortillas with oil or melted butter before baking. It sounds simple, but it’s a game changer for texture—giving you that satisfying crunch without frying.
Another thing I’ve learned is to not overload the quesadillas with filling. Too much stuffing makes them difficult to fold and can lead to messy leaks. A modest layer of chicken and cheese is plenty.
When it comes to seasoning the chicken, balancing the spices is key. Too much chili powder and smoked paprika can overpower the cheese and tortilla, so I stick to moderate amounts. Fresh lime juice brightens the flavor and helps cut through the richness.
I’ve also found that baking on a single layer with space between the triangles is crucial. Overcrowding the pan traps steam, which ruins the crispiness. If you need to make a double batch, use two pans or bake in batches.
Finally, flipping the quesadillas halfway through baking is essential for even browning. I remember one batch I forgot to flip and ended up with one side perfectly golden and the other barely crisped. Not ideal for lunchboxes!
Variations & Adaptations
- Vegetarian Version: Swap chicken for black beans or roasted vegetables like bell peppers and zucchini. Add a pinch of cumin and chili for that familiar flavor vibe.
- Spicy Twist: Mix diced jalapeños or a dash of hot sauce into the filling. This adds a nice kick without overpowering the cheesy goodness.
- Cheese Swap: Use pepper jack for a spicier melt or mozzarella for a milder, gooey texture. You can also try a Mexican blend cheese for authenticity.
- Gluten-Free Option: Use your favorite gluten-free tortillas. Just make sure they’re sturdy enough to crisp up without breaking apart.
- Sheet Pan Upgrade: For extra flavor, sprinkle a little taco seasoning or smoked paprika on top of the triangles before baking.
Personally, I’ve tried adding corn kernels and diced tomatoes to the filling once, which gave a fresh, juicy surprise in every bite. It’s a great way to sneak in some veggies without changing the texture too much.
Serving & Storage Suggestions
These crispy sheet pan chicken quesadilla triangles are best served warm or at room temperature. They hold up nicely in a lunchbox, but if you want to serve them fresh, a quick 2-3 minute reheat in a skillet or toaster oven brings back that fresh-from-the-oven crisp.
Pair them with a side of salsa, guacamole, or sour cream for dipping. A simple Mexican street corn esquites cup (recipe here) makes an excellent accompaniment if you want to round out your lunch.
For storage, keep leftover quesadilla triangles in an airtight container in the fridge for up to 3 days. To freeze, arrange them in a single layer on a baking sheet until solid, then transfer to a freezer bag. Reheat from frozen in a toaster oven or conventional oven for best texture.
Flavors actually mellow and blend nicely after sitting overnight, making these perfect for meal prep. Just remember to avoid the microwave for reheating if you want to keep that crisp!
Nutritional Information & Benefits
Each crispy sheet pan chicken quesadilla triangle offers a balanced mix of protein, fat, and carbs, making it a satisfying and energy-boosting meal option. Here’s a rough estimate per 3-triangle serving:
| Nutrient | Amount |
|---|---|
| Calories | 320 kcal |
| Protein | 22 g |
| Fat | 16 g |
| Carbohydrates | 22 g |
| Fiber | 2 g |
Chicken is a great source of lean protein, which helps keep hunger at bay and supports muscle health. The cheeses contribute calcium and vitamin D, important for bone strength. Using fresh garlic and spices adds antioxidants without added salt or sugar.
This recipe can easily be adjusted for dietary needs: swap in gluten-free tortillas for gluten intolerance or dairy-free cheese for lactose sensitivity. Just keep an eye on the ingredient labels for allergens.
Conclusion
If you want a lunchbox staple that’s both tasty and fuss-free, these crispy sheet pan chicken quesadilla triangles are a solid choice. The way they come together quickly, with minimal hands-on time, means you get more moments back in your day without sacrificing flavor or texture.
Feel free to tweak the spices or cheeses to suit your taste—this recipe is forgiving and flexible. I love how it transforms leftover chicken into something unexpectedly satisfying and portable.
Next time you’re packing lunches or need a quick snack, these triangles might just become your new secret weapon. And hey, if you ever want to switch up the protein game, you might enjoy the ease of Mediterranean chicken sheet pan recipes—they offer a completely different flavor profile but just as much simplicity.
Give these a try and let me know how your lunchbox crowd reacts!
FAQs About Crispy Sheet Pan Chicken Quesadilla Triangles
Can I use raw chicken for this recipe?
This recipe calls for cooked chicken to keep things quick and easy. Using raw chicken would require additional cooking time and could dry out the quesadillas. Rotisserie chicken or leftovers work perfectly.
How do I keep quesadilla triangles from getting soggy in the lunchbox?
Make sure to let them cool completely before packing and use a paper towel in the container to absorb moisture. Reheating in a toaster oven or skillet helps bring back crispiness.
Can I make these ahead and freeze them?
Yes! Freeze the baked triangles in a single layer until firm, then store in a freezer bag. Reheat straight from frozen in the oven or toaster oven for best texture.
What’s the best cheese for melting in quesadillas?
Cheddar and Monterey Jack are classic choices for a great melt and flavor balance. Pepper Jack adds some spice, and mozzarella works if you prefer a mild, stretchy cheese.
How can I make this recipe vegetarian?
Swap the chicken for black beans, sautéed veggies, or even mushrooms. Season similarly to keep the bold flavor, and add extra cheese or avocado for richness.
Pin This Recipe!
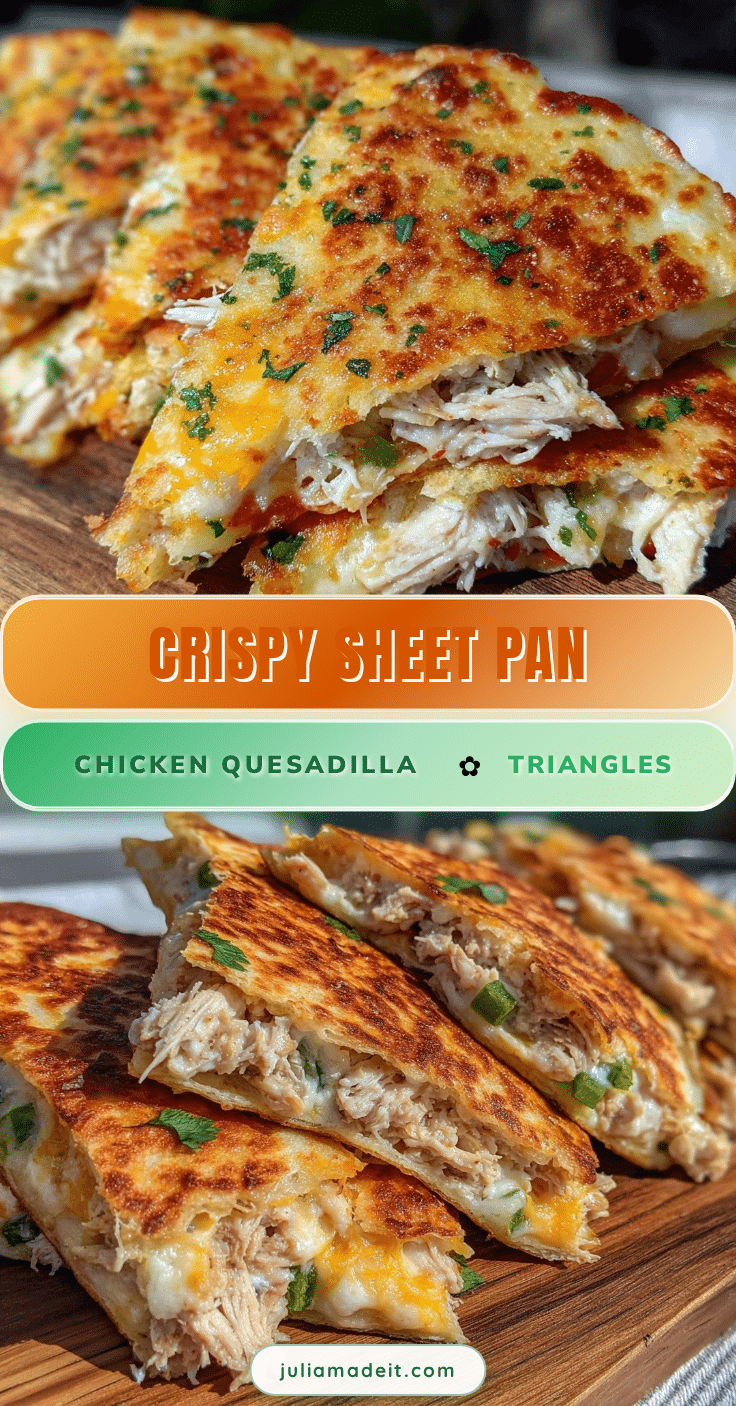
Crispy Sheet Pan Chicken Quesadilla Triangles Easy Lunchbox Recipe

These crispy sheet pan chicken quesadilla triangles are a quick, hands-off baked snack or lunchbox meal featuring seasoned chicken, melty cheese, and perfectly crisped tortillas.
- Prep Time: 10 minutes
- Cook Time: 15 minutes
- Total Time: 25 minutes
- Yield: 6 servings (18 triangles) 1x
- Category: Main Course
- Cuisine: Mexican
Ingredients
- 2 cups (about 10 oz) cooked chicken, shredded or diced (leftover rotisserie works perfectly)
- 1 cup (4 oz) shredded sharp cheddar cheese
- 1 cup (4 oz) shredded Monterey Jack cheese
- 1 clove minced garlic (or garlic powder as substitute)
- 1 teaspoon ground cumin
- 1 teaspoon chili powder
- ½ teaspoon smoked paprika (optional)
- Salt and black pepper to taste
- 2 tablespoons chopped fresh cilantro (optional)
- 1 teaspoon fresh lime juice (about a squeeze)
- 6 medium flour tortillas (sturdy, medium size)
- Olive oil or melted butter (for brushing tortillas)
Instructions
- Preheat your oven to 400°F (200°C). Line a large rimmed baking sheet with parchment paper or a silicone baking mat for easy cleanup.
- In a mixing bowl, combine shredded cooked chicken with ground cumin, chili powder, smoked paprika (if using), minced garlic, salt, and pepper. Add fresh lime juice and chopped cilantro if desired. Toss well to coat evenly.
- Mix in shredded sharp cheddar and Monterey Jack cheeses until well combined.
- Lay out 6 medium flour tortillas on a flat surface. Spread the chicken-cheese mixture evenly over half of each tortilla, leaving a small border at the edge.
- Fold each tortilla in half, pressing gently to seal. Use a sharp knife to cut each quesadilla into 3 equal triangles.
- Brush the tops and bottoms of each triangle lightly with olive oil or melted butter.
- Arrange the quesadilla triangles on the prepared baking sheet in a single layer without overlapping.
- Bake for 12–15 minutes, flipping halfway through baking. Watch for golden-brown color and bubbling cheese edges. Check at 10 minutes if your oven runs hot.
- Remove from oven and let cool for a few minutes before packing or serving.
Notes
Brush tortillas lightly with oil or melted butter before baking for best crispiness. Flip quesadillas halfway through baking to ensure even browning. Let cool before packing to avoid sogginess. For gluten-free, use sturdy gluten-free tortillas. For dairy-free, use dairy-free cheese and neutral oil instead of butter. Avoid overfilling quesadillas to prevent leaks.
Nutrition
- Serving Size: 3 quesadilla triangl
- Calories: 320
- Fat: 16
- Carbohydrates: 22
- Fiber: 2
- Protein: 22
Keywords: chicken quesadilla, sheet pan recipe, lunchbox recipe, crispy quesadilla, easy chicken recipe, baked quesadilla, quick lunch, kid-friendly