A friend asked me why I couldn’t just skip the nutmeg and use extra cinnamon instead. I was in the middle of explaining why baked pumpkin donuts absolutely needed that specific spice blend – the nutmeg, the cloves, the ginger – when I stopped mid-sentence. I mean, who was I to gatekeep pumpkin spice? So I handed her the whisk and said, “Go for it.” She dumped in a heaping tablespoon of cinnamon and skipped the nutmeg entirely. Honestly, I was bracing for a flat, one-note donut.
But then they came out of the oven. The smell was different – warmer, somehow, and almost honey-like. That first bite had this unexpected depth, a cozy roundness that made me realize I’d been following the rules for way too long. My friend just grinned. She didn’t say “I told you so,” but she didn’t have to. That moment changed how I think about this recipe. It’s not about rigid spice ratios. It’s about what feels right on a cold Tuesday night when you just want something that smells like comfort.
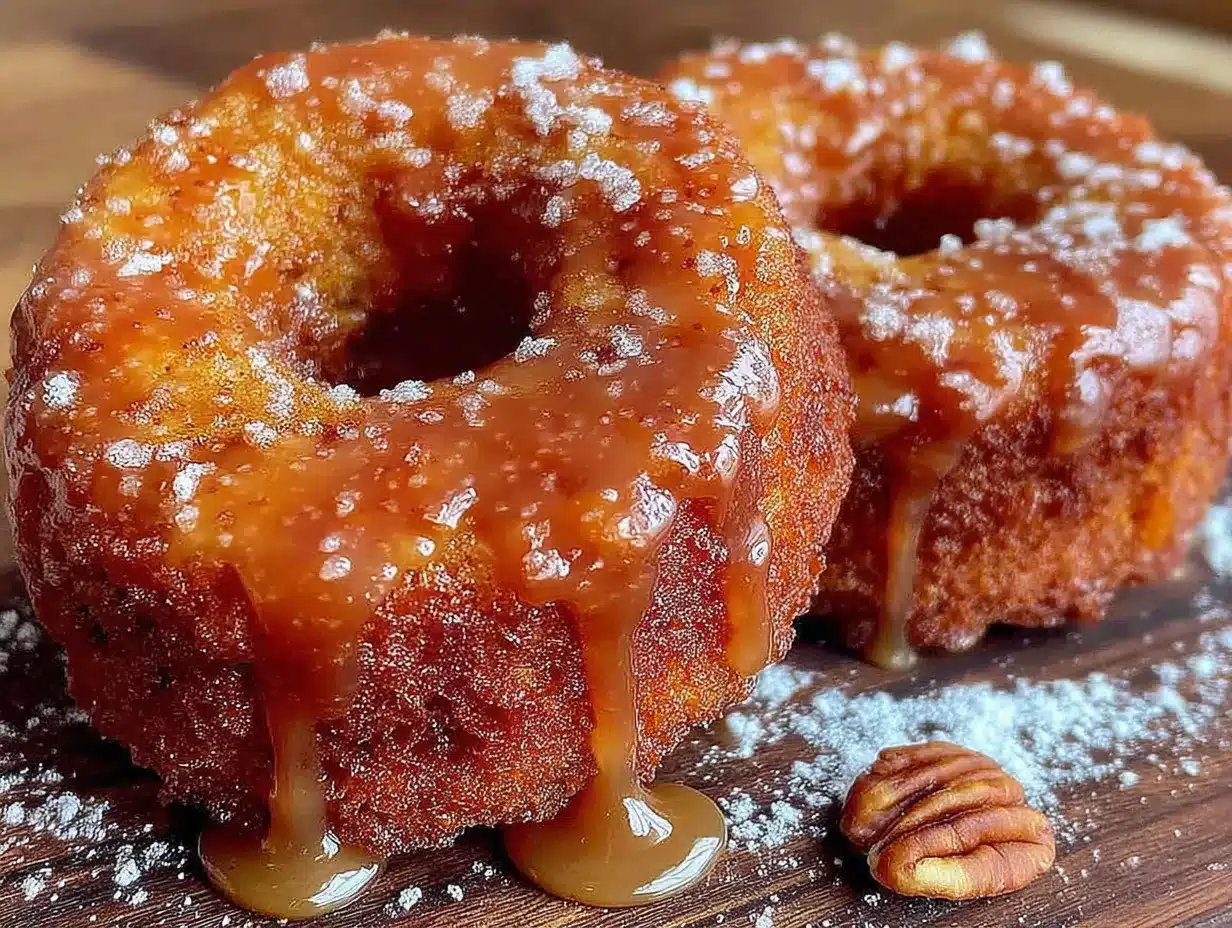
These baked pumpkin donuts with maple glaze have become my go-to for those slow evenings when the world feels a little too loud. They’re soft, cakey, and that maple glaze – let me tell you – it seeps into every little crevice. Maybe you’ve been there, standing in your kitchen at 8 p.m., wanting something sweet but not wanting to pull out the mixer and a million bowls. This recipe is for that exact moment.
Why You’ll Love This Recipe
I’ve tested this recipe about seven times to get the texture just right. Not too dense, not too fluffy – that perfect middle ground where a baked donut actually tastes indulgent. Here’s why this one stands out from the dozens of pumpkin donut recipes out there.
- Quick & Easy: From start to finish, you’re looking at about 30 minutes. No yeast, no rising time, no deep frying. Just mix, bake, glaze, and eat.
- Simple Ingredients: You probably have most of this in your pantry right now. Canned pumpkin, flour, eggs, butter, and basic spices. The maple glaze uses just three ingredients.
- Perfect for Cozy Evenings: These are made for cold weather, rainy afternoons, or any time you need a little edible hug. They pair perfectly with coffee or tea.
- Crowd-Pleaser: I’ve brought these to three different gatherings and watched people go back for seconds every single time. Kids love them, adults love them, even my neighbor who claims she “doesn’t like pumpkin” asked for the recipe.
- Unbelievably Delicious: The secret is browning the butter first. It adds this nutty richness that makes the pumpkin flavor deeper and more complex. You won’t skip this step once you try it.
What makes these different from every other baked pumpkin donut? It’s the texture. Most baked donuts lean toward muffin-like density, but this method gives you a tender crumb that still has structure. The browned butter is the game-changer here. It adds a warmth that plain butter just can’t match. And that maple glaze? It’s not too sweet, not too thin – it sets perfectly into a glossy finish that cracks slightly when you bite into it.
This recipe is comfort food reimagined. It’s faster than making a pie, less fussy than cookies, and somehow more satisfying than both. Perfect for impressing guests without stress, or turning a simple Tuesday into something memorable.
What Ingredients You Will Need
This recipe uses simple, wholesome ingredients to deliver bold flavor and satisfying texture without the fuss. Most of these are pantry staples, especially during fall. Let me walk you through each one and why it matters.
- All-purpose flour (1 ¾ cups / 220g) – Provides structure. Spoon and level it into your measuring cup – don’t scoop directly, or you’ll end up with too much flour and dry donuts.
- Baking powder (1 ½ teaspoons) – The main leavening agent. Make sure it’s fresh. If it doesn’t fizz when dropped in water, toss it and buy new.
- Baking soda (½ teaspoon) – Helps with browning and works with the acidity in the pumpkin.
- Ground cinnamon (2 teaspoons) – The star spice here. I prefer Saigon cinnamon for its stronger, sweeter flavor.
- Ground ginger (½ teaspoon) – Adds a little warmth without being overpowering.
- Ground cloves (¼ teaspoon) – Just a pinch. Cloves are strong, so go easy.
- Salt (½ teaspoon) – Balances the sweetness and enhances all the other flavors.
- Unsalted butter (½ cup / 113g) – You’ll brown this first. I recommend Kerrygold for its higher fat content and richer flavor.
- Granulated sugar (½ cup / 100g) – Adds sweetness and helps create a tender crumb.
- Light brown sugar (¼ cup / 50g, packed) – Adds moisture and a subtle molasses flavor that pairs beautifully with pumpkin.
- Large eggs (2, room temperature) – Room temperature eggs incorporate more evenly into the batter. Set them out 30 minutes before starting.
- Pure pumpkin purée (1 cup / 240g) – Not pumpkin pie filling! Make sure you grab 100% pumpkin. I use Libby’s for consistent results.
- Whole milk (¼ cup / 60ml) – Adds moisture. You can substitute buttermilk for extra tenderness.
- Vanilla extract (1 teaspoon) – Enhances the warm spices. Use pure vanilla extract, not imitation.
For the Maple Glaze:
- Powdered sugar (1 cup / 120g) – Sift it to avoid lumps in your glaze.
- Pure maple syrup (3 tablespoons) – Not pancake syrup! Real maple syrup makes a huge difference here. Grade A dark amber is my favorite for its robust flavor.
- Whole milk (1-2 tablespoons) – Adjust the amount to reach your desired consistency.
Equipment Needed
You don’t need much for this recipe, which is part of why I love it. Here’s what you’ll want handy.
- Donut pan (standard 6-cavity) – I’ve tried three different brands, and Wilton has given me the most consistent results. The non-stick coating works well, but I still grease it lightly.
- Mixing bowls (medium and large) – One for dry ingredients, one for wet.
- Whisk – For combining dry ingredients and smoothing the batter.
- Rubber spatula – For folding the batter and scraping every last bit of glaze.
- Small saucepan – For browning the butter. A light-colored pan helps you see the color change.
- Piping bag or zip-top bag – For filling the donut cavities cleanly. If you don’t have a piping bag, a zip-top bag with the corner snipped off works perfectly.
- Cooling rack – Essential for letting the glaze set without getting soggy on the bottom.
- Measuring cups and spoons – For accuracy. Baking is a science, even if this recipe is forgiving.
If you don’t have a donut pan, you can make these as muffins. Just adjust the baking time to 15-18 minutes. I’ve done it before when my donut pan was in the dishwasher, and they turned out great.
Preparation Method
Let me walk you through this step by step. I’ve made these donuts more times than I can count, so I’ll share the little tricks I’ve picked up along the way.
- Preheat your oven to 350°F (175°C). Position the rack in the center. Lightly grease your donut pan with butter or non-stick spray. I use a pastry brush to get into all the crevices.
- Brown the butter. Place the ½ cup of butter in a small saucepan over medium heat. Swirl the pan occasionally as it melts. It will start to foam, then the foam will subside, and you’ll see golden brown specks forming at the bottom. This takes about 5-7 minutes. The moment it smells nutty and looks amber, remove it from the heat. Pour it into a heatproof bowl to stop the cooking process. Let it cool for 10 minutes.
- Whisk the dry ingredients. In a large bowl, combine the flour, baking powder, baking soda, cinnamon, ginger, cloves, and salt. Whisk thoroughly to distribute the leavening agents and spices evenly.
- Mix the wet ingredients. In a separate medium bowl, whisk together the browned butter, granulated sugar, and brown sugar until well combined. It will look a bit grainy – that’s normal. Add the eggs one at a time, whisking well after each. Stir in the pumpkin purée, milk, and vanilla extract. The mixture should be smooth and a beautiful deep orange.
- Combine wet and dry. Pour the wet ingredients into the dry ingredients. Use a rubber spatula to fold them together gently. Stop as soon as you no longer see streaks of flour. Overmixing will make the donuts tough. A few small lumps are perfectly fine.
- Fill the donut pan. Transfer the batter to a piping bag or zip-top bag. Snip off the tip and pipe the batter into each donut cavity, filling them about ¾ full. Don’t overfill, or the holes will close up during baking. If you don’t have a bag, you can use a spoon, but piping is much cleaner.
- Bake. Place the pan in the preheated oven and bake for 10-12 minutes. The donuts are done when they spring back lightly when touched and a toothpick inserted into the thickest part comes out clean. My oven runs hot, so I check at 10 minutes. Yours might need the full 12.
- Cool in the pan. Let the donuts rest in the pan for 5 minutes. This allows them to set and makes them easier to remove. Then transfer them to a wire cooling rack to cool completely. Don’t skip this – glazing warm donuts will make the glaze run right off.
- Make the maple glaze. While the donuts cool, sift the powdered sugar into a medium bowl. Add the maple syrup and 1 tablespoon of milk. Whisk until smooth. If it’s too thick, add more milk a teaspoon at a time. If it’s too thin, add more powdered sugar. You want a consistency that slowly drips off the whisk.
- Glaze the donuts. Once the donuts are completely cool, dip the top of each donut into the glaze. Let the excess drip off, then place them back on the cooling rack. The glaze will set in about 15-20 minutes. For an extra pretty finish, drizzle a little more glaze over the top with a spoon.
Cooking Tips & Techniques
I’ve messed up this recipe in almost every way possible, so let me save you the trouble. Here are the things I wish someone had told me.
Don’t skip browning the butter. I know it’s an extra step, but it’s the difference between a good donut and a great one. The nutty flavor it adds is irreplaceable. Just watch it carefully – burnt butter tastes bitter and will ruin the batch. If you see black specks, start over.
Room temperature ingredients matter. Cold eggs and cold milk will seize the browned butter and create a lumpy batter. I learned this the hard way. Set everything out 30 minutes before you start. If you forget, place the eggs in a bowl of warm water for 5 minutes.
Don’t overfill the cavities. I promise, ¾ full is enough. The donuts will rise and create that perfect domed top. Overfilling makes them puff up and close the hole, and then you just have weirdly shaped muffins. Still tasty, but not donuts.
Let them cool completely. I know it’s hard to wait. The smell is incredible, and you want to eat one immediately. But glazing warm donuts is a disaster. The glaze slides right off and pools at the bottom. Trust me, I’ve done it. Set a timer if you have to.
Bake in batches if needed. Most standard donut pans make 6 donuts. This recipe yields about 12. If you only have one pan, let it cool completely between batches. Rinsing it under cold water and drying it helps speed things up.
For consistent results, weigh your flour. I know not everyone has a kitchen scale, but it’s the most accurate way to measure. If you’re using measuring cups, spoon the flour into the cup and level it off with a knife. Scooping directly from the bag packs the flour and gives you too much.
Variations & Adaptations
This recipe is wonderfully flexible. Here are some ways I’ve adapted it over the years.
Gluten-Free Version: Substitute the all-purpose flour with a 1:1 gluten-free baking blend. I’ve used King Arthur Measure for Measure with great success. Add an extra tablespoon of milk, as gluten-free flours tend to absorb more liquid. The texture will be slightly more delicate, but still delicious.
Dairy-Free Version: Use vegan butter for browning – Miyoko’s works well. Replace the milk with oat milk or almond milk. The browned butter flavor won’t be as rich, but it’s still good. For the glaze, use a dairy-free milk and ensure your powdered sugar is vegan.
Spice It Up: Add ¼ teaspoon of cardamom for a more complex flavor profile. Or swap the ginger and cloves for pumpkin pie spice if that’s what you have. My friend’s “all cinnamon” version is still a favorite in my house.
Chocolate Drizzle: Melt ½ cup of semi-sweet chocolate chips with 1 teaspoon of coconut oil. Drizzle it over the maple glaze for a beautiful marbled effect. I did this for a Halloween party, and they disappeared in minutes.
Add Mix-Ins: Fold ½ cup of chopped pecans or walnuts into the batter before baking. The crunch adds a nice contrast to the soft crumb. Toasted pepitas on top of the glaze are also fantastic.
Serving & Storage Suggestions
These donuts are best enjoyed the same day, but they store surprisingly well. Here’s what I recommend.
Serving: Serve at room temperature with a hot cup of coffee or chai tea. The maple glaze pairs beautifully with a latte. For a special treat, warm them in the microwave for 10 seconds before serving – it softens the crumb and makes the glaze slightly gooey.
Complementary Dishes: These donuts are perfect alongside a bowl of creamy pumpkin soup for a cozy fall dinner. Or serve them as part of a brunch spread with fluffy pumpkin pancakes and crispy bacon. The sweet and savory combo is unbeatable.
Storage: Store unglazed donuts in an airtight container at room temperature for up to 2 days. If glazed, place them in a single layer in an airtight container with parchment paper between layers. The glaze can get sticky, so handle gently.
Freezing: Freeze unglazed donuts for up to 3 months. Wrap each donut individually in plastic wrap, then place them in a freezer bag. Thaw at room temperature for about 30 minutes, then glaze fresh. I often double the batch and keep some in the freezer for unexpected guests.
Reheating: For the best texture, reheat in a 300°F oven for 5 minutes. The microwave works in a pinch (15 seconds), but the donuts will be softer. The glaze might melt slightly, but it still tastes great.
Flavor Development: These donuts actually taste better the next day. The spices meld together, and the crumb becomes more tender. I sometimes make them the night before a gathering and glaze them in the morning.
Nutritional Information & Benefits
While these are definitely a treat, there are a few nutritional bright spots worth mentioning.
| Nutrient | Per Donut (approx.) |
|---|---|
| Calories | 285 |
| Total Fat | 12g |
| Saturated Fat | 7g |
| Carbohydrates | 41g |
| Sugar | 26g |
| Protein | 4g |
| Fiber | 2g |
| Vitamin A | 85% DV |
Health Benefits: Pumpkin is packed with vitamin A, which supports eye health and immune function. It’s also a good source of fiber, which helps with digestion. The cinnamon in this recipe has anti-inflammatory properties. I like to think of these donuts as a slightly healthier way to satisfy a sweet craving – they have real food in them, not just processed sugar and preservatives.
Dietary Considerations: This recipe contains gluten, dairy, and eggs. For a gluten-free or dairy-free version, see the variations section above. It is nut-free as written, though some variations include nuts. The donuts are relatively low in sodium, with about 200mg per serving.
Conclusion
These baked pumpkin donuts with maple glaze have become a staple in my kitchen for a reason. They’re quick, forgiving, and somehow manage to feel both special and everyday at the same time. That first bite – the soft crumb, the warm spices, the sweet maple glaze – it’s the kind of moment that makes you slow down and actually taste what you’re eating.
I love that this recipe came from being wrong. It reminds me that cooking isn’t about following rules perfectly. It’s about listening to the people around you and being open to a different approach. My friend’s cinnamon-heavy version is now my go-to, and I make it every time I need a little comfort.
I’d love to hear how these turn out for you. Did you try a variation? Did you discover a new favorite spice combination? Drop a comment below and let me know. And if you make these for someone you love, tag me in your photos – there’s nothing better than seeing these donuts bring a little warmth to someone else’s kitchen.
Happy baking, friends. Go make something cozy.
Frequently Asked Questions
Can I use pumpkin pie filling instead of pumpkin purée?
No, please don’t. Pumpkin pie filling is pre-sweetened and spiced, which will throw off the sugar and spice balance in this recipe. Stick with 100% pure pumpkin purée for the best results. If you accidentally buy pie filling, you can still use it, but reduce the sugar by half and skip the added spices.
Why did my donuts stick to the pan?
This usually happens when the pan isn’t greased enough. I recommend using a pastry brush to apply butter or non-stick spray into every crevice, including the center hole. If you’re still having trouble, try a silicone donut pan – they release much more easily. Let the donuts cool in the pan for a full 5 minutes before attempting to remove them.
Can I make the batter ahead of time?
I don’t recommend it. The baking powder and baking soda start reacting as soon as they hit the wet ingredients, so the batter loses its lift over time. If you need to prep ahead, make the dry mix and wet mix separately, then combine them right before baking. You can also bake the donuts fully and freeze them unglazed.
My glaze is too runny. How do I fix it?
Add more sifted powdered sugar, one tablespoon at a time, until it reaches the right consistency. The glaze should slowly drip off your whisk but not run like water. If it’s too thick, add milk a teaspoon at a time. Remember that the glaze will thicken slightly as it sits, so err on the side of a little thinner rather than thicker.
How do I get that perfect domed top on my donuts?
Make sure your baking powder and baking soda are fresh. Old leavening agents won’t give you enough rise. Also, fill the cavities exactly ¾ full – not more, not less. And don’t open the oven door during the first 8 minutes of baking. The sudden temperature drop can cause the donuts to collapse.
Pin This Recipe!
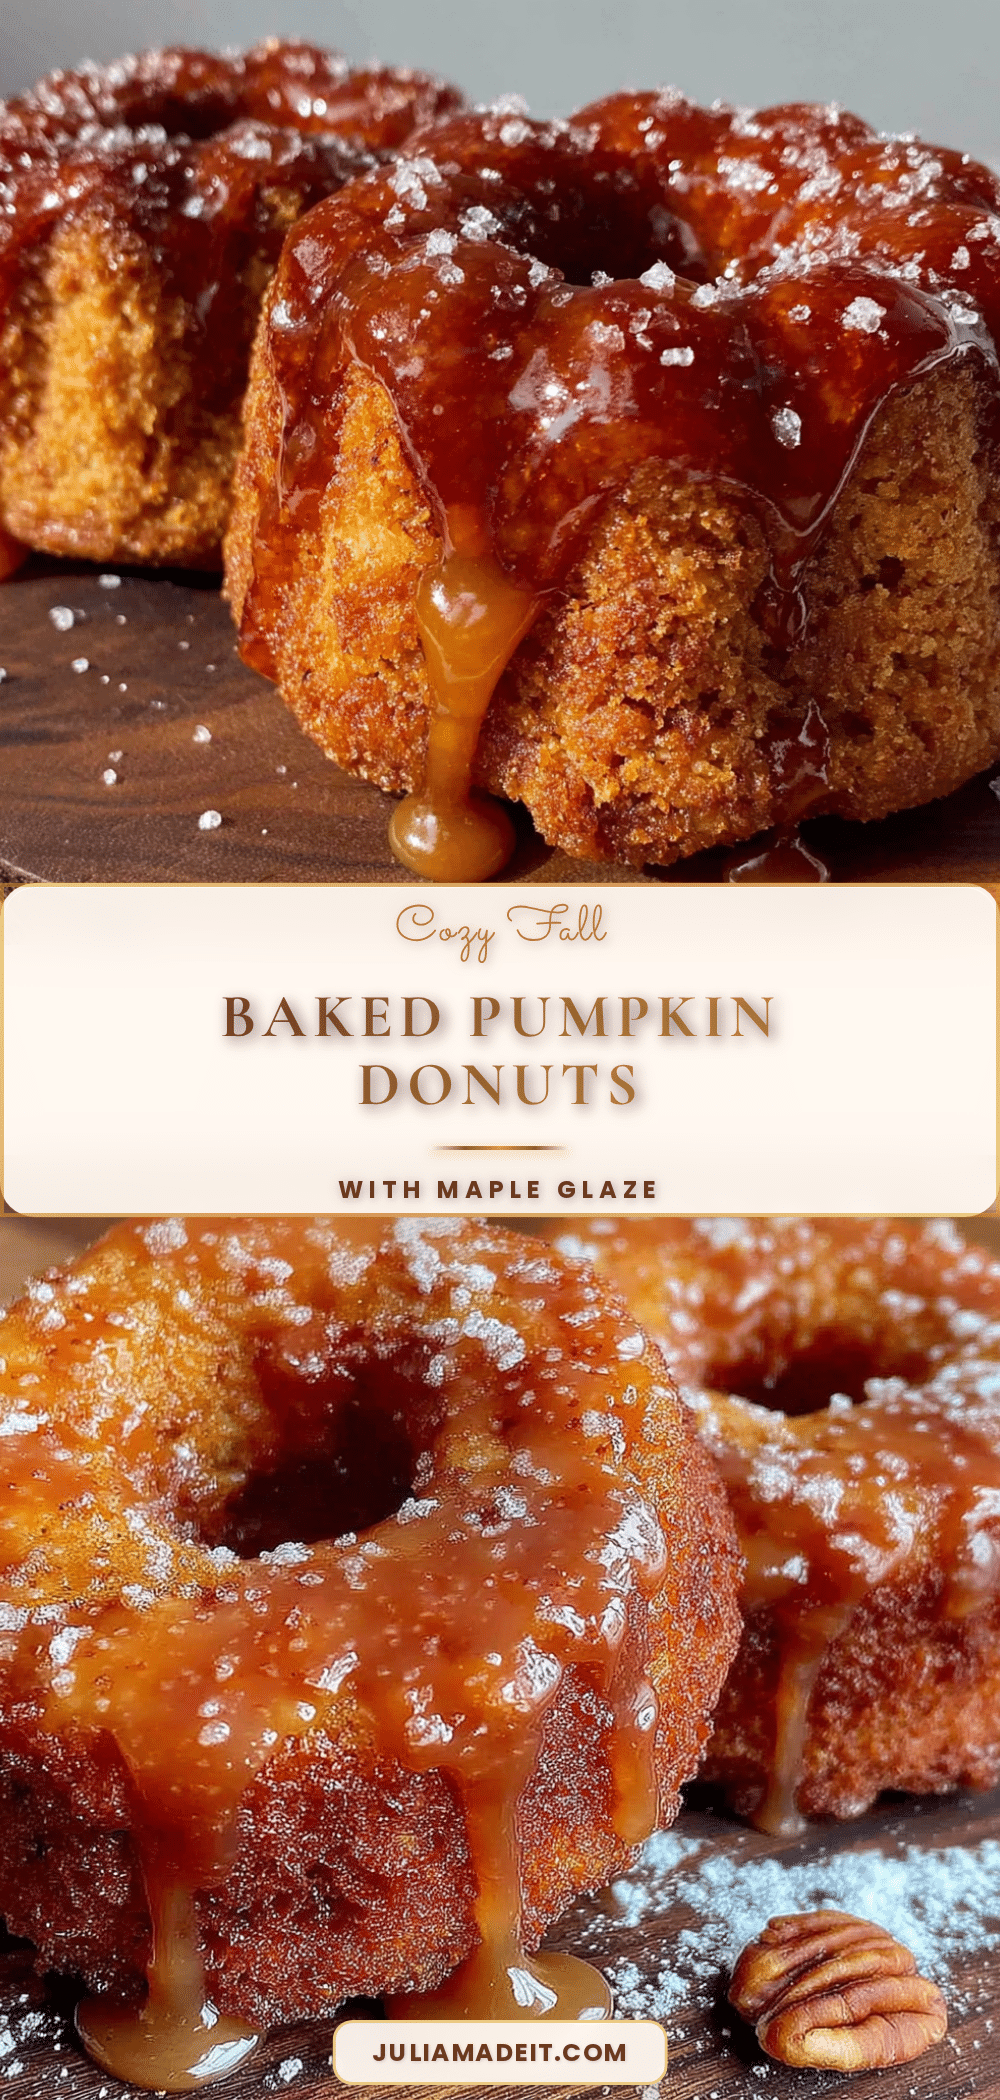
Easy Baked Pumpkin Donuts with Maple Glaze
Soft, cakey baked pumpkin donuts with a rich maple glaze. Made with browned butter for extra depth, these are perfect for cozy evenings and pair beautifully with coffee or tea.
- Prep Time: 15 minutes
- Cook Time: 12 minutes
- Total Time: 30 minutes
- Yield: 12 servings 1x
- Category: Dessert
- Cuisine: American
Ingredients
- 1 ¾ cups (220g) all-purpose flour
- 1 ½ teaspoons baking powder
- ½ teaspoon baking soda
- 2 teaspoons ground cinnamon (preferably Saigon cinnamon)
- ½ teaspoon ground ginger
- ¼ teaspoon ground cloves
- ½ teaspoon salt
- ½ cup (113g) unsalted butter (for browning)
- ½ cup (100g) granulated sugar
- ¼ cup (50g) packed light brown sugar
- 2 large eggs, room temperature
- 1 cup (240g) pure pumpkin purée (not pumpkin pie filling)
- ¼ cup (60ml) whole milk
- 1 teaspoon vanilla extract
- For the Maple Glaze:
- 1 cup (120g) powdered sugar, sifted
- 3 tablespoons pure maple syrup
- 1–2 tablespoons whole milk
Instructions
- Preheat oven to 350°F (175°C). Lightly grease a standard 6-cavity donut pan with butter or non-stick spray.
- Brown the butter: Place ½ cup butter in a small saucepan over medium heat. Swirl occasionally until it foams, then the foam subsides and golden brown specks form (about 5-7 minutes). Remove from heat and pour into a heatproof bowl to stop cooking. Let cool for 10 minutes.
- In a large bowl, whisk together flour, baking powder, baking soda, cinnamon, ginger, cloves, and salt.
- In a separate medium bowl, whisk together browned butter, granulated sugar, and brown sugar until combined. Add eggs one at a time, whisking well after each. Stir in pumpkin purée, milk, and vanilla until smooth.
- Pour wet ingredients into dry ingredients. Fold gently with a rubber spatula until just combined (a few lumps are fine). Do not overmix.
- Transfer batter to a piping bag or zip-top bag. Snip off the tip and pipe batter into each donut cavity, filling about ¾ full.
- Bake for 10-12 minutes, until donuts spring back when touched and a toothpick inserted comes out clean.
- Let donuts cool in the pan for 5 minutes, then transfer to a wire rack to cool completely.
- Make the glaze: Sift powdered sugar into a medium bowl. Add maple syrup and 1 tablespoon milk. Whisk until smooth. Add more milk if needed (1 teaspoon at a time) for desired consistency.
- Once donuts are completely cool, dip the top of each into the glaze. Let excess drip off, then place back on the rack. Glaze will set in 15-20 minutes.
Notes
Don’t skip browning the butter – it adds irreplaceable nutty flavor. Room temperature ingredients are important for a smooth batter. Fill cavities only ¾ full to avoid closing the hole. Let donuts cool completely before glazing. For gluten-free, use a 1:1 gluten-free flour blend. For dairy-free, use vegan butter and oat or almond milk. Donuts taste even better the next day as spices meld.
Nutrition
- Serving Size: 1 donut
- Calories: 285
- Sugar: 26
- Sodium: 200
- Fat: 12
- Saturated Fat: 7
- Carbohydrates: 41
- Fiber: 2
- Protein: 4
Keywords: baked pumpkin donuts, maple glaze, fall dessert, easy donut recipe, pumpkin spice, browned butter donuts