I was knee-deep in a box of vintage linens at a dusty estate sale last October when the woman running the cash register—a tiny, silver-haired woman named Mabel who looked like she hadn’t smiled since 1987—started talking about meringue cookies. Honestly, it was the last place I expected a baking tip. I had just pulled out a set of embroidered napkins, and she squinted at me and said, “You look like someone who bakes.” I wasn’t sure if that was a compliment or an accusation, but before I could answer, she launched into a story about making “ghost cookies” for her grandkids every Halloween for forty years. She didn’t have a written recipe, just a worn index card tucked behind the register with the words “Light & Spooky Ghost Meringue Cookies” scrawled in pencil. I bought the napkins, but honestly, I was already thinking about those cookies.
Mabel’s meringue recipe was a revelation—four ingredients, no complicated piping bags, just a steady hand and a little patience. She told me her secret was to “whisk until your arm hurts, then whisk a little more,” which I later figured out was her way of saying stiff peaks. The cookies themselves are ethereal, almost weightless, and they melt on your tongue with a delicate sweetness that feels more like a memory than a dessert. I’ve tweaked her method over the years, but the soul of the recipe is still hers. The first time I made them, I accidentally used salted butter instead of unsalted for the pan (rookie mistake), but the cookies were still perfect. Maybe you’ve been there—trying a new recipe and holding your breath until it comes out of the oven. That’s exactly how these feel.
These Light & Spooky Ghost Meringue Cookies have become my go-to Halloween treat. They’re not just cute; they’re genuinely delicious, and they fit perfectly into that space between “I want to celebrate” and “I don’t want to spend hours in the kitchen.” Every time I make them, I think of Mabel and her estate sale register, and I smile. That’s the kind of recipe worth keeping.
Why You’ll Love This Recipe
After testing this recipe more times than I’d like to admit (and failing spectacularly on a humid August afternoon—meringue and humidity do not mix, friends), I can confidently say these cookies are a winner. Here is why you will fall for them too:
- Quick & Easy : These come together in about 15 minutes of active prep time. The oven does the rest of the work. Perfect for a last-minute Halloween party or a quiet night in when you want something sweet without the fuss.
- Simple Ingredients : You only need four ingredients, and you likely already have three of them in your pantry right now. No special trips to a gourmet store. No hunting for obscure extracts.
- Perfect for Halloween : These are the definition of spooky cute. They look like tiny ghosts floating on your baking sheet. Kids love them, adults love them, and they photograph beautifully for that perfect Instagram shot.
- Crowd-Pleaser : I have brought these to potlucks and family gatherings, and they disappear faster than anything else on the table. People are always surprised by how light and airy they are—no heavy butter or sugar overload.
- Unbelievably Delicious : The texture is what gets everyone. It is crispy on the outside, slightly chewy on the inside, and it dissolves in your mouth like a sweet cloud. The vanilla flavor is subtle but present, and the mini chocolate chip eyes add just a tiny bit of richness.
What makes this recipe different from all the other meringue cookies out there? It is the method. I use a slightly lower oven temperature and a longer drying time, which gives you that perfect ghost shape without any cracking or browning. Plus, the addition of mini chocolate chips for the eyes is a stroke of genius—they stay put during baking and give the ghosts a friendly, not-scary face. This is comfort food for the Halloween season: lighter, healthier than a typical cookie, but with the same soul-soothing satisfaction. It is the kind of cookie that makes you close your eyes after the first bite.
What Ingredients You Will Need
This recipe relies on a handful of simple, pantry-friendly ingredients to create its magic. Each one plays a specific role, so let us talk about what you need and why it matters.
- 3 large egg whites (room temperature) — The foundation of any meringue. Room temperature egg whites whip up higher and more stable than cold ones. I always separate my eggs when they are cold (it is easier) and then let the whites sit on the counter for about 30 minutes before I start whisking. (Pro tip: save the yolks for a custard or a batch of lemon curd!)
- 3/4 cup (150g) granulated sugar — Regular white sugar works best here. Do not substitute powdered sugar or brown sugar; they will change the texture completely. The sugar dissolves into the egg whites and creates that crisp, airy structure. I personally use a standard brand like Domino, but any fine granulated sugar will do.
- 1/2 teaspoon vanilla extract — Pure vanilla extract gives the cookies a warm, sweet aroma. You can use imitation vanilla in a pinch, but the flavor will be noticeably less rich. I have also used vanilla bean paste for a more intense flavor, and it works beautifully—just make sure it is well incorporated.
- 1/4 cup (45g) mini chocolate chips — These are for the ghost eyes. Mini chips are essential because they are small enough to stay on the meringue without sinking or falling off. Regular chocolate chips are too heavy and will slide right off. Look for a brand like Ghirardelli or Toll House for consistent quality.
- Pinch of salt (optional but recommended) — A tiny pinch of salt balances the sweetness and helps stabilize the egg whites. Do not skip it if you have it on hand.
That is it. Four main ingredients plus a pinch of salt. The beauty of this recipe is its simplicity. You do not need cream of tartar or cornstarch or any of the usual meringue stabilizers—the sugar and the whisking do all the work. If you are in a pinch and only have large eggs, that is fine; just measure the egg whites after separating. You need about 1/2 cup of egg whites total. Also, if you are avoiding refined sugar, you can try using a superfine organic sugar, but I have not tested it with alternative sweeteners like monk fruit or stevia.
Equipment Needed
You do not need a fancy kitchen to make these cookies, but a few specific tools will make your life much easier.
- Electric hand mixer or stand mixer — Whipping egg whites by hand is possible, but it takes about 10-12 minutes of continuous whisking, and your arm will be sore. I strongly recommend a hand mixer or a stand mixer with the whisk attachment. I use a KitchenAid stand mixer, but a $20 hand mixer from a big-box store works just as well.
- Large mixing bowl — Make sure it is completely clean and dry. Any trace of grease or moisture will prevent the egg whites from whipping properly. Glass or metal bowls are best; plastic bowls can sometimes retain a film of grease even after washing.
- Baking sheet — A standard 13×18 inch baking sheet works perfectly. Line it with parchment paper. Do not use wax paper or aluminum foil—the meringues will stick.
- Piping bag with a large round tip (or a zip-top bag) — You can pipe the meringue into ghost shapes using a piping bag fitted with a 1/2-inch round tip. If you do not have a piping bag, just snip the corner off a zip-top bag. It is not as elegant, but it works.
- Spatula or spoon — For folding in the chocolate chips if you are feeling adventurous, though I prefer to place them individually.
- Cooling rack — The cookies need to cool completely on the baking sheet, but a cooling rack is handy for storage later.
If you are on a budget, skip the piping bag and use the zip-top bag trick. It is not pretty, but the ghosts will still taste amazing. Also, make sure your bowl and whisk are completely grease-free. I wipe mine down with a little white vinegar on a paper towel before starting—it removes any lingering oils.
Preparation Method
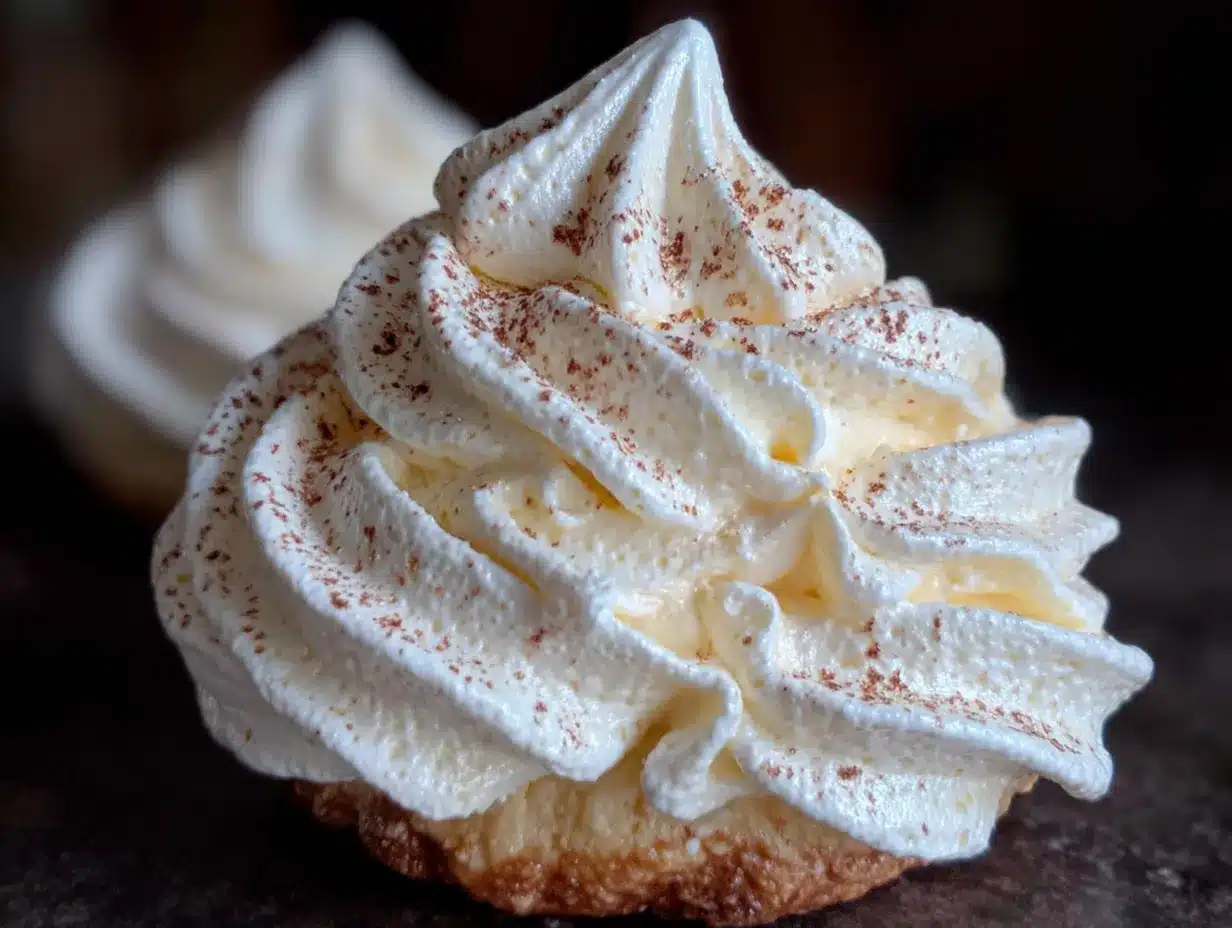
Follow these steps carefully, and you will have a batch of perfect ghost meringues in about two hours (most of that is baking time). Take your time with the whisking—that is where the magic happens.
- Preheat your oven to 200°F (95°C). Yes, that is low. Meringues bake low and slow. Line a large baking sheet with parchment paper and set it aside. Make sure your oven rack is in the center position.
- Prepare your egg whites. Separate three large eggs while they are cold, placing the whites in your clean, dry mixing bowl. Let them sit at room temperature for 30 minutes. This step is not optional—cold egg whites do not whip as high or as stable. (I learned this the hard way after a flat, sad batch of meringues.)
- Start whisking. Using your electric mixer on medium speed, beat the egg whites until they become frothy and bubbly, about 1-2 minutes. Add the pinch of salt now if you are using it. The mixture should look like a light foam.
- Gradually add the sugar. With the mixer still running on medium speed, add the granulated sugar one tablespoon at a time. This should take about 2-3 minutes. Do not dump all the sugar in at once—it will deflate the egg whites. Add it slowly and let it dissolve into the mixture.
- Increase speed and whip to stiff peaks. Once all the sugar is added, increase the mixer speed to high. Whip for 5-7 minutes. You are looking for stiff, glossy peaks. How do you know when it is ready? Lift the whisk attachment straight up. If the meringue forms a peak that stands straight up without drooping, you are there. If the peak flops over, keep whisking. The mixture should also feel smooth between your fingers—no graininess from undissolved sugar.
- Add vanilla. With the mixer on low speed, add the vanilla extract and mix for just 10 seconds until combined. Do not overmix at this stage or you risk deflating the meringue.
- Transfer to piping bag. Spoon the meringue into your piping bag fitted with a large round tip (or into a zip-top bag with a corner snipped off). Work quickly—meringue starts to break down if it sits too long.
- Pipe the ghosts. Pipe small dollops of meringue onto the prepared baking sheet, spacing them about 1 inch apart. To make a ghost shape, pipe a round base, then pull the bag straight up while squeezing gently to create a taller, pointed top. You can also pipe a simple teardrop shape. Each ghost should be about 1.5 inches tall. Aim for 24-30 ghosts depending on size.
- Add the eyes. Gently press two mini chocolate chips into each ghost for eyes. Place them close together near the top of the ghost shape. Do not press too hard or you will deflate the meringue. If a chip falls off, just press it back on gently.
- Bake. Place the baking sheet in the preheated oven and bake for 60 minutes. Do not open the oven door during this time—the sudden temperature change can cause the meringues to crack.
- Turn off the oven and let them rest. After 60 minutes, turn off the oven but leave the cookies inside. Let them sit in the cooling oven for another 30-60 minutes. This drying step ensures the meringues are perfectly crisp all the way through.
- Cool completely. Remove the baking sheet from the oven and let the cookies cool on the pan for 10 minutes. They should lift easily off the parchment paper. If they stick, they need more drying time—pop them back in the warm oven for another 15 minutes.
At this point, your kitchen will smell like vanilla and sugar, and the ghosts will be perfectly pale and spooky. Do not touch them until they are completely cool—they are fragile when warm.
Cooking Tips & Techniques
I have made these cookies more times than I can count, and I have made every mistake in the book. Here is what I have learned so you do not have to repeat my failures.
Humidity is your enemy. Meringue is basically sugar and air, and sugar attracts moisture. If you live in a humid climate (hello, Florida summers), pick a dry day to make these. On rainy days, your meringues might turn out sticky or chewy instead of crisp. I once made them during a thunderstorm, and they never fully dried out—they were still soft after two hours in the oven. Trust me, check the weather forecast first.
Do not overbake. Meringues should be pale and dry, not golden brown. If they start to brown, your oven is too hot. Lower the temperature by 25 degrees next time. Every oven runs a little differently, so keep an eye on them after 45 minutes.
Room temperature egg whites are non-negotiable. I know I said this already, but it bears repeating. Cold egg whites do not whip as high, and your ghosts will be flat and sad. Let them sit out for at least 30 minutes. If you are in a rush, place the bowl of egg whites in a larger bowl of warm water for 5-10 minutes, stirring occasionally.
Patience with the sugar. Adding sugar too quickly is the most common mistake. It will weigh down the egg whites, and you will end up with a dense, syrupy mess. One tablespoon at a time, and let it dissolve completely before adding the next. The final meringue should feel silky, not gritty.
Multitasking strategy. While the meringues are baking, clean up your kitchen. The sugar residue from the bowl can be a pain to scrub if it dries. Also, prepare your storage container—more on that below. This way, when the cookies are done, you are ready to enjoy them without a mess waiting for you.
Variations & Adaptations
Once you master the basic ghost meringue, the possibilities are endless. Here are a few variations I have tried and loved.
Spooky Flavor Variations: Swap the vanilla extract for peppermint extract for a wintery twist, or use almond extract for a nutty, marzipan-like flavor. For a more Halloween-themed taste, add a drop of orange extract and a tiny bit of orange food coloring (gel, not liquid) to create pumpkin spice ghosts. I made a batch with peppermint last December, and they were gone before Christmas morning.
Dietary Adaptations: These cookies are naturally gluten-free and dairy-free (as long as you use dairy-free chocolate chips). For a lower-sugar version, you can reduce the sugar to 1/2 cup (100g), but the texture will be slightly less crisp and the ghosts will not hold their shape as well. I have not tested this with sugar substitutes like erythritol, so I cannot vouch for the results.
Different Ghost Shapes: Instead of piping individual ghosts, you can pipe a large ghost shape (about 4 inches tall) and bake it for 90 minutes. This makes a dramatic centerpiece for a Halloween dessert table. You can also pipe smaller, bite-sized ghosts (about 1 inch tall) and reduce the baking time to 45 minutes.
Add-Ins: Fold in 1/4 cup of finely crushed candy canes or freeze-dried strawberry powder for a pop of color and flavor. Just fold them in gently at the very end before piping. I tried adding cocoa powder once, and it made the meringues too heavy—stick to lightweight add-ins.
Personal Variation: My favorite twist is to dip the bottoms of the finished ghosts in melted dark chocolate. Let the chocolate set on parchment paper before serving. It adds a rich, decadent contrast to the airy meringue, and it looks stunning on a dessert platter.
Serving & Storage Suggestions
These ghost meringues are best served at room temperature. They are perfect on their own as a light dessert or a sweet snack, but they also shine as part of a larger Halloween spread.
Serving Ideas: Arrange them on a platter with fresh berries and a dusting of powdered sugar for a spooky-chic dessert. They pair beautifully with a cup of hot cocoa or a warm apple cider. For a party, place them in a glass jar labeled “Spooky Ghosts” for a fun, grab-and-go treat. They also make excellent edible decorations for a Halloween cake or cupcake tower.
Storage: Store the cooled meringues in an airtight container at room temperature. Do not refrigerate them—the moisture in the fridge will make them sticky. They will stay crisp for up to 5 days if stored properly. If you live in a humid area, add a silica gel packet (the kind you find in shoe boxes) to the container to absorb excess moisture. I learned this trick from a pastry chef friend, and it works wonders.
Freezing: You can freeze baked meringues for up to 2 months. Place them in a single layer in a freezer-safe container, separating layers with parchment paper. Thaw them at room temperature for 30 minutes before serving. Do not thaw them in the refrigerator. The texture will be slightly less crisp after freezing, but they are still delicious.
Reheating: If your meringues lose their crispness after a few days, you can re-crisp them in a 200°F (95°C) oven for 10-15 minutes. Let them cool completely before serving again.
How flavors develop: Honestly, these cookies taste best on the day they are made. The texture is at its peak, and the vanilla flavor is fresh and bright. After a day or two, they are still good, but the crispness fades slightly. Plan to serve them within 24 hours for the best experience.
Nutritional Information & Benefits
These ghost meringue cookies are surprisingly light compared to traditional cookies. Here is the estimated nutritional breakdown per ghost (based on 24 cookies):
- Calories: 35
- Fat: 0.5g
- Carbohydrates: 8g
- Sugar: 7g
- Protein: 1g
These numbers are approximate and will vary based on exact ingredient brands and sizes. The main ingredients—egg whites and sugar—are simple and free of common allergens like dairy, soy, and nuts (check your chocolate chips for potential cross-contamination if you have a severe allergy).
Health Benefits: Egg whites are a good source of lean protein and contain no fat or cholesterol. They also provide small amounts of potassium and magnesium. While these cookies are still a treat, they are lower in calories and fat than most traditional desserts. They are a great option for a lighter indulgence during the Halloween season. From my personal wellness perspective, I love that I can enjoy a handful of these without feeling weighed down. They satisfy my sweet tooth without the heavy, greasy feeling of a butter-laden cookie.
Dietary Considerations: These cookies are naturally gluten-free, dairy-free, and nut-free (again, check your chocolate chips). They are not suitable for a low-sugar diet unless you use a sugar substitute, which I have not tested. Always check your ingredient labels for potential allergens.
Conclusion
These Light & Spooky Ghost Meringue Cookies are more than just a Halloween treat—they are a little piece of baking magic. They come together with minimal effort and ingredients, yet they deliver a result that feels special and memorable. Whether you are making them for a party, a family gathering, or just a quiet night in with a spooky movie, they will bring a smile to your face and a lightness to your step.
I encourage you to make these your own. Experiment with different extracts, try dipping them in chocolate, or pipe them into different shapes. The recipe is forgiving, and the process is fun. And if you happen to make a batch that is a little lopsided or the eyes are a bit crooked? That is okay. Those ghosts have character. I have made plenty of imperfect ghosts myself, and they always taste just as good as the perfect ones.
I would love to hear how your ghost meringues turn out. Did you try a variation? Did your kids help pipe the shapes? Drop a comment below and share your experience. And if you are looking for another light and airy treat to add to your Halloween rotation, try my crispy meringue mushrooms—they pair perfectly with these ghosts for a spooky forest dessert table. Happy baking, and may your ghosts be light, spooky, and absolutely delicious.
Frequently Asked Questions
Can I use liquid egg whites from a carton?
Yes, you can use liquid egg whites from a carton, but the results may vary. Carton egg whites are pasteurized and often have a slightly different protein structure, which can make them harder to whip to stiff peaks. If you use them, make sure they are at room temperature and whip them a little longer than usual. I have had success with them, but fresh egg whites are always more reliable.
Why are my meringues sticky or chewy?
Sticky or chewy meringues are usually a sign of humidity or underbaking. If the air is damp, the meringues will absorb moisture and lose their crispness. Make sure you bake them for the full 60 minutes and let them dry in the turned-off oven for at least 30 minutes. If they are still sticky, try baking them at a slightly lower temperature (180°F) for an additional 15 minutes.
Can I make these without a piping bag?
Absolutely. If you do not have a piping bag, simply use a zip-top bag with a small corner snipped off. You can also use a spoon to drop small dollops of meringue onto the baking sheet and then shape them gently with the back of the spoon. They will not look as uniform, but they will taste the same. I have done this many times when I was too lazy to find my piping tips.
How do I prevent the chocolate chips from falling off?
Press the mini chocolate chips into the meringue gently but firmly right after piping, before the meringue starts to set. If the chips still fall off, try using slightly smaller chips or pressing them in at a slight angle. You can also dip the bottom of each ghost in melted chocolate after baking for a more secure hold and an extra layer of flavor.
Can I double this recipe?
Yes, you can easily double this recipe. Just make sure your mixing bowl is large enough to accommodate the increased volume. You may need to bake the cookies in batches or use two baking sheets placed on separate oven racks. If using two sheets, rotate them halfway through baking to ensure even drying. The baking time remains the same.
Pin This Recipe!
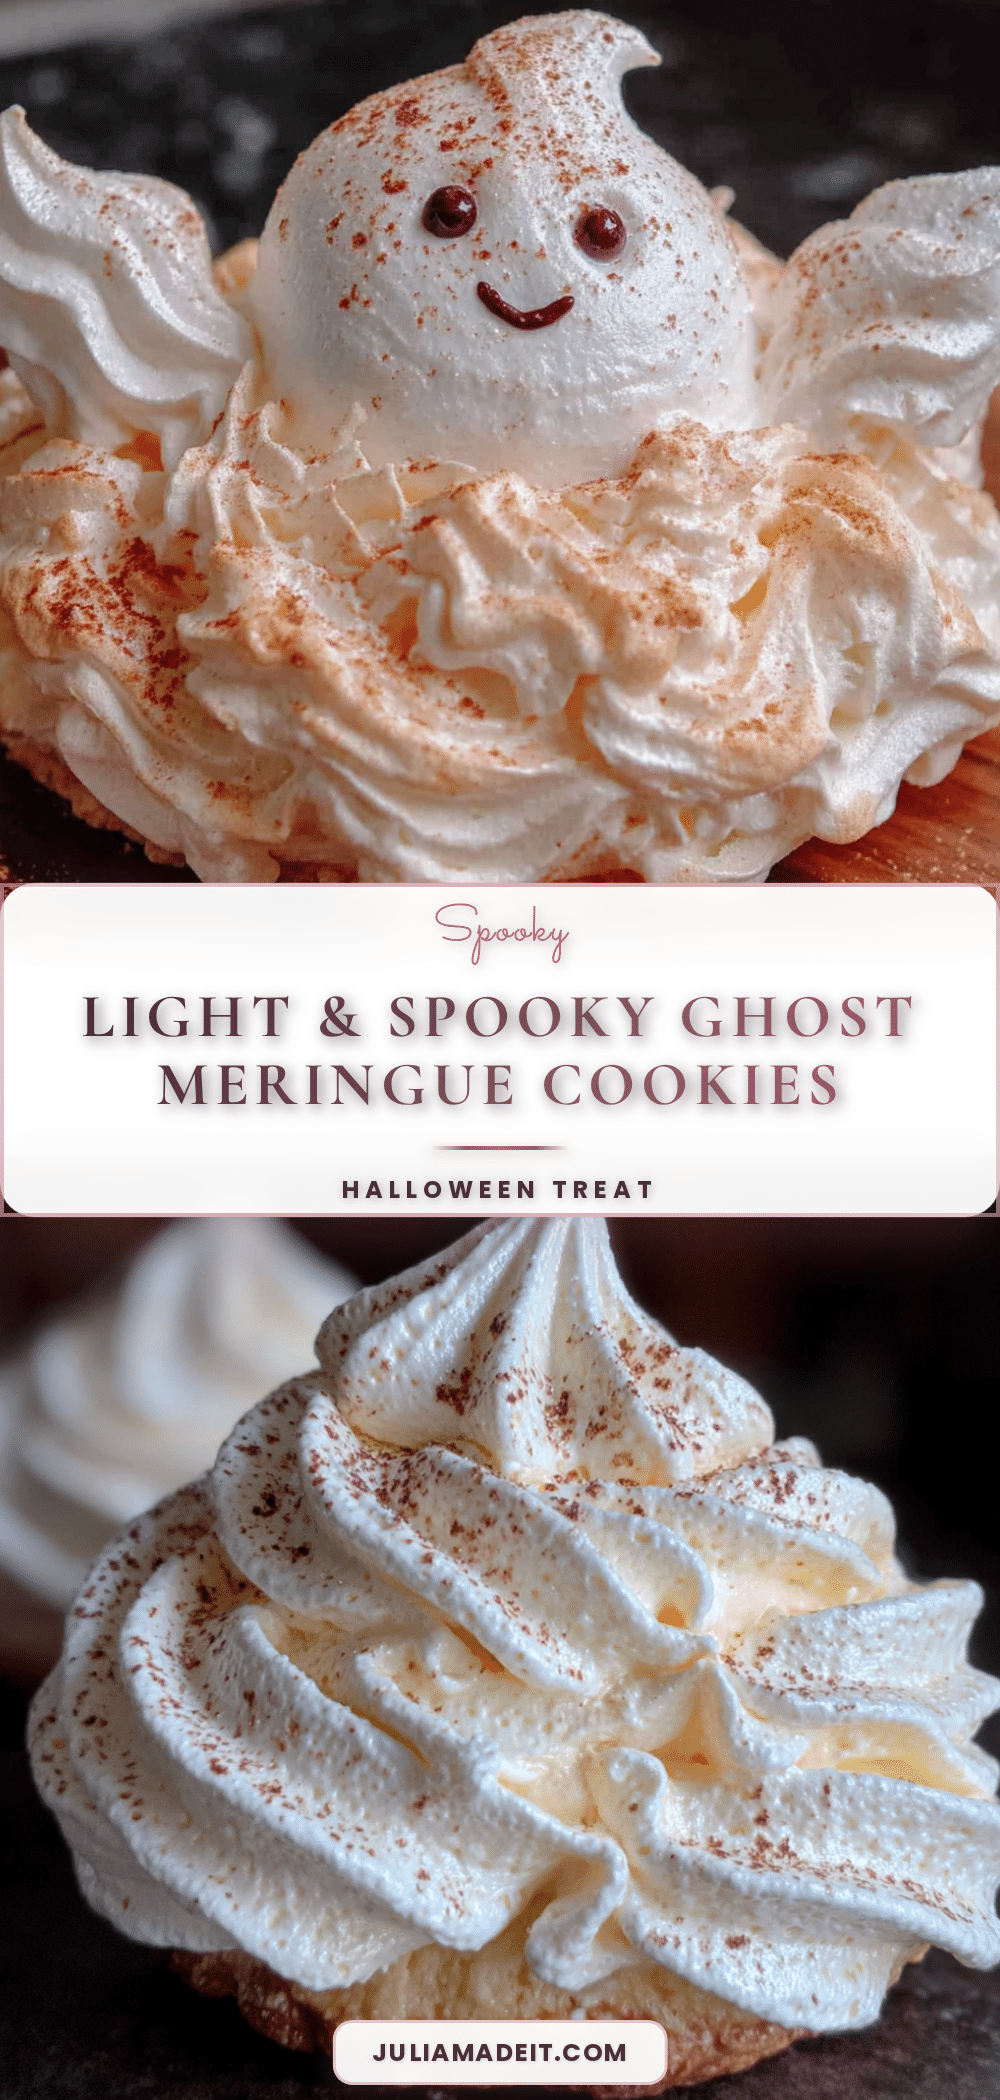
Light & Spooky Ghost Meringue Cookies: Easy 4-Ingredient Recipe

These ethereal, melt-in-your-mouth ghost meringue cookies are made with just four simple ingredients. They’re the perfect spooky-cute Halloween treat that’s quick to make and surprisingly light.
- Prep Time: 15 minutes
- Cook Time: 60 minutes
- Total Time: 1 hour 45 minutes (including drying time)
- Yield: 24-30 cookies 1x
- Category: Dessert
- Cuisine: American
Ingredients
- 3 large egg whites (room temperature)
- 3/4 cup (150g) granulated sugar
- 1/2 teaspoon vanilla extract
- 1/4 cup (45g) mini chocolate chips
- Pinch of salt (optional but recommended)
Instructions
- Preheat your oven to 200°F (95°C). Line a large baking sheet with parchment paper and set aside.
- Separate three large eggs while cold, placing the whites in a clean, dry mixing bowl. Let them sit at room temperature for 30 minutes.
- Using an electric mixer on medium speed, beat the egg whites until frothy and bubbly, about 1-2 minutes. Add the pinch of salt if using.
- With the mixer running on medium speed, add the granulated sugar one tablespoon at a time over 2-3 minutes.
- Increase mixer speed to high and whip for 5-7 minutes until stiff, glossy peaks form. The mixture should feel smooth between your fingers with no graininess.
- Add the vanilla extract on low speed and mix for just 10 seconds until combined.
- Spoon the meringue into a piping bag fitted with a large round tip (or a zip-top bag with a corner snipped off).
- Pipe small dollops onto the prepared baking sheet, spacing them about 1 inch apart. Pipe a round base, then pull the bag straight up while squeezing gently to create a ghost shape about 1.5 inches tall.
- Gently press two mini chocolate chips into each ghost for eyes, placing them close together near the top.
- Bake for 60 minutes without opening the oven door.
- Turn off the oven and let the cookies sit inside for another 30-60 minutes to dry.
- Remove from the oven and let cool on the pan for 10 minutes. They should lift easily off the parchment paper.
Notes
Humidity is the enemy of meringue—choose a dry day to make these. Ensure all equipment is completely clean and grease-free; wipe with white vinegar if needed. Do not open the oven door during baking. For best texture, serve within 24 hours. Store in an airtight container at room temperature for up to 5 days. Can be frozen for up to 2 months.
Nutrition
- Serving Size: 1 ghost cookie
- Calories: 35
- Sugar: 7
- Sodium: 15
- Fat: 0.5
- Carbohydrates: 8
- Protein: 1
Keywords: ghost meringue cookies, Halloween cookies, meringue recipe, easy Halloween dessert, 4-ingredient cookies, spooky cookies, light cookies