The neighborhood cookie swap was in three days and I’d completely forgotten. Everyone else would be bringing their grandmother’s legendary recipes—the ones that had won blue ribbons at the county fair for decades. I had a half-used stick of butter, a bag of chocolate chips that was past its prime, and about forty-five minutes of actual free time between work and a dentist appointment. Honestly, I almost backed out. I mean, who shows up to a cookie swap with a last-minute experiment?
But here’s the thing about desperation—it makes you try things you’d normally overthink. I remembered reading somewhere that browning butter changes everything. So I stood there, watching that butter foam and turn golden, and I thought, “Well, this is either going to be a disaster or the best thing I’ve ever made.” The kitchen smelled like toasted nuts and caramel, and I’ll tell you, that’s a dangerous smell when you’re already hungry and stressed.
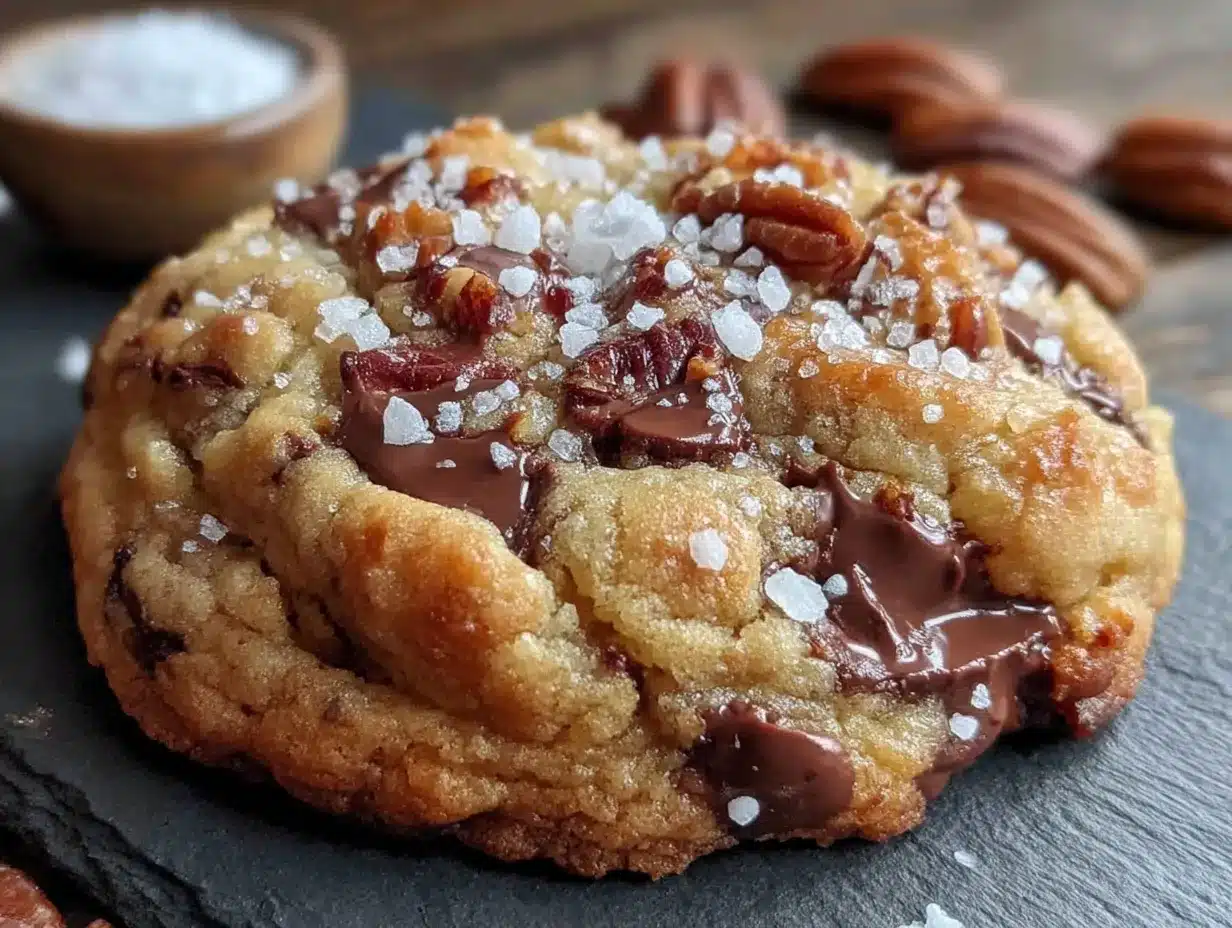
The cookies came out of the oven looking a little lopsided—I’d rushed the scooping—and I sprinkled sea salt on top mostly because I’d dropped the salt cellar and it seemed wasteful not to use what landed on the counter. At the swap, I put them on a paper plate (fancy, I know) and watched people grab the elaborate ones first. But then something funny happened. Someone tried mine. Then someone else. By the end of the night, my paper plate was empty and three people asked for the recipe. That’s the thing about these perfect brown butter chocolate chip cookies with sea salt—they don’t need to look fancy. They just need to taste like you spent all day on them, even when you absolutely did not.
Why You’ll Love This Recipe
Let me be real with you—I’ve tested about seventeen versions of chocolate chip cookies in my life, and this one is the one I keep coming back to. It’s not just another cookie recipe. It’s the one that makes people close their eyes after the first bite, and honestly, that never gets old.
- Quick & Easy : From start to finish, you’re looking at about 30 minutes of active work. The dough needs a quick chill (30 minutes, not overnight), so it’s totally doable on a weeknight or before guests arrive.
- Simple Ingredients : No weird specialty flours or obscure extracts. You probably have everything except maybe the sea salt flakes, and those are worth the two-dollar splurge.
- Perfect for Hosting : These cookies are made for gatherings. They look impressive on a platter, they travel well, and they’re the kind of thing people hover around at parties. Plus, you can prep the dough ahead and bake fresh when guests arrive.
- Crowd-Pleaser : I’ve served these to kids, grandparents, and my picky friend who “doesn’t really like sweets.” All of them asked for seconds. All of them.
- Unbelievably Delicious : The brown butter adds this nutty, toasty depth that regular cookies just don’t have. And the sea salt on top? It’s not just decoration—it makes the chocolate taste richer and the sweetness more balanced.
What makes this different from every other chocolate chip cookie recipe out there? It’s the technique. Browning the butter changes everything—it adds complexity without extra ingredients. And the ratio of brown sugar to white sugar is dialed in for maximum chewiness. This isn’t just another version. It’s your new go-to.
What Ingredients You Will Need
This recipe uses simple, mostly pantry-staple ingredients, but each one plays a specific role in creating that perfect texture and flavor. Trust me, the quality of your butter and chocolate makes a real difference here.
- Unsalted butter, 1 cup (2 sticks or 226g) — You’ll brown this, so use a good-quality brand like Kerrygold or Plugrà. The browning process concentrates the flavor, so starting with great butter matters.
- Brown sugar, 1 cup packed (200g) — Light or dark both work. Dark brown sugar gives a deeper molasses flavor; light keeps it more classic. I usually use light because it lets the brown butter shine.
- Granulated sugar, ½ cup (100g) — This helps with spreading and gives those crispy edges.
- Large egg, 1, plus 1 egg yolk — The extra yolk adds richness and chewiness. Save the white for an omelet or freeze it.
- Vanilla extract, 2 teaspoons — Pure vanilla, not imitation. It’s worth it here since the flavor is prominent.
- All-purpose flour, 2 cups (240g) — Spoon and level it; don’t scoop directly from the bag or you’ll pack in too much.
- Baking soda, 1 teaspoon — Make sure it’s fresh. If it doesn’t fizz when you test it in vinegar, get a new box.
- Salt, ½ teaspoon — I use fine sea salt in the dough and flaky sea salt (like Maldon) for finishing.
- Chocolate chips or chunks, 2 cups (340g) — Use a mix of semi-sweet and dark if you can. I love Guittard or Ghirardelli chips, or chop up a good chocolate bar for irregular chunks.
- Flaky sea salt, for sprinkling — This is non-negotiable for me. Maldon is my go-to, but any flaky salt works.
Substitution notes: If you only have salted butter, reduce the added salt in the dough to ¼ teaspoon. For a dairy-free version, use vegan butter (I like Miyoko’s) and be aware the browning might be slightly different. You can also swap 1 cup of all-purpose flour for white whole wheat flour for a slightly nuttier flavor, though the texture will be a bit denser.
Equipment Needed
You don’t need a fancy kitchen for these cookies, but a few specific tools make the process smoother. Here’s what I use:
- Light-colored saucepan — A stainless steel or light-colored pan helps you see the butter change color as it browns. Dark pans make it hard to tell when it’s done.
- Stand mixer or hand mixer — A stand mixer with the paddle attachment is easiest, but a hand mixer and a large bowl work fine. You can even do it by hand with a wooden spoon if you’re feeling strong.
- Baking sheets — Two rimmed baking sheets. I like Nordic Ware because they don’t warp. Line them with parchment paper or a silicone baking mat.
- Cookie scoop — A 1.5-tablespoon scoop (about #40) gives evenly sized cookies. If you don’t have one, use two spoons or just roll the dough into balls.
- Cooling rack — Wire racks let the cookies cool evenly and keep the bottoms from getting soggy.
- Fine-mesh sieve — You’ll need this to strain the brown butter. It catches the burned bits so your cookies aren’t bitter.
If you don’t have a cookie scoop, a melon baller works in a pinch. And honestly, I’ve used a regular old tablespoon in a hurry—it’s fine, just less consistent.
Preparation Method
Okay, let’s get into it. This method has a few extra steps compared to regular cookies, but each one is worth it. Take your time with the butter—it’s the star here.
- Brown the butter. Cut the butter into pieces and place it in your light-colored saucepan over medium heat. Stir constantly with a spatula or wooden spoon. The butter will melt, then foam, then start to turn golden. Watch for brown specks forming at the bottom—that’s the milk solids toasting. When it smells nutty and looks like the color of amber, about 5-7 minutes, remove it from the heat immediately. Pour it into a heatproof bowl (including all those brown bits) and let it cool for 10-15 minutes. Don’t skip the cooling—hot butter will cook your eggs.
- Mix the sugars and butter. In a large bowl, combine the cooled brown butter with the brown sugar and granulated sugar. Beat with your mixer on medium speed for about 2 minutes until it looks like wet sand and is slightly lighter in color. This step is important—it helps dissolve the sugar for a better texture.
- Add the egg, yolk, and vanilla. Add the whole egg and the extra yolk, one at a time, mixing well after each. Then add the vanilla. The mixture should look smooth and glossy. If it looks separated or greasy, your butter was too hot—don’t panic, just keep mixing and it will come together.
- Combine the dry ingredients. In a separate bowl, whisk together the flour, baking soda, and salt. This ensures the baking soda is evenly distributed so your cookies rise evenly.
- Mix the dough. Gradually add the dry ingredients to the wet mixture, mixing on low speed just until no streaks of flour remain. Do not overmix—this develops gluten and makes tough cookies. Stop the mixer when you still see a few floury bits.
- Fold in the chocolate. Add the chocolate chips or chunks and fold them in with a spatula. Make sure they’re evenly distributed, but don’t stir more than necessary. The dough will be thick, slightly sticky, and smell incredible.
- Chill the dough. Cover the bowl with plastic wrap and refrigerate for at least 30 minutes, or up to 48 hours. This step is crucial—it solidifies the butter so the cookies don’t spread too thin. If you’re in a rush, 30 minutes works, but 2 hours is better.
- Preheat the oven. When you’re ready to bake, preheat your oven to 375°F (190°C). Line two baking sheets with parchment paper or silicone mats.
- Scoop the dough. Use your cookie scoop to portion the dough into balls about 1.5 tablespoons each. Place them 2 inches apart on the prepared sheets. If you want bakery-style cookies, place a few extra chocolate chips on top of each dough ball—it makes them look gorgeous.
- Bake. Bake one sheet at a time for 10-12 minutes. The edges should be golden brown and the centers should look slightly underdone and puffy. They will continue to cook on the hot pan after you take them out. I usually pull mine at 11 minutes for chewy centers and crispy edges.
- Add sea salt and cool. As soon as the cookies come out of the oven, sprinkle a pinch of flaky sea salt on each one. Let them cool on the baking sheet for 5 minutes, then transfer to a wire rack to cool completely. Or, you know, eat one warm. I won’t judge.
Sensory cues: When the butter is browning, you’ll hear it crackle and pop as the water evaporates. The smell will change from milky to nutty and toasty. When the cookies are done, the edges will be set and golden, but the centers will still look soft and slightly puffy. They should feel firm around the edges when you gently touch them.
Cooking Tips & Techniques
I’ve made these cookies probably fifty times, and I’ve learned a few things the hard way. Here’s what I wish someone had told me:
Don’t walk away from the browning butter. I did that once—got distracted by a phone call—and ended up with burnt butter that smelled like ash. It happens to everyone. Stay at the stove, keep stirring, and the moment you see those brown specks and smell that nutty aroma, pull it off. The butter will continue to darken from residual heat, so pouring it into a cool bowl stops the process.
Let the butter cool properly. I know you’re impatient. I am too. But if you add the sugars to hot butter, you’ll melt the sugar instead of creaming it, and your cookies will spread into flat, greasy pucks. Give it a full 10-15 minutes. It should feel warm to the touch, not hot.
Chill the dough—no shortcuts. I tried skipping the chill once because I was in a hurry. The cookies spread so thin they merged into one giant cookie on the sheet. Tasty, sure, but not what we’re going for. Thirty minutes minimum, and the texture gets even better after 24 hours in the fridge. The flour hydrates, the flavors meld, and the cookies develop that complex, almost toffee-like flavor.
Use a light-colored pan. Dark pans absorb more heat and can burn the bottoms of your cookies before the centers are done. If you only have dark pans, reduce the oven temperature by 25°F and check them a minute earlier.
Bake one sheet at a time. I know it’s tempting to cram two sheets in the oven, but the heat doesn’t circulate evenly and you’ll end up with unevenly baked cookies. It takes a little longer, but the results are worth it.
Underbake slightly. Pull the cookies when the edges are set but the centers still look soft and underdone. They’ll set up perfectly as they cool. Overbaked cookies are dry and crumbly—nobody wants that.
Variations & Adaptations
One of the best things about this recipe is how adaptable it is. Here are some variations I’ve tried and loved:
Dark Chocolate Sea Salt: Swap the semi-sweet chips for 70% dark chocolate chunks. The bitterness pairs beautifully with the nutty brown butter and the salty finish. This is my personal favorite for adult gatherings.
Gluten-Free Version: Replace the all-purpose flour with a 1:1 gluten-free baking flour (I like King Arthur Measure for Measure). The texture will be slightly more tender and a little less chewy, but they’re still delicious. Add an extra tablespoon of flour if the dough seems too sticky.
Add-In Variations: Fold in ½ cup of toasted pecans or walnuts along with the chocolate for crunch. Or swap ½ cup of the chocolate chips for white chocolate and dried cranberries for a festive twist. I’ve also added a teaspoon of espresso powder to the dry ingredients for a mocha vibe—it doesn’t make them taste like coffee, it just makes the chocolate taste more chocolatey.
Vegan Option: Use vegan butter (brown it carefully—it behaves differently) and a flax egg (1 tablespoon ground flaxseed mixed with 3 tablespoons water, let sit for 5 minutes). The texture won’t be exactly the same—slightly less chewy—but they’re still fantastic.
Small Batch: Halve the recipe for just 12 cookies. Use 1 whole egg (no extra yolk) and reduce the baking soda to ½ teaspoon. Everything else halves easily.
Serving & Storage Suggestions
These cookies are best served slightly warm, when the chocolate is still melty and the sea salt crystals are just starting to dissolve. For a dinner party, I like to arrange them on a wooden board or a simple white platter—they look rustic and inviting. A small bowl of extra flaky sea salt on the side lets guests add more if they want.
They pair beautifully with a cold glass of milk (obviously), but for grown-up occasions, try them with a cup of strong coffee, a latte, or even a glass of bourbon or dark rum. The nutty notes in the brown butter complement the warmth of spirits.
Storage: Keep baked cookies in an airtight container at room temperature for up to 5 days. Place a slice of bread in the container—it absorbs excess moisture and keeps the cookies soft. Change the bread every other day. I learned this trick from a bakery owner, and it works like magic.
Freezing: You can freeze the baked cookies for up to 3 months. Layer them between sheets of parchment paper in a freezer-safe container. Thaw at room temperature for about 30 minutes, then warm in a 300°F oven for 5 minutes to revive that fresh-baked texture.
Dough freezing: This is my favorite hosting hack. Scoop the dough into balls, freeze them on a baking sheet until solid, then transfer to a freezer bag. Bake from frozen—just add 2-3 minutes to the baking time. Fresh cookies in 15 minutes, any time you want them. Perfect for unexpected guests or late-night cravings.
The flavors actually develop more over time. Day-old cookies are often even better than fresh—the brown butter flavor deepens and the texture settles into that perfect chewy-crisp balance. If you can resist eating them all immediately, that is.
Nutritional Information & Benefits
Let’s be honest—these are cookies, not health food. But knowing what’s in them helps you enjoy them mindfully. Per cookie (based on 24 cookies): approximately 220 calories, 12g fat (7g saturated), 28g carbohydrates, 3g protein, 18g sugar, and 1g fiber.
The brown butter adds a small amount of vitamin A and healthy fats from the milk solids. The dark chocolate (if you use it) provides antioxidants and a little magnesium. And the sea salt? It’s a mineral-rich finishing salt that adds trace elements like calcium and potassium—though honestly, we’re here for the flavor.
These cookies are vegetarian and can be made gluten-free or vegan with the substitutions above. They contain dairy, eggs, and gluten in their standard form. If you’re watching your sugar intake, you can reduce the granulated sugar by ¼ cup, but the texture will be slightly less crisp on the edges.
My personal philosophy? Life is too short for bad cookies. One perfectly made cookie is more satisfying than three mediocre ones. So take your time, enjoy the process, and savor every bite.
Conclusion
These perfect brown butter chocolate chip cookies with sea salt have become my signature for a reason. They’re the cookies I bring to parties, the ones I bake when I need to impress, and honestly, the ones I make just for myself on a quiet Sunday afternoon. The brown butter adds a depth of flavor that feels fancy but takes almost no extra effort. The sea salt makes every bite interesting. And the texture—crispy edges, chewy centers, melty chocolate—is exactly what a chocolate chip cookie should be.
I hope you make these and love them as much as I do. Don’t be afraid to experiment—try different chocolates, add nuts, or play with the salt level. Cooking should be fun, and every batch teaches you something new. If you make them, I’d love to hear how they turned out. Leave a comment below, share a photo, or tell me your favorite variation. And if you bring them to a cookie swap? Well, you might just end up with an empty plate and a reputation as the person who makes the best cookies in the neighborhood.
Happy baking, friends. You’ve got this.
Frequently Asked Questions
Can I use salted butter instead of unsalted?
Yes, you can. Just reduce the added salt in the dough to ¼ teaspoon. The browning process works the same, but be aware that salted butter can brown slightly differently due to the salt content. I prefer unsalted so I can control the salt level myself.
Why did my cookies spread too much?
This usually happens if the dough wasn’t chilled long enough, or if the butter was too warm when you mixed it. Make sure you chill the dough for at least 30 minutes, and let the brown butter cool to room temperature before adding the sugars. Also, check that your baking soda is fresh—old baking soda won’t help cookies rise properly.
Can I make the dough ahead of time?
Absolutely. The dough can be refrigerated for up to 48 hours. In fact, the cookies often taste better after a day in the fridge because the flavors have time to meld. You can also freeze the dough balls for up to 3 months and bake them straight from frozen—just add a couple minutes to the baking time.
What’s the best way to measure flour for this recipe?
Use the spoon-and-level method: fluff the flour in its bag or container, spoon it into your measuring cup, then level it off with a flat edge. Don’t scoop directly from the bag—that packs the flour and gives you too much, which makes dry, dense cookies. A kitchen scale is even more accurate: 240 grams is the sweet spot.
My cookies came out too salty. What went wrong?
Two possibilities: you might have used too much flaky sea salt on top, or your sea salt is very strong. Start with just a pinch per cookie—you can always add more. If you’re using a fine sea salt instead of flaky, use even less because it’s more concentrated. Next time, try a lighter hand and taste as you go.
Pin This Recipe!
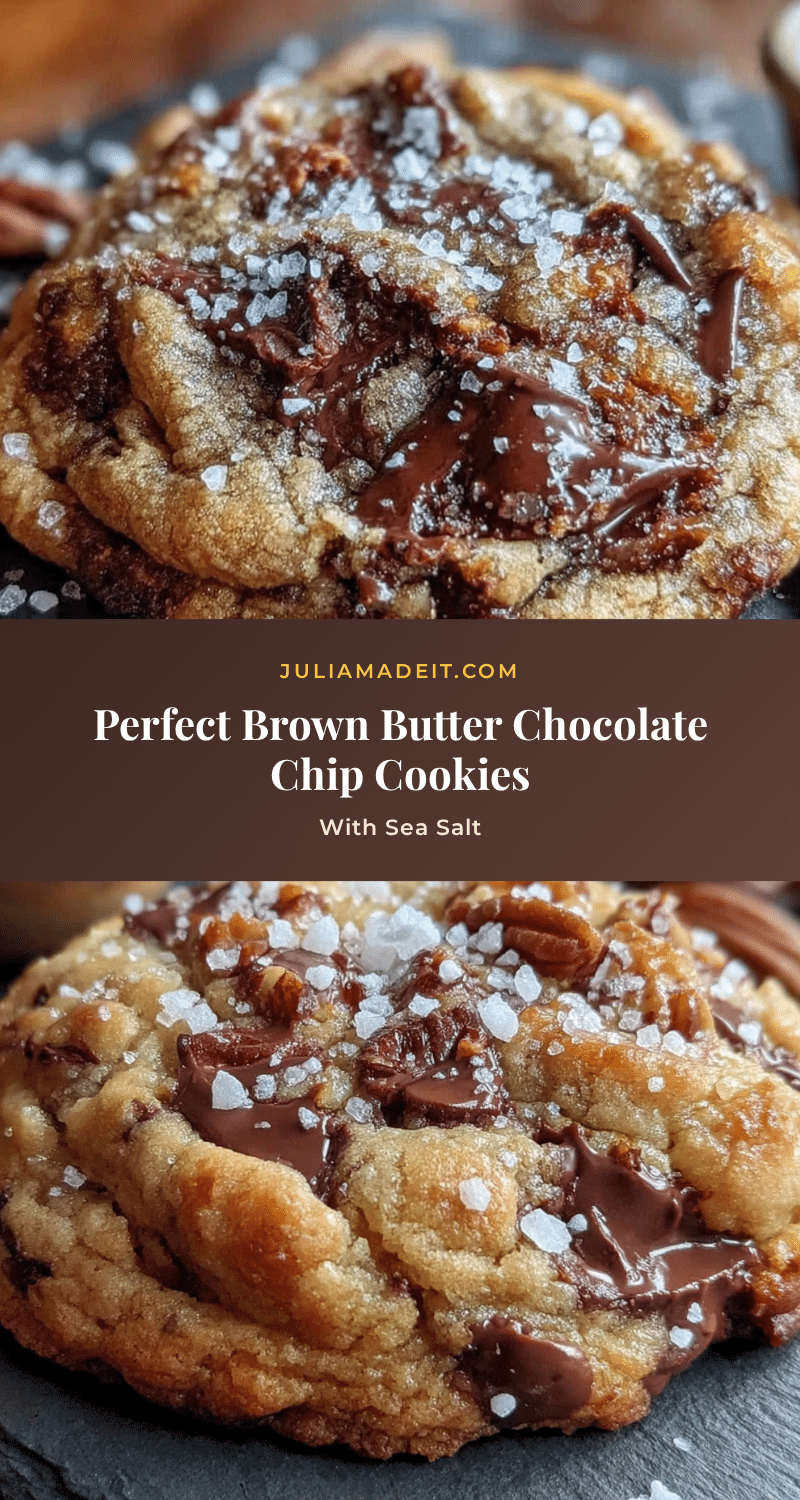
Perfect Brown Butter Chocolate Chip Cookies with Sea Salt

These brown butter chocolate chip cookies with sea salt are the ultimate crowd-pleaser. With nutty, toasty depth from browned butter and a perfect balance of sweet and salty, they deliver crispy edges, chewy centers, and melty chocolate in every bite.
- Prep Time: 30 minutes
- Cook Time: 11 minutes
- Total Time: 1 hour 11 minutes (including 30 minutes chill time)
- Yield: 24 cookies 1x
- Category: Dessert
- Cuisine: American
Ingredients
- 1 cup (2 sticks or 226g) unsalted butter
- 1 cup packed (200g) brown sugar (light or dark)
- ½ cup (100g) granulated sugar
- 1 large egg plus 1 egg yolk
- 2 teaspoons pure vanilla extract
- 2 cups (240g) all-purpose flour, spooned and leveled
- 1 teaspoon baking soda
- ½ teaspoon fine sea salt
- 2 cups (340g) chocolate chips or chunks (semi-sweet and/or dark)
- Flaky sea salt (e.g., Maldon), for sprinkling
Instructions
- Brown the butter: Cut butter into pieces and place in a light-colored saucepan over medium heat. Stir constantly until butter melts, foams, and turns golden amber with brown specks (5-7 minutes). Immediately remove from heat and pour into a heatproof bowl. Let cool for 10-15 minutes.
- Mix sugars and butter: In a large bowl, combine cooled brown butter with brown sugar and granulated sugar. Beat with a mixer on medium speed for about 2 minutes until it looks like wet sand and is slightly lighter in color.
- Add egg, yolk, and vanilla: Add whole egg and extra yolk one at a time, mixing well after each. Add vanilla and mix until smooth and glossy.
- Combine dry ingredients: In a separate bowl, whisk together flour, baking soda, and salt.
- Mix dough: Gradually add dry ingredients to wet mixture, mixing on low speed just until no streaks of flour remain. Do not overmix.
- Fold in chocolate: Add chocolate chips or chunks and fold in with a spatula until evenly distributed.
- Chill dough: Cover bowl with plastic wrap and refrigerate for at least 30 minutes (up to 48 hours).
- Preheat oven: When ready to bake, preheat oven to 375°F (190°C). Line two baking sheets with parchment paper or silicone mats.
- Scoop dough: Use a 1.5-tablespoon cookie scoop to portion dough into balls. Place 2 inches apart on prepared sheets. Optionally, press extra chocolate chips on top.
- Bake: Bake one sheet at a time for 10-12 minutes, until edges are golden brown and centers look slightly underdone and puffy.
- Add sea salt and cool: As soon as cookies come out of the oven, sprinkle a pinch of flaky sea salt on each. Cool on baking sheet for 5 minutes, then transfer to a wire rack to cool completely.
Notes
Don’t walk away from the browning butter—it can burn quickly. Let the butter cool properly before adding to sugars. Chilling the dough is crucial to prevent spreading. Underbake slightly for chewy centers. For best results, use a light-colored pan and bake one sheet at a time.
Nutrition
- Serving Size: 1 cookie
- Calories: 220
- Sugar: 18
- Sodium: 120
- Fat: 12
- Saturated Fat: 7
- Carbohydrates: 28
- Fiber: 1
- Protein: 3
Keywords: brown butter chocolate chip cookies, sea salt cookies, chewy chocolate chip cookies, easy cookie recipe, homemade cookies