“You gotta try this beer can chicken,” my neighbor shouted over the fence one humid Saturday afternoon. I was skeptical, honestly. Cooking a whole chicken perched on a can of beer? It sounded like a backyard trick rather than a serious meal. But curiosity got the better of me. That evening, as the garlic herb butter melted and the savory aromas filled my kitchen, I realized this wasn’t just a barbecue gimmick — it was something special. The skin crisped up perfectly, the meat stayed juicy, and the subtle hints of beer and herbs created a depth I hadn’t expected.
That first attempt was a bit of a happy accident, really. I was aiming for something simple but satisfying after a long week, and the beer can chicken recipe with garlic herb butter fit the bill better than anything else I had tried. Since then, I’ve found myself making it repeatedly — sometimes for a casual dinner, other times when friends drop by unannounced. The magic lies in how the chicken roasts upright, allowing steam from the beer to infuse it from the inside out, all while the herb butter keeps it tender and flavorful.
There’s something quietly impressive about this dish. It’s the kind of recipe that turns an ordinary chicken into a centerpiece without demanding hours of prep or fancy equipment. It stuck with me because it’s reliable, downright tasty, and perfect for those moments when you want comfort food that feels a little elevated. No fuss, just great flavor and a golden, crispy finish that invites you to dig in — trust me, once you try this recipe, you’ll find yourself reaching for it on repeat.
Why You’ll Love This Recipe
This savory beer can chicken with garlic herb butter isn’t your average roast chicken. It’s a dish that combines straightforward technique with an unforgettable flavor profile, making it a fast favorite in my kitchen. Here’s why it stands out:
- Quick & Easy: The prep takes just about 15 minutes, and the chicken roasts hands-off for roughly an hour and a half, perfect for busy weeknights or a laid-back weekend meal.
- Simple Ingredients: No fancy or hard-to-find items here—just a whole chicken, your favorite beer, garlic, fresh herbs, and butter that you probably already have on hand.
- Perfect for Gatherings: Whether it’s a casual backyard hangout or a weekend family dinner, this recipe impresses without stress.
- Crowd-Pleaser: Kids and adults alike keep asking for seconds thanks to that crispy, flavorful skin and juicy interior.
- Unbelievably Delicious: The combination of beer steaming from the inside and the rich garlic herb butter basting the outside creates a harmony of flavors you don’t find in typical roast chicken recipes.
What makes this recipe really different? The garlic herb butter is the star here, gently seeping into the meat as it cooks, while the beer can method gives the chicken a moist, tender texture that’s hard to beat. I’ve tweaked this recipe over several weekends, trying different herb combos and butter blends, and this version consistently wins. Plus, it pairs wonderfully with a range of sides — like the crispy parmesan garlic roasted potatoes I whipped up last week.
Honestly, it’s the kind of dish that makes you slow down and savor each bite — the perfect comfort food that doesn’t require hours in the kitchen or complicated steps. It’s reliable, tasty, and just right for sharing.
What Ingredients You Will Need
This recipe uses simple, wholesome ingredients to deliver bold flavor and satisfying texture without the fuss. Most of these are pantry staples or fresh herbs you can easily find at your local market.
- Whole chicken: About 4 to 5 pounds (1.8 to 2.3 kg), preferably organic or free-range for the best flavor and texture.
- Beer: One standard 12 oz (355 ml) can of your favorite lager or pale ale (avoid super hoppy IPAs as they can turn bitter).
- Unsalted butter: 4 tablespoons (60 g), softened — this is the base for the garlic herb butter.
- Garlic: 4 cloves, minced — fresh garlic gives that punchy, aromatic flavor.
- Fresh herbs: 2 tablespoons chopped parsley, 1 tablespoon chopped thyme, and 1 tablespoon chopped rosemary — these bring a fragrant, earthy note.
- Lemon zest: From one lemon — adds brightness and balances richness.
- Salt and pepper: To taste, but don’t be shy — seasoning is key to tasty skin and juicy meat.
- Olive oil: 1 tablespoon, for rubbing on the chicken before seasoning.
Optional add-ins:
- A pinch of smoked paprika for a subtle smoky warmth.
- A splash of honey in the butter mixture for a gentle caramelized sweetness.
When picking your chicken, I recommend choosing one with a bit of heft so it doesn’t dry out during roasting. And for the beer, I usually go with a classic lager like Samuel Adams Boston Lager or something similar — they give a clean flavor without overpowering the chicken. If you want to keep it alcohol-free, you can try using non-alcoholic beer or even chicken broth, but the original beer method really adds a subtle depth you won’t forget.
Equipment Needed
- Roasting pan or rimmed baking sheet: Big enough to hold the chicken upright. A rimmed sheet is great for catching drippings.
- Beer can chicken holder (optional): These little stands are designed to keep the chicken stable on the can. I’ve used one a few times, but honestly, you can just use the beer can itself if you’re careful.
- Meat thermometer: Highly recommended to check for doneness — aiming for an internal temperature of 165°F (74°C) in the thickest part of the thigh.
- Mixing bowl: For making the garlic herb butter.
- Pastry brush or spoon: To spread butter evenly under the skin and on the chicken exterior.
If you don’t have a beer can chicken holder, no worries — just make sure the can is stable in the roasting pan and the chicken stands upright without wobbling. Using a reliable meat thermometer will save you from guesswork and keep your chicken juicy every time. For budget-friendly options, a simple instant-read thermometer from your local store works just fine. Over time, I’ve found that my trusty thermometer and a good roasting pan are the kitchen MVPs for recipes like this one.
Preparation Method
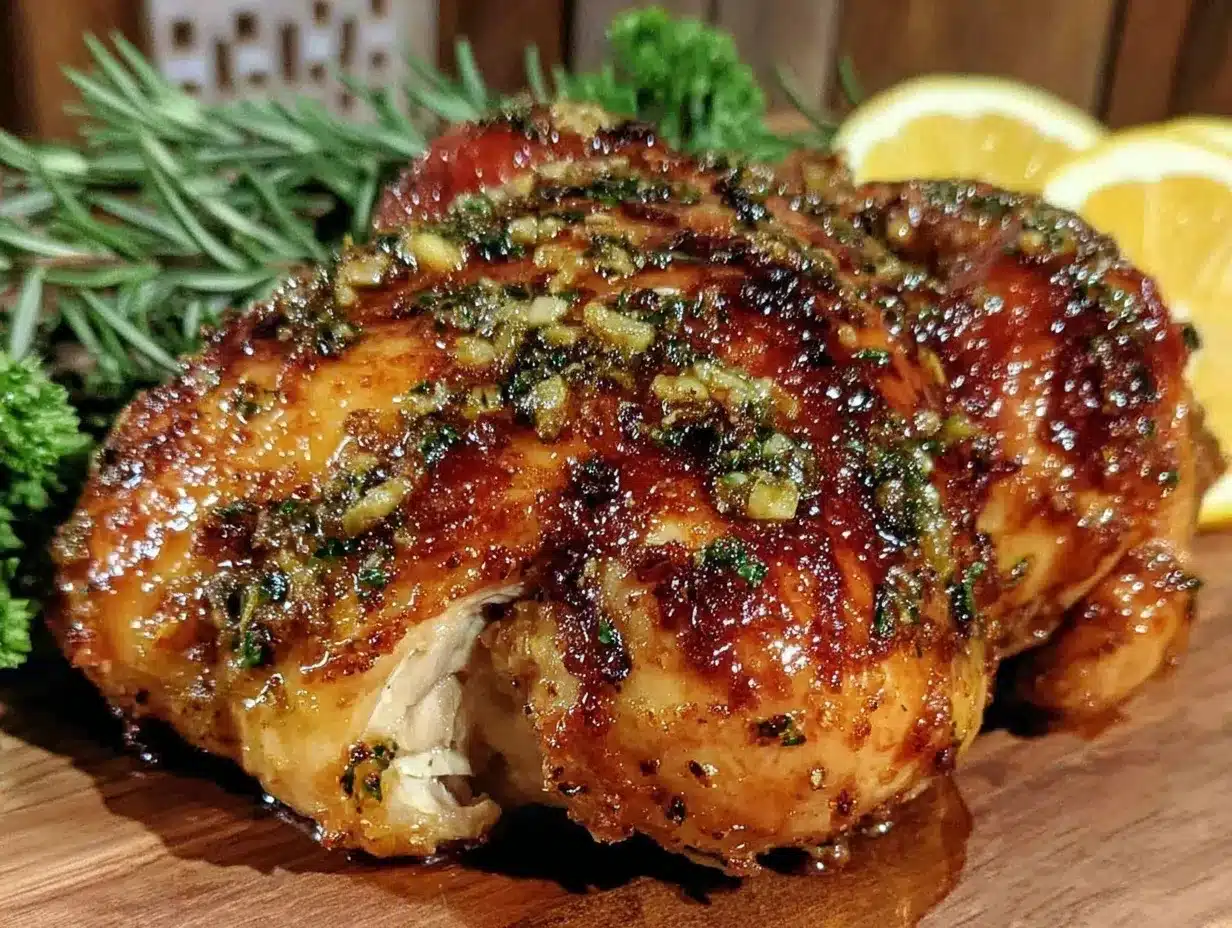
- Preheat your oven to 375°F (190°C). This moderate temperature crisps the skin without drying out the meat. Give yourself about 10 minutes to get the oven hot.
- Prepare the garlic herb butter. In a mixing bowl, combine 4 tablespoons softened unsalted butter, minced garlic, chopped parsley, thyme, rosemary, lemon zest, and a pinch of salt and pepper. Mix well until everything is evenly incorporated.
- Clean and pat dry the chicken. Remove any giblets from the cavity, then thoroughly pat the chicken dry with paper towels. Moisture is the enemy of crispy skin, so this step is crucial.
- Loosen the skin gently. Using your fingers, carefully separate the skin from the breast meat without tearing it. This creates a pocket to spread the garlic herb butter under the skin, which keeps the meat moist and infuses flavor.
- Spread the garlic herb butter. Using a spoon or your fingers, evenly distribute about two-thirds of the butter mixture under the skin on the breasts and thighs. Then rub the remaining butter all over the outside of the chicken for that beautiful golden crust.
- Season the chicken inside and out. Sprinkle salt and pepper liberally on the exterior and inside the cavity for balanced seasoning.
- Open the beer can. Pour out (or drink!) about half of the beer so there’s enough liquid left to steam but the can won’t overflow. Optionally, add a few crushed garlic cloves or herbs inside the can for extra aroma.
- Place the chicken on the beer can. Carefully position the chicken upright so the can fits inside the cavity and the bird stands steady. If you have a beer can chicken holder, use it now for extra stability.
- Transfer the chicken to the roasting pan. Place the can and chicken upright in the pan. The legs should touch the pan, and the chicken should stand firm.
- Roast. Place the pan in the oven and roast the chicken for 60 to 75 minutes, or until the internal temperature reaches 165°F (74°C) in the thickest part of the thigh. Cooking time varies by chicken size, so start checking at 60 minutes.
- Rest before carving. Remove the chicken carefully from the pan (watch out for hot beer!) and let it rest for 10 to 15 minutes. This lets the juices redistribute and makes carving easier.
- Serve. Carve the chicken into pieces and enjoy the crispy skin and juicy meat. Don’t forget to spoon any pan juices over the top for extra flavor!
Quick tip: If your chicken skin isn’t as crispy as you like, you can pop it under the broiler for 2-3 minutes at the end—but watch it closely so it doesn’t burn. The smell of garlic and herbs roasting will fill your kitchen and has a way of making you forget all the little kitchen mishaps that might have happened earlier (trust me, I’ve had my share!).
Cooking Tips & Techniques
Cooking beer can chicken might seem a bit quirky, but a few tricks will make it a reliable winner every time.
- Pat the chicken dry: Moisture on the skin prevents crisping. I always double-check this step—even a little dampness can translate into limp skin.
- Butter under the skin: This is a game-changer. It bastes the meat from inside as it cooks, keeping the chicken moist and giving a rich, savory flavor.
- Use a meat thermometer: I’ve learned the hard way that guessing don’t cut it. The thickest part of the thigh should hit 165°F (74°C) to be safe yet juicy.
- Stability matters: Whether you use a beer can holder or not, make sure your chicken stands upright securely. Wobbly birds can be a pain and risk spills.
- Rest your chicken: Waiting 10 minutes after roasting is tough when the house smells this good, but it really helps keep juices locked in.
One time, I forgot to loosen the skin and the butter mostly stayed on the surface. The chicken was still tasty but the meat wasn’t as buttery and tender as it could’ve been. Lesson learned! Also, timing is forgiving here—if you need to prep some fresh sides or a quick dessert, you can multitask since the chicken mostly roasts unattended.
Variations & Adaptations
This recipe is more flexible than it seems. Here are some ways to make it your own:
- Herb swaps: Try basil, oregano, or tarragon instead of the usual rosemary and thyme for a different herbal twist.
- Spicy version: Add red pepper flakes or cayenne to the butter mix for a subtle kick that warms from the inside out.
- Gluten-free option: This recipe is naturally gluten-free, but double-check your beer choice or swap it for gluten-free beer or chicken broth.
- Different cooking methods: You can also cook this chicken on the grill using indirect heat. Just set it upright on the can and cover the grill, maintaining medium heat for about the same time.
- Butter alternatives: Use ghee or dairy-free margarine for a lactose-free version while keeping that rich texture.
Personally, I once tried adding a splash of bourbon to the beer can for a smoky undertone — it was unexpectedly delicious and paired beautifully with the garlic herb butter. Feel free to experiment and find your favorite spin.
Serving & Storage Suggestions
This savory beer can chicken is best served warm, right off the pan, when the skin is still crisp and the aroma is irresistible. Carve it into generous pieces and plate alongside your favorite sides. For a classic combo, I love pairing it with those crispy parmesan garlic roasted potatoes and a fresh green salad. A cold beer or crisp white wine complements the flavors nicely too.
Leftovers keep well in the refrigerator for up to 3 days. Store the carved chicken in an airtight container to maintain moisture. When reheating, I recommend warming it gently in the oven at 300°F (150°C) for about 15 minutes to keep the skin from getting soggy. Microwaving is convenient but tends to soften the crispiness.
Interestingly, the flavors deepen a bit after resting overnight — that garlic herb butter really gets a chance to soak into the meat, making leftovers just as tasty, if not better. If you want to freeze leftovers, wrap them tightly and consume within 2 months for best quality.
Nutritional Information & Benefits
Here’s a rough estimate for one serving (based on 6 servings from a 4.5 lb chicken):
- Calories: 350-400
- Protein: 40 grams
- Fat: 22 grams (mostly from butter)
- Carbohydrates: 0-2 grams
Chicken is a great source of lean protein, essential for muscle repair and satiety. The fresh herbs provide antioxidants, and garlic has well-known immune-supporting properties. Using unsalted butter gives control over sodium, and choosing a quality beer adds flavor without unnecessary additives. This recipe fits well into gluten-free and low-carb diets, especially when paired with veggie sides.
Conclusion
This savory beer can chicken with garlic herb butter recipe has earned its spot in my regular rotation because it balances ease and excitement so well. It’s not just another roast chicken — it’s a flavorful, juicy, and visually fun dish that feels special without demanding too much time or effort. I love how the garlic herb butter seeps into every bite, and the beer-steamed method keeps everything moist and tender.
Feel free to make this your own by swapping herbs, adjusting the butter flavors, or even trying it on the grill. I’d love to hear how you customize it — drop a comment sharing your tweaks or questions. Cooking should be fun and forgiving, and this recipe definitely brings both to the table.
Give it a try, and soon you’ll understand why it’s become a quiet favorite for effortless, impressive dinners.
Frequently Asked Questions
Can I use other types of beer for this recipe?
Yes, but avoid very bitter or heavily hopped beers like IPAs, which can impart a harsh flavor. Lagers, pilsners, or pale ales work best for a balanced taste.
Do I have to use a beer can chicken holder?
No, it’s optional. The chicken can stand upright on the beer can itself if placed carefully in a stable roasting pan, but holders provide extra stability and safety.
Can I prepare the garlic herb butter in advance?
Absolutely! You can make the garlic herb butter up to 2 days ahead and keep it refrigerated. Just bring it to room temperature before spreading under the skin.
What if I don’t have fresh herbs?
Dried herbs can be used in a pinch, but reduce the amount by about half since dried herbs are more concentrated. Fresh herbs give a brighter, fresher flavor.
Is this recipe suitable for grilling?
Yes, you can cook the beer can chicken on a grill using indirect heat. Keep the grill covered and maintain medium heat for about the same cooking time, checking internal temperature for doneness.
Pin This Recipe!
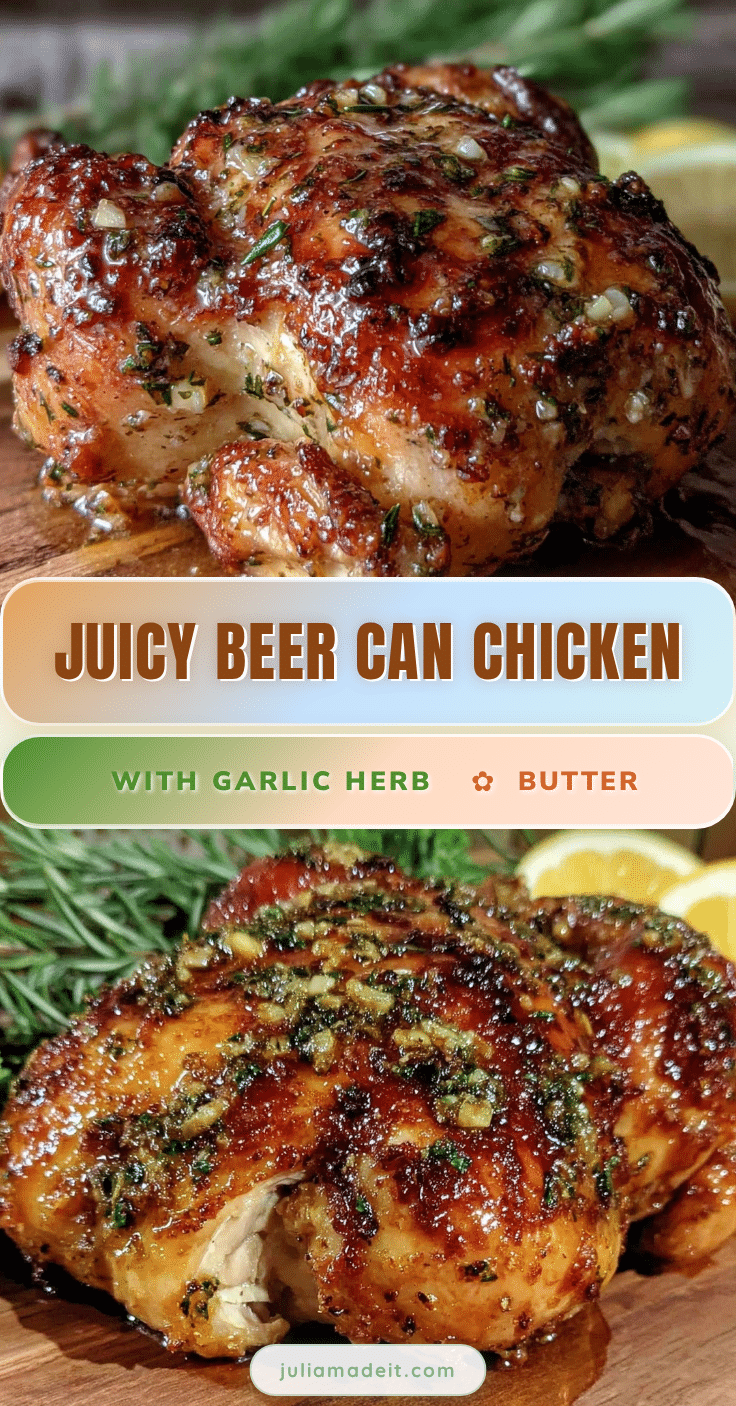
Savory Beer Can Chicken Recipe with Garlic Herb Butter Easy and Perfect

A flavorful and juicy beer can chicken roasted upright with garlic herb butter, delivering crispy skin and tender meat infused with subtle beer and herb aromas.
- Prep Time: 15 minutes
- Cook Time: 60 to 75 minutes
- Total Time: 1 hour 15 minutes to 1 hour 30 minutes
- Yield: 6 servings 1x
- Category: Main Course
- Cuisine: American
Ingredients
- 1 whole chicken (4 to 5 pounds, preferably organic or free-range)
- 1 standard 12 oz (355 ml) can of lager or pale ale beer
- 4 tablespoons (60 g) unsalted butter, softened
- 4 cloves garlic, minced
- 2 tablespoons fresh parsley, chopped
- 1 tablespoon fresh thyme, chopped
- 1 tablespoon fresh rosemary, chopped
- Zest of 1 lemon
- Salt and pepper to taste
- 1 tablespoon olive oil
- Optional: pinch of smoked paprika
- Optional: splash of honey
Instructions
- Preheat your oven to 375°F (190°C).
- In a mixing bowl, combine softened butter, minced garlic, chopped parsley, thyme, rosemary, lemon zest, salt, and pepper. Mix well.
- Remove giblets from the chicken cavity and pat the chicken dry thoroughly with paper towels.
- Gently loosen the skin from the breast meat without tearing it to create a pocket.
- Spread about two-thirds of the garlic herb butter under the skin on the breasts and thighs. Rub the remaining butter all over the outside of the chicken.
- Season the chicken inside and out with salt and pepper.
- Open the beer can and pour out or drink about half of the beer. Optionally add crushed garlic cloves or herbs inside the can.
- Place the chicken upright on the beer can so the can fits inside the cavity and the bird stands steady. Use a beer can chicken holder if available.
- Place the chicken and can upright in a roasting pan or rimmed baking sheet.
- Roast in the oven for 60 to 75 minutes, or until the internal temperature reaches 165°F (74°C) in the thickest part of the thigh.
- Remove the chicken carefully from the pan and let it rest for 10 to 15 minutes.
- Carve the chicken into pieces and serve, spooning any pan juices over the top.
Notes
If skin is not crispy enough, broil for 2-3 minutes at the end, watching closely to avoid burning. Use a meat thermometer to ensure the chicken reaches 165°F (74°C). Let the chicken rest 10-15 minutes before carving to keep juices locked in. The recipe can be adapted for grilling using indirect heat.
Nutrition
- Serving Size: 1/6 of a whole chick
- Calories: 375
- Sodium: 150
- Fat: 22
- Saturated Fat: 13
- Carbohydrates: 1
- Protein: 40
Keywords: beer can chicken, garlic herb butter, roast chicken, easy chicken recipe, backyard chicken, crispy skin chicken, juicy chicken, beer steamed chicken