The butter was browning in the pan, and I was supposed to be bringing a dessert to a friend’s house in forty minutes. The pantry had a can of pumpkin I’d bought on a whim back in September, and a half-open bag of powdered sugar that was starting to clump. I had no plan, no recipe pulled up on my phone—just a craving for something that tasted like fall without the fuss of a layer cake. That’s how these pumpkin bars were born, honestly, out of a little bit of chaos and a lot of hope.
I’d been making variations of pumpkin desserts for years, but this one felt different from the start. The smell of that brown butter bubbling on the stove—nutty, toasty, almost like caramel—filled the kitchen and made me forget I was in a hurry. I poured the pumpkin into a bowl, grabbed a whisk, and just started mixing. No stand mixer, no sifting flour, no creaming butter and sugar for ten minutes. Just one bowl, a wooden spoon, and the kind of faith that comes from knowing you’ve done this before.
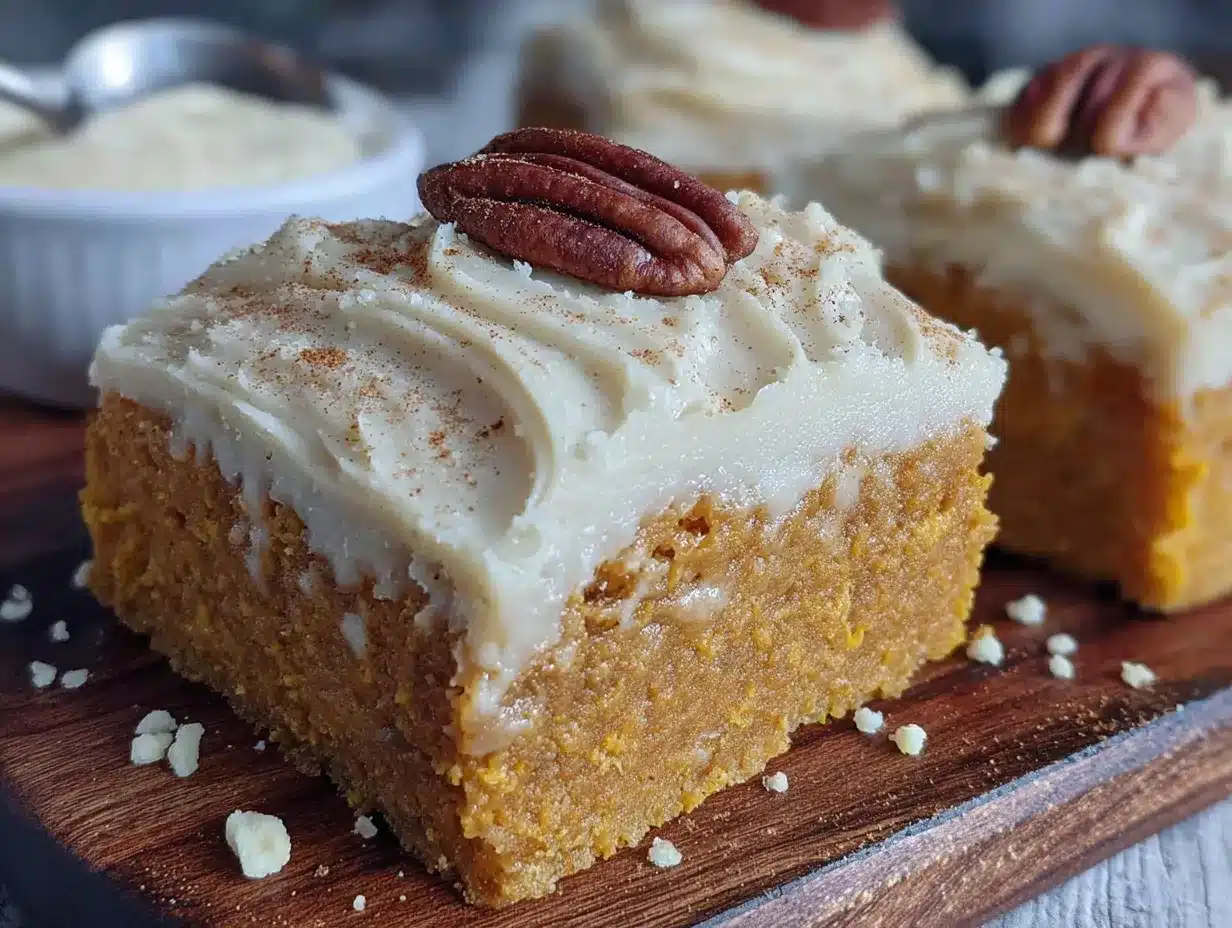
When I pulled the pan out of the oven, the bars were puffed and golden, with that perfect crackly top that tells you they’re going to be soft inside. I let them cool just enough so the frosting wouldn’t melt into a puddle, then spread that brown butter icing over the top in thick, uneven swirls. The first bite made me stop. It was exactly what I wanted—spiced, tender, not too sweet, with that deep, almost savory richness from the brown butter cutting through the pumpkin. I brought the whole pan to my friend’s house, and by the end of the night, there were only crumbs left on the foil.
That’s the thing about this recipe. It doesn’t need a fancy origin story or a trip to a specialty store. It came together in a real kitchen, with real ingredients, on a regular Tuesday. And it stuck because it worked.
Why You’ll Love This Recipe
Let me tell you why these pumpkin bars keep showing up at every gathering I go to. I’ve tested this recipe at least six times now, tweaking the spice ratio and the baking time until it felt just right. Here’s what makes it different from the other pumpkin recipes floating around out there.
- One Bowl Wonder: You mix everything in a single bowl. No stand mixer needed, no sifting, no separating wet and dry ingredients. It’s the kind of recipe you can make with a toddler clinging to your leg or while you’re half-listening to a podcast.
- Brown Butter Frosting: This isn’t your standard cream cheese frosting. The brown butter adds a nutty, almost butterscotch flavor that makes the pumpkin taste deeper and more interesting. It’s the secret weapon here, and it only takes an extra five minutes.
- Perfectly Spiced, Not Overpowering: I use a blend of cinnamon, ginger, nutmeg, and a tiny pinch of cloves. It’s warm and cozy without tasting like a candle. The pumpkin flavor actually gets to shine through.
- Incredibly Moist: These bars stay soft for days. The combination of pumpkin puree and oil (not butter, which can make baked goods dry) keeps them tender and almost custard-like in the center.
- Crowd-Pleaser Status: I’ve brought these to potlucks, Thanksgiving dinners, and casual coffee dates. They disappear fast. People who say they don’t like pumpkin desserts have asked me for the recipe.
- No Fancy Equipment: A 9×13 pan, a whisk, and a spatula. That’s it. You don’t need a pastry bag or a piping tip. Just spread the frosting and call it done.
This recipe is the kind you’ll make on a Sunday afternoon just because, and then again on Wednesday when you need something sweet. It’s comfort food that doesn’t require a lot of effort, which is exactly what fall baking should be.
What Ingredients You Will Need
This recipe uses simple, pantry-friendly ingredients to create something that tastes anything but basic. The magic is in the technique, not the shopping list.
For the Pumpkin Bars
- Canned pumpkin puree (15 oz can) — not pumpkin pie filling. I prefer Libby’s for its consistent texture and deep color. Make sure it’s 100% pure pumpkin.
- Granulated sugar (1 cup / 200g) — adds sweetness and helps create that slightly crackly top.
- Brown sugar (1 cup packed / 200g) — I use light brown sugar for moisture and a hint of molasses flavor. Dark brown works too if you want a deeper taste.
- Vegetable oil (1/2 cup / 120ml) — keeps the bars tender. Canola or avocado oil work just as well. Don’t use olive oil here; the flavor is too strong.
- Large eggs (4, room temperature) — room temperature eggs blend more smoothly into the batter. If you forget to take them out early, place them in a bowl of warm water for five minutes.
- Vanilla extract (2 teaspoons) — pure vanilla adds warmth. Imitation extract works in a pinch, but pure is worth the splurge here.
- All-purpose flour (2 cups / 250g) — spoon and level it into your measuring cup. Scooping directly from the bag packs the flour and makes the bars dense.
- Baking powder (2 teaspoons) — gives the bars lift without making them cakey.
- Baking soda (1 teaspoon) — helps with browning and tenderness.
- Salt (1/2 teaspoon) — balances the sweetness and enhances the spices.
- Pumpkin pie spice (2 teaspoons) — or make your own blend: 1 teaspoon cinnamon, 1/2 teaspoon ginger, 1/4 teaspoon nutmeg, 1/4 teaspoon cloves.
For the Brown Butter Frosting
- Unsalted butter (1/2 cup / 113g, or 1 stick) — this is the star. Use unsalted so you control the salt level.
- Powdered sugar (2 cups / 240g, sifted) — sifting prevents lumps. I know it’s an extra step, but it makes a difference in the smoothness.
- Vanilla extract (1 teaspoon)
- Milk (2-3 tablespoons) — whole milk gives the creamiest texture, but 2% or oat milk work too. Add it one tablespoon at a time until the frosting reaches your desired consistency.
- Salt (a pinch) — a tiny flaky salt like Maldon on top is optional but highly recommended.
For ingredient selection tips: look for butter that’s pale yellow and firm to the touch. Older butter can have off-flavors that become more noticeable once browned. And if you’re using a different brand of pumpkin puree, check the consistency—some are more watery than others. If yours seems thin, drain off any excess liquid before measuring.
Equipment Needed
You don’t need a fully stocked bakery kitchen for this one. Here’s what you’ll actually use.
- 9×13 baking pan — metal or glass both work. Metal pans conduct heat more evenly and give you a nicer golden bottom. Glass pans take slightly longer to bake.
- Parchment paper — cut a piece long enough to overhang on two sides. This creates handles that let you lift the entire block of bars out of the pan for easy cutting. Trust me, it’s worth the extra ten seconds.
- Large mixing bowl — any bowl big enough to hold all the ingredients without splashing.
- Whisk — for smoothing out the pumpkin and eggs before adding the dry ingredients.
- Spatula or wooden spoon — for folding the flour mixture into the wet ingredients. Don’t overmix, so a gentle hand is key.
- Small saucepan — for browning the butter. A light-colored pan (stainless steel or enamel) helps you see the color change. Dark nonstick pans make it hard to tell when the butter is truly browned.
- Hand mixer or stand mixer — for the frosting. You can whisk it by hand, but your arm will get tired. A hand mixer makes it fluffy in under a minute.
- Cooling rack — lets air circulate under the pan so the bars cool evenly. If you don’t have one, just set the pan on a trivet.
- Offset spatula — not required, but it makes spreading frosting look effortless. A butter knife works perfectly fine.
Budget-friendly tip: skip the parchment paper and just grease the pan well with butter or nonstick spray. The bars might stick a little on the edges, but they’ll still taste great.
Preparation Method
Let’s walk through this step by step. I’ve included little notes along the way that I wish someone had told me the first time I made these.
- Preheat the oven to 350°F (175°C). Line your 9×13 pan with parchment paper, leaving a two-inch overhang on the long sides. Lightly grease the parchment with cooking spray so nothing sticks.
- In a large bowl, whisk together the pumpkin puree, granulated sugar, brown sugar, and vegetable oil. Whisk until smooth and well combined. The mixture should look glossy and thick. If it looks separated or watery, your pumpkin might be too thin—drain off any excess liquid before starting.
- Add the eggs one at a time, whisking well after each addition. Then add the vanilla extract. The batter should be smooth and slightly fluffy at this point. Don’t rush this step; each egg needs to be fully incorporated before you add the next one.
- In a separate medium bowl, whisk together the flour, baking powder, baking soda, salt, and pumpkin pie spice. Make sure there are no lumps of baking powder hiding in the flour. I always use a fork to break up any clumps.
- Gradually add the dry ingredients to the wet ingredients, folding gently with a spatula. Stir just until you no longer see streaks of flour. A few small lumps are fine. Overmixing at this stage will make the bars tough instead of tender.
- Pour the batter into the prepared pan and spread it evenly. The batter will be thick—almost like a muffin batter. Use the back of your spatula to smooth it into the corners. Tap the pan gently on the counter a few times to release any air bubbles.
- Bake for 25-30 minutes, or until a toothpick inserted in the center comes out clean. The edges should pull away slightly from the pan, and the top should be golden and spring back when touched lightly. Start checking at 25 minutes. Every oven runs a little differently.
- Let the bars cool completely in the pan on a wire rack. This is crucial. If you try to frost them while they’re still warm, the frosting will slide right off. I usually wait at least an hour, sometimes two. Patience is hard, but it pays off.
- While the bars cool, make the brown butter frosting. Place the butter in a small saucepan over medium heat. Stir frequently as it melts. It will foam up, then the foam will subside, and you’ll see golden brown specks forming at the bottom. Swirl the pan occasionally but don’t walk away—brown butter can go from perfect to burnt in about 30 seconds. When it smells nutty and looks amber, remove it from the heat immediately.
- Pour the brown butter into a heatproof bowl and let it cool for 5 minutes. It should be warm but not hot. If it’s too hot, it will melt the powdered sugar and make the frosting runny.
- Add the sifted powdered sugar, vanilla extract, and a pinch of salt to the warm brown butter. Beat with a hand mixer on low speed until combined, then increase to medium speed. Add milk one tablespoon at a time until the frosting is smooth and spreadable. It should be thick but still soft enough to glide across the bars.
- Spread the frosting evenly over the cooled bars. Use an offset spatula or the back of a spoon. Don’t worry about making it perfect—rustic swirls look homemade and inviting.
- Let the frosting set for about 15 minutes before slicing. If you can wait that long. Use the parchment overhang to lift the whole block of bars out of the pan, then cut into squares with a sharp knife. Wipe the knife clean between cuts for neat edges.
Cooking Tips & Techniques
I’ve made these bars more times than I can count, and I’ve messed up plenty along the way. Here’s what I’ve learned so you don’t have to make the same mistakes.
Don’t overmix the batter. I know I said this already, but it’s worth repeating. When you overmix, you develop the gluten in the flour, and that makes the bars dense and chewy instead of soft and tender. Fold the dry ingredients in with a light hand, and stop as soon as the flour disappears.
Use room temperature eggs. Cold eggs can seize the batter and make it lumpy. If you’re short on time, place the eggs in a bowl of warm water for five minutes before cracking them. Same goes for the pumpkin—let it sit on the counter for a bit if you can.
Watch the brown butter like a hawk. The first time I made brown butter, I burned it so badly I had to start over. The butter goes from golden to dark brown very quickly. Swirl the pan constantly, and trust your nose more than your eyes. When it smells like toasted nuts, it’s ready. Pour it into a cool bowl immediately to stop the cooking process.
Let the bars cool completely. I know you’re excited. I am too. But warm bars + frosting = a melty mess. If you’re in a hurry, pop the pan in the fridge for 20 minutes after they’ve cooled to room temperature. That speeds things up without compromising the texture.
Cut clean squares. Use a sharp chef’s knife and wipe it clean between each cut. This gives you those beautiful, bakery-style edges. If the frosting sticks to the knife, dip the blade in hot water and dry it off before slicing.
Multitask wisely. While the bars are baking, clean up your dishes. While they’re cooling, make the frosting. This way, by the time the bars are ready, you’re just minutes away from eating.
Variations & Adaptations
One of the best things about this recipe is how flexible it is. Here are a few ways I’ve adapted it depending on what I have in the pantry or who I’m feeding.
Gluten-Free Version: Swap the all-purpose flour with a 1:1 gluten-free baking blend. I’ve used Bob’s Red Mill and King Arthur with great results. The texture is slightly more delicate, so let the bars cool completely before slicing. Don’t use almond flour or coconut flour alone—they change the structure too much.
Dairy-Free Frosting: Use vegan butter sticks (like Miyoko’s or Earth Balance) for the brown butter. It browns beautifully and tastes almost identical. Use oat milk or almond milk for the liquid. The frosting won’t be quite as rich, but it’s still delicious.
Spice It Up: Add 1/4 teaspoon of cardamom or allspice to the flour mixture for a more complex flavor profile. I’ve done this for holiday gatherings and it always gets compliments. You can also add a pinch of black pepper for a subtle warmth that plays well with the pumpkin.
Add Mix-Ins: Fold in 1/2 cup of chopped pecans or walnuts before baking for some crunch. Or sprinkle chocolate chips over the batter before it goes in the oven—dark chocolate and pumpkin are a surprisingly good pair. If you’re feeling extra, drizzle some caramel sauce over the finished bars.
Make It a Layer Cake: Double the recipe and bake it in two 9-inch round pans. Layer the frosting between the cakes and on top. It’s a showstopper for Thanksgiving without being too complicated.
Lower Sugar Option: Reduce the granulated sugar to 3/4 cup and the brown sugar to 3/4 cup. The bars will be less sweet but still moist. The frosting will balance out the sweetness, so don’t skimp there.
I once made a batch with maple syrup instead of brown sugar—just used 3/4 cup maple syrup and reduced the oil by 2 tablespoons. The flavor was incredible, but the bars were a bit more fragile. Worth trying if you’re feeling adventurous.
Serving & Storage Suggestions
These bars are forgiving and actually taste better the next day, after the flavors have had time to meld together.
Serving Temperature: Serve at room temperature. The frosting softens slightly and the bars become extra tender. If you’ve stored them in the fridge, let them sit on the counter for 20 minutes before serving.
Presentation: Cut into 24 squares for a party or 12 larger bars for a more generous portion. Arrange on a wooden board or a simple white platter. A dusting of flaky sea salt on top of the frosting adds a beautiful finish and a salty-sweet contrast.
What to Serve With: A cup of hot coffee or tea is the obvious choice. For a dessert spread, pair with brown butter apple crisp for a double dose of fall flavors. A scoop of vanilla ice cream on the side never hurts either.
Storage Instructions: Store in an airtight container at room temperature for up to 3 days. If your kitchen is warm, refrigerate them—the frosting can get a bit soft otherwise. Layer parchment paper between the bars if you’re stacking them to prevent sticking.
Freezing: These freeze beautifully. Freeze the unfrosted bars wrapped tightly in plastic wrap and then foil for up to 3 months. Thaw overnight in the fridge, then bring to room temperature before frosting. You can also freeze the frosted bars—just place them in a single layer on a baking sheet until the frosting hardens, then wrap individually. Thaw in the fridge overnight.
Reheating: If you like your bars slightly warm, pop them in the microwave for 10-15 seconds. The frosting will get a little melty, but that’s part of the charm. Don’t overheat or the bars will dry out.
I’ve noticed that the spices actually deepen after a day or two in the fridge. The bars become even more flavorful, so don’t be afraid to make them ahead of time.
Nutritional Information & Benefits
Let’s be real—these are a dessert, not a health food. But they do have some redeeming qualities worth mentioning.
Estimated Nutrition Per Bar (24 servings):
Calories: 220 | Fat: 10g | Saturated Fat: 4g | Carbohydrates: 32g | Fiber: 1g | Sugar: 24g | Protein: 3g
Pumpkin is a nutritional powerhouse. It’s packed with vitamin A (from beta-carotene), which supports eye health and immune function. It also contains fiber, which helps with digestion and keeps you feeling full. One cup of pumpkin puree has about 50 calories, so it’s a great way to add moisture without a ton of extra fat.
Brown butter adds a small amount of vitamin A and healthy fats, but let’s be honest—we’re here for the flavor. A little goes a long way, and the richness means you’re satisfied with one bar instead of three.
Dietary Considerations: This recipe contains eggs, dairy (butter, milk), and gluten (wheat flour). For a gluten-free version, use a 1:1 gluten-free flour blend. For a dairy-free version, use vegan butter and plant-based milk in the frosting. The bars themselves are nut-free if you skip the pecan variation.
Allergen Note: If you’re serving a crowd, label the bars clearly if you’ve added nuts. I always keep a few plain ones aside for guests with allergies.
I’m not a nutritionist, but I love that these bars let me enjoy a seasonal treat without feeling like I’ve derailed my whole day. One bar is enough to satisfy a sweet craving, and the pumpkin makes me feel slightly virtuous.
Conclusion
These pumpkin bars with brown butter frosting are the kind of recipe that becomes a staple—the one you make for fall gatherings, the one you text to your sister, the one you pull out when you need something that tastes like effort but feels like ease. The brown butter adds a depth that makes people ask, “What’s in this?” and the pumpkin keeps everything soft and tender for days.
What I love most about this recipe is how adaptable it is. You can dress it up with nuts or chocolate chips, keep it simple with just the frosting, or double it for a crowd. It works for a casual weeknight dessert or a holiday table. It doesn’t demand perfection—just a little patience while the bars cool and a watchful eye on that butter as it browns.
If you make these, I’d love to hear how they turn out. Leave a comment below or tag me in your photos. Tell me if you added a twist or kept it classic. And if you’re looking for more fall baking inspiration, don’t miss my pumpkin chocolate chip cream cheese swirl bread or these pumpkin sugar cookie bars with orange cream cheese frosting—they’re both perfect for this time of year.
Happy baking, friends. I hope these bars bring a little warmth to your kitchen.
Frequently Asked Questions
Can I use fresh pumpkin instead of canned?
Yes, but you’ll need to roast and puree it first. Fresh pumpkin has more water than canned, so after pureeing, drain it in a cheesecloth-lined strainer for about an hour to remove excess moisture. Otherwise, your bars might turn out soggy. I usually stick with canned for consistency, but fresh works in a pinch.
Why did my brown butter frosting turn out grainy?
Grainy frosting usually means the powdered sugar wasn’t sifted, or the brown butter was too hot when you added the sugar. Make sure to sift your powdered sugar before mixing, and let the brown butter cool for at least 5 minutes after browning. If your frosting is already grainy, try adding a tablespoon of warm milk and beating it again on high speed.
Can I make these bars ahead of time?
Absolutely. Bake the bars a day ahead, let them cool completely, and store them unfrosted in an airtight container at room temperature. Make the frosting the next day and spread it on just before serving. The bars actually taste better after a day because the spices have time to meld.
How do I know when the bars are done baking?
Insert a toothpick into the center of the bars. If it comes out clean or with a few moist crumbs, they’re done. The edges should be pulling away slightly from the pan, and the top should spring back when you press it gently with your finger. Start checking at 25 minutes to avoid overbaking.
Can I freeze the frosted bars?
Yes. Place the frosted bars on a baking sheet in a single layer and freeze until the frosting is firm (about 30 minutes). Then wrap each bar individually in plastic wrap and store them in a freezer-safe bag. They’ll keep for up to 3 months. Thaw in the fridge overnight or at room temperature for about an hour before serving.
Pin This Recipe!
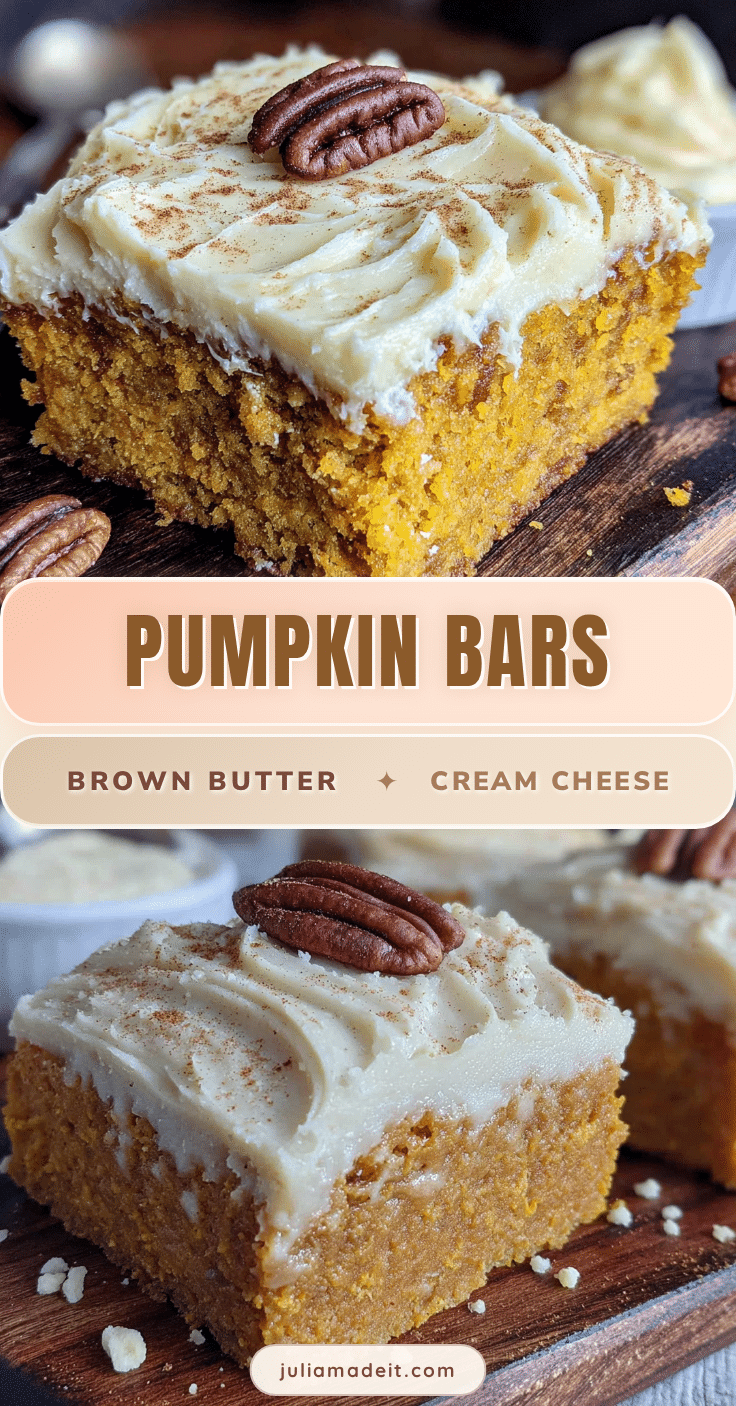
The Best Pumpkin Bars with Brown Butter Frosting
These pumpkin bars are a one-bowl wonder with a nutty brown butter frosting. They’re perfectly spiced, incredibly moist, and come together with simple pantry ingredients for an easy fall dessert that’s always a crowd-pleaser.
- Prep Time: 15 minutes
- Cook Time: 30 minutes
- Total Time: 45 minutes
- Yield: 24 servings 1x
- Category: Dessert
- Cuisine: American
Ingredients
- 1 cup (200g) granulated sugar
- 1 cup packed (200g) light brown sugar
- 1/2 cup (120ml) vegetable oil
- 4 large eggs, room temperature
- 2 teaspoons vanilla extract
- 2 cups (250g) all-purpose flour
- 2 teaspoons baking powder
- 1 teaspoon baking soda
- 1/2 teaspoon salt
- 2 teaspoons pumpkin pie spice
- 1 can (15 oz) canned pumpkin puree (not pumpkin pie filling)
- 1/2 cup (113g) unsalted butter (for frosting)
- 2 cups (240g) powdered sugar, sifted (for frosting)
- 1 teaspoon vanilla extract (for frosting)
- 2–3 tablespoons milk (for frosting)
- A pinch of salt (for frosting)
Instructions
- Preheat the oven to 350°F (175°C). Line a 9×13 baking pan with parchment paper, leaving a two-inch overhang on the long sides. Lightly grease the parchment with cooking spray.
- In a large bowl, whisk together the pumpkin puree, granulated sugar, brown sugar, and vegetable oil until smooth and glossy.
- Add the eggs one at a time, whisking well after each addition. Then add the vanilla extract and whisk until smooth.
- In a separate medium bowl, whisk together the flour, baking powder, baking soda, salt, and pumpkin pie spice.
- Gradually add the dry ingredients to the wet ingredients, folding gently with a spatula until just combined. Do not overmix.
- Pour the batter into the prepared pan and spread it evenly. Tap the pan gently on the counter to release air bubbles.
- Bake for 25-30 minutes, or until a toothpick inserted in the center comes out clean. Let the bars cool completely in the pan on a wire rack.
- While the bars cool, make the brown butter frosting. Place the butter in a small saucepan over medium heat. Stir frequently until it melts, foams, and turns golden brown with a nutty aroma. Remove from heat immediately.
- Pour the brown butter into a heatproof bowl and let it cool for 5 minutes.
- Add the sifted powdered sugar, vanilla extract, and a pinch of salt to the warm brown butter. Beat with a hand mixer on low speed until combined, then increase to medium speed. Add milk one tablespoon at a time until the frosting is smooth and spreadable.
- Spread the frosting evenly over the cooled bars. Let the frosting set for about 15 minutes before slicing.
- Use the parchment overhang to lift the bars out of the pan. Cut into squares with a sharp knife, wiping the knife clean between cuts.
Notes
Don’t overmix the batter to keep bars tender. Watch brown butter closely to avoid burning. Let bars cool completely before frosting. For clean cuts, wipe knife between slices. Bars taste even better the next day.
Nutrition
- Serving Size: 1 bar
- Calories: 220
- Sugar: 24
- Sodium: 150
- Fat: 10
- Saturated Fat: 4
- Carbohydrates: 32
- Fiber: 1
- Protein: 3
Keywords: pumpkin bars, brown butter frosting, fall dessert, easy pumpkin recipe, one bowl pumpkin bars