The entire batch disappeared in under twenty-four hours. My son had asked for them again before I’d even finished wiping the counter. That was the moment I realized these little balls of oats and peanut butter were more than just a snack—they were a survival tool for the 3:30 PM chaos that descends the second the school bus rounds the corner.
I didn’t set out to create a recipe. Honestly, I was just trying to use up the half-empty jar of peanut butter and the bag of oats that was threatening to go stale. My first attempt was a crumbly, dry mess that fell apart in my hands. The second batch was too sticky, more like cookie dough you couldn’t bake. But the third try? That was the one. The texture was perfect—chewy, a little dense, and just sweet enough to feel like a treat without being a sugar bomb.
These easy no-bake protein energy bites for after school came from a very real place of desperation and a very full pantry. They weren’t born from a fancy food blog inspiration or a wellness kick. They came from a Tuesday afternoon when I had nothing prepped, a hungry kid, and exactly fifteen minutes before I needed to be somewhere else. And you know what? They turned out to be the best kind of accident. I’ve been making them ever since, tweaking the ratios until they were just right. They’re the snack I actually trust to hold up in a lunchbox or get us through homework time without anyone melting down. That kind of reliability is hard to find.
Why You’ll Love This Recipe
Let’s be real for a second. Finding an after-school snack that kids actually want to eat and that doesn’t make you feel guilty about feeding it to them is like finding a unicorn. These energy bites are that unicorn. They’ve been tested on my own picky eater, shared with neighbors, and packed for countless soccer practices. They work.
- No Baking Required: Seriously. No oven. No mixer. Just a bowl, a spoon, and your hands. This is the kind of recipe you can make while talking on the phone or helping with homework. It takes ten minutes of active time, tops.
- Simple, Real Ingredients: You won’t find any weird protein powders or hard-to-find superfoods here. Just oats, peanut butter, honey, chocolate chips, and a few pantry staples you probably already have. It’s real food, made simple.
- Perfect for Busy Afternoons: The 3 PM hunger is a beast. These bites are ready to grab and go. No plates, no forks, no mess. Just unwrap and eat. They save my sanity on those days when the bus is late and everyone is cranky.
- Crowd-Pleaser for All Ages: I’ve seen toddlers, teenagers, and grown adults polish these off. They’re not too sweet, not too healthy-tasting. They hit that perfect middle ground where everyone reaches for another one.
- Unbelievably Satisfying: The combination of oats, protein from the peanut butter, and a little bit of chocolate hits the spot in a way that a bag of chips just can’t. They actually fill you up and keep you going until dinner.
What makes these different from every other energy ball recipe out there? It’s the texture. So many recipes turn out either too dry or too sticky. This one uses just the right ratio of wet to dry ingredients, and the little trick of letting the mixture rest for a few minutes before rolling makes all the difference. It’s not just another version—it’s the one that finally worked for me. And when you bite into one, you’ll get it. It’s the kind of snack that makes you close your eyes for a second because it’s exactly what you needed.
What Ingredients You Will Need
This recipe relies on simple, wholesome ingredients that come together to create a satisfying and delicious snack without any fuss. Most of these are pantry staples, which is exactly why I love this recipe. Here’s everything you need and a little bit about why each one matters.
- Rolled Oats (1 ½ cups / 135g): These are the backbone of the energy bites. I recommend using old-fashioned rolled oats, not the quick-cooking kind. They give the bites a better, chewier texture. Quick oats can turn a bit mushy. If you need a gluten-free option, just grab certified gluten-free rolled oats. I’ve used Bob’s Red Mill and Quaker Oats with great results.
- Creamy Peanut Butter (½ cup / 130g): This is your main binder and protein source. I use a standard creamy peanut butter like Jif or Skippy for the best texture. Natural peanut butters that separate can sometimes make the bites too oily or crumbly. If you only have natural, just stir it really well and you might need to add a few extra oats to balance the texture.
- Honey (⅓ cup / 110g): Honey adds the perfect amount of sweetness and helps hold everything together. It’s stickier than maple syrup, which is why I prefer it here. If you’re vegan, you can swap in agave nectar or brown rice syrup, though the texture might be slightly less firm.
- Dark Chocolate Chips (⅓ cup / 60g): The little bursts of chocolate make these feel like a treat. I like using dark chocolate chips (60-70% cacao) because they’re not too sweet and they pair beautifully with the peanut butter. Mini chocolate chips are great too—they distribute more evenly. If you’re dairy-free, look for Enjoy Life brand or another vegan chocolate chip.
- Ground Flaxseed (2 tablespoons / 14g): This is my secret ingredient. It adds a boost of omega-3s and fiber without changing the taste. It also helps absorb some of the moisture and makes the bites hold together better. You can skip it if you don’t have it, but I love what it adds. I always keep mine in the fridge to keep it fresh.
- Vanilla Extract (1 teaspoon): A little vanilla goes a long way in rounding out the flavors. Use pure vanilla extract if you have it—the flavor is noticeably better than imitation.
- Pinch of Salt (¼ teaspoon): Don’t skip this! Salt enhances the sweetness and the peanut butter flavor. If you’re using salted peanut butter, you can reduce this to just a tiny pinch or omit it altogether.
That’s it. Seven ingredients, no surprises. I’ve made these so many times that I don’t even measure the oats anymore—I just pour until it looks right. But for your first batch, stick to the measurements. Once you get a feel for the texture, you can start playing around.
Equipment Needed
One of the best things about this recipe is that it doesn’t require any fancy equipment. You probably already have everything you need in your kitchen drawers and cabinets.
- Large Mixing Bowl: Any medium to large bowl will work. I use a glass mixing bowl because it doesn’t hold onto smells, but stainless steel or ceramic is fine too.
- Measuring Cups and Spoons: You’ll need standard dry measuring cups for the oats and chocolate chips, and a liquid measuring cup for the honey (it’s easier to pour). A set of measuring spoons for the flaxseed, vanilla, and salt.
- Rubber Spatula or Wooden Spoon: For mixing everything together. A rubber spatula is great for scraping the sides of the bowl and getting every last bit of the mixture.
- Baking Sheet or Large Plate: To hold the rolled energy bites while they chill. Line it with parchment paper or wax paper for easy cleanup.
- Parchment Paper or Wax Paper: Not strictly necessary, but it makes cleanup a breeze and prevents the bites from sticking to the baking sheet.
- Refrigerator: The bites need at least 30 minutes to firm up. A little patience goes a long way here.
That’s genuinely it. No food processor, no stand mixer, no special gadgets. I’ve made these in a tiny apartment kitchen and in a full-size kitchen, and the process is exactly the same. If you have hands and a bowl, you’re good to go.
Preparation Method
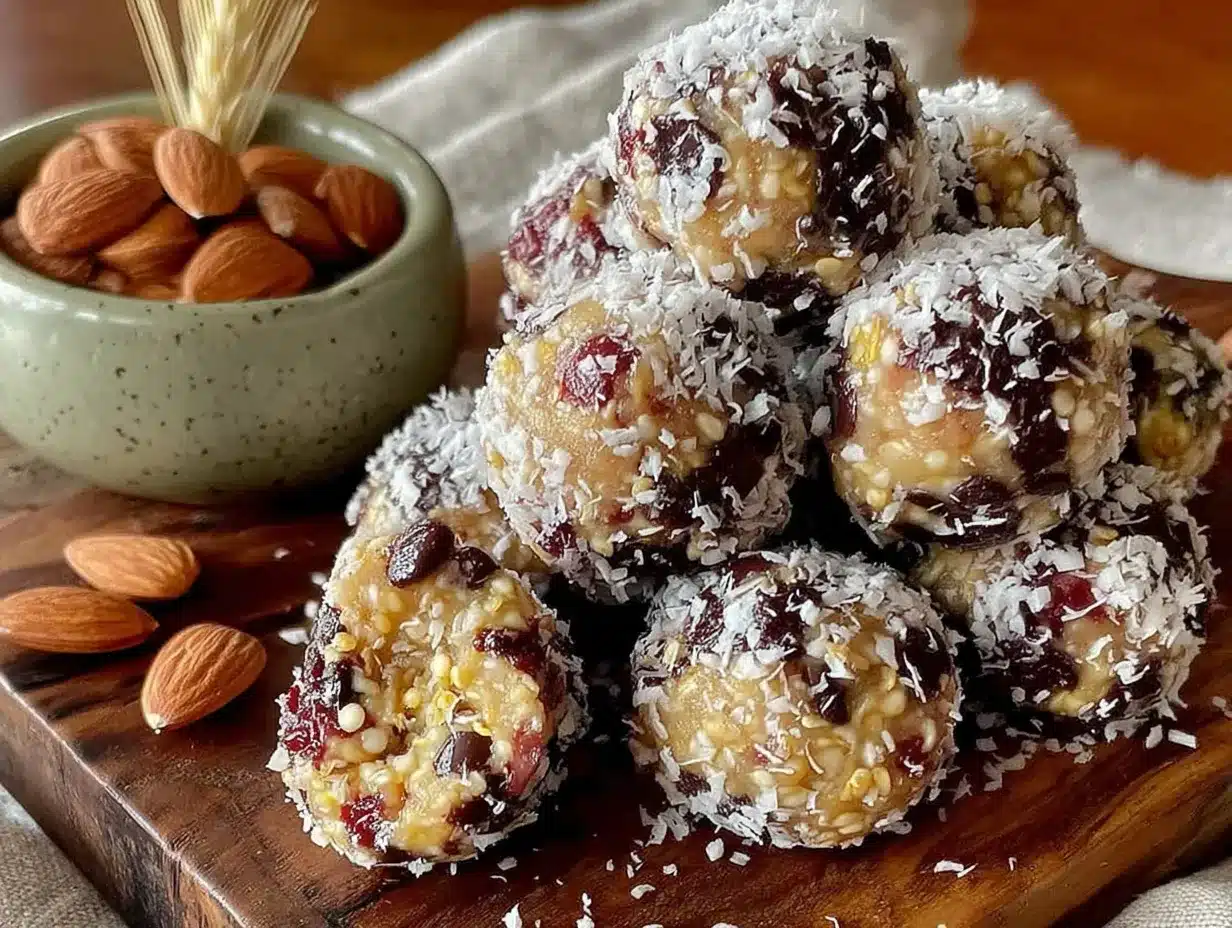
This is the easy part. I promise, if you can stir and roll, you can make these energy bites. The whole process takes about 10 minutes of active time, plus a little chill time. Let’s break it down step by step.
- Combine the Wet Ingredients (2 minutes): In your large mixing bowl, add the ½ cup of creamy peanut butter, ⅓ cup of honey, and 1 teaspoon of vanilla extract. Stir them together with your rubber spatula or wooden spoon until they are completely combined and smooth. It should look like a thick, glossy sauce. This is your base, and it needs to be well-mixed before you add anything else.
- Add the Dry Ingredients (2 minutes): Now, add the 1 ½ cups of rolled oats, ⅓ cup of dark chocolate chips, 2 tablespoons of ground flaxseed, and ¼ teaspoon of salt to the bowl. Stir everything together. At first, it will seem like there’s not enough wet stuff to coat all the oats. Don’t panic. Keep stirring. Press the mixture against the sides of the bowl with your spatula. It will come together. You want a texture that looks like a stiff cookie dough. Every oat should be coated, and the chocolate chips should be evenly distributed.
- Let the Mixture Rest (5 minutes): This is the step most people skip, and it’s the one that makes the biggest difference. Let the mixture sit in the bowl for 5 minutes. This gives the oats time to absorb some of the moisture from the peanut butter and honey. The mixture will firm up noticeably. If after 5 minutes it still looks a little dry or crumbly, you can add a tiny splash of water or milk (about a teaspoon) and mix again. If it looks too sticky to handle, add another tablespoon of oats.
- Wet Your Hands (30 seconds): This is my best tip. Lightly wet your hands with cold water. Shake off the excess. This prevents the mixture from sticking to your palms while you roll. It’s a game-changer. You’ll need to re-wet your hands every few bites as the mixture starts to build up.
- Roll into Bites (5 minutes): Scoop out about 1 to 1 ½ tablespoons of the mixture. I use a small cookie scoop for consistency, but a regular spoon works fine. Roll it between your palms to form a smooth ball. It should be about 1 inch in diameter. Place the finished ball on your parchment-lined baking sheet. Repeat with the rest of the mixture. This recipe makes about 18 to 20 bites, depending on how big you roll them.
- Chill to Set (30 minutes minimum): Place the baking sheet with the rolled bites into the refrigerator. Let them chill for at least 30 minutes. This is crucial. The cold temperature helps the peanut butter and honey firm up, turning a soft, sticky ball into a perfectly portable, grab-and-go snack. If you try to eat one right away, it will be delicious but a little messy. After 30 minutes, they hold their shape beautifully.
- Store and Enjoy: Once they are firm, transfer the energy bites to an airtight container. Store them in the refrigerator for up to a week, or in the freezer for up to three months. They’re perfect straight from the fridge or after sitting at room temperature for a few minutes.
I always make a double batch. The first batch usually gets eaten within two days. The second batch goes straight into the freezer for those weeks when I know I won’t have time to think about snacks. It’s like finding money in a coat pocket—a happy surprise on a busy day.
Cooking Tips & Techniques
After making these easy no-bake protein energy bites for after school more times than I can count, I’ve learned a few things the hard way. Here are my best tips to make sure your first batch is perfect.
The Texture Test: The most important thing is getting the texture right. Before you start rolling, take a small pinch of the mixture and squeeze it in your hand. It should hold together firmly without crumbling. If it falls apart, it’s too dry. Add a tiny bit more honey or a splash of milk. If it’s sticky and leaves residue on your fingers, it’s too wet. Add a tablespoon more oats. Trust the squeeze test—it never lies.
Don’t Overmix: Once you add the dry ingredients, mix just until everything is combined. Overmixing can break down the oats and make the bites gummy. You want to see distinct oat flakes and chocolate chips. A few stirs past “just combined” is all you need.
Chill Time is Non-Negotiable: I know it’s tempting to skip the chill time, especially when you’re hungry. But don’t. The bites need that time in the fridge to set. Without it, they’re too soft and will fall apart in your lunchbox or your hand. Thirty minutes is the minimum. An hour is even better. I’ve made the mistake of rushing this step, and I ended up with a bowl of delicious oat crumble instead of energy bites.
Use a Cookie Scoop for Consistency: If you make these often, invest in a small cookie scoop (about 1 tablespoon size). It makes the rolling process so much faster and gives you perfectly uniform bites. Even rolling is important because it ensures they all chill and set at the same rate.
Room Temperature Ingredients Matter: If your peanut butter has been sitting in the fridge, it will be hard to mix. Let it come to room temperature for 15-20 minutes before you start. The same goes for honey if it’s crystallized. A quick 10-second zap in the microwave will soften it right up.
I once tried to make these with a super-runny natural peanut butter. The mixture was a soupy disaster. I kept adding oats, and it kept getting soupier. I finally gave up and threw the whole thing in the fridge, hoping for a miracle. It didn’t work. The bites were greasy and never really set. Stick with a standard creamy peanut butter for the best results every time.
Variations & Adaptations
This recipe is incredibly forgiving and easy to customize. Once you have the basic ratio down, the possibilities are endless. Here are some of my favorite ways to switch things up.
- Nut-Free Version: If you’re packing these for a nut-free school or classroom, swap the peanut butter for sunflower seed butter (like SunButter) or WowButter. Both work beautifully. Just note that sunflower seed butter can react with baking soda if you ever use it in baked goods, but since these are no-bake, you’re safe. The flavor is a little different, but still delicious.
- Tropical Twist: Replace the dark chocolate chips with ¼ cup of unsweetened shredded coconut and ¼ cup of dried pineapple or mango, chopped small. The combination of chewy coconut and sweet tropical fruit is amazing. It feels like a mini vacation in a bite-sized snack.
- Add Some Crunch: For a satisfying crunch, add 2 tablespoons of chia seeds or hemp hearts along with the flaxseed. You can also throw in ¼ cup of chopped almonds, walnuts, or pecans. Just make sure the nuts are chopped small enough that they don’t cause the bites to fall apart.
- Seasonal Spice: In the fall, I love adding ½ teaspoon of cinnamon and a pinch of nutmeg to the mixture. It gives the bites a cozy, almost dessert-like flavor. You could also add a dash of pumpkin pie spice for a festive twist. It pairs perfectly with the honey and peanut butter.
- Chocolate Lovers: If you’re a die-hard chocolate fan, use ½ cup of chocolate chips instead of ⅓ cup. You can also swap the vanilla extract for a teaspoon of chocolate extract or add a tablespoon of unsweetened cocoa powder to the dry ingredients. The bites will be darker and richer, like a healthy chocolate truffle.
I once made a batch with dried cherries and white chocolate chips instead of dark chocolate. It was a happy accident—I was out of dark chocolate and had white chocolate left over from a holiday baking project. They turned out incredible. The tartness of the cherries balanced the sweetness of the white chocolate perfectly. That’s the beauty of this recipe. It’s a template, not a rulebook.
Serving & Storage Suggestions
These energy bites are designed to be as convenient as possible. Here’s how to serve and store them for maximum freshness and enjoyment.
Serving: These bites are best enjoyed straight from the refrigerator. They’re firm, cold, and incredibly satisfying. If you prefer a softer texture, let them sit at room temperature for 5-10 minutes before eating. They’re perfect on their own as a quick snack, but they also pair beautifully with a glass of cold milk, a cup of coffee, or a piece of fresh fruit. I often pack one or two in a lunchbox as a dessert or afternoon snack. They hold up remarkably well, even after a few hours in a backpack.
Storage: Store the energy bites in an airtight container in the refrigerator. They will stay fresh for up to one week. I use a glass container with a tight-fitting lid. If you stack them, place a piece of parchment paper between the layers to prevent them from sticking together. They will be perfectly fine for the entire week, though honestly, they rarely last that long in my house.
Freezing: These bites freeze like a dream. Place them in a single layer on a baking sheet and freeze for 1-2 hours, or until they are solid. Transfer the frozen bites to a freezer-safe bag or container. They will keep for up to three months. You can eat them straight from the freezer—they’re like little frozen cookie dough bites, but healthier. Or let them thaw in the refrigerator overnight before eating. I always keep a stash in the freezer for emergencies. It’s my secret weapon against the hangry after-school monster.
Flavor Development: If you can manage to let them sit for a day, the flavors actually meld together and get better. The oats soften slightly, the honey and peanut butter become more integrated, and the chocolate chips firm up perfectly. They’re delicious on day one, but they’re even better on day two or three.
Nutritional Information & Benefits
I’m not a nutritionist, but I do care about what I’m feeding my family. Here’s the estimated nutritional breakdown for one energy bite (based on a recipe that makes 20 bites).
| Nutrient | Amount Per Bite |
|---|---|
| Calories | ~120 |
| Total Fat | 6g |
| Saturated Fat | 1.5g |
| Carbohydrates | 14g |
| Fiber | 2g |
| Sugar | 8g |
| Protein | 4g |
These numbers are estimates and will vary based on the specific brands you use. The real benefit here is what’s inside. The oats provide slow-burning complex carbohydrates for steady energy. The peanut butter offers protein and healthy fats to keep you full. The flaxseed adds a dose of omega-3 fatty acids and fiber. And the dark chocolate? It’s packed with antioxidants and makes you happy. That’s a win in my book.
These bites are naturally vegetarian and can easily be made gluten-free by using certified gluten-free oats and vegan by swapping the honey for agave. They are a much better alternative to processed granola bars or packaged snacks. You know exactly what’s in them, and that peace of mind is worth more than any number on a label.
Conclusion
These easy no-bake protein energy bites for after school have become a staple in my kitchen for a reason. They’re simple, they’re fast, and they actually work. No more scrambling for a snack at 3:30 PM when the kids are hungry and I’m out of ideas. No more buying expensive, over-packaged granola bars that are half sugar and half air. Just real food, made in ten minutes, that everyone actually wants to eat.
I love that this recipe is a starting point, not a finish line. You can make it your own. Add your favorite mix-ins, swap the nut butter, adjust the sweetness. It’s forgiving and flexible, just like a good recipe should be. The first time you roll a batch and see them lined up on the baking sheet, you’ll feel a little bit proud. You made that. With your own hands. And it’s going to make the next few afternoons so much easier.
I’d love to hear how yours turn out. Did you add something unexpected? Did your kids love them? Did you have to hide a few for yourself? (I won’t tell.) Drop a comment below and let me know. And if you’re looking for another easy, no-fuss snack, you might also enjoy these easy no-bake peanut butter energy bites with dark chocolate chips—they’re a slightly different take on the same idea. Happy rolling!
Frequently Asked Questions
Can I use quick oats instead of rolled oats?
You can, but the texture will be different. Quick oats are more finely processed and will absorb moisture faster, resulting in a denser, softer bite. Rolled oats give a chewier, more satisfying texture. If you only have quick oats, reduce the rest time to 2-3 minutes, as they’ll soak up the liquid much quicker.
My mixture is too dry. What do I do?
Don’t worry, this is an easy fix. Add a tablespoon of honey or a splash of milk (dairy or plant-based) and stir well. You can also add a teaspoon of melted coconut oil. The key is to add liquid slowly and mix thoroughly until the mixture holds together when squeezed.
Can I make these without peanut butter?
Absolutely. You can substitute any creamy nut or seed butter. Almond butter, cashew butter, sunflower seed butter, or tahini all work well. Just be aware that different nut butters have different fat contents, which can affect the texture. You may need to adjust the amount of oats or liquid slightly.
How long do these energy bites last at room temperature?
They are best stored in the refrigerator, but they can be kept at room temperature for up to 24 hours. If you’re packing them in a lunchbox, they will be fine for the day. For longer storage, always keep them chilled. The peanut butter and honey can become unstable at warm temperatures, and the bites may lose their shape.
Can I add protein powder?
Yes, you can. If you want to boost the protein content, add 1-2 tablespoons of your favorite protein powder. Start with 1 tablespoon and see how the texture feels. You may need to add a little extra liquid (milk or honey) to compensate, as protein powder can be very drying. Vanilla or chocolate protein powder works best with the flavors in this recipe.
Pin This Recipe!

Easy No-Bake Protein Energy Bites: Best After School Snack

These easy no-bake protein energy bites are the perfect after-school snack. Made with simple, real ingredients like oats, peanut butter, and chocolate chips, they come together in just 10 minutes and are a crowd-pleaser for all ages.
- Prep Time: 10 minutes
- Cook Time: 0 minutes
- Total Time: 40 minutes
- Yield: 18-20 bites 1x
- Category: Snack
- Cuisine: American
Ingredients
- 1 ½ cups (135g) rolled oats
- ½ cup (130g) creamy peanut butter
- ⅓ cup (110g) honey
- ⅓ cup (60g) dark chocolate chips
- 2 tablespoons (14g) ground flaxseed
- 1 teaspoon vanilla extract
- ¼ teaspoon salt
Instructions
- In a large mixing bowl, combine the peanut butter, honey, and vanilla extract. Stir until smooth and well combined.
- Add the rolled oats, dark chocolate chips, ground flaxseed, and salt. Stir until everything is evenly coated and the mixture resembles stiff cookie dough.
- Let the mixture rest for 5 minutes to allow the oats to absorb moisture.
- Lightly wet your hands with cold water to prevent sticking.
- Scoop about 1 to 1 ½ tablespoons of the mixture and roll into smooth balls, about 1 inch in diameter. Place on a parchment-lined baking sheet.
- Refrigerate for at least 30 minutes to set.
- Transfer to an airtight container and store in the refrigerator for up to a week, or freeze for up to three months.
Notes
For best texture, use old-fashioned rolled oats and standard creamy peanut butter. Let the mixture rest for 5 minutes before rolling to allow oats to absorb moisture. Wet your hands with cold water to prevent sticking. Chilling for at least 30 minutes is essential for the bites to hold their shape.
Nutrition
- Serving Size: 1 bite
- Calories: 120
- Sugar: 8
- Sodium: 50
- Fat: 6
- Saturated Fat: 1.5
- Carbohydrates: 14
- Fiber: 2
- Protein: 4
Keywords: no-bake energy bites, protein bites, after school snack, peanut butter oats, healthy snack, easy snack