Alright, I need to get this straight in my head. It’s Saturday morning, the grocery app is open, and I am trying to mentally map out a full football field on a wooden board. I have the pepperoni for the yard lines, the cheese cubes for the goal posts, and a serious craving for something dippable. But I am missing the one thing that makes it a touchdown—the right kind of sausage to slice into tiny football shapes. Honestly, that is the only thing standing between me and the best game day spread of the season. I am already picturing the cream cheese dip in the end zone and the little helmet picks I bought last week. This isn’t just a snack board; it is a whole vibe. And I am determined to make it work, even if I have to carve the footballs myself.
This is how the Best Loaded Football Field Charcuterie Board was born—not from a formal plan, but from a very specific craving for something that felt both impressive and totally snackable. I wanted a board that would make my friends pause mid-conversation, grab a cracker, and say, “Wait, is that the 50-yard line?” It had to be easy to assemble, packed with variety, and visually stunning enough to earn a spot on the Instagram feed before the first quarter even starts. No complicated cooking, just smart arranging and a whole lot of flavor. Let’s build this thing.
Why You’ll Love This Best Loaded Football Field Charcuterie Board
I have made a lot of snack boards in my day, but this one is different. It is the kind of board that gets people talking before they even take a bite. The visual impact alone is a game-changer, and the flavor combinations are just as strong as the presentation.
- Game Day Showstopper: This board is designed to be the centerpiece of your party. It looks like a mini football field, complete with yard lines and goal posts. It is guaranteed to get a reaction.
- No-Fuss Assembly: You don’t need to be a professional chef to pull this off. It is all about arranging store-bought ingredients in a creative way. The hardest part is deciding which dips to use.
- Crowd-Pleasing Variety: With a mix of meats, cheeses, crunchy veggies, and sweet touches, there is something for everyone. It is a complete meal in snack form.
- Customizable to Your Team: You can easily swap out ingredients to match your team colors or dietary preferences. It is your field, your rules.
- Built for Grazing: This board is perfect for a long game. Guests can pick and choose what they want without needing plates or forks. It keeps the party moving.
This isn’t just another charcuterie board. It is a conversation starter, a photo op, and a delicious way to feed a crowd. I have tested this layout multiple times, and it never fails to impress. It is the kind of board that makes you look like a party planning genius, even though it is secretly one of the easiest things you will ever make.
What Ingredients You Will Need
The beauty of this board is that it uses mostly simple, store-bought ingredients. The key is to choose items that look good, taste great, and are easy to arrange into the football field shape. Here is what you will need to bring your gridiron vision to life.
For the Field Base
- Large wooden board or sheet pan: At least 18×13 inches to give you enough room. A rimmed baking sheet works perfectly to contain everything.
- Green leaf lettuce or spinach leaves: This creates the “grass” for the field. Wash and dry them thoroughly so they don’t make the board soggy.
- White cheese slices: Provolone or white cheddar works great. You will cut these into strips to make the yard lines. Use 4-5 slices for the lines.
- Pretzel sticks or breadsticks: These will form the goal posts at each end of the field. Choose sturdy ones that won’t break easily.
For the Players (Meats & Cheeses)
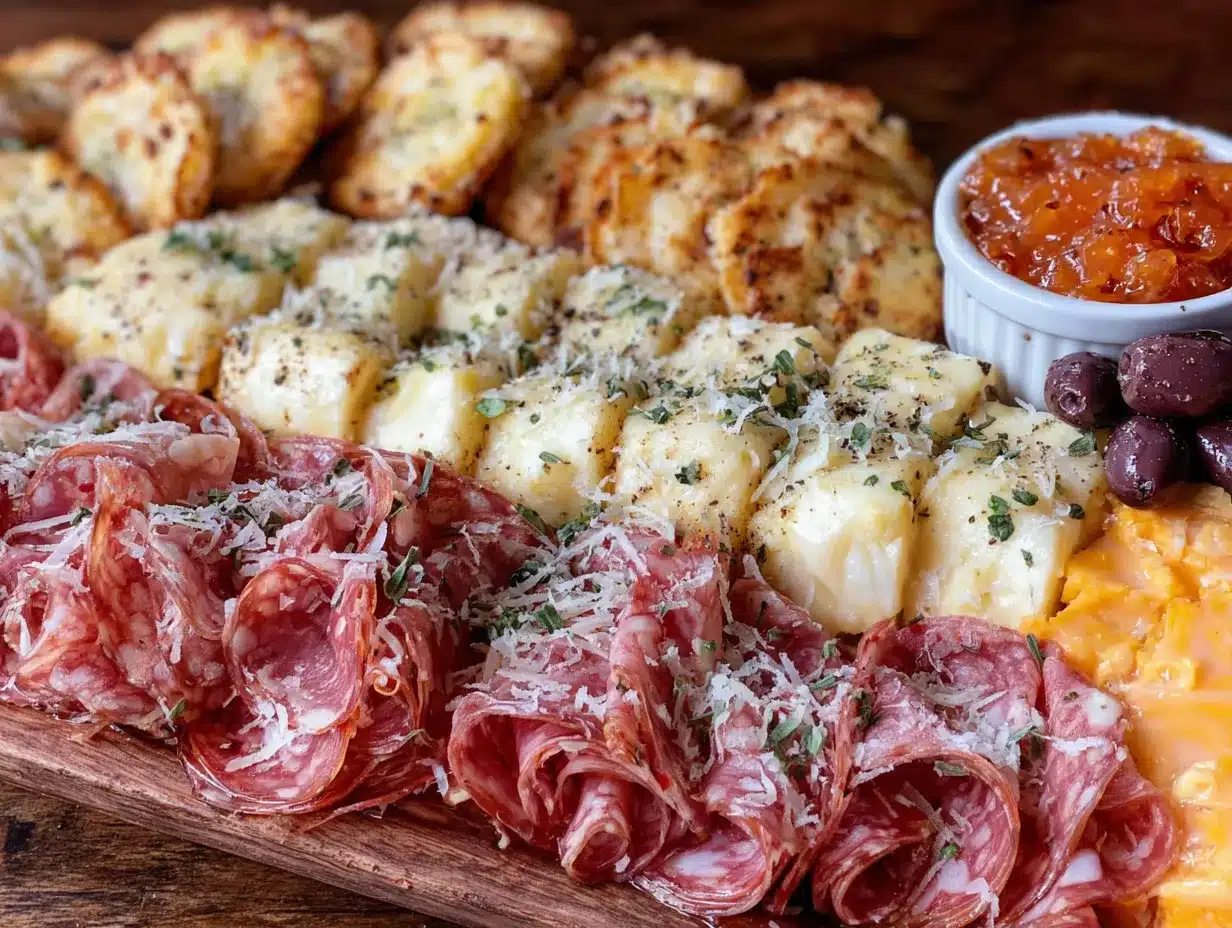
- Salami or pepperoni slices: These are perfect for the yard lines. The red color contrasts beautifully with the green field. Use about 8 ounces.
- Prosciutto or ham: Roll these into little roses or bundles for texture and height. Use about 4 ounces.
- Cheddar cheese cubes: Cut these into small blocks. They look great scattered around the field. Use about 8 ounces.
- Mozzarella balls (bocconcini): These look like little footballs! Drain them well and place them on the field. Use a 12-ounce container.
- Pepper Jack cheese: Cut into thin strips or small cubes for a pop of color and a little heat. Use about 4 ounces.
For the End Zones (Dips & Spreads)
- Ranch dressing or blue cheese dip: Place a small bowl at one end of the board for dipping.
- French onion dip or hummus: Place another small bowl at the opposite end for variety.
- Grape tomatoes or cherry tomatoes: These are great for dipping and add a pop of red. Use about 1 cup.
- Baby carrots and celery sticks: These are perfect for scooping up dips and add a nice crunch. Use about 1 cup each.
For the Sidelines (Crunchy Extras)
- Assorted crackers: Choose a mix of shapes and flavors. Ritz, Wheat Thins, and bagel chips are all great options. Use about 8 ounces.
- Pretzels: Mini pretzels or pretzel sticks are perfect for munching. Use about 4 ounces.
- Nuts: Roasted almonds or cashews add a nice salty crunch. Use about 4 ounces.
- Grapes (red or green): These add a sweet, juicy element to balance the savory flavors. Use about 1 cup.
Pro Tip: I always recommend using a mix of textures and flavors. You want something creamy (the dips), something crunchy (the crackers and veggies), something salty (the meats), and something sweet (the grapes). It keeps people coming back for more. If you are feeling adventurous, you can also add some fresh cowboy caviar in a small bowl for a zesty, chunky dip option.
Equipment Needed
You don’t need a lot of fancy tools to build this board. A few basic kitchen items will do the trick. Here is what I recommend having on hand.
- Large wooden board or rimmed baking sheet: This is your canvas. A 13×18 inch baking sheet is perfect. It contains the ingredients and makes it easy to carry. I use a wooden board for a more rustic look, but a sheet pan is just as good.
- Small bowls or ramekins: You will need 2-3 small bowls for the dips. Ramekins or small glass bowls work perfectly. They should be shallow enough to allow easy dipping.
- Sharp knife and cutting board: You will need a sharp knife to cut the cheese slices into strips and to slice any larger ingredients. A good cutting board makes prep much easier.
- Cheese slicer or wire cutter: This is optional but helpful for getting uniform cheese slices. I have a simple wire cheese slicer that makes cutting perfect strips a breeze.
- Tongs or small spoons: You will need these for serving the dips and for arranging small items like olives or nuts.
- Toothpicks or small skewers: These are great for picking up individual items like mozzarella balls or cheese cubes. You can also use them to hold the goal posts in place.
Budget Tip: If you don’t have a large board, a clean pizza pan or a large plastic cutting board works perfectly. You can even use a clean cardboard box covered in parchment paper for a one-time use board. I have done this for tailgates, and it works like a charm.
Preparation Method
Now for the fun part—building the field! Follow these steps carefully, and you will have a board that looks like it came from a professional caterer.
Step 1: Prepare the Field Base
- Start by washing and thoroughly drying your green leaf lettuce or spinach leaves. Any moisture will make the crackers and bread soggy, so pat them dry with a paper towel.
- Arrange the lettuce leaves in a single, even layer over the entire surface of your board or baking sheet. Overlap the leaves slightly so no wood or metal shows through. This is your football field grass.
- Take your white cheese slices (provolone or white cheddar) and cut them into thin strips, about 1/2 inch wide. You will need about 8-10 strips to create the yard lines.
- Lay the white cheese strips horizontally across the “field” at even intervals. Place them about 2-3 inches apart to create the illusion of yard lines. Press them gently into the lettuce so they stay in place.
Step 2: Build the Goal Posts
- Take two sturdy pretzel sticks or breadsticks for each goal post. You will need four total for two goal posts.
- Place one pretzel stick vertically at each end of the field, sticking it into the lettuce base so it stands upright.
- Take a third pretzel stick and lay it horizontally across the top of the two vertical sticks to form the crossbar. You can use a small dab of cream cheese or hummus to help it stick. It doesn’t have to be perfect—just make it look like a goal post.
- Repeat this process for the other end of the field. You now have two goal posts!
Step 3: Create the Yard Lines with Meats
- Take your salami or pepperoni slices and lay them in a straight line across the field, perpendicular to the white cheese strips. This creates a second set of “yard lines” that adds depth and texture.
- Space the meat slices evenly between the cheese strips. You can use whole slices or cut them in half for a thinner line.
- For the 50-yard line, consider using a different colored meat or a special cheese to make it stand out. I like to use a line of roasted red pepper strips for a pop of color.
Step 4: Arrange the Cheeses
- Scatter your cheddar cheese cubes evenly around the field. Place them in small clusters to mimic groups of players.
- Take your mozzarella balls (bocconcini) and place them in a line down the center of the field. These are your “footballs” and they look incredibly cute. Space them about 2 inches apart.
- Add the Pepper Jack cheese cubes or strips in small clusters near the goal posts. This adds a splash of orange color and a hint of spice.
Step 5: Set Up the End Zones
- Place your small bowls of dip at opposite ends of the board. One bowl goes in the “end zone” on the left, and the other goes in the end zone on the right.
- Arrange the grape tomatoes, baby carrots, and celery sticks around the dip bowls. These are your “sideline snacks” and they make it easy for people to dip and munch.
- Fan out the carrot and celery sticks around the bowls for a tidy, organized look.
Step 6: Fill the Sidelines
- Arrange your assorted crackers along the long sides of the board. This creates a “sideline” of crunchy goodness that frames the field.
- Place the pretzels and nuts in small piles along the edges. This adds height and texture to the board.
- Scatter the grapes in small clusters near the crackers. Their natural sweetness provides a nice contrast to the salty meats and cheeses.
- Add the rolled prosciutto or ham roses in a few key spots for a touch of elegance. To make a prosciutto rose, simply fold a slice of prosciutto in half lengthwise, then roll it up tightly from one end. Fluff the top slightly to create a flower shape.
Step 7: Final Touches
- Step back and look at your board. Fill in any empty spots with extra crackers, nuts, or small cheese cubes. The goal is to make it look full and abundant.
- Add any decorative elements, like small football-themed picks or tiny flags. You can find these at party supply stores or online.
- Check that the goal posts are still standing straight. If they are leaning, use a little extra dip or cream cheese to secure them.
- Serve immediately or cover with plastic wrap and refrigerate for up to 2 hours before serving. Do not add the crackers until just before serving to keep them crisp.
Sensory Cue: When you step back, you should see a vibrant green field with crisp white lines, bright red meats, and golden crackers. It should look like a miniature football stadium, ready for action. The smell of the cured meats and cheeses will be inviting, and the crunch of the lettuce base will be satisfying.
Cooking Tips & Techniques
I have learned a few things the hard way so you don’t have to. Here are my top tips for building a perfect football field charcuterie board every time.
- Dry the lettuce thoroughly: This is the most important step. If the lettuce is wet, it will make everything on the board soggy within 30 minutes. I use a salad spinner and then pat the leaves dry with a paper towel. It makes a huge difference.
- Use a rimmed baking sheet: A rimmed sheet pan is actually better than a flat wooden board for this recipe. The rim helps contain the ingredients, especially the small items like nuts and olives. It also makes it easier to carry the board to the table without anything falling off.
- Cut the cheese strips evenly: Use a cheese slicer or a sharp knife to cut the white cheese strips for the yard lines. Uneven strips will make the field look messy. Take your time with this step—it is the foundation of the visual appeal.
- Don’t overcrowd the board: It is tempting to pile everything on, but leaving a little bit of space between the elements makes the board look more intentional and easier to navigate. People need room to grab items without knocking everything over.
- Prep everything before you start arranging: Have all your ingredients washed, sliced, and ready to go before you start building the board. This makes the assembly process much smoother and less stressful. I learned this lesson after a few frantic game day mornings.
- Keep the crackers separate until serving: If you assemble the board too far in advance, the crackers will absorb moisture from the lettuce and dips and become soft. I recommend adding the crackers right before you serve the board, or placing them in a separate bowl next to the board.
My Biggest Failure: The first time I made this board, I used wet lettuce and the entire thing turned into a sad, soggy mess within 15 minutes. The crackers were limp, the breadsticks were bendy, and the cheese slices were sliding around. It was a disaster. Now, I am militant about drying the lettuce, and the board stays crisp and beautiful for hours.
Variations & Adaptations
One of the best things about this board is how easy it is to customize. Here are a few of my favorite variations to keep things interesting.
- Team Colors Twist: Want to show your team spirit? Swap out the ingredients to match your favorite team’s colors. For a team with blue and white, use blue cheese crumbles, white cheddar cubes, and blue tortilla chips. For a team with red and gold, use roasted red peppers, yellow bell pepper strips, and sharp cheddar. The possibilities are endless.
- Vegetarian Game Day Board: Skip the meats and load up on extra cheeses, roasted vegetables, and hearty dips. Grilled artichoke hearts, marinated mushrooms, and roasted red peppers are all excellent additions. You can also add some crispy parmesan zucchini fritters on the side for a warm, crunchy element.
- Spicy Southwest Field: Give your board a Tex-Mex twist. Use pepper Jack cheese, spicy salami, jalapeño-stuffed olives, and a side of flavorful frozen roasted corn salsa. Add some tortilla chips and a bowl of queso for dipping. This version is always a hit at my house.
- Sweet & Salty Sidelines: Add a sweet element to balance the savory. Chocolate-covered pretzels, honey-roasted peanuts, or dried cranberries are all great options. You can also add a small bowl of dark chocolate chips for a sweet treat.
- Breakfast Tailgate Board: Who says charcuterie is only for lunch? For a morning game, swap the meats and cheeses for breakfast items. Use mini pancakes, bacon strips, sausage links, cheese cubes, and fresh fruit. Add a bowl of maple syrup for dipping. It is a fun and unexpected twist.
Serving & Storage Suggestions
This board is best served fresh, but there are a few tricks to keep it looking and tasting great.
- Serving Temperature: Serve the board at room temperature. Take the meats and cheeses out of the refrigerator about 30 minutes before serving. This allows the flavors to fully develop. The dips can be served chilled or at room temperature, depending on your preference.
- Presentation: Place the board in the center of the table where everyone can reach it. Provide small plates and napkins for each guest. I like to put out a few small serving spoons and tongs so people can easily grab what they want.
- Complementary Dishes: This board is a meal in itself, but you can pair it with other game day favorites. A bowl of creamy 5-ingredient lazy chicken tortilla soup on the side is a great option for guests who want something warm. It also pairs well with a crisp salad or some fresh fruit.
- Beverage Pairings: A cold beer is the classic choice for game day. A light lager or an IPA pairs perfectly with the salty meats and cheeses. For a non-alcoholic option, serve sparkling water with lemon or a pitcher of iced tea.
- Storage: If you have leftovers, store the meats, cheeses, and vegetables separately in airtight containers in the refrigerator. The crackers and pretzels should be stored in a separate airtight container at room temperature. The board itself should be disassembled within 2 hours of serving for food safety.
- Reheating: This board is served cold or at room temperature, so there is no need to reheat anything. If you have leftover dips, they can be reheated in the microwave or on the stovetop.
- How Flavors Develop: The flavors of the meats and cheeses actually improve after they have been sitting out for a little while. The cheese becomes creamier, and the cured meats release more of their oils. This is why serving at room temperature is so important.
Nutritional Information & Benefits
While this board is definitely a treat, it also offers some nutritional benefits when you choose the right ingredients. Here is a general breakdown.
- Estimated Nutritional Values (per serving, based on 8 servings): Calories: 450-550, Fat: 30g, Protein: 20g, Carbohydrates: 30g, Fiber: 4g, Sugar: 8g. These are estimates and will vary based on your specific ingredient choices.
- Protein Power: The cheeses and cured meats are excellent sources of protein, which helps keep you full and satisfied during a long game. Mozzarella and cheddar are particularly good options.
- Healthy Fats: The nuts and cheeses provide healthy monounsaturated and polyunsaturated fats, which are good for heart health. The olives and avocado-based dips also contribute healthy fats.
- Vitamins and Minerals: The vegetables like carrots, celery, and tomatoes provide essential vitamins like Vitamin A, Vitamin C, and potassium. The grapes add antioxidants and natural sweetness.
- Dietary Considerations: This board can be easily adapted for different dietary needs. For a gluten-free option, use gluten-free crackers and pretzels. For a low-carb option, focus on the meats, cheeses, and vegetables, and skip the crackers and pretzels. For a dairy-free option, use dairy-free cheese alternatives and hummus instead of ranch dip.
- Allergen Warning: This board contains common allergens including dairy (cheese), gluten (crackers, pretzels), and tree nuts (almonds, cashews). Be sure to label the board clearly if you are serving guests with allergies.
My Personal Perspective: I love that this board allows people to control their own portions. It is easy to load up on the vegetables and lighter options while still enjoying the indulgent meats and cheeses. It is a balanced way to snack.
Conclusion
This Best Loaded Football Field Charcuterie Board is more than just a snack—it is the star of the party. It is the kind of thing that makes people stop, smile, and grab their phones for a picture before they even take a bite. And the best part? It is incredibly easy to put together. You don’t need to be a chef or a party planner to pull this off. You just need a little creativity and a love for game day food.
I encourage you to make this board your own. Swap in your favorite team colors, try new dips, or add a personal touch that reflects your style. The goal is to have fun with it and create something that brings people together. I promise, the first time you see your friends’ faces light up when they see the field, it will all be worth it.
I would love to see your creations! Leave a comment below and let me know how your board turned out. What dips did you use? What team colors did you choose? Share your photos and tag me on social media. Let’s make this the best game day season yet. Happy snacking, and go team!
Frequently Asked Questions
Can I make this board ahead of time?
Yes, you can prepare most of the board up to 2 hours in advance. Assemble the lettuce base, add the cheese strips and meat lines, and arrange the dips and vegetables. Cover the board with plastic wrap and refrigerate. Add the crackers, pretzels, and any delicate items like grapes just before serving to keep them crisp.
What is the best size board to use?
A 13×18 inch rimmed baking sheet is the ideal size. It provides enough space to create a realistic football field shape while still being easy to carry and fit on a table. If you are using a wooden board, look for one that is at least 18 inches long.
How do I keep the goal posts from falling over?
Use a small dab of cream cheese, hummus, or thick dip at the base of each pretzel stick to anchor it to the lettuce. You can also press the sticks into a small piece of cheese or a thick slice of cucumber for extra stability. The goal posts are mostly decorative, so they don’t need to be perfectly secure.
What are the best dips for this board?
Ranch dressing and French onion dip are classic choices that pair well with the vegetables and crackers. For a spicier option, try a buffalo chicken dip or a jalapeño popper dip. For a lighter option, hummus or a Greek yogurt-based dip works great. I also love adding a bowl of fresh cowboy caviar for a zesty, chunky option.
Can I use different types of cheese for the yard lines?
Absolutely! White cheddar, provolone, mozzarella, or even a mild white cheese like Monterey Jack all work well. The key is to choose a cheese that is firm enough to cut into clean strips. Soft cheeses like brie will not hold their shape. You can also use strips of roasted red pepper or yellow bell pepper for a colorful alternative.
Pin This Recipe!
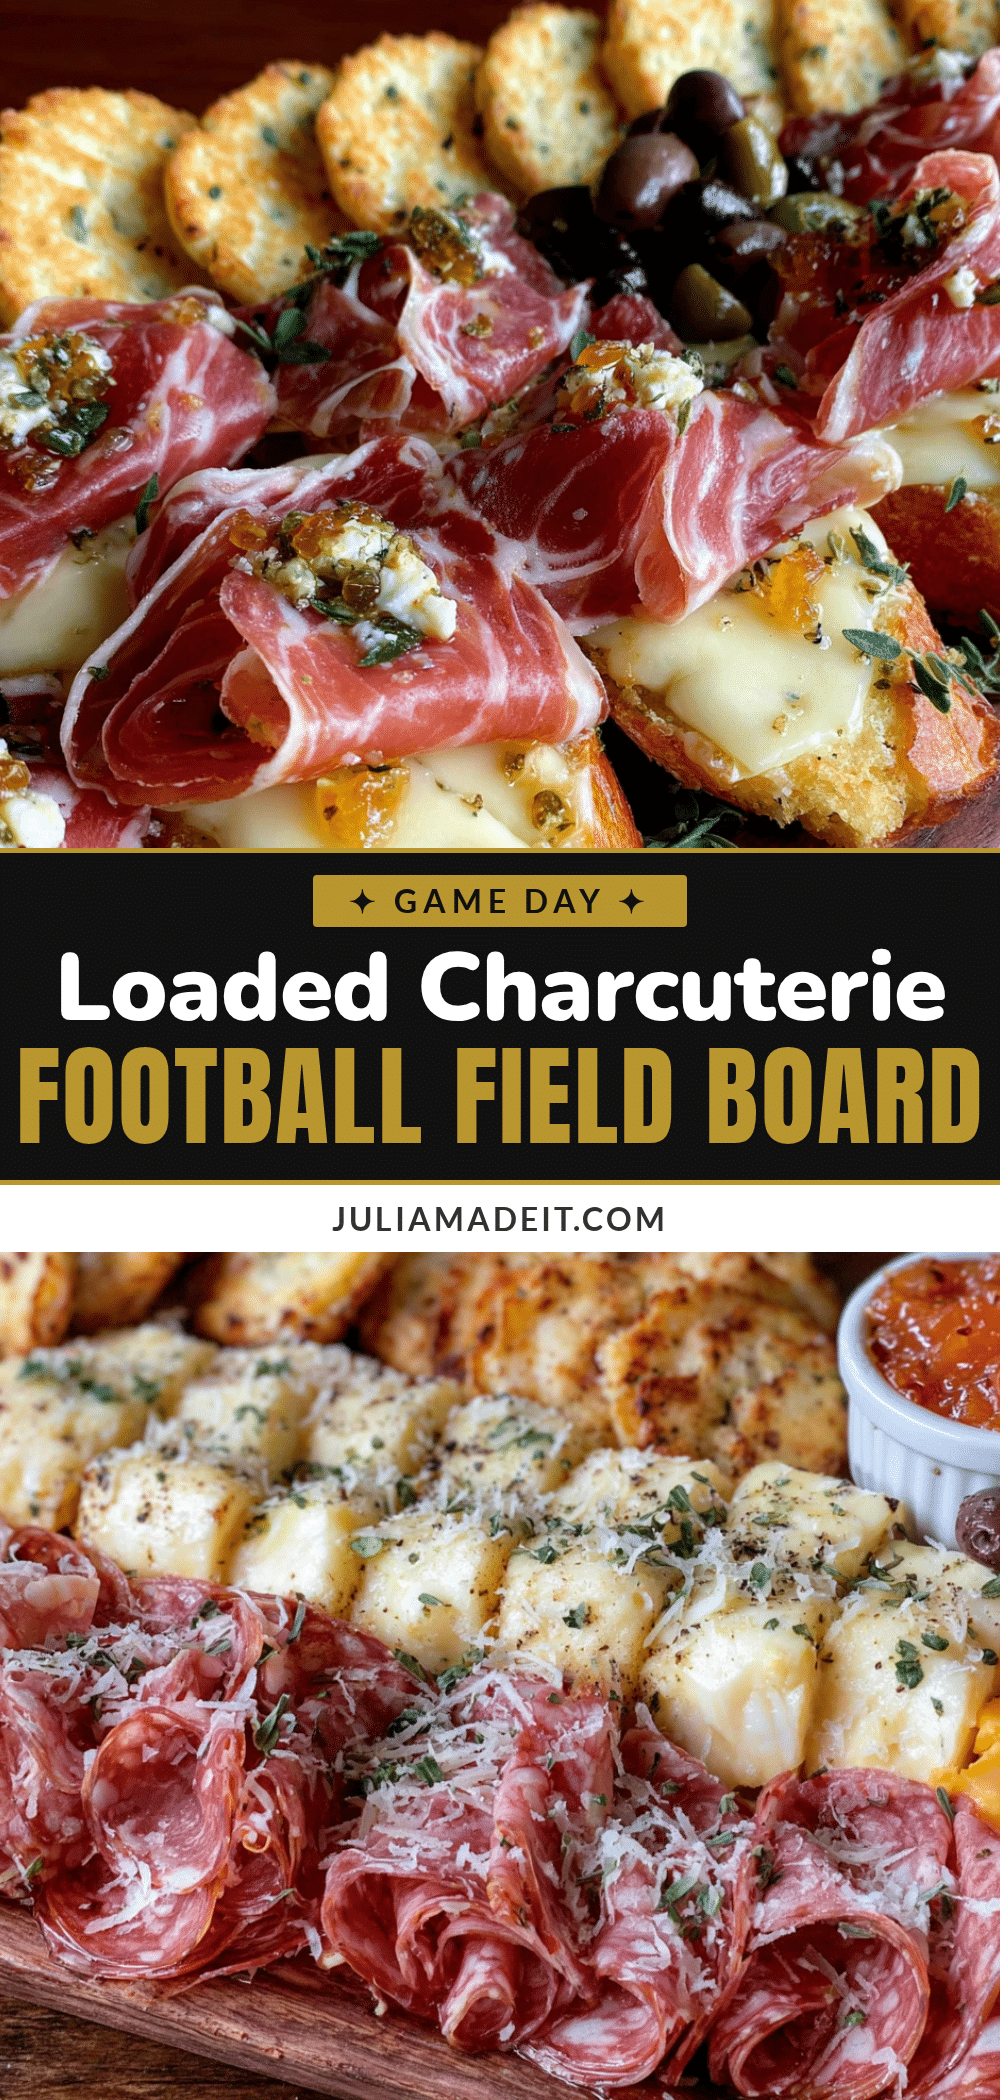
Best Loaded Football Field Charcuterie Board Easy Game Day
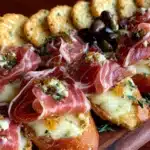
A visually stunning and easy-to-assemble charcuterie board shaped like a football field, perfect for game day gatherings. Packed with meats, cheeses, veggies, and dips, it’s a crowd-pleasing centerpiece that requires no cooking.
- Prep Time: 30 minutes
- Cook Time: 0 minutes
- Total Time: 30 minutes
- Yield: 8 servings 1x
- Category: Appetizer
- Cuisine: American
Ingredients
- 1 large wooden board or rimmed baking sheet (at least 18x13 inches)
- Green leaf lettuce or spinach leaves (enough to cover board)
- 4–5 slices white cheese (provolone or white cheddar), cut into strips
- 4 sturdy pretzel sticks or breadsticks (for goal posts)
- 8 ounces salami or pepperoni slices
- 4 ounces prosciutto or ham (for roses)
- 8 ounces cheddar cheese, cut into cubes
- 12 ounces mozzarella balls (bocconcini)
- 4 ounces Pepper Jack cheese, cut into strips or cubes
- 1/2 cup ranch dressing or blue cheese dip
- 1/2 cup French onion dip or hummus
- 1 cup grape tomatoes or cherry tomatoes
- 1 cup baby carrots
- 1 cup celery sticks
- 8 ounces assorted crackers (Ritz, Wheat Thins, bagel chips)
- 4 ounces pretzels (mini or sticks)
- 4 ounces roasted almonds or cashews
- 1 cup red or green grapes
Instructions
- Wash and thoroughly dry the lettuce or spinach leaves. Arrange them in a single, even layer over the entire board to create the ‘grass’.
- Cut white cheese slices into thin strips (about 1/2 inch wide). Lay them horizontally across the field at even intervals (2-3 inches apart) to create yard lines.
- For goal posts: Place two pretzel sticks vertically at each end of the field, sticking them into the lettuce. Lay a third pretzel stick horizontally across the top to form the crossbar. Use a dab of cream cheese or hummus to secure.
- Lay salami or pepperoni slices in straight lines across the field, perpendicular to the cheese strips, to create additional yard lines. Space evenly between cheese strips.
- Scatter cheddar cheese cubes evenly around the field in small clusters. Place mozzarella balls in a line down the center of the field (about 2 inches apart). Add Pepper Jack cheese near the goal posts.
- Place small bowls of dip at opposite ends of the board (end zones). Arrange grape tomatoes, baby carrots, and celery sticks around the dip bowls.
- Arrange assorted crackers along the long sides of the board (sidelines). Place pretzels and nuts in small piles along the edges. Scatter grapes in small clusters near the crackers.
- Roll prosciutto or ham slices into roses: fold each slice in half lengthwise, then roll tightly from one end and fluff the top. Place in a few key spots.
- Fill any empty spots with extra crackers, nuts, or cheese cubes. Add decorative football-themed picks or tiny flags if desired. Serve immediately or refrigerate for up to 2 hours (add crackers just before serving).
Notes
Dry lettuce thoroughly to prevent sogginess. Use a rimmed baking sheet for easier carrying. Cut cheese strips evenly for a neat look. Add crackers just before serving to keep them crisp. For team colors, swap ingredients accordingly.
Nutrition
- Serving Size: 1 serving (based on
- Calories: 500
- Sugar: 8
- Sodium: 800
- Fat: 30
- Saturated Fat: 12
- Carbohydrates: 30
- Fiber: 4
- Protein: 20
Keywords: football charcuterie board, game day snack, charcuterie board, football field board, party appetizer, easy charcuterie