I want a pumpkin muffin that doesn’t taste like a health project, but I also don’t want the sugar crash that comes with the bakery kind. That’s the whole thought. It’s mid-October, my kitchen counter has a can of pumpkin that’s been staring at me for a week, and I have exactly one overripe banana left. The oats are in the pantry, the honey jar is getting low. I’m not trying to reinvent breakfast here—I just want something that feels cozy without the guilt, something I can grab on my way out the door and not regret by 10 a.m.
So here’s what happened. I pulled out my favorite bowl, the one with the chip on the rim, and started mixing things that felt right. Pumpkin because it’s fall and I’m not a monster. Oats because I wanted texture that actually keeps you full. Honey because it’s sweet but not cloying, and honestly, it makes everything feel a little more intentional. The first batch came out dense—edible, but dense. The second batch, I added a splash more milk and let the oats soak for ten minutes before mixing. That was the moment. They came out tender, lightly sweet, with those little oat flecks throughout that make you feel like you’re eating something homemade, not something from a box. I’ve made them four times since, and I’m finally ready to share the version that actually works.
These muffins are the kind of thing you make on a Sunday afternoon and then forget you have them until Tuesday morning when you’re running late and suddenly breakfast is solved. They’re not fancy. They’re not trying to be. But they’re exactly what you want when you need something that tastes like fall and feels good to eat.
Why You’ll Love This Recipe
I’ve tested this recipe through three different oat varieties, two types of honey, and one memorable batch where I accidentally used baking soda instead of powder. (Don’t ask. We don’t talk about those muffins.) Here’s why this version is the one worth keeping.
- Quick & Easy: From bowl to oven in about 15 minutes. No stand mixer needed, no complicated steps. Just one bowl, a whisk, and a spatula.
- Simple Ingredients: You probably already have most of these in your kitchen. Oats, pumpkin, honey, eggs, flour, baking staples. No weird specialty items that you’ll use once and then forget about.
- Perfect for Fall Mornings: These muffins pair beautifully with a warm drink, whether that’s coffee, tea, or a creamy brown sugar cinnamon pumpkin chai latte for those days when you need a little extra comfort.
- Crowd-Pleaser: I brought a batch to my neighbor’s book club and they disappeared before the discussion even started. Kids love them, adults love them, and nobody guesses they’re actually good for you.
- Unbelievably Delicious: The texture is what gets me every time. The oats give it this hearty chew, the pumpkin keeps it moist, and the honey adds just the right amount of sweetness without overwhelming the pumpkin flavor.
What makes this recipe different from the rest is the technique of letting the oats soak in the liquid ingredients for a few minutes before adding the dry stuff. It’s a small step, but it transforms the texture completely. Instead of ending up with gummy or dense muffins, you get these tender, bakery-style muffins that just happen to be packed with fiber and whole grains. This isn’t just another healthy muffin recipe—it’s the one that actually delivers on flavor and texture.
What Ingredients You Will Need
This recipe uses simple, wholesome ingredients that work together to create muffins that are moist, flavorful, and satisfying. Most of these are pantry staples, which makes this recipe perfect for those mornings when you want something homemade but don’t want to make a special trip to the store.
- Rolled oats: 1 cup (90g). Use old-fashioned rolled oats, not quick oats. The texture matters here—rolled oats give you that hearty chew. I prefer Bob’s Red Mill or Quaker. If you’re gluten-sensitive, make sure to use certified gluten-free oats.
- All-purpose flour: 1 cup (120g). You can substitute whole wheat pastry flour for a nuttier flavor, but the texture will be slightly denser. For a gluten-free version, use a 1:1 gluten-free baking blend.
- Pumpkin puree: 1 cup (245g). Make sure you’re using pure pumpkin puree, not pumpkin pie filling. Libby’s is my go-to brand because it’s consistently thick and not watery.
- Honey: 1/3 cup (113g). Use a mild honey like clover or orange blossom so the pumpkin flavor shines through. If your honey is very thick, warm it slightly to make it easier to mix.
- Eggs: 2 large, at room temperature. Room temperature eggs incorporate more evenly into the batter. If you forgot to take them out ahead of time, place them in a bowl of warm water for 5 minutes.
- Milk: 1/2 cup (120ml). Any milk works here—dairy, almond, oat, or soy. I’ve used all of them and they all work fine.
- Coconut oil: 1/4 cup (60ml), melted. You can also use melted butter or vegetable oil. Coconut oil adds a subtle flavor that complements the pumpkin nicely.
- Brown sugar: 1/4 cup (50g), packed. This adds depth of flavor and helps with browning. You can substitute coconut sugar if you prefer.
- Baking powder: 1 1/2 teaspoons. Make sure it’s fresh—old baking powder won’t give you the rise you need.
- Baking soda: 1/2 teaspoon.
- Pumpkin pie spice: 2 teaspoons. If you don’t have pumpkin pie spice, use a mix of 1 teaspoon cinnamon, 1/2 teaspoon ginger, 1/4 teaspoon nutmeg, and 1/4 teaspoon cloves.
- Cinnamon: 1 teaspoon. I add extra cinnamon because I’m that person who puts cinnamon on everything.
- Salt: 1/2 teaspoon. Don’t skip this—salt enhances all the other flavors.
- Vanilla extract: 1 teaspoon. Pure vanilla extract is worth the splurge here.
- Optional mix-ins: 1/2 cup chopped walnuts, pecans, chocolate chips, or dried cranberries. I love adding walnuts for crunch, but chocolate chips make these feel more like a treat.
Equipment Needed
You don’t need a fancy kitchen to make these muffins. Here’s what you’ll need, along with a few tips from my own experience.
- Muffin tin: Standard 12-cup muffin tin. I use a non-stick one from Wilton that’s held up for years. If yours tends to stick, definitely use liners.
- Paper muffin liners: I prefer unbleached parchment liners because they don’t stick. The colored ones look cute but sometimes peel off the muffin.
- Large mixing bowl: Any large bowl works. I use my grandmother’s old ceramic bowl because it’s wide enough to whisk without splashing.
- Whisk: For combining wet ingredients. A fork works in a pinch, but a whisk gives you a smoother batter.
- Rubber spatula: For folding in the dry ingredients and scraping every last bit of batter into the pan.
- Measuring cups and spoons: Accurate measurements matter in baking. I use stainless steel ones that won’t warp over time.
- Cooling rack: Essential for getting muffins to cool evenly. If you leave them in the pan, the bottoms get soggy.
- Ice cream scoop or large spoon: For portioning the batter evenly. A #20 scoop (about 3 tablespoons) gives you perfectly sized muffins.
If you don’t have a cooling rack, you can use the oven rack itself—just make sure it’s clean. And if you’re using a dark non-stick pan, reduce the oven temperature by 25°F to prevent over-browning.
Preparation Method
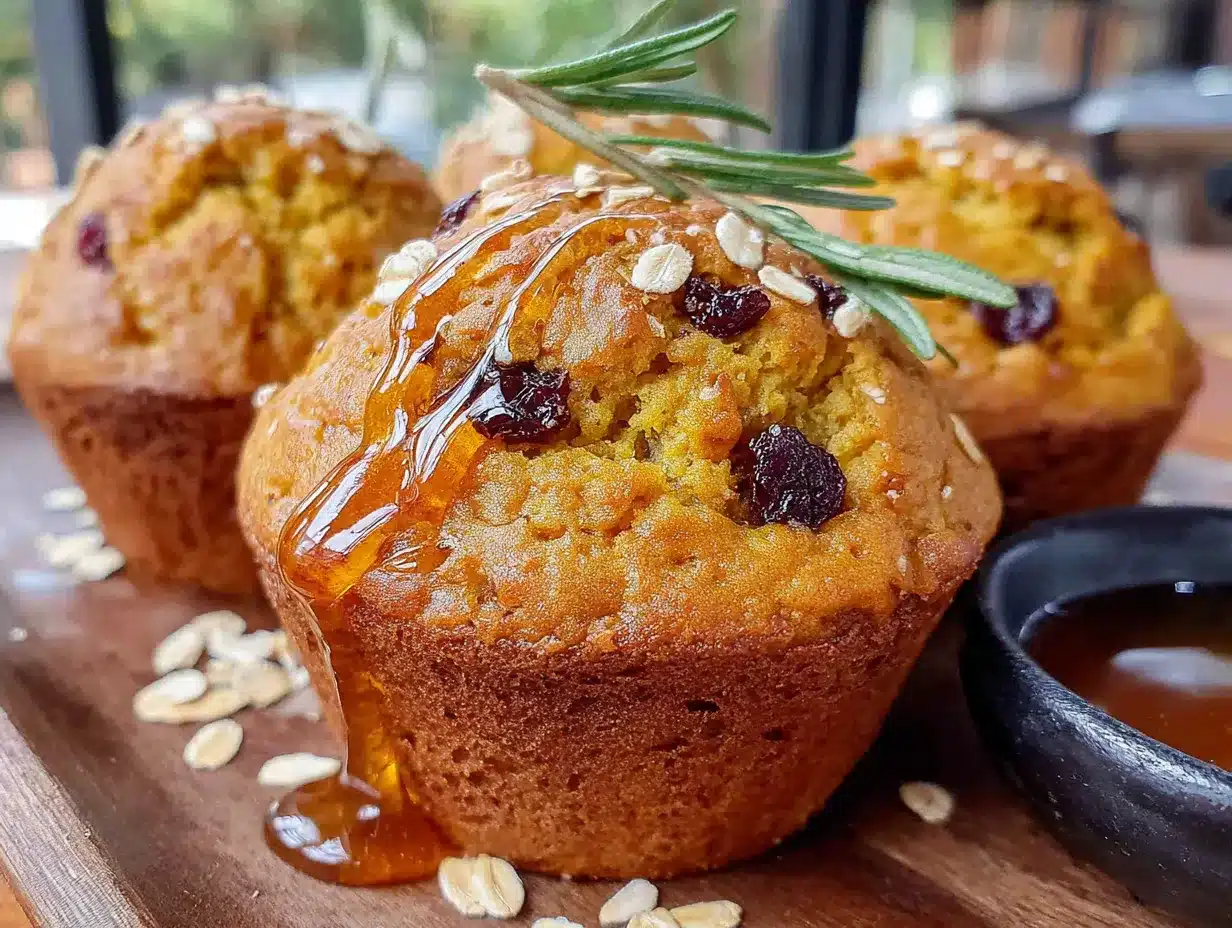
Let’s make these muffins. I’ve broken everything down step by step, with all the little details I’ve learned from making this recipe over and over.
- Preheat your oven to 350°F (175°C). Line a 12-cup muffin tin with paper liners or grease the cups well. I’ve forgotten to do this before and spent twenty minutes chiseling muffins out of the pan. Don’t be me.
- In a large bowl, whisk together the eggs, honey, milk, melted coconut oil, brown sugar, vanilla extract, and pumpkin puree. Whisk until everything is smooth and well combined. The mixture should look like a thick, creamy orange liquid. If your coconut oil solidifies on contact with cold ingredients, don’t worry—just keep whisking and it will incorporate.
- Add the rolled oats to the wet mixture and stir to combine. Let this sit for 10 minutes. This is the most important step in the whole recipe. The oats need time to absorb some of the liquid, which softens them and prevents the muffins from being too dense. I usually set a timer on my phone because I get distracted easily.
- In a separate medium bowl, whisk together the flour, baking powder, baking soda, pumpkin pie spice, cinnamon, and salt. Make sure the baking powder and baking soda are evenly distributed. I like to use a fork for this—it breaks up any clumps better than a whisk.
- Add the dry ingredients to the wet ingredients and fold together with a rubber spatula. Fold gently, just until no streaks of flour remain. Overmixing is the enemy of tender muffins. The batter will be thick and slightly lumpy—that’s exactly what you want. If you’re adding mix-ins like walnuts or chocolate chips, fold them in now.
- Divide the batter evenly among the 12 muffin cups. I use an ice cream scoop for this, which gives me perfectly even portions without making a mess. Each cup should be about 3/4 full. If you have extra batter, don’t overfill—just bake the extra in a separate ramekin.
- Bake for 18-22 minutes, or until a toothpick inserted into the center of a muffin comes out clean or with just a few moist crumbs. My oven runs hot, so I check at 18 minutes. The muffins should be golden brown on top and spring back lightly when you touch them.
- Let the muffins cool in the pan for 5 minutes. This allows them to set properly. Then transfer them to a wire rack to cool completely. If you leave them in the pan too long, the bottoms will steam and become soggy.
- Optional but recommended: While the muffins are still warm, brush the tops with a little extra honey. This gives them a beautiful shine and adds a touch more sweetness. I learned this trick from a bakery in Portland, and it makes the muffins look professionally made.
One thing I want to mention: if your kitchen is particularly humid, you might need to add an extra tablespoon of flour. The batter should be thick but scoopable—if it looks runny, add a little more flour. If it looks like cookie dough, add a splash more milk. Baking is about using your senses, not just following instructions.
Cooking Tips & Techniques
I’ve made these muffins about a dozen times now, and I’ve learned a few things the hard way. Here are my best tips for getting perfect results every time.
Don’t skip the oat soaking step. I know it adds ten minutes to the process, but those ten minutes make all the difference. The oats absorb liquid and soften, which means your muffins turn out tender instead of chewy. The first time I made these, I was impatient and skipped this step. The muffins were edible, but they had a texture that reminded me of cardboard. Let the oats soak. Trust me on this.
Use room temperature ingredients. Cold eggs and cold milk can cause the melted coconut oil to solidify into little chunks. If that happens, the muffins will have pockets of oil instead of a uniform crumb. Take your eggs and milk out of the fridge about 30 minutes before you start baking. If you forgot, place the eggs in warm water for 5 minutes and microwave the milk for 15 seconds.
Measure your flour correctly. This is a common mistake that ruins baked goods. Spoon the flour into your measuring cup and level it off with a knife. Don’t scoop directly from the bag—that packs the flour down and you’ll end up with too much. Too much flour means dry, crumbly muffins.
Rotate the pan halfway through baking. Most ovens have hot spots, and rotating the pan ensures even browning. I set a timer for 10 minutes, rotate the pan, and then bake for the remaining time. This simple step has saved me from lopsided muffins more times than I can count.
Let the muffins cool completely before storing. If you put them in a container while they’re still warm, the steam will make the tops sticky and the bottoms soggy. I know it’s tempting to pack them up right away, especially if you’re in a hurry, but patience pays off here.
Variations & Adaptations
One of the best things about this recipe is how flexible it is. Here are some variations I’ve tried and loved.
Gluten-Free Version: Substitute the all-purpose flour with a 1:1 gluten-free baking blend (I like King Arthur’s). Make sure your oats are certified gluten-free. The texture will be slightly more delicate, but they still hold together beautifully.
Vegan Version: Replace the eggs with flax eggs (2 tablespoons ground flaxseed mixed with 5 tablespoons water, let sit for 5 minutes). Use maple syrup instead of honey and your favorite plant-based milk. The muffins will be a bit denser, but they’re still delicious.
Lower Sugar Version: Reduce the honey to 1/4 cup and omit the brown sugar. Add an extra 1/4 cup of mashed banana or applesauce for sweetness. The muffins won’t be as sweet, but the pumpkin flavor shines through more.
Chocolate Chip Pumpkin Oat Muffins: Fold in 1/2 cup of dark chocolate chips along with the dry ingredients. This is my personal favorite variation. The combination of pumpkin and dark chocolate is surprisingly perfect—the bitterness of the chocolate balances the sweetness of the honey.
Savory-Sweet Version: Add 1/4 cup of toasted pumpkin seeds on top before baking and reduce the honey to 1/4 cup. The pumpkin seeds add a nutty crunch that complements the pumpkin flavor. I made these for a fall brunch and they were a hit.
Spiced Apple Pumpkin Oat Muffins: Fold in 1/2 cup of finely diced apple (I use Honeycrisp) along with the dry ingredients. The apple adds little pockets of sweetness and moisture. This variation reminds me of the cozy brown butter apple crisp I make every Thanksgiving—same comforting flavors, but in muffin form.
Serving & Storage Suggestions
These muffins are incredibly versatile when it comes to serving. Here’s how I like to enjoy them, along with tips for keeping them fresh.
Serving Temperature: These muffins are delicious at room temperature, but I actually prefer them slightly warm. Pop one in the microwave for 10-15 seconds, and it tastes freshly baked. The honey flavor becomes more pronounced, and the oats soften even more.
Presentation Ideas: For a breakfast spread, arrange the muffins on a wooden board with a small bowl of honey butter and fresh fruit. For a more indulgent treat, split a muffin in half, toast it lightly, and spread with butter or cream cheese. I’ve also been known to crumble one over Greek yogurt with a drizzle of honey for a breakfast parfait situation.
Complementary Dishes: These muffins pair beautifully with a hot cup of coffee or tea. For a heartier breakfast, serve alongside scrambled eggs and fresh fruit. They also make a great side for soups and stews—I love having one with a bowl of cozy thermos tomato soup on a chilly day.
Storage Instructions: Store the muffins in an airtight container at room temperature for up to 3 days. If your kitchen is warm, refrigerate them—they’ll last up to 5 days. I like to place a paper towel in the bottom of the container to absorb excess moisture and another on top to keep the muffins from getting sticky.
Freezing Instructions: These muffins freeze beautifully. Let them cool completely, then place them in a single layer in a freezer-safe bag or container. They’ll keep for up to 3 months. To thaw, leave them at room temperature for about an hour, or microwave for 20-30 seconds. I always keep a stash in my freezer for busy mornings.
How Flavors Develop: Interestingly, these muffins taste even better the next day. The flavors meld together overnight, and the honey becomes more pronounced. If you can resist eating them all on day one, you’ll be rewarded on day two.
Nutritional Information & Benefits
Here’s the nutritional breakdown per muffin (based on 12 muffins, without optional mix-ins):
| Nutrient | Amount Per Muffin |
|---|---|
| Calories | 185 |
| Total Fat | 7g |
| Saturated Fat | 5g |
| Cholesterol | 31mg |
| Sodium | 210mg |
| Total Carbohydrates | 28g |
| Dietary Fiber | 3g |
| Sugars | 13g |
| Protein | 5g |
| Vitamin A | 80% DV |
| Iron | 8% DV |
The pumpkin in these muffins is a powerhouse of nutrition. It’s loaded with vitamin A, which supports eye health and immune function. The oats provide soluble fiber, which helps lower cholesterol and keeps you feeling full longer. Honey offers antioxidants and has natural antibacterial properties. And unlike many store-bought muffins that are loaded with refined sugar and unhealthy fats, these are made with wholesome ingredients that actually nourish your body.
These muffins are also naturally nut-free (unless you add walnuts), making them a great option for school lunches. They’re lower in sugar than traditional muffins, and you can easily adapt them to be gluten-free or vegan. If you’re looking for a breakfast or snack that satisfies your sweet tooth without the sugar crash, these are it.
Conclusion
These healthy pumpkin oat muffins with honey have become a staple in my kitchen, and I think they’ll become one in yours too. They’re the kind of recipe that solves a real problem—how to eat something that tastes like fall without derailing your healthy habits. They’re simple enough for a weekday morning, but special enough to bring to a gathering.
I love that this recipe is forgiving. You can swap ingredients, adjust the sweetness, add your favorite mix-ins, and it still works. That’s the mark of a good recipe, in my opinion. It’s not rigid. It’s a starting point that you can make your own.
I’d love to hear how these turn out for you. Did you add chocolate chips? Walnuts? Did you make them gluten-free? Drop a comment below and let me know. And if you’re looking for more cozy fall recipes, check out my tender pumpkin spice sourdough bread or my creamy homemade pumpkin cold foam for your morning coffee. Happy baking, friends!
Frequently Asked Questions
Can I use quick oats instead of rolled oats?
You can, but the texture will be different. Quick oats are more finely chopped, so they’ll absorb liquid faster and create a softer, more uniform crumb. The muffins won’t have that hearty, chewy texture that rolled oats provide. If you only have quick oats, reduce the soaking time to 5 minutes.
Why did my muffins turn out dry?
Dry muffins usually come from one of three issues: overmixing the batter, using too much flour, or overbaking. Make sure you’re measuring your flour correctly (spoon and level, don’t scoop) and check the muffins at 18 minutes. Every oven is different, and even an extra minute or two can make a difference.
Can I make these into mini muffins?
Absolutely. For mini muffins, reduce the baking time to 10-12 minutes. You’ll get about 24 mini muffins from this recipe. They’re perfect for snacking and great for lunchboxes. Just keep an eye on them—mini muffins bake quickly and can go from perfect to overdone in a hurry.
Can I use canned pumpkin that’s been opened for a few days?
Yes, as long as it’s been stored properly in an airtight container in the refrigerator and it’s not more than 5-7 days past opening. Give it a sniff first—if it smells off, don’t use it. Also, give it a stir before measuring, as the liquid can separate during storage.
Can I make these muffins without eggs?
Yes, you can use flax eggs as a substitute. Mix 2 tablespoons of ground flaxseed with 5 tablespoons of water and let it sit for 5 minutes until it forms a gel-like consistency. The muffins will be slightly denser, but they’ll still be delicious. You can also use applesauce (1/4 cup per egg), but the texture will be more cake-like.
Pin This Recipe!
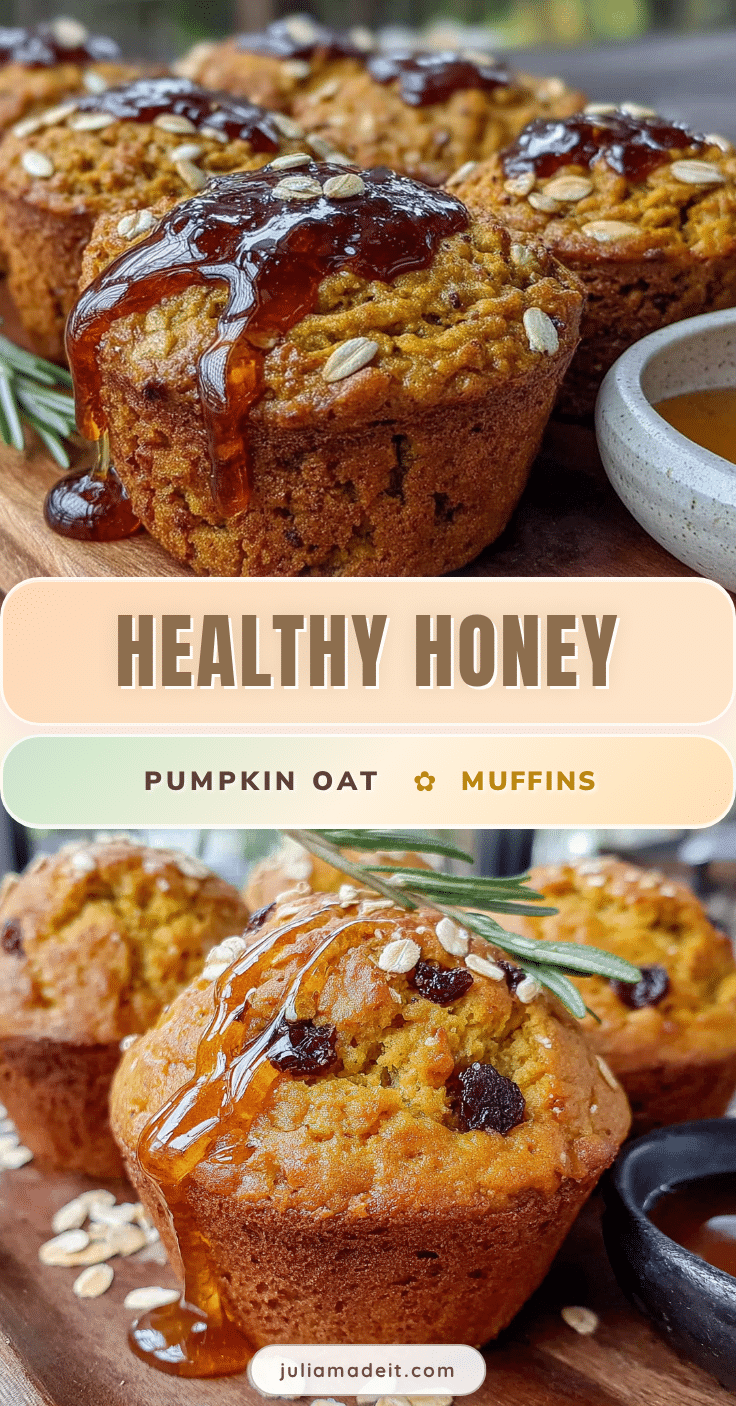
Healthy Pumpkin Oat Muffins with Honey (Easy Recipe)
These healthy pumpkin oat muffins with honey are tender, lightly sweet, and packed with fiber and whole grains. They’re the perfect cozy fall breakfast or snack that tastes indulgent but is actually good for you.
- Prep Time: 15 minutes
- Cook Time: 20 minutes
- Total Time: 35 minutes
- Yield: 12 muffins 1x
- Category: Breakfast
- Cuisine: American
Ingredients
- 1 cup (90g) rolled oats
- 1 cup (120g) all-purpose flour
- 1 cup (245g) pumpkin puree
- 1/3 cup (113g) honey
- 2 large eggs, at room temperature
- 1/2 cup (120ml) milk (dairy or plant-based)
- 1/4 cup (60ml) coconut oil, melted
- 1/4 cup (50g) brown sugar, packed
- 1 1/2 teaspoons baking powder
- 1/2 teaspoon baking soda
- 2 teaspoons pumpkin pie spice
- 1 teaspoon cinnamon
- 1/2 teaspoon salt
- 1 teaspoon vanilla extract
- Optional: 1/2 cup chopped walnuts, pecans, chocolate chips, or dried cranberries
Instructions
- Preheat your oven to 350°F (175°C). Line a 12-cup muffin tin with paper liners or grease the cups well.
- In a large bowl, whisk together the eggs, honey, milk, melted coconut oil, brown sugar, vanilla extract, and pumpkin puree until smooth and well combined.
- Add the rolled oats to the wet mixture and stir to combine. Let this sit for 10 minutes. This is the most important step—the oats need time to absorb liquid, which softens them and prevents dense muffins.
- In a separate medium bowl, whisk together the flour, baking powder, baking soda, pumpkin pie spice, cinnamon, and salt.
- Add the dry ingredients to the wet ingredients and fold together with a rubber spatula just until no streaks of flour remain. If adding mix-ins, fold them in now.
- Divide the batter evenly among the 12 muffin cups, filling each about 3/4 full.
- Bake for 18-22 minutes, or until a toothpick inserted into the center comes out clean or with a few moist crumbs.
- Let the muffins cool in the pan for 5 minutes, then transfer to a wire rack to cool completely.
- Optional: While still warm, brush the tops with a little extra honey for a beautiful shine.
Notes
Don’t skip the oat soaking step—it transforms the texture. Use room temperature ingredients to prevent coconut oil from solidifying. Measure flour correctly by spooning and leveling. Rotate the pan halfway through baking for even browning. Let muffins cool completely before storing to avoid sogginess.
Nutrition
- Serving Size: 1 muffin
- Calories: 185
- Sugar: 13
- Sodium: 210
- Fat: 7
- Saturated Fat: 5
- Carbohydrates: 28
- Fiber: 3
- Protein: 5
Keywords: pumpkin muffins, healthy muffins, oat muffins, honey muffins, fall breakfast, easy muffin recipe