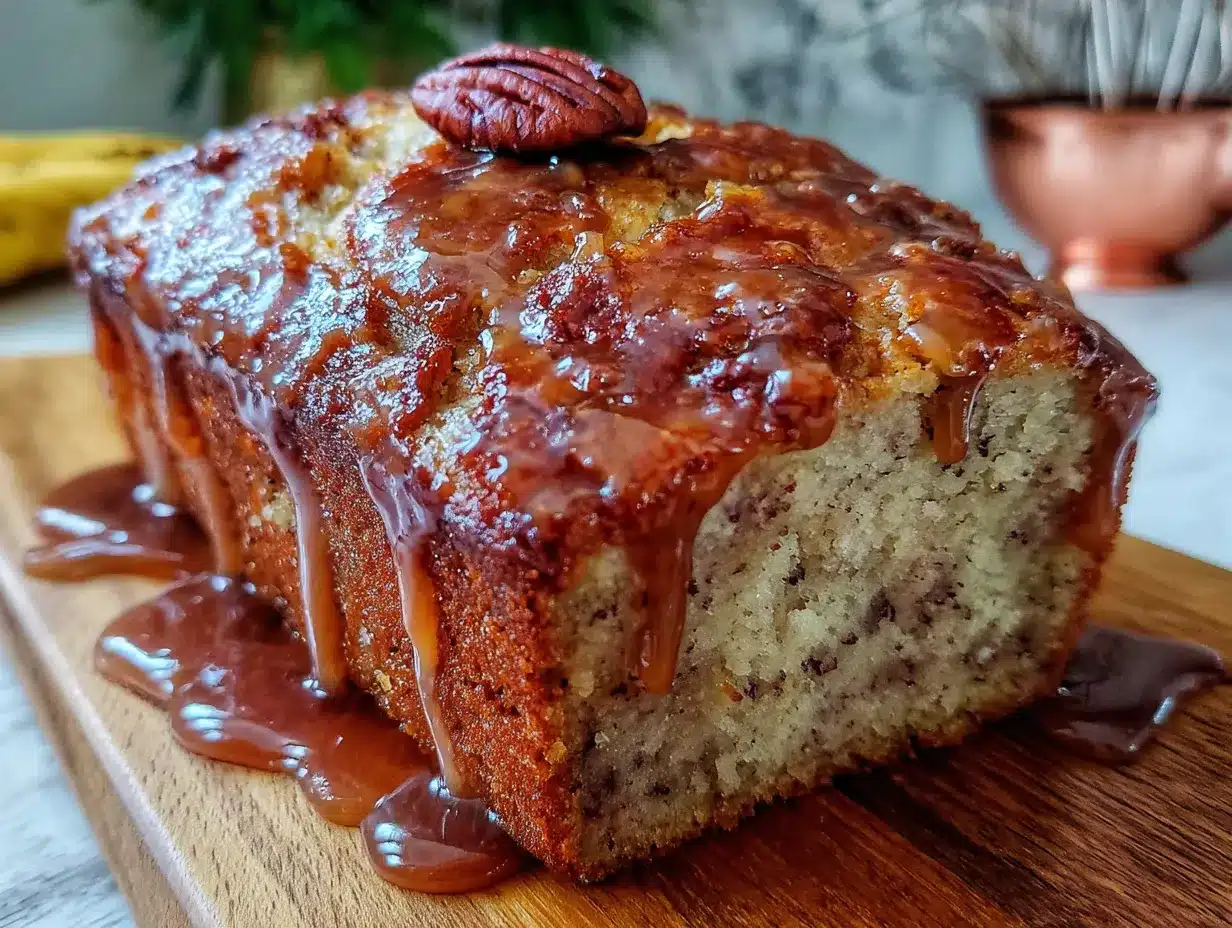
My husband looked up from his third slice and just said, “Don’t ever buy banana bread again.” No preamble, no polite request—just a quiet, definitive statement with crumbs on his chin. I stood there at the counter, spatula in hand, and realized I had accidentally stumbled onto something. This wasn’t supposed to be a recipe that changed things. It was supposed to be a way to use up the sad, spotty bananas on my counter before they turned into a science experiment. But that first bite of this browned butter banana bread made me pause too. The nutty warmth from the butter, the impossibly tender crumb, the way the edges get almost caramelized while the middle stays soft as a cloud. It felt like the banana bread I’d been chasing for years but never quite found. And the best part? It all comes together in one bowl. No stand mixer. No separate bowl for dry ingredients. Just one bowl, a whisk, and about ten minutes of your time. That’s it.
I have made a lot of banana bread in my life. Dry banana bread. Dense banana bread. Banana bread that looked beautiful but tasted like nothing. This one is different, and I think it’s the browned butter that does the magic. It adds this deep, almost toasty richness that plain melted butter just can’t replicate. You know how some recipes feel like they are trying too hard? This one doesn’t. It’s straightforward, forgiving, and honestly, it makes your whole kitchen smell like a cozy bakery. Let me show you how to make it.
Why You’ll Love This Recipe
Let me be real with you. I have tested this recipe more times than I care to admit. I have made it with overripe bananas and barely ripe bananas. I have used Greek yogurt and sour cream. I have forgotten the vanilla and added it halfway through mixing. And every single time, it worked. That is the kind of recipe you want in your back pocket.
- One Bowl, No Fuss: No stand mixer, no sifting, no separate bowls for wet and dry ingredients. Just one bowl and a whisk. Cleanup takes two minutes.
- Browned Butter Magic: This is not your average banana bread. Browning the butter adds a nutty, caramel-like depth that makes this bread taste like you spent hours on it. You didn’t. But no one has to know.
- Perfectly Moist Every Time: The combination of ripe bananas, browned butter, and a touch of yogurt creates a crumb that is tender, moist, and never gummy. I have tested this with both sour cream and Greek yogurt, and both work beautifully.
- Simple Pantry Ingredients: You probably have everything you need already. Bananas, butter, flour, sugar, eggs, vanilla, baking soda, salt. That is it. No weird ingredients you will never use again.
- Freezer-Friendly: This bread freezes like a dream. Make two loaves, eat one now, and save one for later. It thaws beautifully and tastes just as fresh.
- Family-Approved and Kid-Tested: My niece, who is the pickiest eater I know, asked for seconds. Then thirds. Then asked if she could take the rest home. That is the kind of endorsement that matters.
This is the banana bread I turn to when I want something that feels special but requires almost no effort. It is comfort food at its finest—warm, buttery, and full of flavor. If you have ever been disappointed by dry or bland banana bread, this recipe will change your mind.
What Ingredients You Will Need
This recipe uses simple, everyday ingredients, but each one plays a specific role in creating that perfect texture and flavor. I have tested this with different brands and substitutions, so I will share what works best.
- Unsalted Butter (1/2 cup, or 1 stick): This is the star of the show. Browning the butter is what gives this banana bread its signature nutty flavor. I use unsalted butter so I can control the salt level. If you only have salted butter, just reduce the added salt to 1/4 teaspoon.
- Very Ripe Bananas (3 medium, about 1 1/2 cups mashed): The riper, the better. You want bananas that are heavily spotted or even mostly brown. They are sweeter and easier to mash, which means better flavor and texture. If your bananas are not ripe enough, you can roast them in a 300°F oven for 15-20 minutes until they soften and darken.
- Granulated Sugar (3/4 cup): Regular white sugar works perfectly here. It dissolves easily and adds just the right amount of sweetness. You can reduce it to 1/2 cup if your bananas are very sweet, but I would not go lower than that.
- Large Egg (1, room temperature): The egg provides structure and richness. Make sure it is at room temperature so it incorporates smoothly into the batter. If you forgot to take it out of the fridge, place it in a bowl of warm water for 5 minutes.
- Plain Yogurt or Sour Cream (1/4 cup): This is my secret ingredient for extra moisture. Greek yogurt works great and adds a slight tang that balances the sweetness. Sour cream is even richer. Both are excellent, so use what you have on hand.
- Vanilla Extract (1 teaspoon): Pure vanilla extract adds warmth and depth. I recommend using pure vanilla rather than imitation for the best flavor, but imitation will work in a pinch.
- All-Purpose Flour (1 1/2 cups): Regular all-purpose flour gives this bread the perfect structure. Spoon and level your flour—do not scoop directly from the bag, or you will end up with too much flour and a dry loaf.
- Baking Soda (1 teaspoon): This is our leavening agent. It reacts with the acidity in the yogurt and bananas to help the bread rise. Make sure your baking soda is fresh (less than 6 months old) for the best results.
- Salt (1/2 teaspoon): Salt enhances all the flavors and balances the sweetness. Do not skip it, even if you are using salted butter.
- Optional Mix-Ins: Chocolate chips, chopped walnuts, or pecans are all excellent additions. I love adding 1/2 cup of semi-sweet chocolate chips for a little indulgence. If you want a more classic version, try 1/2 cup of toasted walnuts.
I personally recommend using Land O’Lakes unsalted butter for browning—it browns evenly and has a consistent fat content that gives reliable results. For yogurt, I usually grab Fage 2% Greek yogurt because it is thick and tangy, but any plain yogurt will work.
Equipment Needed
One of the best things about this recipe is how little equipment it requires. You do not need a stand mixer or any fancy gadgets.
- One Large Mixing Bowl: Any large bowl will work. I use a glass or stainless steel bowl, but ceramic is fine too.
- Whisk or Wooden Spoon: A whisk works best for incorporating the wet ingredients, but a wooden spoon or rubber spatula will do the job.
- Small Saucepan: For browning the butter. A light-colored saucepan is ideal because you can see the butter change color more easily. I use a small stainless steel pan.
- 9×5-Inch Loaf Pan: A standard loaf pan is perfect. If you use an 8×4-inch pan, you will need to bake it a little longer. If you use a larger pan, the bread will be shorter and bake faster.
- Parchment Paper: Lining the pan with parchment paper makes lifting the bread out super easy. You can also grease the pan with butter or non-stick spray, but parchment is foolproof.
- Cooling Rack: A wire rack allows air to circulate around the bread so it cools evenly and does not get soggy on the bottom.
- Mixing Spatula: A rubber spatula is great for scraping every last bit of batter into the pan. I use a silicone spatula that is heat-resistant.
If you do not have a loaf pan, you can bake this batter in a 9-inch square pan for about 25-30 minutes. It will be more like banana cake, but it is just as delicious. I have also made these as muffins—bake at 350°F for 18-22 minutes.
Preparation Method
Let me walk you through this step by step. I promise it is easier than it sounds, and the results are absolutely worth it.
- Preheat your oven to 350°F (175°C). Place a rack in the center of the oven. Line a 9×5-inch loaf pan with parchment paper, leaving some overhang on the long sides. This makes lifting the bread out so much easier later.
- Brown the butter. Place the 1/2 cup (1 stick) of unsalted butter in a small saucepan over medium heat. Let it melt completely, then continue cooking, swirling the pan occasionally. The butter will start to foam and crackle—that is normal. After about 4-5 minutes, the foam will subside, and you will see golden brown specks forming at the bottom of the pan. The butter will smell nutty and toasty. As soon as it turns a light amber color, remove it from the heat immediately. Pour it into a heat-safe bowl to stop the cooking process. Let it cool for about 5 minutes while you prepare the other ingredients.
- Mash the bananas. In your large mixing bowl, add the 3 very ripe bananas. Mash them with a fork until they are mostly smooth with a few small lumps remaining. I like to leave a few chunks for texture. You should have about 1 1/2 cups of mashed banana.
- Add the browned butter and sugar. Pour the slightly cooled browned butter into the bowl with the mashed bananas. Add the 3/4 cup granulated sugar. Whisk everything together until well combined. The mixture will look a little glossy and smell amazing.
- Add the egg, yogurt, and vanilla. Crack in the 1 large egg (room temperature), add the 1/4 cup plain yogurt or sour cream, and 1 teaspoon vanilla extract. Whisk vigorously until the mixture is smooth and fully combined. It will be a pale golden color.
- Add the dry ingredients. Sprinkle the 1 1/2 cups all-purpose flour, 1 teaspoon baking soda, and 1/2 teaspoon salt over the wet mixture. Use a rubber spatula or wooden spoon to fold everything together gently. Stir just until you no longer see streaks of flour. Do not overmix—overmixing will make the bread tough. A few small lumps are perfectly fine.
- Fold in any mix-ins (optional). If you are adding chocolate chips, nuts, or anything else, gently fold them in now. I usually add 1/2 cup of semi-sweet chocolate chips because I love the combination of banana and chocolate with the nutty browned butter.
- Pour the batter into the prepared loaf pan. Use your spatula to scrape every bit of batter into the pan. Spread it evenly, then give the pan a gentle tap on the counter to release any air bubbles. The batter will be fairly thick—that is normal.
- Bake for 50-60 minutes. Place the pan in the preheated oven and bake until a toothpick inserted into the center comes out clean or with just a few moist crumbs. The top should be golden brown and cracked. If the top is browning too quickly (around the 40-minute mark), loosely tent the pan with aluminum foil.
- Cool in the pan for 10 minutes. Remove the pan from the oven and place it on a cooling rack. Let it cool in the pan for 10 minutes. Then use the parchment paper overhang to lift the bread out of the pan and transfer it to the cooling rack to cool completely.
Let the bread cool for at least 30 minutes before slicing. I know it is hard to wait, but slicing too early will make the bread crumble. Trust me—I have made that mistake more than once. The texture firms up as it cools, and the flavors continue to develop.
Cooking Tips & Techniques
I have made this banana bread more times than I can count, and I have learned a few things along the way. Here are my best tips for getting perfect results every time.
- Do not walk away from the browning butter. Butter can go from perfectly browned to burnt in about 30 seconds. Keep an eye on it, and remove it from the heat as soon as it turns a light amber color. If you see black specks, you have gone too far. Start over—it is worth it.
- Use a light-colored pan for browning butter. Dark pans make it hard to see the color change. I use a stainless steel saucepan, and it makes a huge difference. If you only have a dark pan, keep the heat on medium-low and watch closely.
- Let your bananas get really, really ripe. The best banana bread comes from bananas that are almost black. They are sweeter, softer, and have a more intense banana flavor. If your bananas are not ripe enough, the bread will be less flavorful and less moist.
- Room temperature ingredients matter. Cold egg or yogurt can seize the browned butter and create a lumpy batter. Take your egg and yogurt out of the fridge 30 minutes before you start baking. If you forgot, place the egg in a bowl of warm water for 5 minutes.
- Do not overmix the batter. Once you add the flour, mix just until it disappears. Overmixing develops gluten, which makes the bread tough and dense. A few streaks of flour are fine—they will disappear as you fold.
- Check for doneness with a toothpick. Insert a toothpick into the center of the bread. If it comes out clean or with just a few moist crumbs, it is done. If it comes out with wet batter, bake for another 5 minutes and check again.
- Let it cool completely before slicing. I know it is tempting, but slicing warm banana bread is a recipe for crumbly disappointment. The bread needs time to set. I usually wait at least an hour, but overnight is even better.
One time, I forgot to add the baking soda. The bread came out dense and flat—like a banana brick. It still tasted good, but it was not the same. So double-check your ingredients before you start mixing. It is an easy mistake to make when you are in a hurry.
Variations & Adaptations
This recipe is incredibly versatile. Here are some of my favorite ways to change it up depending on what I have in my pantry or what I am craving.
- Chocolate Chip Banana Bread: This is my go-to variation. Fold in 1/2 cup of semi-sweet chocolate chips or dark chocolate chunks. The chocolate melts into the warm bread and pairs beautifully with the nutty browned butter. I have also used white chocolate chips, which are amazing if you want something sweeter.
- Nutty Banana Bread: Add 1/2 cup of toasted walnuts or pecans. Toast them in a dry skillet over medium heat for 3-4 minutes until fragrant before folding them into the batter. The crunch adds a lovely texture contrast.
- Gluten-Free Banana Bread: Substitute the all-purpose flour with a 1:1 gluten-free baking flour blend (like Bob’s Red Mill or King Arthur). The texture will be slightly more delicate, but it still works beautifully. Add an extra tablespoon of yogurt to help with moisture.
- Vegan Banana Bread: Replace the butter with vegan butter or coconut oil (brown the coconut oil for a nutty flavor). Use a flax egg (1 tablespoon ground flaxseed mixed with 3 tablespoons water, let sit for 5 minutes) and dairy-free yogurt. The texture will be a bit denser but still delicious.
- Spiced Banana Bread: Add 1 teaspoon of cinnamon, 1/2 teaspoon of nutmeg, and 1/4 teaspoon of ground ginger to the flour mixture. This gives the bread a warm, cozy flavor that is perfect for fall. I love making this version when the weather turns cool.
- Brown Sugar Banana Bread: Replace the granulated sugar with 3/4 cup of packed light or dark brown sugar. Brown sugar adds a deeper, more molasses-like sweetness that complements the browned butter beautifully. The bread will also be slightly more moist.
I have tried all of these variations, and they are all winners. My personal favorite is the chocolate chip version—there is something about warm banana bread with melted chocolate that just feels like a hug in food form. If you are feeling adventurous, try adding a swirl of peanut butter or Nutella to the batter before baking. Just drop spoonfuls on top and swirl with a knife.
Serving & Storage Suggestions
This banana bread is delicious in so many ways. Here is how I like to serve it and how to keep it fresh for days.
- Serving Temperature: This bread is amazing warm, at room temperature, or even slightly toasted. I love slicing a piece and toasting it in a skillet with a little butter until the edges are crispy. It is like a whole new dessert.
- Perfect Pairings: Serve with a pat of salted butter on top, a drizzle of honey, or a dollop of Greek yogurt. A cup of coffee or tea is the perfect accompaniment. For a special treat, serve with a scoop of vanilla ice cream or a dollop of whipped cream.
- Breakfast or Dessert: This bread works for both. I have eaten it for breakfast with a smear of cream cheese, and I have served it for dessert with a drizzle of caramel sauce. It is versatile like that.
- Storage: Store the banana bread in an airtight container at room temperature for up to 4 days. Wrap it tightly in plastic wrap or aluminum foil to keep it from drying out. If you live in a humid climate, store it in the refrigerator to prevent mold.
- Freezing: This bread freezes beautifully. Let it cool completely, then wrap it tightly in plastic wrap, followed by a layer of aluminum foil. Freeze for up to 3 months. To thaw, leave it on the counter for a few hours or overnight in the refrigerator. You can also slice it before freezing and grab individual slices as needed.
- Reheating: To reheat, microwave a slice for 15-20 seconds, or toast it in a toaster oven or skillet. The toasted version is my favorite—the edges get crispy while the inside stays soft and warm.
One thing I love about banana bread is that it often tastes even better the next day. The flavors have time to meld, and the texture becomes even more moist. So do not be afraid to make it a day ahead if you are serving it for a special occasion.
Nutritional Information & Benefits
While this is definitely a treat, it does have some redeeming qualities. Here is a rough nutritional breakdown per slice (assuming 10 slices per loaf, without mix-ins).
- Calories: Approximately 250-280 per slice
- Fat: 12-14g (mostly from butter)
- Carbohydrates: 35-38g
- Protein: 4-5g
- Fiber: 1-2g (from bananas)
- Sugar: 18-20g (naturally occurring plus added)
Bananas are a good source of potassium, vitamin B6, and vitamin C. They also provide natural sweetness, which allows us to use a reasonable amount of added sugar. The yogurt or sour cream adds a little calcium and protein. If you use Greek yogurt, you will get a bit more protein and less fat.
This recipe is vegetarian and can be made gluten-free or vegan with the substitutions mentioned above. It contains dairy and eggs in the original version, so keep that in mind if you have allergies. If you are watching your sugar intake, you can reduce the sugar to 1/2 cup, especially if your bananas are very ripe.
I do not pretend this is health food, but I feel good about eating it because it is made with real ingredients. No preservatives, no artificial flavors, just simple, wholesome food that tastes amazing. Everything in moderation, right?
Frequently Asked Questions
Can I use frozen bananas for this recipe?
Absolutely! Frozen bananas are actually perfect for banana bread. Thaw them completely, then drain off any excess liquid before mashing. They will be very soft and almost syrupy, which adds extra moisture and sweetness to the bread.
Why did my banana bread turn out dry?
Dry banana bread usually means either too much flour or overbaking. Make sure you are spooning and leveling your flour instead of scooping directly from the bag. Also, check your bread at the 50-minute mark—ovens vary, and yours might bake faster than mine. A toothpick with a few moist crumbs is perfect.
Can I make this recipe without browning the butter?
You can, but you will lose that amazing nutty flavor. If you are short on time, just melt the butter and use it as is. The bread will still be delicious, just not as complex. If you want to skip browning, I recommend adding 1/2 teaspoon of vanilla extract extra to boost the flavor.
How do I know when my bananas are ripe enough?
Look for bananas that are heavily spotted with brown or even mostly black. They should feel soft to the touch and smell strongly banana-like. If your bananas are still yellow, they will work, but the bread will be less sweet and less moist. You can speed up ripening by placing them in a paper bag with an apple overnight.
Can I double this recipe?
Yes! This recipe doubles beautifully. Just use a larger bowl and bake in two loaf pans. You can also bake one loaf and freeze the other for later. If you are using a stand mixer, be careful not to overmix—stick to the same gentle folding method.
Conclusion
This one-bowl banana bread with browned butter has become a staple in my kitchen, and I have a feeling it will become one in yours too. It is the kind of recipe that feels special without being complicated, the kind that makes you look like a hero when you bring it to a brunch or a potluck. The browned butter adds a depth of flavor that you just do not get from regular banana bread, and the one-bowl method makes it almost too easy.
I love that this recipe is forgiving. You can use Greek yogurt or sour cream. You can add chocolate chips or nuts or nothing at all. You can make it gluten-free or vegan. It always works, and it always tastes amazing. That is the kind of recipe worth holding onto.
I would love to hear how yours turns out. Did you add any mix-ins? Did you try a variation? Let me know in the comments below. And if you are looking for more easy, delicious recipes, check out my zucchini banana bread with maple glaze for another twist on a classic, or try my brown butter pumpkin chocolate chip cookies for a seasonal treat that uses the same browned butter technique. Happy baking, friends!
Pin This Recipe!
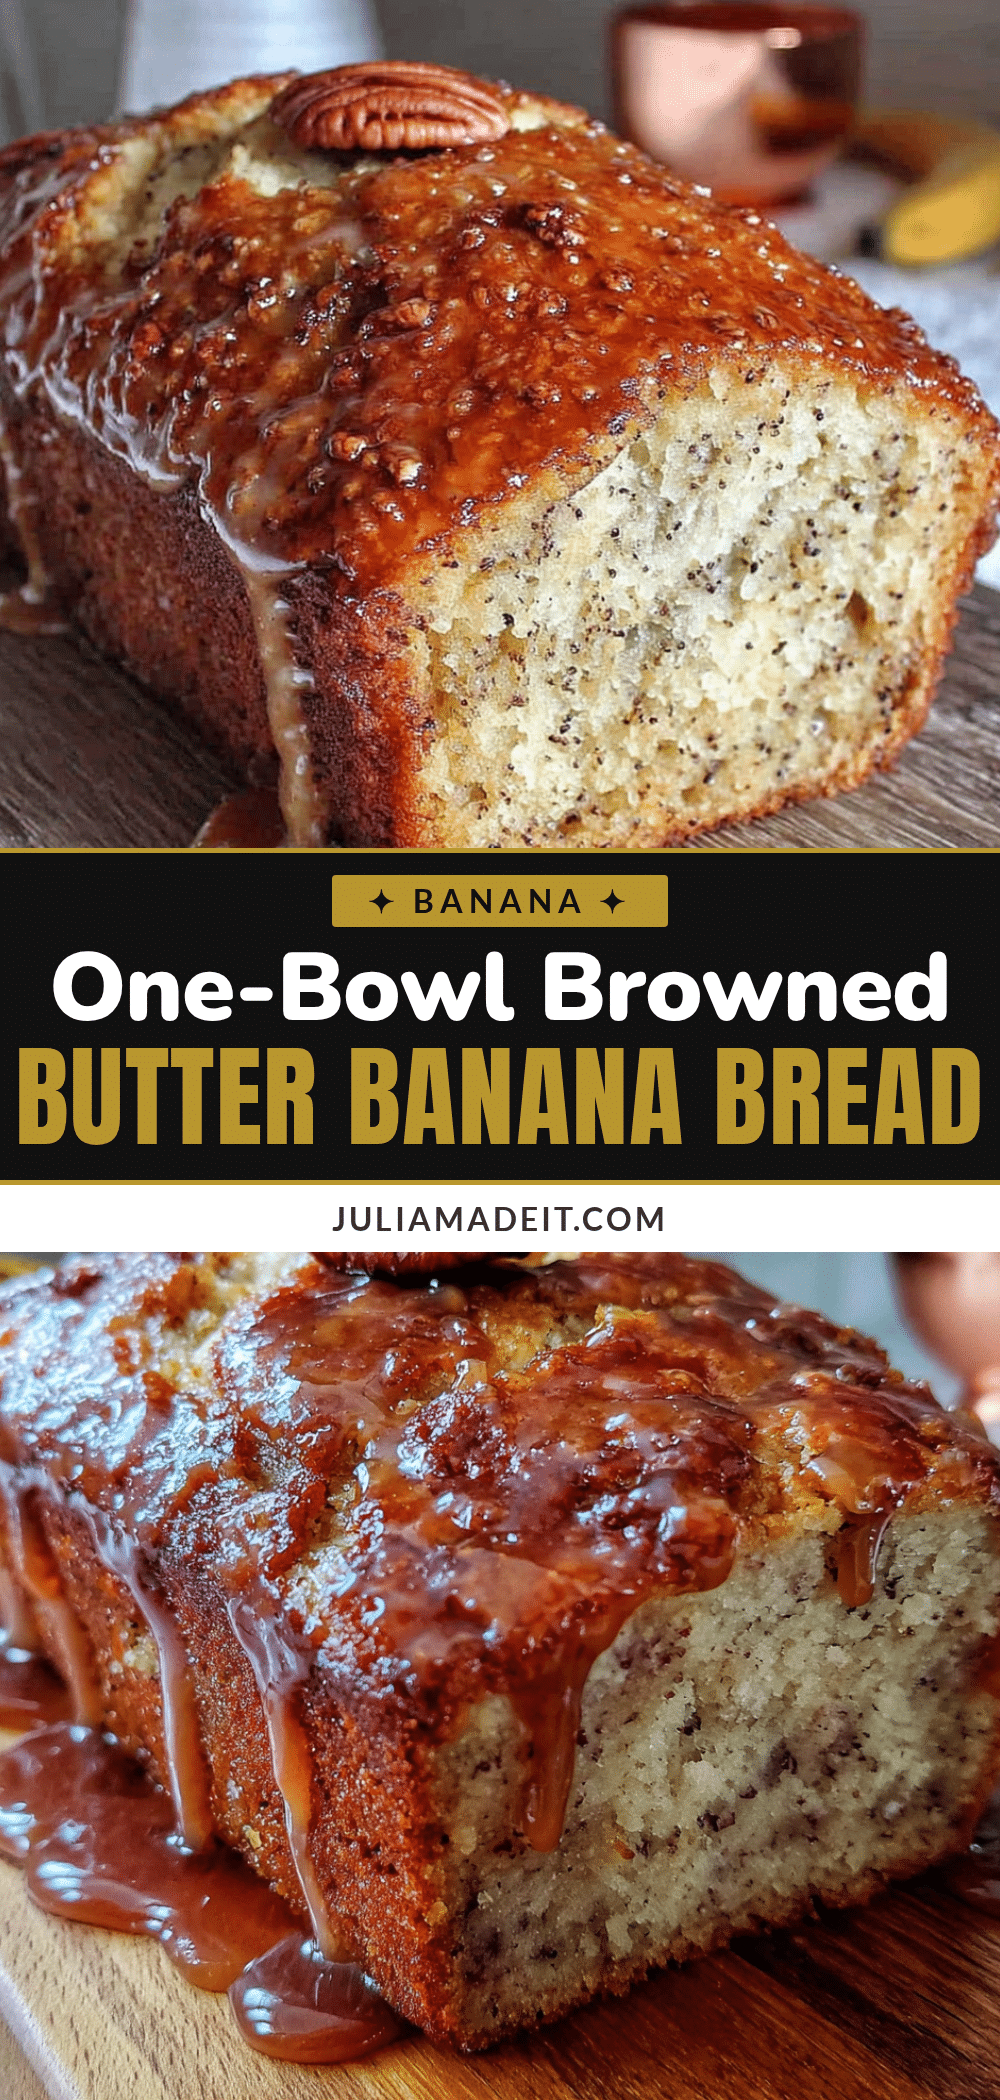
Best Browned Butter Banana Bread (One Bowl, Easy Recipe)
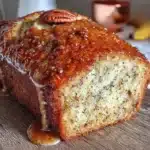
This one-bowl banana bread with browned butter is incredibly moist, tender, and full of nutty, caramel-like flavor. It’s an easy, forgiving recipe that comes together in about 10 minutes and tastes like a cozy bakery treat.
- Prep Time: 10 minutes
- Cook Time: 55 minutes
- Total Time: 1 hour 5 minutes
- Yield: 10 servings 1x
- Category: Dessert
- Cuisine: American
Ingredients
- 1/2 cup (1 stick) unsalted butter
- 3 medium very ripe bananas (about 1 1/2 cups mashed)
- 3/4 cup granulated sugar
- 1 large egg, room temperature
- 1/4 cup plain yogurt or sour cream
- 1 teaspoon vanilla extract
- 1 1/2 cups all-purpose flour
- 1 teaspoon baking soda
- 1/2 teaspoon salt
- Optional: 1/2 cup semi-sweet chocolate chips, chopped walnuts, or pecans
Instructions
- Preheat oven to 350°F (175°C). Line a 9×5-inch loaf pan with parchment paper, leaving overhang on the long sides.
- Brown the butter: In a small saucepan over medium heat, melt the butter. Continue cooking, swirling occasionally, until it foams, subsides, and turns a light amber color with golden specks (about 4-5 minutes). Remove from heat immediately and pour into a heat-safe bowl to cool for 5 minutes.
- In a large mixing bowl, mash the bananas with a fork until mostly smooth with a few lumps.
- Add the browned butter and sugar to the bananas. Whisk until well combined and glossy.
- Add the egg, yogurt or sour cream, and vanilla. Whisk vigorously until smooth and pale golden.
- Sprinkle the flour, baking soda, and salt over the wet mixture. Fold gently with a rubber spatula or wooden spoon just until no streaks of flour remain. Do not overmix.
- If using, fold in chocolate chips or nuts.
- Pour batter into the prepared loaf pan, spread evenly, and tap gently on the counter to release air bubbles.
- Bake for 50-60 minutes, until a toothpick inserted in the center comes out clean or with a few moist crumbs. If top browns too quickly, tent loosely with foil after 40 minutes.
- Cool in the pan for 10 minutes, then lift out using parchment and transfer to a wire rack to cool completely (at least 30 minutes before slicing).
Notes
Do not walk away from browning butter—it can burn quickly. Use a light-colored pan to see color changes. Let bananas get very ripe (almost black) for best flavor. Room temperature ingredients help prevent lumpy batter. Do not overmix once flour is added. Let bread cool completely before slicing to avoid crumbling. Bread tastes even better the next day.
Nutrition
- Serving Size: 1 slice (1/10 of loa
- Calories: 265
- Sugar: 19
- Sodium: 220
- Fat: 13
- Saturated Fat: 8
- Carbohydrates: 37
- Fiber: 2
- Protein: 4
Keywords: banana bread, browned butter, one bowl, easy, moist, homemade, quick bread