The skin on these chicken thighs shatters when you bite into it. Not just crisp — it cracks, flakes apart in brittle little shards that cling to the Parmesan crust, and honestly, that sound alone is half the reason I make this recipe on repeat. The other half is the garlic, which browns into these tiny, toasted bits that taste almost nutty against all that salty, funky cheese.
I stumbled into this combination by accident, which is how most good things happen in my kitchen, isn’t it? I had a pack of chicken thighs thawing on the counter, a block of Parmesan with just a rind left, and a craving for something that felt indulgent but didn’t require standing over a skillet of sputtering oil. The air fryer was sitting there, looking smug and underused. So I did what any reasonable person would do — I grated every last bit of that Parmesan, smashed a few cloves of garlic, and started layering flavors like I had something to prove.
The first batch came out good. The second batch — the one where I actually paid attention to how the cheese clings to the skin, where I let the garlic sit in oil long enough to perfume every molecule — that one came out dangerous. My husband walked into the kitchen mid-bite and just stared at me. I didn’t offer him any. That’s how you know a recipe is worth writing down.
This crispy garlic Parmesan chicken thighs in air fryer situation has become my go-to for nights when I want something that feels fancy but takes 25 minutes from start to plate. It’s the kind of dinner that makes you look like you tried really hard when really, you just let the air fryer do the heavy lifting. And honestly? That’s my favorite kind of cooking.
Why You’ll Love This Recipe
I’ve tested this recipe at least a dozen times, adjusting temperatures, tweaking the garlic-to-cheese ratio, and even trying different brands of Parmesan (the cheap stuff in the green can? Don’t do it). What I landed on is a method that delivers consistent, restaurant-quality results without the mess or the fuss.
- Ready in 25 Minutes: From fridge to table in under half an hour. That’s faster than delivery, and way more satisfying.
- Simple Pantry Ingredients: Chicken thighs, Parmesan, garlic, olive oil, and basic seasonings. You probably have all of it right now.
- Perfect for Busy Weeknights: No marinating, no complicated steps. Just season, cook, and eat.
- Crowd-Pleaser Every Time: I’ve served these to picky eaters, food snobs, and kids who “don’t like chicken.” Empty plates all around.
- That Irresistible Crunch: The Parmesan creates a craggy, golden crust that stays crisp even after sitting for a few minutes. It’s texture magic, honestly.
What sets this recipe apart from the hundreds of other air fryer chicken recipes out there is the technique. I don’t just toss everything together and hope for the best. There’s a specific order to how the garlic and cheese get applied, a precise temperature window, and a little trick with the oil that makes all the difference. I learned this through trial and error — mostly error, if I’m being honest. But now you get to skip straight to the good part.
This isn’t just another chicken recipe. It’s the one you’ll text your friends about. The one that makes you look forward to Monday dinner. The one that proves you don’t need a deep fryer to get genuinely crispy, golden-brown chicken that tastes like it came from a restaurant kitchen.
What Ingredients You Will Need
This recipe relies on a handful of quality ingredients, each playing a specific role in building that signature crust and deep savory flavor. Nothing here is complicated, but choosing wisely makes a real difference.
- Boneless, skin-on chicken thighs (4-6 thighs, about 1.5 lbs): The skin is non-negotiable here. It renders fat during cooking, which helps the Parmesan crust form and get crispy. Boneless thighs cook faster and are easier to eat, but bone-in will work if you increase the cook time by 5-7 minutes. I prefer thighs over breasts because they stay juicier and forgive a minute or two of overcooking.
- Freshly grated Parmesan cheese (½ cup, packed): Please, for the love of good food, grate it yourself from a block. Pre-shredded cheese contains anti-caking agents that won’t melt and adhere properly. I like using a microplane for the finest texture, which creates a more delicate crust. Parmigiano-Reggiano is ideal, but a good domestic Parmesan works too.
- Fresh garlic (4-5 cloves, minced): Don’t use the jarred stuff. Fresh garlic has a pungency that mellows and sweetens as it cooks, creating those little toasted bits that make every bite interesting. I mince mine by hand because I like the irregular texture, but a garlic press works fine.
- Olive oil (2 tablespoons): Extra virgin for flavor, but regular olive oil works too. The oil helps the seasoning stick and encourages browning. Don’t skip it, even if you’re watching calories — a little goes a long way here.
- Garlic powder (1 teaspoon): This is different from fresh garlic. Garlic powder adds a deeper, almost savory note that permeates the meat itself. It’s the foundation layer.
- Onion powder (½ teaspoon): Rounds out the savory profile without being identifiable. Trust me on this one.
- Smoked paprika (½ teaspoon): Adds color and a subtle smokiness that complements the Parmesan beautifully. Regular paprika works, but smoked is better.
- Salt (½ teaspoon, plus more to taste): I use fine sea salt. The Parmesan is already salty, so go easy at first and adjust later.
- Black pepper (¼ teaspoon, freshly ground): Freshly ground has more punch. Pre-ground works, but use a little extra.
- Optional garnish: Fresh parsley or chives (2 tablespoons, chopped): Not strictly necessary, but a sprinkle of green adds visual contrast and a fresh note that cuts through the richness.
For the best results, look for chicken thighs that are roughly the same size so they cook evenly. If some are significantly larger, you can pound them gently to even them out, or just check the smaller ones first and remove them as they finish.
Equipment Needed
The beauty of this recipe is that it doesn’t require a ton of specialized gear. Here’s what you’ll need:
- Air fryer (basket-style or oven-style): I use a 5.8-quart basket-style air fryer, and it fits 4-6 thighs comfortably without overcrowding. If yours is smaller, cook in batches. An overcrowded basket steams the chicken instead of crisping it.
- Microplane or box grater: For grating the Parmesan into a fine, fluffy texture. A microplane gives you the most delicate crust, but the fine side of a box grater works too.
- Sharp chef’s knife: For mincing garlic and trimming any excess fat or skin from the chicken. A dull knife makes this job frustrating and dangerous.
- Cutting board: Preferably one with a groove to catch juices. I use a separate board for raw chicken and wash it immediately after.
- Mixing bowl (medium): For combining the Parmesan, garlic, and oil mixture. A glass or stainless steel bowl works best.
- Tongs: For flipping the chicken halfway through cooking. Silicone-tipped tongs won’t scratch your air fryer basket.
- Paper towels: Essential for patting the chicken dry. This step is not optional — wet skin won’t crisp.
- Instant-read thermometer (optional but recommended): To ensure the chicken reaches 165°F internally without overcooking. I use mine every single time.
If you don’t own an air fryer, you can make this recipe in a convection oven at 400°F, though the cook time will be longer (about 25-30 minutes) and the crust won’t be quite as shatteringly crisp. A regular oven works too, but expect a softer texture.
Preparation Method
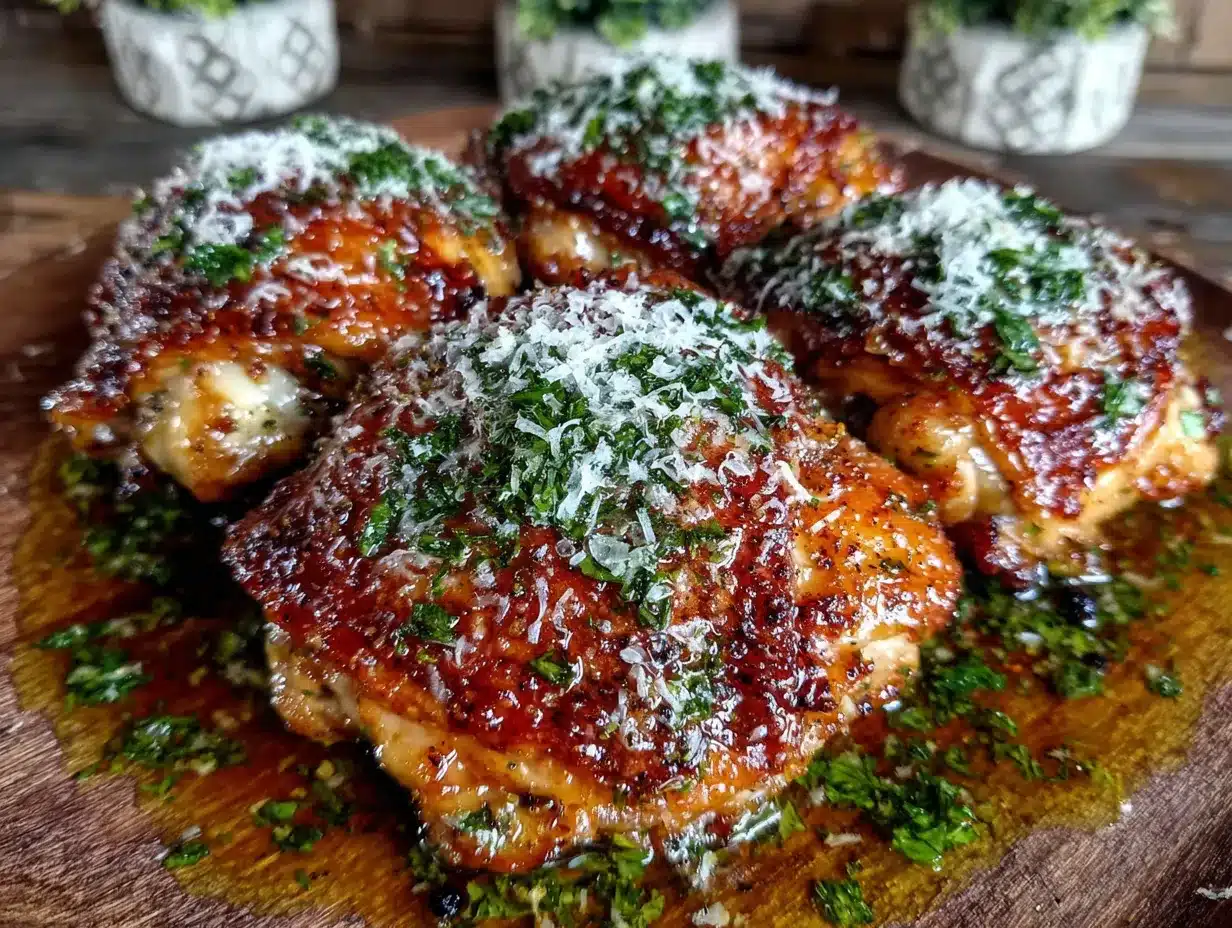
Let me walk you through this step by step. I’ve included every little detail I wish someone had told me the first time I made these.
- Pat the chicken thighs completely dry. This is the most important step, and I’m not exaggerating. Use paper towels and press firmly to absorb as much moisture as possible from both sides of the skin. Wet skin steams instead of crisps, and all that beautiful Parmesan crust will just slide right off. Let the chicken sit uncovered on a plate for 5 minutes after patting to air-dry any remaining moisture.
- Season the chicken with dry spices. In a small bowl, combine the garlic powder, onion powder, smoked paprika, salt, and black pepper. Sprinkle this mixture evenly over both sides of the chicken thighs, pressing gently to adhere. Don’t skip the underside — even though the crust goes on top, the meat itself needs flavor.
- Prepare the Parmesan-garlic coating. In a medium bowl, combine the freshly grated Parmesan, minced garlic, and olive oil. Stir until the mixture forms a thick, crumbly paste. It should look like wet sand — not soupy, not dry. If it seems too dry, add another teaspoon of oil. If it’s too wet, add a tablespoon more Parmesan.
- Apply the coating to the skin side only. Using your fingers or the back of a spoon, press the Parmesan mixture firmly onto the skin side of each thigh. Don’t just sprinkle it on — really press it in so it adheres. The coating should be about ¼ inch thick. Leave the underside bare.
- Preheat your air fryer to 380°F (193°C). Preheating ensures the chicken starts cooking immediately, which helps the crust set before the fat renders. If your air fryer doesn’t have a preheat function, just run it empty for 3 minutes at the target temperature.
- Arrange the chicken in the basket, skin side up. Place the thighs in a single layer with space between each piece. Overcrowding traps steam and ruins the crispiness. If you need to cook in batches, keep the coated chicken in the refrigerator while the first batch cooks.
- Cook at 380°F for 12 minutes. Don’t open the basket during this time. Let the heat do its work. The Parmesan will start to melt and brown, and the fat under the skin will begin rendering.
- Flip and cook for another 8-10 minutes. Using tongs, carefully flip each thigh so the skin side is now facing down. Cook for 8 minutes, then check the internal temperature. You’re looking for 165°F (74°C) in the thickest part. If it’s not there yet, cook in 2-minute increments until it hits the mark.
- Optional: Broil for extra crispiness. If your air fryer has a broil or max crisp function, run it for the final 1-2 minutes. Watch closely — the Parmesan can burn quickly at high heat. I do this when I want that extra-shardy, almost crackling texture.
- Rest for 3-5 minutes before serving. This is crucial. The juices need time to redistribute, and the crust needs to set. If you cut into the chicken immediately, the crust will slide off and the juices will run out. I know it’s hard to wait, but trust the process.
Visual cues: The finished chicken should have a deep golden-brown crust with visible flecks of darker brown where the garlic has toasted. The edges of the Parmesan will look slightly lacy and crispy. If you tap the crust with a fork, it should sound hollow and brittle — that’s how you know you’ve nailed it.
Cooking Tips & Techniques
After making these chicken thighs more times than I care to count, I’ve collected a few hard-won lessons that will save you from my early mistakes.
Don’t skip the drying step. I know it seems tedious, but moisture is the enemy of crispiness. I once got lazy and just dabbed the chicken once with a paper towel. The result was a soggy, sad crust that peeled off in one rubbery sheet. Never again. Take the extra 30 seconds to really dry those thighs.
Watch the garlic. Fresh garlic burns faster than you think, especially at air fryer temperatures. That’s why I mince it finely rather than chopping it coarsely — smaller pieces toast more evenly and are less likely to turn bitter. If you’re worried about burning, you can use garlic powder instead of fresh in the coating, but you’ll lose that sweet, roasted garlic flavor.
Use the right Parmesan. I learned this the hard way when I tried using pre-shredded Parmesan from a bag. It didn’t melt properly, it didn’t stick to the chicken, and it tasted like sawdust. Freshly grated Parmesan from a block has the moisture and fat content needed to create that lacy, golden crust. It’s worth the extra minute of grating.
Don’t overcrowd the basket. This is the most common mistake I see in air fryer recipes. If the pieces are touching, the steam gets trapped between them and the crust never fully crisps. Leave at least half an inch of space around each thigh. If you have to cook in batches, do it — the extra 10 minutes is worth it.
Let it rest. I know you’re hungry. I know the kitchen smells incredible. But cutting into these thighs immediately is the fastest way to lose that beautiful crust. The resting period allows the cheese to firm up and the juices to settle. I set a timer for 5 minutes and force myself to walk away. It makes a real difference.
Multitasking tip: While the chicken cooks, I like to quickly whip up a side dish. These thighs pair beautifully with a fresh smashed cucumber salad or some simple roasted vegetables. The timing works out perfectly — the salad comes together in the time it takes the chicken to rest.
Variations & Adaptations
One of the things I love about this recipe is how adaptable it is. Here are a few variations I’ve tried and loved:
Spicy Garlic Parmesan: Add ½ teaspoon of red pepper flakes or cayenne pepper to the Parmesan mixture. The heat cuts through the richness beautifully and adds a subtle kick that builds with each bite. I make this version when I’m cooking just for myself.
Herb-Crusted Version: Mix 1 tablespoon of finely chopped fresh herbs (rosemary, thyme, or oregano work best) into the Parmesan coating. The herbs get crispy and fragrant in the air fryer, adding another layer of flavor. This version feels especially fitting alongside a cozy thermos tomato soup on a chilly evening.
Gluten-Free Adaptation: This recipe is naturally gluten-free as written, since Parmesan and garlic form the crust instead of breadcrumbs. Just double-check that your Parmesan doesn’t contain any anti-caking agents with gluten, and you’re good to go.
Dairy-Free Option: Swap the Parmesan for a combination of nutritional yeast (3 tablespoons) and almond flour (¼ cup). The nutritional yeast provides that savory, cheesy flavor, while the almond flour helps create a crispy texture. It’s not an exact replica, but it’s surprisingly good in its own right.
Lemon-Garlic Twist: Add the zest of one lemon to the Parmesan mixture, and squeeze the juice over the finished chicken before serving. The brightness cuts through the richness and makes the whole dish feel lighter. This is my go-to spring variation.
Oven Method: If you don’t have an air fryer, bake the coated thighs on a wire rack set over a baking sheet at 425°F for 25-30 minutes. The wire rack allows air to circulate around the chicken, which helps the crust crisp up. You won’t get quite the same shatter texture, but it’s still delicious.
Serving & Storage Suggestions
These chicken thighs are versatile enough to work for a quick weeknight dinner or a casual gathering. Here’s how I like to serve and store them.
Serving temperature: Serve the chicken hot, straight from the air fryer. The crust is at its absolute best within the first 10 minutes of cooking. If you need to hold them for a bit, keep them on a wire rack in a low oven (200°F) rather than stacking them on a plate, which traps steam.
Presentation: Arrange the thighs on a platter with the crust side facing up. Garnish with fresh parsley or chives for color, and maybe a lemon wedge or two. I sometimes add a small bowl of honey soy glaze on the side for dipping, though honestly, these are good enough to eat on their own.
What to serve with them: These thighs pair well with almost anything. I love them with a simple green salad, roasted asparagus, garlic mashed potatoes, or crusty bread to soak up any juices. For a lighter meal, try them over a bed of arugula with shaved Parmesan and a lemon vinaigrette.
Storage: Leftover chicken keeps in the refrigerator for up to 4 days in an airtight container. The crust will soften over time, but the flavor remains excellent. I don’t recommend freezing these, as the texture of the crust degrades significantly upon thawing.
Reheating: The air fryer is your best friend here. Reheat at 350°F for 3-4 minutes, or until the chicken is warmed through and the crust has re-crisped. A microwave will make the crust soggy, so avoid it if possible. If you’re in a rush, a hot skillet with a tiny bit of oil works in a pinch — just cook the chicken skin-side down for 2 minutes.
How flavors develop: These thighs are actually delicious cold, straight from the fridge. The garlic mellows and the Parmesan flavor becomes more pronounced. I’ve been known to slice leftover chicken over a salad for lunch the next day, and it’s honestly one of my favorite ways to eat it.
Nutritional Information & Benefits
Here’s the estimated nutritional breakdown for one chicken thigh (based on 6 servings):
- Calories: 320
- Protein: 28g
- Fat: 22g (including 7g saturated fat)
- Carbohydrates: 2g
- Fiber: 0g
- Sugar: 0g
- Sodium: 480mg
- Calcium: 150mg (from the Parmesan)
Chicken thighs are an excellent source of high-quality protein, which supports muscle maintenance and repair. They also contain important B vitamins, particularly B6 and B12, which play a role in energy metabolism and brain function. The skin provides a good amount of healthy fats, which help with the absorption of fat-soluble vitamins.
Parmesan cheese is naturally low in lactose, making it easier to digest for those with mild lactose sensitivity. It’s also a good source of calcium and phosphorus, both essential for bone health.
This recipe is naturally low in carbohydrates and contains no added sugar, making it suitable for low-carb, keto, and diabetic-friendly meal plans. If you’re watching your sodium intake, you can reduce the added salt and rely on the Parmesan for seasoning.
I will say this — this isn’t a “diet” recipe, and I don’t pretend it is. It’s a recipe for when you want something satisfying and delicious that also happens to be relatively balanced. The protein-to-fat ratio is solid, and paired with vegetables or a salad, it makes a well-rounded meal that keeps you full for hours.
Conclusion
These crispy garlic Parmesan chicken thighs have earned a permanent spot in my weekly dinner rotation, and I have a feeling they’ll do the same in yours. They’re fast enough for a Tuesday night, impressive enough for company, and satisfying enough to cure just about any craving.
The magic here is in the simplicity — a handful of ingredients, a little technique, and an air fryer that does most of the work. That shatteringly crisp crust, the tender, juicy meat underneath, the little pockets of toasted garlic in every bite — it’s the kind of meal that reminds you why cooking at home is worth it.
I’d love to hear how these turn out for you. Did you try one of the variations? Did you discover a new favorite side dish to serve alongside them? Drop a comment below and let me know — your adaptations might inspire someone else’s dinner tonight. And if you’re looking for another quick, satisfying dinner idea, these honey sriracha chicken thighs are another weeknight favorite in my kitchen.
Now go make some crispy, garlicky, Parmesan-crusted magic. Your taste buds will thank you.
Frequently Asked Questions
Can I use chicken breasts instead of thighs?
You can, but the results won’t be quite the same. Chicken breasts cook faster and have less fat, which means they’re more likely to dry out before the crust gets properly crispy. If you use breasts, pound them to an even thickness and reduce the cook time by 3-4 minutes. Check the internal temperature early and often.
Why did my Parmesan crust fall off?
This usually happens for one of three reasons: the chicken wasn’t dried properly before coating, the Parmesan mixture wasn’t pressed firmly enough onto the skin, or the chicken was moved too soon after cooking. Make sure to pat the skin completely dry, press the coating on with intention, and let the chicken rest for at least 3 minutes after cooking.
Can I make this recipe ahead of time?
You can prep the chicken up to 24 hours in advance by seasoning it and applying the Parmesan coating, then storing it uncovered in the refrigerator. The uncovered storage helps the skin dry out further, which actually improves crispiness. Cook straight from the fridge, adding 2-3 minutes to the cook time.
How do I keep the air fryer from smoking?
The rendered chicken fat can sometimes cause smoking, especially with fattier thighs. To minimize this, trim any excess fat before cooking, and don’t overcrowd the basket. If your air fryer starts smoking, open it briefly to let the smoke clear, then continue cooking. A little smoke is normal, but if it’s excessive, reduce the temperature by 10-15 degrees.
Can I double this recipe?
Absolutely, but you’ll need to cook in batches. Don’t try to cram all the thighs into the basket at once — overcrowding is the fastest way to ruin the crust. Cook one batch, keep it warm in a low oven, and cook the second batch. The extra 10 minutes is worth the perfect texture.
Pin This Recipe!
Crispy Garlic Parmesan Chicken Thighs in Air Fryer | Easy 25-Min Recipe

These air fryer chicken thighs have a shatteringly crisp Parmesan crust with toasted garlic bits, ready in just 25 minutes. A simple, crowd-pleasing weeknight dinner that feels fancy without the fuss.
- Prep Time: 10 minutes
- Cook Time: 20 minutes
- Total Time: 25 minutes
- Yield: 4-6 servings 1x
- Category: Main Course
- Cuisine: American
Ingredients
- 4–6 boneless, skin-on chicken thighs (about 1.5 lbs)
- ½ cup freshly grated Parmesan cheese, packed
- 4–5 cloves garlic, minced
- 2 tablespoons olive oil
- 1 teaspoon garlic powder
- ½ teaspoon onion powder
- ½ teaspoon smoked paprika
- ½ teaspoon fine sea salt, plus more to taste
- ¼ teaspoon freshly ground black pepper
- 2 tablespoons fresh parsley or chives, chopped (optional garnish)
Instructions
- Pat the chicken thighs completely dry with paper towels. Let them sit uncovered on a plate for 5 minutes to air-dry.
- In a small bowl, combine garlic powder, onion powder, smoked paprika, salt, and black pepper. Sprinkle evenly over both sides of the chicken, pressing gently to adhere.
- In a medium bowl, combine freshly grated Parmesan, minced garlic, and olive oil. Stir until it forms a thick, crumbly paste (like wet sand).
- Press the Parmesan mixture firmly onto the skin side of each thigh, about ¼ inch thick. Leave the underside bare.
- Preheat the air fryer to 380°F (193°C).
- Arrange the chicken in the air fryer basket in a single layer, skin side up, with space between each piece.
- Cook at 380°F for 12 minutes without opening the basket.
- Flip the chicken with tongs so the skin side is facing down. Cook for another 8-10 minutes, until the internal temperature reaches 165°F (74°C) in the thickest part.
- Optional: For extra crispiness, broil for 1-2 minutes, watching closely to prevent burning.
- Let the chicken rest for 3-5 minutes before serving. Garnish with fresh parsley or chives if desired.
Notes
Pat the chicken completely dry for maximum crispiness. Use freshly grated Parmesan from a block, not pre-shredded. Don’t overcrowd the basket; cook in batches if needed. Let the chicken rest after cooking to keep the crust intact.
Nutrition
- Serving Size: 1 chicken thigh
- Calories: 320
- Sodium: 480
- Fat: 22
- Saturated Fat: 7
- Carbohydrates: 2
- Protein: 28
Keywords: air fryer chicken thighs, crispy chicken thighs, garlic parmesan chicken, easy chicken recipe, weeknight dinner, gluten-free chicken, keto chicken