Third batch of mummy hot dogs in five days, and I finally figured out why the cheese kept sliding off the ghost faces. It was the moisture—too much moisture on the baking sheet, and the cheese ghosts just… melted into sad little puddles. Not spooky. Just depressing. But that third time? The cheese stayed put, the crescent dough wrapped tight like actual gauze, and my kids actually gasped. A genuine Halloween gasp, not the polite “that’s nice, Mom” they give me when I try too hard.
Look, I’m not a crafty person. I burn toast. I’ve never successfully frosted a cake without it looking like a toddler got creative. But these easy mummy hot dogs with cheesy ghost faces? They’re the one Halloween recipe that makes me look like I have my life together. And honestly, they’re stupidly simple. Like, embarrassingly simple. But nobody needs to know that part.
What kept me coming back to the kitchen counter that week wasn’t just the Halloween Pinterest aesthetic—it was the way the cheese browned in the oven, the little crispy edges that formed around the ghost faces, the way the crescent dough puffed up like actual bandages. There’s something deeply satisfying about food that looks like it took effort when it really didn’t. These mummy hot dogs deliver that energy every single time. No fondant, no food coloring, no stress.
Why You’ll Love This Recipe
Let me tell you why these easy mummy hot dogs with cheesy ghost faces have become my most-requested Halloween recipe. And I mean that literally—my sister texted me last October asking if I could “make the dead hot dogs again.” Charming, right? But she’s not wrong.
- Quick & Easy: These come together in about 20 minutes flat. Perfect for Halloween parties when you’re juggling costumes, candy, and keeping the kids from eating all the decorations.
- Simple Ingredients: Hot dogs, crescent rolls, cheese slices, and mustard. That’s it. No weird specialty items, no hunting down obscure ingredients at three different stores.
- Perfect for Halloween Parties: Whether it’s a school party, a neighborhood gathering, or just a spooky family dinner before trick-or-treating, these fit right in.
- Crowd-Pleaser: Kids devour them. Adults pretend to be sophisticated but eat three. I’ve seen it happen.
- Unbelievably Delicious: The flaky, buttery crescent dough wrapped around a juicy hot dog, paired with that slightly crispy, melty cheese ghost face—it’s comfort food with a Halloween costume.
What makes these different from every other mummy hot dog recipe out there? It’s the cheese ghost faces. Most recipes just wrap the hot dog and call it a day. But adding those little cheese ghosts with mustard eyes takes it from “cute snack” to “actually impressive Halloween food.” And the trick I learned about patting the cheese dry before cutting? That’s the game-changer. No more melted cheese sliding off into oblivion.
These easy mummy hot dogs with cheesy ghost faces are the kind of recipe that makes you feel like a Halloween hero without actually having to work for it. And honestly? That’s my favorite kind of recipe.
What Ingredients You Will Need
This recipe uses basic, everyday ingredients to create something that looks way more complicated than it actually is. Here’s what you’ll need to gather:
For the Mummy Hot Dogs
- 8 hot dogs (standard size—I prefer all-beef for better flavor, but any brand works)
- 1 can (8 oz) refrigerated crescent roll dough (I use Pillsbury, but store brand works fine too)
- 4 slices cheddar cheese (or any cheese that melts well—more on that below)
- Candy eyes or mustard (for the eyes—I use mustard because I always have it, but candy eyes are fun too)
For the Cheesy Ghost Faces
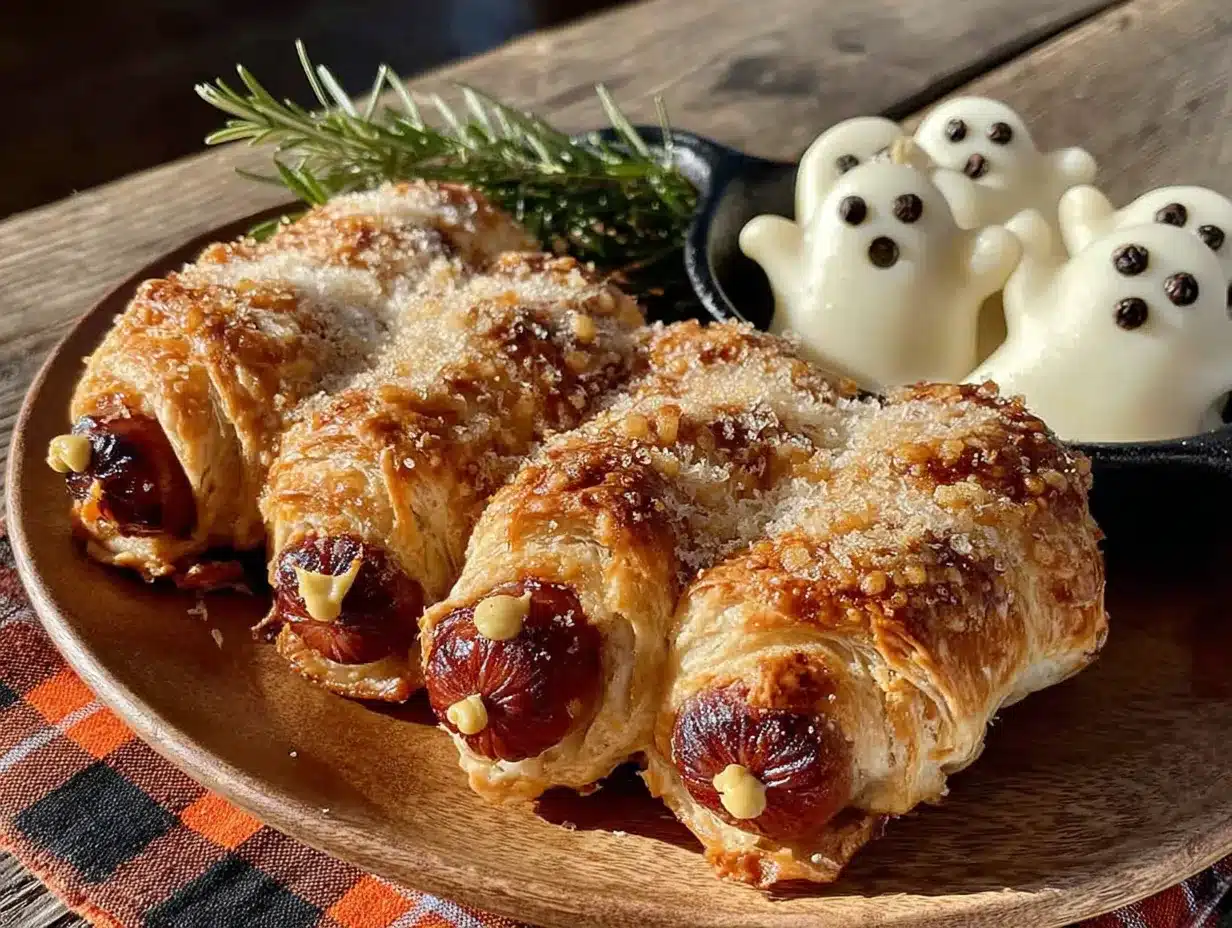
- 4 slices white cheddar or mozzarella cheese (the key here is using cheese that melts but holds its shape—avoid pre-shredded cheese as it doesn’t melt as smoothly)
- Mustard or ketchup (for piping the ghost eyes and mouths—mustard gives that classic spooky yellow look)
A note on cheese selection: I’ve tested this with cheddar, mozzarella, provolone, and even pepper jack. Cheddar gives the best color contrast against the golden crescent dough, but mozzarella melts the most evenly. If you want the ghost faces to look really defined, use mozzarella. If you want that deep orange “spooky” look, go with cheddar. Both work—it’s really about what vibe you’re going for.
Hot dog tip: I’ve made these with beef hot dogs, turkey dogs, and even plant-based options. The plant-based ones work surprisingly well, though they tend to be a bit softer, so handle them gently when wrapping. My personal favorite is all-beef—they hold up better to the baking process and have that satisfying snap when you bite into them.
Crescent roll hack: If you can’t find crescent roll dough (or you’re feeling ambitious), you can use puff pastry instead. Just roll it out a bit thinner and cut it into strips. The texture will be flakier and more buttery, which is never a bad thing.
Equipment Needed
You don’t need any fancy kitchen gadgets for these easy mummy hot dogs with cheesy ghost faces. Here’s what you’ll need:
- Baking sheet (any standard size works—line it with parchment paper for easy cleanup)
- Parchment paper or silicone baking mat (trust me on this—the cheese can stick, and nobody wants to scrub a baking sheet at 9 PM after Halloween festivities)
- Sharp knife or pizza cutter (for cutting the crescent dough into strips and shaping the cheese ghosts)
- Small cookie cutter (optional—a ghost-shaped cutter makes perfect ghost faces, but a small knife works just as well)
- Pastry brush (for egg wash if you want extra golden mummies—not required but nice)
- Small piping bag or zip-top bag (for piping mustard eyes—a sandwich bag with the corner snipped off works perfectly)
I’ve made these with just a baking sheet and a butter knife before, so don’t overthink the equipment. The only thing I’d say is non-negotiable is the parchment paper. That cheese ghost face will stick to a bare baking sheet, and you’ll spend more time scrubbing than you did making the actual recipe.
Preparation Method
Alright, let’s make these easy mummy hot dogs with cheesy ghost faces. I’ll walk you through every step, including the little tricks I learned the hard way.
Step 1: Preheat and Prep
Preheat your oven to 375°F (190°C). Line a baking sheet with parchment paper or a silicone baking mat. This is important—don’t skip the parchment. Trust me on this one.
Step 2: Prepare the Crescent Dough
Open the can of crescent roll dough (that satisfying pop never gets old). Unroll the dough and separate it along the perforated lines into 8 triangles. Using a sharp knife or pizza cutter, cut each triangle lengthwise into 3 long, thin strips. You want them to look like bandages—thin enough to wrap around the hot dog but not so thin they tear. You should end up with 24 strips total.
Pro tip from my third batch disaster: If the dough feels too sticky, dust your cutting board with a tiny bit of flour. But honestly, crescent dough is pretty forgiving. If a strip tears, just press it back together—nobody will know.
Step 3: Wrap the Mummies
Take one hot dog and start wrapping a strip of dough around it, slightly overlapping as you go. Leave a small gap at the top for the “face” area—about 1 inch (2.5 cm) should do. Don’t wrap too tightly, or the dough won’t puff up properly. You want it snug but not strangling the hot dog. Repeat with all 8 hot dogs, using about 3 strips per mummy.
Place the wrapped hot dogs on the prepared baking sheet, spacing them about 2 inches (5 cm) apart. They’ll puff up a bit during baking, so give them room to breathe.
Step 4: Make the Cheesy Ghost Faces
This is where the magic happens. Take your cheese slices and use a small ghost-shaped cookie cutter to cut out ghost faces. If you don’t have a ghost cutter (I didn’t for my first few batches), use a small knife to freehand a simple ghost shape—basically a rounded top with a wavy bottom. You want the ghosts to be about 1.5 inches (4 cm) tall so they fit nicely on the exposed hot dog area.
Critical tip I learned the hard way: Pat the cheese ghosts dry with a paper towel before placing them on the hot dogs. Excess moisture makes the cheese slide off during baking. I lost three ghost faces to the baking sheet before I figured this out.
Place one cheese ghost on the exposed hot dog area of each mummy, pressing gently so it sticks.
Step 5: Bake the Mummies
Bake at 375°F (190°C) for 10-12 minutes, or until the crescent dough is golden brown and the cheese ghosts are melted but still holding their shape. The edges of the cheese might get a little crispy and brown—that’s actually perfect. It adds to the “spooky” look.
Watch the oven carefully around the 10-minute mark. Every oven runs differently, and you don’t want the cheese to completely melt into a blob. You want the ghost shapes to still be recognizable.
Step 6: Add the Eyes
Remove the baking sheet from the oven and let the mummies cool for 2-3 minutes. While they’re still warm, use mustard (or ketchup, or candy eyes) to add eyes to the cheese ghosts. I put a small amount of mustard in a zip-top bag, snip off a tiny corner, and pipe two small dots for eyes. You can also add a little “scared” mouth if you’re feeling fancy.
Serve warm and watch them disappear.
Cooking Tips & Techniques
After making these easy mummy hot dogs with cheesy ghost faces approximately seventeen times (not an exaggeration), I’ve collected some wisdom worth sharing.
The dough strip width matters. I made the mistake of cutting the strips too wide on my first attempt, and the mummies looked more like burritos than bandaged corpses. Too thin, and they tore during wrapping. The sweet spot is about 1/2 inch (1.25 cm) wide—wide enough to handle easily but narrow enough to create that mummy effect.
Don’t overbake. I know it’s tempting to leave them in for that extra-golden look, but the cheese ghosts will start to lose their shape around the 13-minute mark. Pull them at 11-12 minutes when the dough is just golden and the cheese is melted but still defined. They’ll continue cooking slightly from the residual heat on the baking sheet.
Room temperature dough is easier to work with. If the crescent dough is straight from the fridge, it can crack when you try to stretch it. Let it sit on the counter for 5 minutes before unwrapping. Not too long though—you don’t want it to get sticky.
My biggest failure: I once forgot to pat the cheese dry and ended up with ghost faces that migrated to the bottom of the baking sheet. The hot dogs looked like sad, naked sausages with cheese puddles underneath. Not spooky. Just tragic. Learn from my mistakes.
Variations & Adaptations
One of the best things about these easy mummy hot dogs with cheesy ghost faces is how adaptable they are. Here are some variations I’ve tried and loved:
Spicy Mummy Hot Dogs
Use spicy jalapeño hot dogs or add a thin slice of pickled jalapeño under the cheese ghost face. The heat pairs surprisingly well with the buttery crescent dough. I made these for a Halloween party and they were the first to disappear.
Vegetarian Version
Use plant-based hot dogs or even cheese sticks wrapped in the crescent dough. For the cheese ghosts, use vegan cheese slices—just note that vegan cheese doesn’t melt as smoothly, so the ghost faces will be more defined (which honestly looks even spookier).
Breakfast Mummy Hot Dogs
Swap the hot dogs for breakfast sausages and use American cheese for the ghost faces. Serve with mustard on the side for dipping. I made these for a Halloween morning breakfast and the kids lost their minds.
Gluten-Free Option
Use gluten-free crescent roll dough (it exists!) and gluten-free hot dogs. The texture is slightly different—a bit more crumbly—but the flavor is still great. Just handle the dough gently as it’s more delicate.
Mini Mummy Bites
Cut the hot dogs into thirds before wrapping, and use smaller cheese ghost cutouts. These are perfect for Halloween parties where people want to graze. Bake time reduces to about 8-10 minutes.
I personally love the spicy version best. There’s something about the heat from the jalapeño cutting through the rich, buttery dough that just works. But the classic version is what my kids request every year, so that’s what we make most often.
Serving & Storage Suggestions
These easy mummy hot dogs with cheesy ghost faces are best served warm, right out of the oven. The crescent dough is at its flakiest, the cheese is perfectly melty, and the mustard eyes are still bright and fresh.
For presentation: Arrange them on a platter with some “spooky” decorations around them—I like to add a few pretzel sticks as “bones” and maybe some black olives as “spider bodies.” A little bowl of ketchup or mustard for dipping completes the look. If you’re serving them at a party, label them “Mummy Dogs” with a cute little sign.
What to serve with them: These pair great with a simple side of potato chips or some creamy roasted tomato basil soup for dipping. The soup adds a cozy, warm element that balances the salty, buttery hot dogs. For a full Halloween spread, I’ll sometimes make a batch of black velvet spider web cookies for dessert—they keep the spooky theme going.
Storage: If you have leftovers (unlikely, but possible), store them in an airtight container in the refrigerator for up to 3 days. The crescent dough will soften slightly, but they’re still delicious.
Reheating: The best way to reheat these is in the oven at 350°F (175°C) for 5-7 minutes. The microwave works in a pinch, but the dough gets chewy rather than flaky. If you’re in a hurry, an air fryer at 350°F for 3-4 minutes brings back some of the crispiness.
Make-ahead tip: You can assemble the mummies up to the baking step and refrigerate them for up to 4 hours before baking. Just add an extra 2 minutes to the bake time since they’ll be cold. This is a lifesaver for Halloween parties when you’re juggling a million things.
Nutritional Information & Benefits
Let’s be real—these easy mummy hot dogs with cheesy ghost faces are a treat, not a health food. But here’s the estimated nutritional breakdown per serving (one mummy hot dog with cheese ghost):
| Nutrient | Amount |
|---|---|
| Calories | 290 |
| Protein | 12g |
| Carbohydrates | 18g |
| Fat | 19g |
| Saturated Fat | 8g |
| Sodium | 780mg |
| Calcium | 120mg |
Health highlights: Hot dogs do provide some protein (about 6-7g per dog), and the cheese adds calcium. The crescent dough gives you a little energy from carbs. Is this a balanced meal? No. Is it a fun Halloween treat that brings joy to kids and adults alike? Absolutely.
Dietary considerations: This recipe contains gluten (crescent dough), dairy (cheese), and processed meats. For a lower-sodium option, use turkey hot dogs and reduced-sodium cheese. For a dairy-free version, use vegan hot dogs and dairy-free cheese slices—just note the cheese won’t melt the same way.
Potential allergens: Wheat, dairy, and soy (often found in hot dogs). Always check your ingredient labels if cooking for someone with allergies.
My personal philosophy? Halloween comes once a year. Make the mummy hot dogs, enjoy every bite, and don’t stress about the nutritional breakdown. Balance comes from the rest of your meals, not from one spooky snack.
Conclusion
These easy mummy hot dogs with cheesy ghost faces have become a Halloween tradition in my house, and I have a feeling they’ll become one in yours too. They’re the perfect combination of fun and delicious—the kind of recipe that makes kids light up and adults secretly sneak seconds when nobody’s looking.
The best part? You don’t need to be a Pinterest-perfect parent or a professional chef to pull these off. If I can make them (and I’ve had my share of cheese ghost disasters), you absolutely can too. Start with the classic version, then feel free to experiment with the variations. Maybe add some spice, or go mini, or try different cheese shapes. That’s the beauty of a simple recipe—it leaves room for your own creativity.
I’d love to hear how yours turn out! Drop a comment below and let me know if your kids gasped when they saw the cheese ghost faces, or if you came up with a variation I haven’t tried yet. And if you’re looking for more Halloween fun, check out these crispy mummy hot dog crescent rolls with spicy sriracha honey sauce for another spooky twist on the same idea.
Happy Halloween, and happy cooking! These mummies are waiting for you.
Frequently Asked Questions
Can I make these mummy hot dogs ahead of time?
Yes! Assemble them up to the baking step, cover with plastic wrap, and refrigerate for up to 4 hours. Add 2 extra minutes to the bake time since they’ll be cold from the fridge.
What if I don’t have a ghost-shaped cookie cutter?
No problem! Use a small knife to freehand a ghost shape—just a rounded top with a slightly wavy bottom. It doesn’t need to be perfect. In fact, imperfect ghosts look even spookier.
Can I use puff pastry instead of crescent rolls?
Absolutely. Roll out thawed puff pastry slightly thinner, cut it into strips, and wrap the same way. The texture will be flakier and more buttery. Bake time might increase by 2-3 minutes.
How do I prevent the cheese ghost from sliding off during baking?
Pat the cheese dry with a paper towel before placing it on the hot dog. Excess moisture causes the cheese to slide. Also, press the cheese gently onto the hot dog so it adheres.
Can I freeze these mummy hot dogs?
Yes, but freeze them before baking. Assemble the mummies, place them on a parchment-lined baking sheet, and freeze until solid. Transfer to a freezer bag for up to 2 months. Bake from frozen, adding 5-7 minutes to the bake time.
Pin This Recipe!
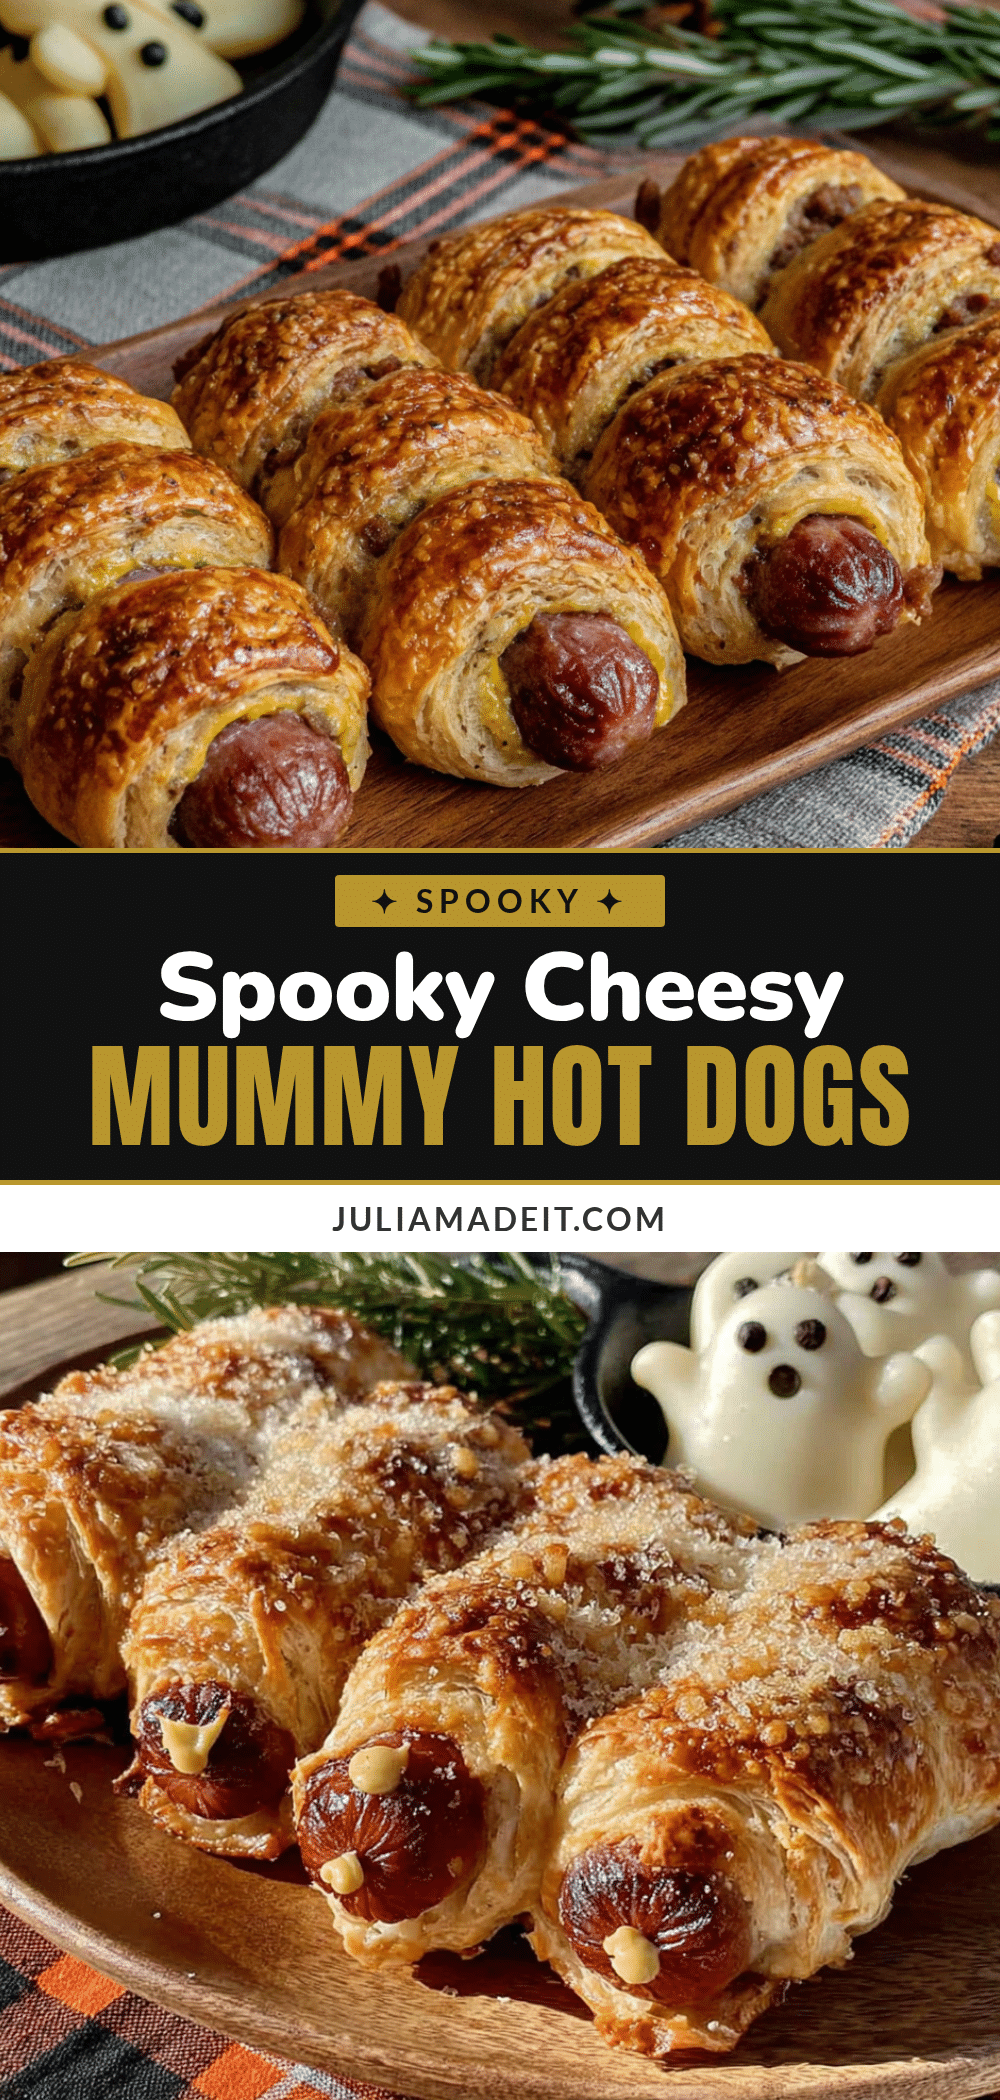
Easy Mummy Hot Dogs with Cheesy Ghost Faces
These easy mummy hot dogs with cheesy ghost faces are a fun and simple Halloween recipe that looks impressive but comes together in about 20 minutes. Hot dogs wrapped in crescent dough strips are topped with cheese ghost faces and mustard eyes for a spooky, crowd-pleasing treat.
- Prep Time: 10 minutes
- Cook Time: 12 minutes
- Total Time: 22 minutes
- Yield: 8 servings 1x
- Category: Appetizer
- Cuisine: American
Ingredients
- 8 hot dogs (standard size, preferably all-beef)
- 1 can (8 oz) refrigerated crescent roll dough
- 4 slices cheddar cheese
- 4 slices white cheddar or mozzarella cheese
- Mustard or ketchup (for piping eyes and mouths)
- Candy eyes (optional)
Instructions
- Preheat oven to 375°F (190°C). Line a baking sheet with parchment paper or a silicone baking mat.
- Open the can of crescent roll dough and separate into 8 triangles. Cut each triangle lengthwise into 3 thin strips (about 1/2 inch wide) to create 24 strips total.
- Take one hot dog and wrap 3 strips of dough around it, slightly overlapping, leaving about 1 inch (2.5 cm) exposed at the top for the face. Repeat with remaining hot dogs.
- Place wrapped hot dogs on the prepared baking sheet, spacing them about 2 inches (5 cm) apart.
- Using a ghost-shaped cookie cutter or a small knife, cut ghost shapes from the cheese slices. Pat the cheese ghosts dry with a paper towel to remove excess moisture.
- Place one cheese ghost on the exposed hot dog area of each mummy, pressing gently to adhere.
- Bake for 10-12 minutes, until the crescent dough is golden brown and the cheese ghosts are melted but still holding their shape.
- Remove from oven and let cool for 2-3 minutes. Pipe mustard or ketchup eyes (and optional mouth) onto the cheese ghosts using a small piping bag or zip-top bag with a snipped corner. Serve warm.
Notes
Pat the cheese ghosts dry with a paper towel before placing on the hot dogs to prevent them from sliding off during baking. For best results, let crescent dough sit at room temperature for 5 minutes before handling. Watch the oven carefully around the 10-minute mark to avoid overbaking and losing the ghost shape.
Nutrition
- Serving Size: 1 mummy hot dog
- Calories: 290
- Sugar: 3
- Sodium: 780
- Fat: 19
- Saturated Fat: 8
- Carbohydrates: 18
- Protein: 12
Keywords: Halloween, mummy hot dogs, cheesy ghost faces, crescent rolls, hot dog recipe, spooky snacks, easy Halloween recipe