I ruined Thanksgiving rolls for three years straight before I finally figured out what I was doing wrong. Not a little wrong—like, hockey-puck-dense, why-did-I-bother wrong. And the saddest part? I was using my precious sourdough discard, convinced I was being thrifty and clever, when really I was just setting myself up for disappointment. The rolls would come out of the oven looking promising enough, all golden and puffed, but by the time the turkey hit the table they’d turned into doorstops. My mother-in-law would politely chew and swallow, and I’d pretend I meant for them to be that sturdy.
The problem wasn’t the discard itself—it was how I treated it. I was using it straight from the fridge, no thought to fermentation time, no understanding of hydration ratios. I figured discard was discard, right? Just a way to use up the excess. But sourdough discard has this beautiful, tangy personality that wanted to be highlighted, not hidden. It needed a recipe that respected its character, not one that treated it like a second-class citizen.
Then last fall, with Thanksgiving creeping up and my confidence bruised, I went back to basics. I started paying attention to the little things—temperature of the milk, resting time for the dough, the way the rolls felt when they were properly proofed. And honestly? The first batch of proper sourdough discard dinner rolls that came out of my oven—soft, pillowy, with that subtle tang that makes you close your eyes and actually taste Thanksgiving—I nearly cried. Not because they were perfect, but because they finally were what I’d been chasing all along.
These rolls have become my Thanksgiving signature now. They’re the thing people ask for, the basket that gets passed around twice, the one recipe that makes me feel like I actually belong at the holiday table. Not bad for a batch of dough made from scraps.
Why You’ll Love This Recipe
These sourdough discard dinner rolls are the Thanksgiving hero you didn’t know you needed. They solve the two biggest problems with holiday bread: they stay soft for hours (no more rock-hard rolls by dessert time) and they actually taste like something special. The sourdough adds a gentle tang that cuts through all the rich, heavy dishes on your plate.
- No Waste, All Flavor : Uses your sourdough discard in a way that actually makes the rolls better. No more tossing that excess starter down the drain.
- Make-Ahead Friendly : The dough can be shaped and refrigerated overnight, meaning less chaos on Thanksgiving morning. You can literally wake up, pop them in the oven, and pretend you’ve been baking all week.
- Perfectly Soft Texture : Thanks to a touch of butter and the natural enzymes in the sourdough, these rolls stay tender and pillowy even the next day. No reheating required (though they’re spectacular warmed up).
- Impresses Everyone : People take one bite and immediately ask if you made them from scratch. The tangy flavor is a conversation starter, and you get to casually mention they’re made with sourdough discard—bonus points for sounding fancy.
- Simple Ingredients : Flour, butter, milk, salt, sugar, and your discard. That’s it. No weird additives or specialty flours needed.
What makes these different from every other roll recipe out there is the fermentation. The discard isn’t just there to use up leftovers—it’s actively working to develop flavor and improve texture. The natural acids in the sourdough break down the gluten slightly, creating a more tender crumb. Plus, the long, cold fermentation in the fridge gives them a depth of flavor you just can’t get from quick-rise yeast rolls.
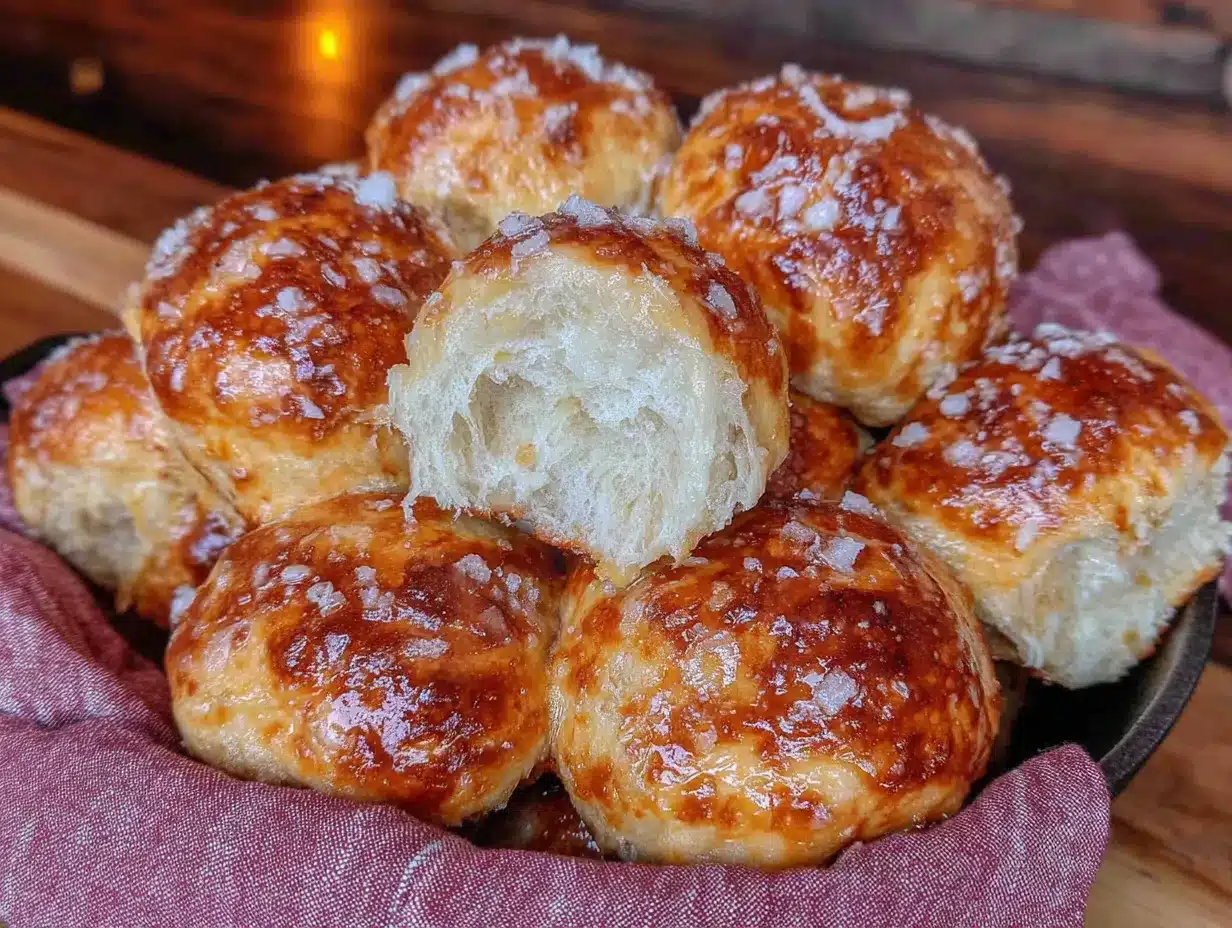
These rolls are the kind that make you close your eyes after the first bite. They’re soft enough to pull apart with your hands, sturdy enough to hold a smear of butter and a drizzle of honey, and tangy enough to stand up to gravy without getting lost. They’re comfort food at its finest—reimagined through the lens of fermentation, but with the same soul-soothing satisfaction of a warm roll fresh from the oven.
What Ingredients You Will Need
This recipe uses simple, everyday ingredients that come together to create something truly special. The magic is in how they work together, not in any exotic components. Most of these are pantry staples, so you probably already have everything you need.
- All-Purpose Flour : 4 cups (500g). I prefer King Arthur Flour for consistent results, but any good-quality all-purpose flour works. Don’t use bread flour here—it can make the rolls too chewy. We want soft, not tough.
- Sourdough Discard : 1 cup (240g), unfed and straight from the fridge. This is the star of the show. Your discard should be at 100% hydration (equal parts flour and water by weight). If it’s been sitting for more than a week, give it a quick stir and smell it—it should smell pleasantly sour, not funky or alcoholic.
- Whole Milk : ¾ cup (180ml), warm but not hot (around 110°F). Whole milk adds richness, but you can substitute 2% if that’s what you have. Avoid skim milk—the rolls need the fat for tenderness.
- Unsalted Butter : 6 tablespoons (85g), softened. Use good-quality butter here; it makes a difference. I use Kerrygold when I’m feeling fancy. Save the salted butter for spreading on the finished rolls.
- Granulated Sugar : 3 tablespoons (38g). Just enough to feed the yeast and add a hint of sweetness. Don’t skip it—the sugar helps with browning and texture.
- Active Dry Yeast : 2¼ teaspoons (one packet). Yes, we’re using commercial yeast alongside the discard. The discard adds flavor, but the commercial yeast gives us reliable rise. Trust me on this one.
- Salt : 1½ teaspoons (9g). Fine sea salt or table salt works best. Salt controls fermentation and enhances flavor. Don’t reduce it.
- Egg : 1 large, room temperature. Adds richness and helps with structure. If you forget to take it out of the fridge, place it in a bowl of warm water for 5 minutes.
For the Topping:
- Melted Butter : 2 tablespoons (28g). Brushed on the rolls immediately after baking. This is non-negotiable—it’s what gives them that glossy, irresistible finish.
- Flaky Sea Salt : Optional but recommended. A sprinkle of Maldon salt right after the butter takes these from great to unforgettable.
Ingredient Selection Tips: Look for a sourdough starter that’s been fed within the last week. If your discard is too old or smells like nail polish remover, it’s past its prime. Your milk should be warm to the touch but not hot—if it’s too hot, it’ll kill the yeast. And please, please use room temperature ingredients. Cold eggs or cold butter will shock the dough and slow down fermentation.
Substitutions: You can use bread flour in a pinch, but expect slightly denser rolls. For a dairy-free version, substitute the milk with unsweetened oat milk and use vegan butter. The texture won’t be quite as tender, but it still works beautifully. If you don’t have active dry yeast, you can use instant yeast—just mix it directly with the flour instead of proofing it in the milk.
Equipment Needed
You don’t need a professional bakery setup for these rolls. Most of this equipment is standard kitchen stuff you probably already own. Here’s what you’ll need:
- Stand Mixer with Dough Hook : This is my preferred method because it makes the kneading effortless. A crockpot chicken breast might be hands-off, but this dough benefits from a machine doing the heavy lifting. If you don’t have a stand mixer, don’t worry—you can knead by hand. It’ll take about 10-12 minutes of solid work.
- Large Mixing Bowl : For mixing and proofing the dough. Glass or ceramic works best because they hold heat evenly.
- 9×13-inch Baking Dish : A metal or ceramic baking dish works perfectly. Glass also works, but you may need to add a few minutes to the baking time.
- Plastic Wrap or Clean Kitchen Towel : For covering the dough during proofing. A damp towel helps prevent the dough from drying out.
- Pastry Brush : For applying that glorious butter glaze after baking. A silicone brush is easier to clean, but a natural bristle brush works fine.
- Kitchen Scale : I highly recommend weighing your ingredients for consistent results. Baking is chemistry, and volume measurements can be inconsistent. A $15 kitchen scale will change your baking life.
- Instant-Read Thermometer : Helpful for checking milk temperature and internal roll temperature. Rolls are done when they reach 190°F internally.
Budget-Friendly Alternatives: No stand mixer? No problem. A wooden spoon and some elbow grease work just fine. No pastry brush? Use the back of a spoon to spread the melted butter. No kitchen scale? Use the spoon-and-level method for flour (spoon flour into your measuring cup, then level it off with a knife).
Maintenance Tip: If you use a stand mixer, clean the dough hook immediately after use—dried dough is a nightmare to remove. A quick soak in warm water does the trick.
Preparation Method
Let’s get to the good part. This process takes about 3 hours total, but most of that is hands-off rising time. The actual hands-on work is maybe 20 minutes. Here’s how to make the best sourdough discard dinner rolls of your life.
- Proof the Yeast (5 minutes) : In a small bowl, combine the warm milk (110°F) with 1 tablespoon of the sugar and the active dry yeast. Stir gently and let it sit for 5 minutes until it becomes foamy. If it doesn’t foam, your yeast might be dead—start over with fresh yeast. I learned this the hard way one Thanksgiving morning and ended up with flat, sad rolls.
- Mix the Dough (5 minutes) : In the bowl of your stand mixer, combine the flour, remaining 2 tablespoons of sugar, and salt. Add the sourdough discard, the proofed yeast mixture, the room temperature egg, and 4 tablespoons of the softened butter. Mix on low speed with the dough hook until the ingredients come together—about 2 minutes.
- Knead the Dough (8-10 minutes) : Increase the speed to medium-low and knead for 8 minutes. The dough should be smooth, elastic, and slightly tacky to the touch. If it’s sticking to the sides of the bowl like crazy, add a tablespoon of flour. If it’s dry and shaggy, add a tablespoon of warm milk. You’re looking for that sweet spot where the dough is soft but not sticky—like a baby’s bottom, honestly.
- First Rise (1-1.5 hours) : Shape the dough into a ball and place it in a lightly greased bowl, turning once to coat. Cover with plastic wrap or a damp towel and let it rise in a warm, draft-free spot until doubled in size. This takes about 1 to 1.5 hours, depending on how warm your kitchen is. I like to put mine in the oven with the light on—it stays around 80°F in there.
- Shape the Rolls (10 minutes) : Punch down the dough gently to release the air. Turn it out onto a lightly floured surface. Divide the dough into 12 equal pieces—a bench scraper makes this easy. Each piece should weigh about 70g if you’re using a scale. Shape each piece into a smooth ball by pulling the edges toward the center and pinching them together, then rolling it between your palms. Place the rolls in a greased 9×13-inch baking dish, spacing them evenly—they should be touching slightly but not crammed together.
- Second Rise (45 minutes to 1 hour) : Cover the dish with plastic wrap and let the rolls rise until they’re puffy and have doubled in size, about 45 minutes to 1 hour. They should be touching each other now. This is where the sourdough discard really shines—the slow fermentation creates those beautiful air pockets.
- Bake the Rolls (20-25 minutes) : Preheat your oven to 375°F (190°C) about 15 minutes before the rolls are done rising. Bake the rolls on the middle rack for 20-25 minutes, until they’re golden brown on top and sound hollow when tapped. If they’re browning too quickly, tent them loosely with foil after 15 minutes. The internal temperature should read 190°F.
- Finish with Butter (2 minutes) : As soon as the rolls come out of the oven, brush them generously with the remaining 2 tablespoons of melted butter. Sprinkle with flaky sea salt if you’re using it. Let them cool in the pan for 5 minutes, then transfer to a wire rack (or straight to the serving basket—I won’t judge).
Pro Tip for Thanksgiving Prep: After shaping the rolls in step 5, you can cover the dish and refrigerate them overnight. The next morning, take them out of the fridge, let them come to room temperature for about 1 hour, then proceed with the second rise. This actually improves the flavor because the cold fermentation gives the sourdough more time to develop those complex notes.
Cooking Tips & Techniques
After years of trial and error (and some truly embarrassing batches), I’ve collected a few tricks that make these rolls foolproof. Here’s what I wish someone had told me from the start.
Temperature Matters More Than You Think : Your milk should be between 105°F and 115°F. Too cold and the yeast won’t activate. Too hot and you’ll kill it. I use an instant-read thermometer every single time because I’ve killed yeast with hot milk more times than I care to admit. If you don’t have a thermometer, the milk should feel like warm bathwater—comfortably warm on your wrist.
Don’t Over-Knead : The dough should be smooth and elastic, not tough. Over-kneading develops too much gluten, which makes the rolls dense and chewy instead of light and fluffy. When you press the dough with your finger, it should spring back slowly. If it springs back immediately, keep kneading. If it doesn’t spring back at all, you’ve gone too far.
The Windowpane Test : This is my secret weapon for perfect rolls. Take a small piece of dough and stretch it gently between your fingers. If it stretches into a thin, translucent membrane without tearing (like a windowpane), it’s ready. If it tears easily, keep kneading for another 2 minutes.
Watch the Second Rise Carefully : Under-proofed rolls will be dense. Over-proofed rolls will collapse in the oven. The sweet spot is when the rolls have doubled in size and look puffy, but they still have a slight spring when you poke them gently. If your finger leaves an indentation that doesn’t bounce back, they’re over-proofed. Bake them anyway—they’ll still taste good, just not as tall.
My Biggest Failure : One year, I tried to speed up the second rise by putting the rolls in a warm oven. I forgot about them, the oven got too hot, and the yeast died. The rolls came out flat, dense, and sad. Now I set a timer every single time. Learn from my mistakes, friends.
Multitasking Strategy : While the dough is doing its first rise, prep the rest of your Thanksgiving meal. Make the creamy roasted butternut squash soup for a starter, or get your slow cooker white bean and kale soup going. The rise time is your friend—use it wisely.
Variations & Adaptations
One of the best things about this recipe is how adaptable it is. You can tweak it to suit your tastes, dietary needs, or whatever’s in your pantry. Here are some of my favorite variations.
Herb and Garlic Rolls : Add 2 teaspoons of dried rosemary, 1 teaspoon of dried thyme, and 2 minced garlic cloves to the flour mixture before adding the wet ingredients. The herbs infuse the dough with this incredible savory aroma that pairs perfectly with turkey and gravy. I made these for a Friendsgiving once and they disappeared before the turkey even hit the table.
Whole Wheat Version : Substitute 1 cup of the all-purpose flour with whole wheat flour. The rolls will be slightly denser and nuttier, but they’ll still be soft and delicious. Add an extra tablespoon of milk to compensate for the whole wheat’s absorbency. My health-conscious sister-in-law requests these every year.
Cheesy Pull-Apart Rolls : After shaping the rolls in step 5, cut each ball in half, place a small cube of cheddar or Gruyère in the center, and reshape into a ball. The cheese melts into the center during baking, creating these little pockets of gooey goodness. Dangerous. Absolutely dangerous.
Gluten-Free Adaptation : This one’s tricky because sourdough discard relies on gluten for structure. I’ve had the best luck using a gluten-free all-purpose flour blend that contains xanthan gum (like Bob’s Red Mill 1-to-1). Reduce the liquid by 2 tablespoons and expect a denser, more crumbly texture. They won’t be identical to the original, but they’ll still be delicious.
Sweet Cinnamon Rolls : Roll the dough out into a rectangle, spread with softened butter, sprinkle with cinnamon sugar, roll up, slice, and bake in a round dish. Skip the salt topping and drizzle with a simple powdered sugar glaze instead. Perfect for Thanksgiving morning breakfast while the turkey’s in the oven.
Personal Favorite : My go-to variation is adding ¼ cup of grated Parmesan and 1 tablespoon of everything bagel seasoning to the dough. The salty, savory flavors complement the sourdough tang beautifully. I serve these alongside a creamy tomato basil bisque for a cozy fall lunch.
Serving & Storage Suggestions
These rolls are at their absolute best warm from the oven, but they’re still fantastic at room temperature. Here’s how to serve and store them like a pro.
Serving Temperature : Serve warm, ideally within 30 minutes of baking. If you’ve made them ahead, reheat them in a 350°F oven for 5-7 minutes, wrapped in foil. The foil traps steam and keeps them soft. A quick 15-second zap in the microwave works in a pinch, but the oven method is superior.
Presentation Ideas : Arrange the rolls in a beautiful basket lined with a cloth napkin. Serve with a dish of softened butter (salted, always salted) and a small bowl of flaky sea salt. For a fancier touch, mix honey into softened butter for a sweet-savory spread. A cozy skillet brown sugar peach cobbler makes a perfect dessert to follow these rolls.
Complementary Dishes : These rolls are made for Thanksgiving, but they’re fantastic with any hearty meal. Serve them alongside roast chicken, beef stew, or a big bowl of soup. They’re also incredible for sopping up gravy, so make extra gravy. You’ve been warned.
Storage Instructions : Store leftover rolls in an airtight container at room temperature for up to 3 days. Do not refrigerate them—the cold temperature will dry them out and make them stale faster. If you need to keep them longer, freeze them.
Freezing Instructions : Cool the rolls completely, then wrap them tightly in plastic wrap and place them in a freezer bag. They’ll keep for up to 3 months. To reheat, thaw at room temperature for 1 hour, then warm in a 350°F oven for 5-7 minutes. They’ll taste almost as good as fresh-baked.
Flavor Development : Here’s a secret—these rolls actually taste better the next day. The sourdough flavor continues to develop as they sit, and the texture softens slightly. If you can resist eating them all on Thanksgiving, save a few for turkey sandwiches the next day. Trust me on this one.
Nutritional Information & Benefits
Let’s be real—these are dinner rolls, not health food. But they’re made with real, simple ingredients, and there are a few nutritional bright spots worth mentioning.
Estimated Nutritional Values (per roll):
- Calories: 220
- Total Fat: 8g
- Saturated Fat: 5g
- Carbohydrates: 32g
- Fiber: 1g
- Sugar: 4g
- Protein: 5g
- Sodium: 250mg
Health Benefits of Sourdough : The fermentation process in sourdough breaks down some of the gluten and phytic acid in the flour, making the nutrients more bioavailable. This means your body can absorb more of the iron, zinc, and magnesium from the flour. Plus, the natural acids in sourdough give it a lower glycemic index compared to regular bread, so it won’t spike your blood sugar as dramatically.
Dietary Considerations : These rolls are vegetarian-friendly. For a vegan version, substitute the butter with vegan butter and the egg with a flax egg (1 tablespoon ground flaxseed mixed with 3 tablespoons water). The texture will be slightly different, but they’ll still be delicious. They’re not gluten-free, but the whole wheat variation offers more fiber.
Potential Allergens : Contains wheat, dairy, and eggs. If you’re serving a crowd with allergies, make sure to label the basket clearly. I always put a small sign next to my rolls at Thanksgiving potlucks.
My Personal Take : Look, I’m not here to tell you that dinner rolls are a health food. They’re a treat, and that’s okay. But using sourdough discard means you’re not wasting food, and the fermentation does offer some genuine benefits. Plus, making bread from scratch is a form of mindfulness—it forces you to slow down, pay attention, and connect with the process. That counts for something, right?
Conclusion
These sourdough discard dinner rolls are more than just a recipe—they’re a way to make Thanksgiving feel special without adding stress to your plate. They’re forgiving enough for beginners, rewarding enough for experienced bakers, and delicious enough to become a new family tradition. The tangy sourdough flavor, the soft, pillowy texture, the glossy butter finish—every bite is a reminder that good things come from patience and practice.
I’ve made these rolls for Thanksgivings with my family, for Friendsgivings with chosen family, and for quiet dinners when I just wanted something warm and comforting. They’ve never let me down. And the best part? You get to use up that sourdough discard that’s been taking up space in your fridge, turning what feels like waste into something genuinely beautiful.
So go ahead—give these rolls a try. Customize them with herbs or cheese or extra butter (always extra butter). Make them ahead or bake them fresh. Share them with people you love. And when someone asks for the recipe, tell them it came from a place of trial and error, persistence, and a deep, abiding love for soft, warm bread.
I’d love to hear how they turn out for you. Leave a comment below, share your photos, and let me know what variations you tried. Did you add rosemary? Did you make them into cinnamon rolls? Did you eat three in a row standing over the kitchen counter? (No judgment here—I’ve done it too.) Happy Thanksgiving, friends. You’ve got this.
Frequently Asked Questions
Can I use sourdough discard that’s been in the fridge for weeks?
Yes, as long as it doesn’t have mold or smell like nail polish remover. Discard that’s been sitting for a while might be more acidic, which can affect the flavor slightly, but it’s still perfectly usable. Give it a good stir before measuring, and if it smells overly sharp, reduce the amount by a tablespoon or two.
Why did my rolls turn out dense and heavy?
This usually happens for one of three reasons: the dough wasn’t kneaded enough, the rolls were under-proofed, or the milk was too hot and killed the yeast. Make sure you’re kneading until the dough passes the windowpane test, and let the rolls rise until they’ve truly doubled in size. Patience is key here.
Can I make these rolls without a stand mixer?
Absolutely! Mix the dough with a wooden spoon until it comes together, then turn it out onto a floured surface and knead by hand for 10-12 minutes. It’s a great arm workout, honestly. The dough should be smooth and elastic when you’re done.
How do I know when the rolls are fully baked?
The rolls should be golden brown on top and sound hollow when tapped on the bottom. The internal temperature should read 190°F on an instant-read thermometer. If you don’t have a thermometer, look for that golden color and the hollow sound—that’s your cue.
Can I double this recipe for a crowd?
Yes, but don’t try to make a double batch in one stand mixer bowl—it’ll overflow. Make two separate batches or knead by hand. You’ll also need two 9×13-inch baking dishes. The baking time stays the same, but keep an eye on them—ovens can be unpredictable with larger quantities.
Pin This Recipe!

Easy Sourdough Discard Dinner Rolls for Thanksgiving

Soft, pillowy dinner rolls with a subtle tangy flavor from sourdough discard. These rolls stay tender for hours and are perfect for Thanksgiving or any hearty meal.
- Prep Time: 20 minutes
- Cook Time: 25 minutes
- Total Time: 3 hours (including rising time)
- Yield: 12 servings 1x
- Category: Side Dish
- Cuisine: American
Ingredients
- 4 cups (500g) all-purpose flour
- 1 cup (240g) sourdough discard, unfed and straight from the fridge
- 3/4 cup (180ml) whole milk, warm (about 110°F)
- 6 tablespoons (85g) unsalted butter, softened
- 3 tablespoons (38g) granulated sugar
- 2 1/4 teaspoons active dry yeast (one packet)
- 1 1/2 teaspoons (9g) fine sea salt
- 1 large egg, room temperature
- 2 tablespoons (28g) melted butter (for topping)
- Flaky sea salt (optional, for topping)
Instructions
- Proof the yeast: In a small bowl, combine warm milk (110°F) with 1 tablespoon sugar and active dry yeast. Stir gently and let sit for 5 minutes until foamy.
- Mix the dough: In a stand mixer bowl, combine flour, remaining 2 tablespoons sugar, and salt. Add sourdough discard, proofed yeast mixture, room temperature egg, and 4 tablespoons softened butter. Mix on low speed with dough hook until combined, about 2 minutes.
- Knead the dough: Increase speed to medium-low and knead for 8-10 minutes until dough is smooth, elastic, and slightly tacky. Add flour or warm milk as needed.
- First rise: Shape dough into a ball and place in a lightly greased bowl, turning once to coat. Cover with plastic wrap or damp towel and let rise in a warm, draft-free spot until doubled in size, about 1 to 1.5 hours.
- Shape the rolls: Punch down dough gently. Turn onto a lightly floured surface and divide into 12 equal pieces (about 70g each). Shape each into a smooth ball and place in a greased 9×13-inch baking dish, spacing evenly.
- Second rise: Cover dish with plastic wrap and let rolls rise until puffy and doubled in size, about 45 minutes to 1 hour. They should be touching.
- Bake: Preheat oven to 375°F (190°C). Bake on middle rack for 20-25 minutes until golden brown and hollow-sounding when tapped. Internal temperature should reach 190°F. Tent with foil if browning too quickly.
- Finish: Brush hot rolls with remaining 2 tablespoons melted butter. Sprinkle with flaky sea salt if desired. Cool in pan 5 minutes, then transfer to wire rack.
Notes
For make-ahead: After shaping rolls in step 5, cover and refrigerate overnight. Next morning, let come to room temperature for 1 hour, then proceed with second rise. This improves flavor. Rolls can be frozen for up to 3 months.
Nutrition
- Serving Size: 1 roll
- Calories: 220
- Sugar: 4
- Sodium: 250
- Fat: 8
- Saturated Fat: 5
- Carbohydrates: 32
- Fiber: 1
- Protein: 5
Keywords: sourdough discard, dinner rolls, Thanksgiving rolls, sourdough rolls, homemade rolls, holiday bread