Last October, I was at the grocery store with my youngest, who was going through a phase where everything was “gross” unless it came in a nugget form. I was tired, the cart had a wobbly wheel, and the Halloween candy aisle was already up, mocking my good intentions. As I stood there staring at a tube of crescent rolls, a mom I see at the school pickup line came up beside me. She didn’t say hello. She just pointed at the can and said, “Grab two. And some hot dogs. I’ll text you what to do.” And that was it. She walked away, and I stood there with a tube of dough in my hand, feeling like I’d just been given a secret mission.
That night, I made these mummy hot dogs for the first time. My son ate three. Three! He didn’t even say they were gross. He just asked for more ketchup. Honestly, I felt like I’d won Halloween. I mean, let’s face it, getting a picky eater to eat anything that isn’t beige and shaped like a dinosaur is a win. This recipe became my go-to for every spooky season party, every classroom celebration, and even those random Tuesday nights when we just needed a little fun at the dinner table.
The best part? They are ridiculously easy. You wrap a hot dog in a strip of crescent dough, give it two little eyes, and bake. That’s it. But the magic is in how they look—like little mummies peeking out of a tomb. The kids go wild for them, and honestly, so do the adults. I’ve brought these to potlucks and watched grown men fight over the last one. Maybe you’ve been there, trying to find something that pleases everyone without spending hours in the kitchen. This is that recipe. It’s the one that saves the day, makes everyone smile, and costs next to nothing. That’s why it’s stayed with me.
Why You’ll Love This Recipe
I’ve tested this recipe more times than I can count, and I can tell you with confidence—it’s foolproof. Whether you are a seasoned cook or someone who burns toast, these mummy hot dogs come out perfect every time. Here is why this recipe is a keeper:
- Quick & Easy: From start to table in under 25 minutes. Perfect for those after-school hangry moments or a last-minute Halloween party.
- Simple Ingredients: You only need four things—hot dogs, crescent rolls, mustard, and ketchup. No fancy grocery trips required.
- Perfect for Halloween: They look spooky and cute, which makes them the star of any Halloween-themed meal or classroom party.
- Crowd-Pleaser: Kids absolutely love them, and adults secretly do too. I’ve never brought these anywhere without them disappearing.
- Unbelievably Fun: The joy on a kid’s face when they see a mummy hot dog is priceless. It turns dinner into an event.
What makes this recipe different from the rest is the wrapping technique I’ve perfected over the years. Instead of wrapping the dough too tightly, I leave a little gap for the “mummy” face. This gives the hot dog room to puff up without splitting the dough, and it makes the eyes look like they are peeking out. It’s a small detail, but it makes all the difference in presentation.
This recipe isn’t just good—it’s the kind that makes you feel like a superhero parent. It’s comfort food with a spooky twist, fast enough for a weeknight, but fun enough for a party. Perfect for turning a simple meal into something memorable without any stress.
What Ingredients You Will Need
This recipe uses simple, pantry-friendly ingredients to create something that looks way more impressive than it actually is. Here is everything you need:
- Hot dogs (8 count): Use your favorite brand. I personally prefer beef hot dogs for a richer flavor, but turkey or chicken hot dogs work great too. (Look for ones that are plump and not too skinny for the best mummy shape.)
- Crescent rolls (2 cans, 8 count each): The star of the show. I recommend Pillsbury for the flakiest texture, but any store brand works. (Make sure they are the original or buttermilk flavor, not the flaky layers, which are harder to wrap.)
- Mustard (for the eyes): Yellow mustard works best for that classic mummy look. You can also use ketchup or sriracha for a different color.
- Ketchup (for dipping or eyes): Optional, but my kids love dipping their mummies in ketchup. It adds a nice tangy contrast to the salty hot dog.
Substitution Guidance:
- Hot dogs: Swap with turkey, chicken, or plant-based hot dogs for dietary needs. Just make sure they are fully cooked before wrapping.
- Crescent rolls: Use gluten-free crescent dough if needed. I’ve tried it, and it works, though the texture is slightly denser. You can also use puff pastry for a flakier version, but the cooking time may vary.
- Mustard: For a less tangy eye, use a dab of mayonnaise or cream cheese. It gives a softer look and taste.
Ingredient Selection Tips:
- For the best texture, use hot dogs that are not too thin. Thin hot dogs tend to get lost in the dough. Look for jumbo or regular-sized ones.
- If you are using crescent rolls, make sure they are cold. Cold dough is easier to cut and wrap without sticking.
- For a fun twist, try using cheddar-stuffed hot dogs. They add a gooey surprise inside.
Equipment Needed
You don’t need fancy equipment for this recipe. Here is what you’ll need:
- Baking sheet: A standard half-sheet pan works perfectly. Line it with parchment paper for easy cleanup.
- Sharp knife or pizza cutter: For cutting the crescent dough into thin strips. A pizza cutter makes the job faster and cleaner.
- Small bowl: For holding the mustard or ketchup for the eyes. You can also use a piping bag for more precision.
- Toothpick: Optional, but useful for dabbing on the eyes without making a mess.
- Cooling rack: Not necessary, but it helps the mummies stay crispy if you are making a large batch.
I’ve used a regular butter knife in a pinch, and it works fine, but a pizza cutter is a game-changer. It makes the strips uniform, which helps them cook evenly. If you don’t have one, just use a sharp chef’s knife. Also, if you are making these for a party, I recommend using two baking sheets so you can bake them all at once.
Preparation Method
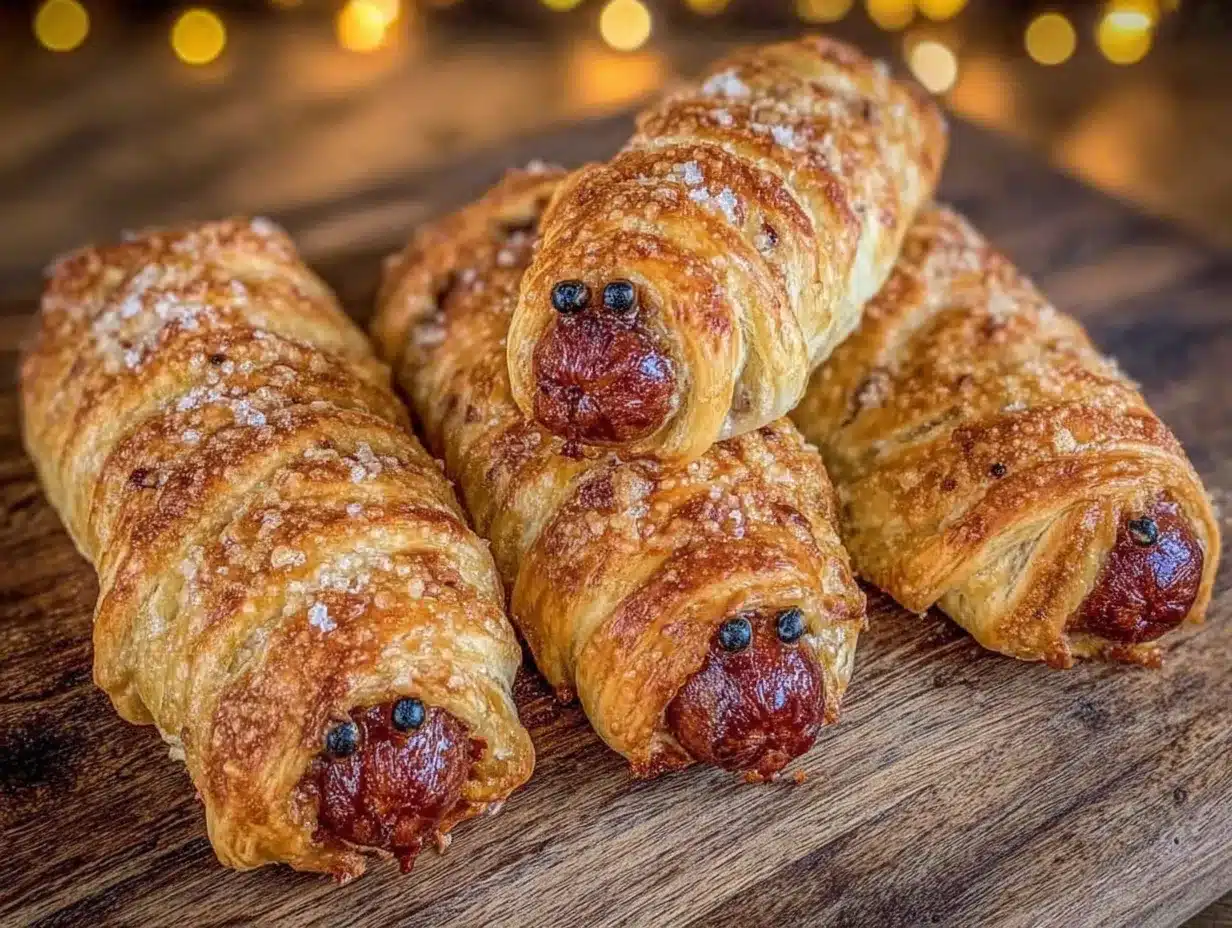
Follow these steps carefully, and you’ll have perfect mummy hot dogs every time. The key is to work quickly with the dough while it’s still cold.
- Preheat your oven to 375°F (190°C). Line a baking sheet with parchment paper. This prevents sticking and makes cleanup a breeze.
- Unroll the crescent dough. Separate the dough along the perforated lines to create 8 rectangles. Pinch the seams together gently to seal them. You should have 8 flat pieces of dough.
- Cut each rectangle into thin strips. Using a pizza cutter or sharp knife, cut each rectangle lengthwise into 3-4 thin strips. The strips should be about 1/2 inch wide. Don’t worry if they aren’t perfect—mummies are supposed to look a little messy!
- Wrap the hot dogs. Take one hot dog and start wrapping a strip of dough around it, leaving a small gap at the top for the “face.” Overlap the dough slightly as you go. The strips should look like bandages. Leave about an inch of the hot dog exposed at the top for the eyes. Repeat with the remaining hot dogs and dough strips.
- Place the wrapped hot dogs on the baking sheet. Make sure they are spaced about 2 inches apart. This allows the dough to puff up and cook evenly.
- Bake for 12-15 minutes, or until the dough is golden brown and the hot dogs are heated through. The dough should be flaky and slightly crisp on the edges. Keep an eye on them after 12 minutes—ovens vary, and you don’t want them to burn.
- Let them cool for 2-3 minutes. This is important because the dough is very hot and can burn little fingers. While they cool, prepare the “eyes.”
- Add the eyes. Using a toothpick or a small piping tip, dab a tiny dot of mustard on the exposed part of the hot dog for the eyes. You can also use ketchup for a different look. Make sure the dots are small so they look like mummy eyes peeking out.
- Serve immediately. These are best enjoyed warm, straight from the oven. The dough is flaky, the hot dog is juicy, and the eyes add a fun touch.
Troubleshooting Tips:
- If the dough is too sticky to handle, dust your hands with a little flour. Cold dough is easier to work with, so keep it in the fridge until you are ready.
- If the dough splits while wrapping, just press it back together. The heat from baking will seal it.
- If the hot dogs are too long for the dough strips, trim them slightly. But honestly, a little extra hot dog poking out just adds to the mummy look.
Cooking Tips & Techniques
After making these dozens of times, I’ve learned a few tricks that make them even better. Here are my top tips:
- Don’t over-wrap: Leave a small gap between the dough strips. The hot dog needs room to expand, and the gaps make the mummy look more realistic. Plus, it lets the hot dog get a little charred on the edges, which adds flavor.
- Use cold dough: Crescent dough is much easier to cut and wrap when it’s cold. If it gets too warm, pop it in the fridge for 5 minutes. Warm dough becomes sticky and hard to work with.
- Even strips are key: Try to cut the strips evenly so they cook at the same rate. Thin strips will get crispy, while thick strips might stay doughy. A pizza cutter makes this easy.
- Don’t skip the parchment paper: I once made these without parchment, and the dough stuck to the pan. The bottoms burned while the tops were still pale. Parchment paper ensures even browning and easy cleanup.
- Multitask: While the mummies are baking, set up a dipping station with ketchup, mustard, and even ranch dressing. It makes serving fun and keeps kids entertained.
Common Mistakes to Avoid:
- Overcrowding the baking sheet: If the mummies are too close together, they steam instead of bake. This makes the dough soggy. Give them space.
- Adding eyes before baking: I tried this once, and the mustard just baked into a brown blob. Always add the eyes after baking for the best look.
- Using too much dough: You don’t need to cover the entire hot dog. A few strips are enough. Too much dough makes them look like breadsticks, not mummies.
Variations & Adaptations
These mummy hot dogs are incredibly versatile. Here are some fun variations I’ve tried:
- Cheesy Mummies: Before wrapping, slice the hot dog lengthwise and insert a strip of cheddar or mozzarella cheese. Wrap as usual. The cheese melts inside and creates a gooey surprise.
- Spicy Mummies: Use spicy Italian sausages instead of hot dogs. Add a dab of sriracha to the eyes for a kick. These are great for adult parties.
- Veggie Mummies: Swap the hot dog with a fully cooked veggie sausage or a carrot stick (blanched first). The carrot adds a sweet crunch and looks orange against the dough.
- Breakfast Mummies: Use breakfast sausages instead of hot dogs. Serve with a side of scrambled eggs for a fun Halloween morning meal.
- Gluten-Free Mummies: Use gluten-free crescent dough. I’ve tried it, and while the texture is a bit different, the taste is still great. Just follow the package instructions for baking time.
My personal favorite is the cheesy version. I made it for a Halloween movie night, and the kids went crazy for the melted cheese. It adds a whole new level of deliciousness.
Serving & Storage Suggestions
These mummy hot dogs are best served warm, right after baking. The dough is flaky, and the hot dog is juicy. Here are my serving tips:
- Presentation: Arrange the mummies on a platter with a small bowl of ketchup and mustard for dipping. You can also add some “spooky” decorations like plastic spiders or fake cobwebs for a Halloween vibe.
- Side Dishes: These pair perfectly with a simple green salad, roasted vegetables, or a bowl of tomato soup. For a fun party, serve them with Halloween pizza cups and spider web dip for a full spooky spread.
- Beverages: For kids, serve with apple cider or a “witch’s brew” punch. For adults, a crisp lager or a pumpkin ale complements the salty hot dogs nicely.
Storage Instructions:
- Refrigerator: Store leftover mummies in an airtight container for up to 3 days. The dough may lose some crispness, but they still taste great.
- Freezer: You can freeze the unbaked mummies. Wrap them individually in plastic wrap and place them in a freezer bag. Bake from frozen, adding 2-3 minutes to the cooking time.
- Reheating: To reheat, place them on a baking sheet and warm in a 350°F (175°C) oven for 5-7 minutes. Avoid the microwave, as it makes the dough soggy.
The flavors actually develop nicely over time. The next day, the dough absorbs a bit of the hot dog’s smoky flavor, making them even more delicious. They are perfect for lunchboxes or quick snacks.
Nutritional Information & Benefits
Here is the estimated nutritional information per serving (1 mummy hot dog):
- Calories: 220
- Fat: 14g
- Carbohydrates: 18g
- Protein: 7g
- Sodium: 580mg
Health Benefits:
- Hot dogs: While not a health food, hot dogs provide a decent amount of protein. Opt for low-sodium or turkey versions for a healthier option.
- Crescent dough: Provides carbohydrates for energy, making these a great pre-game snack for kids.
- Mustard: Low in calories and adds a tangy flavor without extra sugar.
Dietary Considerations:
- Gluten-Free: Use gluten-free crescent dough.
- Low-Carb: Use cheese wraps or lettuce leaves instead of crescent dough.
- Allergens: Contains wheat, milk (in the dough), and soy (in some hot dogs). Check labels for specific allergens.
I personally love that this recipe is a treat, not a daily meal. It’s the kind of thing you make for a special occasion, and that makes it even more fun. Moderation is key, and these mummies are totally worth the splurge.
Conclusion
These mummy hot dogs are more than just a recipe—they are a memory in the making. They are the kind of food that makes kids giggle, adults smile, and everyone feel a little bit of Halloween magic. I love how simple they are, yet how much joy they bring. Whether you are making them for a classroom party, a Halloween dinner, or just a fun Tuesday night, they never fail to impress.
I encourage you to make them your own. Add cheese, try different sausages, or let the kids help with the wrapping. That’s the beauty of this recipe—it’s forgiving, fun, and always delicious. So go ahead, grab some crescent rolls and hot dogs, and create your own mummy army. Your family will thank you.
If you make these, I’d love to hear about it! Leave a comment below and let me know how they turned out. Did your kids love them? Did you try a fun variation? Share your photos and stories—I can’t wait to see your mummy creations. Happy Halloween, and happy cooking!
FAQs
Can I make these mummy hot dogs ahead of time?
Yes! You can assemble them up to 24 hours in advance. Just wrap the hot dogs, place them on a baking sheet, cover with plastic wrap, and refrigerate. Bake them right before serving for the best texture.
Can I use puff pastry instead of crescent rolls?
Absolutely. Puff pastry will give you a flakier, more buttery result. Just roll it out slightly thinner before cutting into strips. The baking time may increase by 2-3 minutes.
How do I prevent the dough from unraveling during baking?
Make sure the dough strips overlap slightly as you wrap. The dough will puff up and seal itself during baking. If you are worried, you can tuck the end of the strip under the hot dog.
Can I use other types of sausages?
Definitely. Try using chicken sausages, bratwurst, or even smoked sausages. Just make sure they are fully cooked before wrapping. Adjust the baking time if the sausages are thicker.
What can I use for the eyes besides mustard?
You can use ketchup, sriracha, mayonnaise, or even small dots of cream cheese. For a vegan option, use a dab of vegan cheese sauce. The key is to use something that contrasts with the hot dog color.
Pin This Recipe!
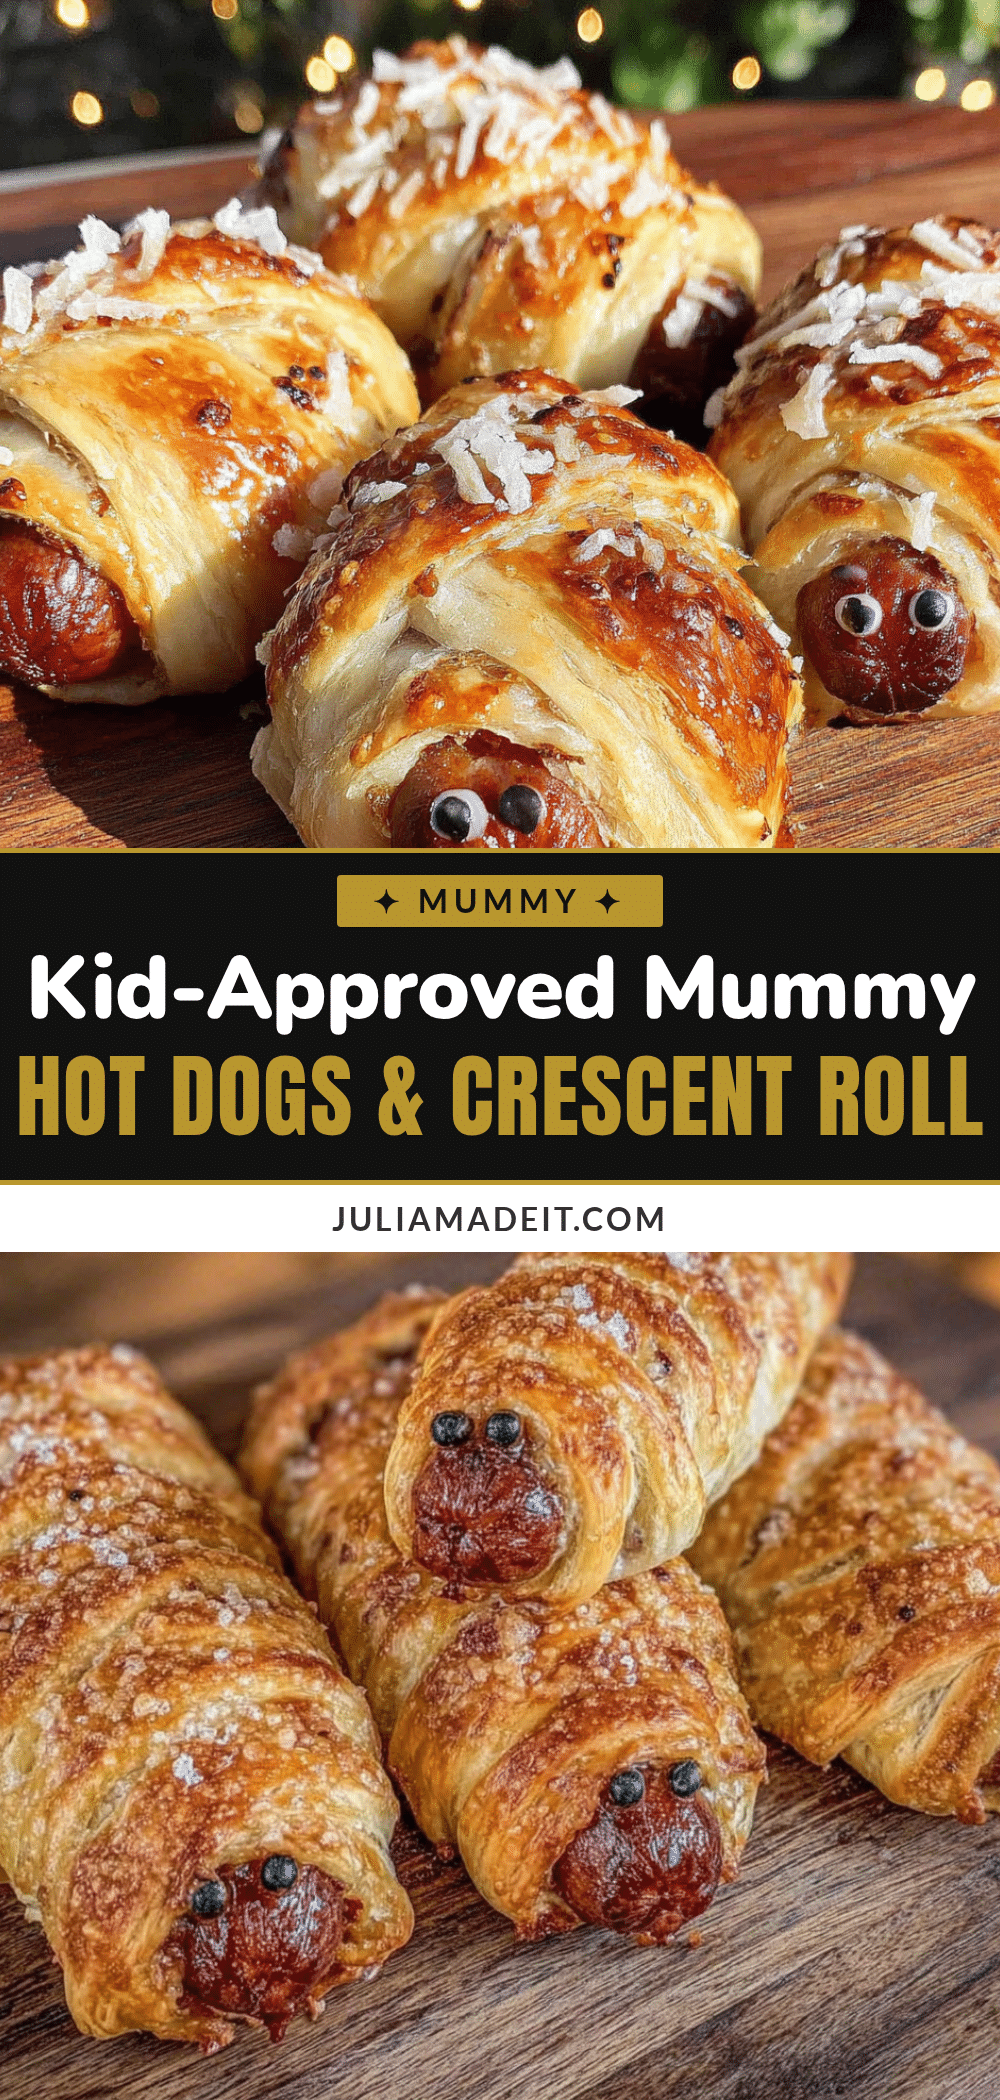
Kid-Approved Mummy Hot Dogs Easy Crescent Roll Recipe

These mummy hot dogs are a fun and easy Halloween treat that kids and adults love. Made with just hot dogs and crescent roll dough, they come together in under 25 minutes for a spooky, crowd-pleasing snack.
- Prep Time: 10 minutes
- Cook Time: 15 minutes
- Total Time: 25 minutes
- Yield: 8 servings 1x
- Category: Appetizer
- Cuisine: American
Ingredients
- 8 hot dogs (beef, turkey, or chicken)
- 2 cans (8 count each) crescent rolls (original or buttermilk flavor)
- Mustard (for eyes)
- Ketchup (for dipping or eyes, optional)
Instructions
- Preheat your oven to 375°F (190°C). Line a baking sheet with parchment paper.
- Unroll the crescent dough. Separate the dough along the perforated lines to create 8 rectangles. Pinch the seams together gently to seal them.
- Using a pizza cutter or sharp knife, cut each rectangle lengthwise into 3-4 thin strips, about 1/2 inch wide.
- Take one hot dog and start wrapping a strip of dough around it, leaving a small gap at the top for the ‘face.’ Overlap the dough slightly as you go. Leave about an inch of the hot dog exposed at the top for the eyes. Repeat with the remaining hot dogs and dough strips.
- Place the wrapped hot dogs on the baking sheet, spaced about 2 inches apart.
- Bake for 12-15 minutes, or until the dough is golden brown and the hot dogs are heated through.
- Let them cool for 2-3 minutes.
- Using a toothpick or small piping tip, dab a tiny dot of mustard on the exposed part of the hot dog for the eyes. You can also use ketchup for a different look.
- Serve immediately.
Notes
For best results, use cold crescent dough and don’t over-wrap the hot dogs. Leave gaps for the mummy face. Add eyes after baking to prevent the mustard from browning. Store leftovers in an airtight container in the refrigerator for up to 3 days. Reheat in a 350°F oven for 5-7 minutes.
Nutrition
- Serving Size: 1 mummy hot dog
- Calories: 220
- Sugar: 4
- Sodium: 580
- Fat: 14
- Saturated Fat: 5
- Carbohydrates: 18
- Protein: 7
Keywords: mummy hot dogs, Halloween recipe, crescent roll hot dogs, easy Halloween snack, kid-friendly Halloween food