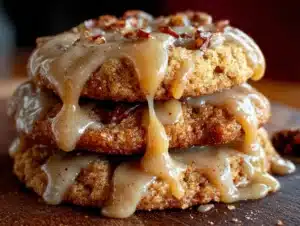
My niece Clara asked why I couldn’t just crush up the leftover peppermint bark and throw it into a batch of chocolate chip cookies. I started to explain why that wouldn’t work—something about the candy melting weirdly, the texture getting thrown off, the sugar ratio being all wrong. Then I stopped. I had no real reason why not. I mean, people put crushed candy canes on cookies all the time, right? So I told her, honestly, “You know what? Let’s find out.”
It was a Tuesday afternoon, three days after Christmas, and my kitchen counters were still littered with tins of cookies nobody had finished and a half-eaten box of peppermint bark that was starting to get that sad, dusty look. Clara, who is twelve and has strong opinions about everything, was supposed to be helping me pack up the leftovers. Instead, she was rummaging through the pantry, holding up a bag of chocolate chips and giving me that look she gets when she’s about to suggest something ridiculous. I almost said no. But honestly, I was tired of saying no to things.
So we tried it. And let me tell you—she was right. The peppermint bark didn’t ruin the cookies. It made them better. The little chunks of dark chocolate and white chocolate melted into the dough in these tiny pockets, and the crushed peppermint pieces stayed crunchy, giving each bite this cool, refreshing burst. I had to eat three of them just to be sure. For quality control, you know. Maybe you’ve been there—someone suggests a kitchen experiment and you’re sure it’s going to flop, but it turns into something you keep making for years. That’s this cookie. It’s the reason I still buy extra peppermint bark every December, even when I tell myself I don’t need it.
Why You’ll Love This Recipe
These cookies are the kind that disappear from the cookie jar before you’ve even had a chance to sit down with a cup of coffee. They’re light, chewy, and packed with just the right amount of peppermint crunch—without being overwhelming or tasting like toothpaste. Here’s why they’re going to become your new holiday favorite:
- Quick & Easy: From start to finish, these come together in about 25 minutes. Perfect for those last-minute holiday parties or when you realize you need a hostess gift in an hour.
- Simple Ingredients: You probably already have most of these in your pantry. The only special item is the peppermint bark, and honestly, you can use any leftover holiday chocolate you’ve got stashed away.
- Perfect for the Holidays: These cookies scream Christmas without being too fancy. They’re great for cookie exchanges, holiday brunches, or just decorating the kitchen counter.
- Crowd-Pleaser: I’ve brought these to three different holiday gatherings now, and every single time, someone asks for the recipe. Kids love the crunch, adults love the nostalgic flavor.
- Unbelievably Delicious: The texture is what gets me every time. They’re soft in the middle, slightly crisp on the edges, and those little bits of peppermint bark add this surprising pop of coolness that makes you take another bite just to figure out what’s happening.
What makes this recipe different from every other peppermint cookie out there? It’s the balance. Most peppermint cookies are either too crunchy or they turn into a sticky mess. By using finely crushed peppermint bark instead of whole candy canes, you get that minty freshness without the risk of breaking a tooth. And the dough itself is light—almost pillowy—thanks to a little trick I picked up from a pastry chef friend years ago. It’s not just another holiday cookie. It’s the one you’ll actually look forward to making every December.
What Ingredients You Will Need
This recipe uses simple, wholesome ingredients to create cookies that taste anything but basic. Most of these are pantry staples, with just one or two holiday-specific additions that make all the difference.
- Unsalted butter, softened (1 cup, or 2 sticks) – Use good-quality butter here. I prefer Kerrygold for the richness, but any unsalted butter works. Let it sit out for about 30 minutes before you start—you want it soft but not melted.
- Granulated sugar (¾ cup, 150g) – Regular white sugar gives the cookies that slight crispiness on the edges.
- Light brown sugar, packed (¾ cup, 150g) – This is where the chewiness comes from. Don’t skip it, and make sure you pack it firmly into the measuring cup.
- Large eggs (2, room temperature) – Room temperature eggs mix more evenly into the batter. If you forgot to take them out, place them in a bowl of warm water for 5 minutes.
- Vanilla extract (1 teaspoon) – Pure vanilla extract is worth the splurge here. The peppermint bark already adds a lot of flavor, but the vanilla rounds everything out nicely.
- All-purpose flour (2¼ cups, 280g) – Spoon and level your flour—don’t scoop directly from the bag, or you’ll end up with dense cookies.
- Baking soda (1 teaspoon) – Make sure it’s fresh. If it doesn’t fizz when you drop a little into vinegar, toss it and buy new.
- Salt (½ teaspoon) – A little salt balances the sweetness of the peppermint bark. I use fine sea salt.
- Peppermint bark, finely chopped (1½ cups, about 225g) – This is the star of the show. You can use store-bought peppermint bark (I like Williams Sonoma or even the generic brand from Target), or make your own. The key is to chop it into small pieces—think pea-sized or smaller. Big chunks can make the cookies uneven.
- Semi-sweet chocolate chips (1 cup, 175g) – I use Ghirardelli because they hold their shape well during baking. You could also use dark chocolate chips if you prefer a less sweet cookie.
- White chocolate chips (½ cup, 90g) – These add extra creaminess and complement the white chocolate layer in the peppermint bark. Optional, but highly recommended.
Equipment Needed
You don’t need anything fancy to make these cookies, but having the right tools makes the process smoother. Here’s what I use:
- Mixing bowls – One large bowl for the dry ingredients and one medium bowl for the wet ingredients. I use glass bowls because they don’t hold onto smells.
- Electric hand mixer or stand mixer – A hand mixer works perfectly fine. I’ve made these with a whisk and some elbow grease before, and it’s doable but tiring. If you’re using a stand mixer, use the paddle attachment.
- Baking sheets – Two standard half-sheet pans. I like Nordic Ware because they don’t warp in the oven. If you only have one, just bake in batches and let the pan cool completely between rounds.
- Parchment paper or silicone baking mats – Parchment paper is cheap and makes cleanup a breeze. Silicone mats work well too, but they can make cookies spread a bit more.
- Cookie scoop – A 1.5-tablespoon scoop gives you uniform cookies that bake evenly. If you don’t have one, use a regular spoon and try to make each dough ball roughly the same size.
- Cooling rack – Letting cookies cool on a rack instead of the hot baking sheet prevents them from over-baking and getting too crispy.
- Sharp knife and cutting board – For chopping the peppermint bark. A serrated knife works best to get through the chocolate and candy layers without shattering everything.
Preparation Method

- Preheat your oven to 350°F (175°C). Line two baking sheets with parchment paper. This is one of those steps you don’t want to skip—ungreased pans can make the cookies stick and spread unevenly.
- Chop the peppermint bark. Place the bark on a cutting board and use a sharp, heavy knife to cut it into small pieces. Aim for pieces about ¼-inch in size. Some will be smaller, and that’s fine—those little bits will melt into the dough and create those lovely pockets of minty flavor. Set aside about ¼ cup for pressing onto the tops of the cookies later if you want them to look extra festive.
- Whisk the dry ingredients together. In a medium bowl, combine the flour, baking soda, and salt. Whisk until evenly distributed. This ensures the baking soda is spread throughout the dough so your cookies rise evenly. Set aside.
- Cream the butter and sugars. In a large bowl, beat the softened butter, granulated sugar, and brown sugar together on medium speed until light and fluffy—about 3 minutes. You’ll know it’s ready when the mixture looks pale and almost like soft sand. Scrape down the sides of the bowl halfway through.
- Add the eggs and vanilla. Beat in the eggs one at a time, making sure each is fully incorporated before adding the next. Then add the vanilla extract and mix until combined. The batter should look smooth and glossy at this point.
- Gradually add the dry ingredients. With the mixer on low speed, add the flour mixture in three additions, mixing just until the flour disappears after each addition. Don’t overmix—this is where cookies can get tough. If you see a few streaks of flour, that’s okay. You’ll finish mixing by hand in the next step.
- Fold in the chocolate and peppermint bark. Using a rubber spatula, gently fold in the semi-sweet chocolate chips, white chocolate chips (if using), and chopped peppermint bark. Fold until everything is evenly distributed. The dough will be thick and chunky. If it seems too soft, pop it in the fridge for 15 minutes to firm up.
- Scoop the dough. Using your cookie scoop or a spoon, drop rounded tablespoons of dough onto the prepared baking sheets, spacing them about 2 inches apart. I usually fit 12 cookies per sheet. If you reserved some peppermint bark pieces, press a few onto the tops of each dough ball now—this makes them look bakery-style pretty.
- Bake for 10-12 minutes. Bake one sheet at a time in the center of the oven. The cookies are done when the edges are lightly golden and the centers still look slightly soft and underdone. Don’t wait for them to brown all over—they’ll continue cooking on the hot baking sheet after you take them out.
- Cool on the baking sheet for 5 minutes. This is important. Let the cookies rest on the sheet for exactly 5 minutes. This allows them to set up without becoming too firm. Then transfer them to a wire rack to cool completely. If you try to move them too soon, they’ll fall apart.
Cooking Tips & Techniques
I’ve made these cookies at least a dozen times now, and I’ve learned a few things the hard way. Here’s what I wish someone had told me from the start:
Don’t over-chop the peppermint bark. The first time I made these, I got a little too enthusiastic with the knife and ended up with peppermint dust. It still tasted good, but the cookies lacked that satisfying crunch. You want visible pieces of chocolate and candy—not powder. If you’re worried about uneven chopping, put the bark in a zip-top bag and gently smash it with a rolling pin. It’s less precise but way faster.
Chill the dough if you have time. I know, I know—nobody wants to wait longer for cookies. But if you can pop the dough in the fridge for 30 minutes before baking, the cookies will spread less and stay thicker and chewier. I’ve tested it both ways, and chilled dough consistently gives better results. If you’re in a rush, skip it. The cookies will still be delicious—just a little flatter.
Watch your oven temperature. Every oven runs a little differently. My old oven ran hot, and I burned my first batch of these cookies to a crisp. The peppermint bark started to caramelize and turn bitter. If your oven tends to run hot, reduce the temperature to 340°F (170°C) and check the cookies at 9 minutes. Better to underbake slightly than overbake.
Use a light-colored baking sheet. Dark baking sheets absorb more heat and can cause the bottoms of your cookies to brown too quickly. If all you have is dark sheets, reduce the baking time by a minute or two. I learned this after a particularly sad batch of burnt-bottom cookies that I had to give to my neighbor’s dog (just kidding—I ate them anyway).
Let them cool completely before storing. I know it’s tempting to stack them while they’re still warm, but trust me on this. Warm cookies release moisture, and if you seal them in a container while they’re hot, they’ll turn soggy. The peppermint crunch will soften, and nobody wants a sad, chewy peppermint cookie. Give them at least 30 minutes on the cooling rack before moving them to an airtight container.
Variations & Adaptations
One of the best things about this recipe is how easy it is to tweak. Here are a few variations I’ve tried and loved:
Gluten-Free Version: Swap the all-purpose flour for a 1:1 gluten-free baking flour blend. I’ve used Bob’s Red Mill and King Arthur Measure for Measure with great results. The cookies might spread a tiny bit more, so chill the dough for 30 minutes before baking. Nobody will be able to tell the difference.
Dark Chocolate Lover’s Twist: Replace the semi-sweet chocolate chips with dark chocolate chunks (70% cacao or higher). The bitterness of the dark chocolate balances the sweetness of the peppermint bark beautifully. I did this for a friend who claims she doesn’t like sweet desserts, and she ate six cookies in one sitting.
Mint Chocolate Chip Version: If you can’t find peppermint bark (or you just want something simpler), use 1 cup of semi-sweet chocolate chips and ½ cup of crushed candy canes instead. The texture will be a little different—the candy canes dissolve more than bark does—but the flavor is still fantastic. Add a drop of peppermint extract to the dough if you want a stronger mint kick.
White Chocolate Peppermint: Go all-in on the white chocolate. Use white chocolate chips instead of semi-sweet, and add an extra ¼ cup of crushed peppermint bark. These are sweeter, obviously, but they look gorgeous on a cookie platter. I made these for a cookie exchange last year, and they were the first ones to disappear.
Dairy-Free Option: Use vegan butter (I like Earth Balance) and dairy-free chocolate chips. Most peppermint bark is naturally dairy-free, but double-check the label. The texture will be slightly different—vegan butter tends to make cookies a bit more cakey—but they’re still delicious.
Serving & Storage Suggestions
These cookies are best enjoyed slightly warm, when the chocolate chips are still a little melty and the peppermint bark is at its crunchiest. I like to serve them with a cold glass of milk or a hot cup of peppermint tea for the ultimate holiday experience. If you’re feeling fancy, drizzle a little melted white chocolate over the tops and sprinkle with crushed candy canes before serving.
For storage, place the completely cooled cookies in an airtight container at room temperature. They’ll stay fresh for up to 5 days—though in my house, they rarely last that long. If you want to keep them longer, you can freeze them for up to 3 months. Just layer them between sheets of parchment paper in a freezer-safe container. When you’re ready to eat, let them thaw at room temperature for about 30 minutes.
One thing I’ve noticed: the flavors actually get better after a day or two. The peppermint mellows out and blends with the chocolate in a way that feels more balanced. So if you can resist eating them all on day one, you’re in for a treat on day two. I’ve also found that these cookies travel really well—I’ve mailed them to friends across the country without any breakage. Just pack them snugly in a tin with crumpled parchment paper between layers.
For reheating, pop a cookie in the microwave for 10 seconds to bring back that just-baked softness. Or if you’re reheating a whole batch, warm them in a 300°F (150°C) oven for 5 minutes. They’ll taste like they just came out of the oven.
Nutritional Information & Benefits
Let’s be real—these are cookies, not health food. But they’re made with real ingredients, and there are a few small benefits worth mentioning. Peppermint has been used for centuries to aid digestion and freshen breath, so you could argue that these cookies are practically medicinal. (I’m only half joking.)
Per cookie (based on a batch of 24), here’s the approximate breakdown:
- Calories: 210
- Fat: 11g
- Saturated Fat: 7g
- Carbohydrates: 27g
- Sugar: 18g
- Protein: 3g
- Sodium: 95mg
If you’re watching your sugar intake, you can reduce the granulated sugar to ½ cup without affecting the texture too much. The peppermint bark and chocolate chips add plenty of sweetness on their own. For a lower-fat version, swap half the butter with unsweetened applesauce—just know that the cookies will be a little more cakey and less chewy.
These cookies are vegetarian and can easily be made gluten-free or dairy-free with the substitutions I mentioned earlier. They contain eggs, dairy, and gluten in their standard form, so keep that in mind if you’re baking for someone with allergies.
Conclusion
These Light & Chewy Peppermint Bark Chocolate Chip Cookies are proof that sometimes the best recipes come from listening to a twelve-year-old who doesn’t know any better. They’re festive without being fussy, indulgent without being heavy, and they come together so quickly that you’ll find yourself making them all season long. I’ve already made three batches this December, and I’m not done yet.
I’d love to hear how these turn out for you. Did you try any of the variations? Did your family fight over the last cookie? Drop a comment below and let me know—I read every single one, and I always answer questions. And if you’re looking for more holiday baking inspiration, don’t miss my soft gingerbread cookies or my classic snowball cookies. Happy baking, friends. May your cookies be chewy and your holidays be bright.
Frequently Asked Questions
Can I use regular candy canes instead of peppermint bark?
Yes, you can. Crush about ½ cup of candy canes and use them in place of the peppermint bark. Keep in mind that candy canes are harder than bark and don’t melt as nicely. The texture will be crunchier, and the cookies might be slightly less sweet. I recommend adding an extra ¼ cup of white chocolate chips to balance things out.
Why did my cookies spread too much?
This usually happens for one of three reasons: your butter was too soft (almost melted), you didn’t chill the dough, or your baking soda is old. Make sure your butter is softened but still cool to the touch. If your kitchen is warm, chill the dough for 20-30 minutes before baking. And always check that your baking soda is fresh—it should fizz when mixed with vinegar.
Can I freeze the cookie dough?
Absolutely. Scoop the dough into balls, place them on a parchment-lined baking sheet, and freeze until solid (about 1 hour). Then transfer the frozen dough balls to a freezer bag. When you’re ready to bake, place them on a baking sheet and add 2-3 minutes to the baking time. No need to thaw first.
How do I keep the peppermint bark from melting into a sticky mess?
The key is to chop the bark into small, even pieces and not overmix the dough. If you stir too vigorously, the heat from your hands and the friction can start to melt the chocolate. Fold the bark in gently with a spatula, and stop as soon as it’s evenly distributed. Also, make sure your dough isn’t too warm when you add the bark.
Can I make these cookies vegan?
Yes, with a few swaps. Use vegan butter (like Earth Balance), flax eggs (1 tablespoon ground flaxseed mixed with 3 tablespoons water per egg), and dairy-free chocolate chips. Most peppermint bark is vegan, but check the label to be sure. The texture will be slightly different—a bit more cakey—but the flavor is still spot-on.
Pin This Recipe!
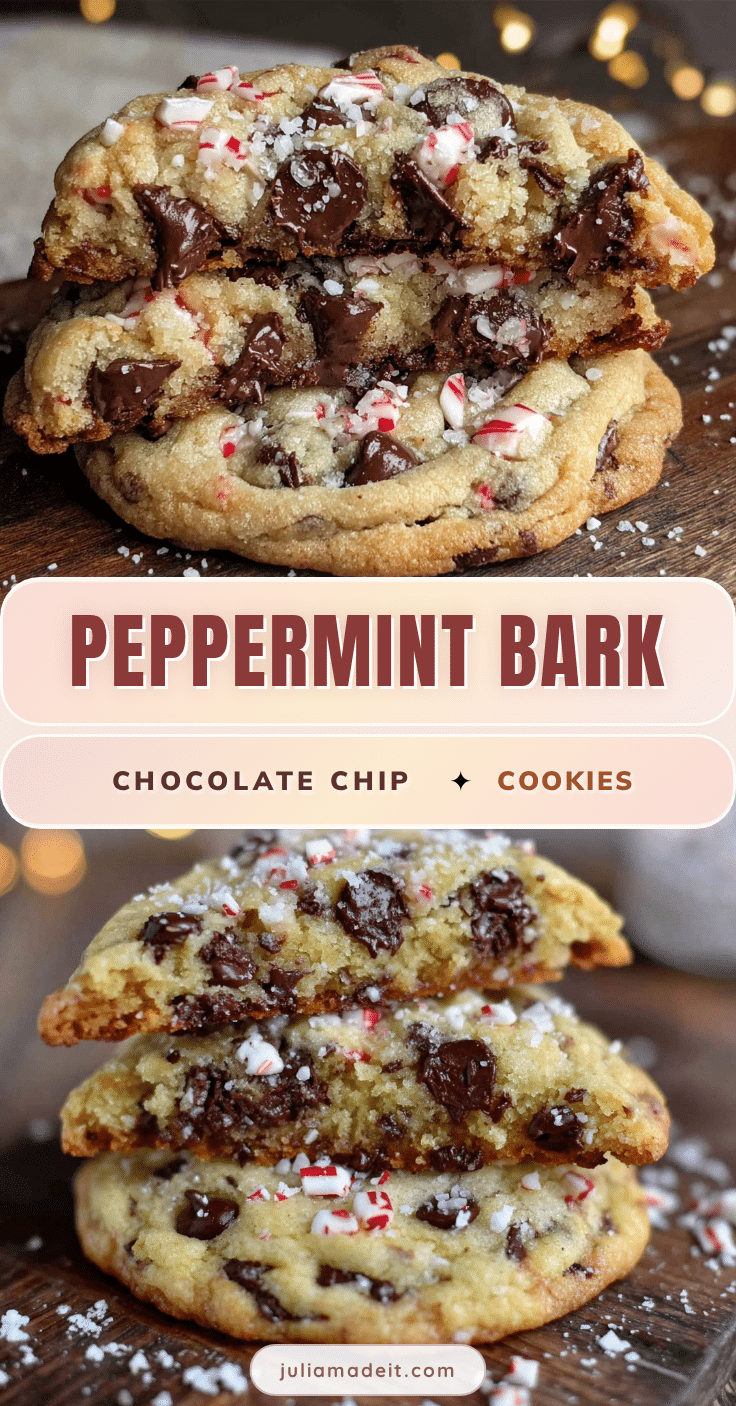
Light & Chewy Peppermint Bark Chocolate Chip Cookies

These light and chewy cookies are packed with peppermint bark, semi-sweet chocolate chips, and white chocolate chips for a festive holiday treat that comes together in just 25 minutes.
- Prep Time: 15 minutes
- Cook Time: 10-12 minutes
- Total Time: 25 minutes
- Yield: 24 servings 1x
- Category: Dessert
- Cuisine: American
Ingredients
- 1 cup (2 sticks) unsalted butter, softened
- ¾ cup (150g) granulated sugar
- ¾ cup (150g) light brown sugar, packed
- 2 large eggs, room temperature
- 1 teaspoon vanilla extract
- 2¼ cups (280g) all-purpose flour
- 1 teaspoon baking soda
- ½ teaspoon salt
- 1½ cups (about 225g) peppermint bark, finely chopped
- 1 cup (175g) semi-sweet chocolate chips
- ½ cup (90g) white chocolate chips (optional)
Instructions
- Preheat your oven to 350°F (175°C). Line two baking sheets with parchment paper.
- Chop the peppermint bark into small pieces about ¼-inch in size. Set aside about ¼ cup for pressing onto the tops of the cookies later if desired.
- In a medium bowl, whisk together the flour, baking soda, and salt until evenly distributed.
- In a large bowl, beat the softened butter, granulated sugar, and brown sugar together on medium speed until light and fluffy, about 3 minutes. Scrape down the sides of the bowl halfway through.
- Beat in the eggs one at a time, ensuring each is fully incorporated before adding the next. Add the vanilla extract and mix until combined.
- With the mixer on low speed, add the flour mixture in three additions, mixing just until the flour disappears after each addition. Do not overmix.
- Using a rubber spatula, gently fold in the semi-sweet chocolate chips, white chocolate chips (if using), and chopped peppermint bark until evenly distributed. If the dough seems too soft, refrigerate for 15 minutes.
- Using a cookie scoop or spoon, drop rounded tablespoons of dough onto the prepared baking sheets, spacing them about 2 inches apart. If reserved, press a few peppermint bark pieces onto the tops of each dough ball.
- Bake one sheet at a time in the center of the oven for 10-12 minutes, until the edges are lightly golden and the centers still look slightly soft.
- Cool on the baking sheet for exactly 5 minutes, then transfer to a wire rack to cool completely.
Notes
For best results, chill the dough for 30 minutes before baking to prevent spreading. Use a light-colored baking sheet to avoid over-browning the bottoms. Let cookies cool completely before storing to maintain crunchiness.
Nutrition
- Serving Size: 1 cookie
- Calories: 210
- Sugar: 18
- Sodium: 95
- Fat: 11
- Saturated Fat: 7
- Carbohydrates: 27
- Fiber: 1
- Protein: 3
Keywords: peppermint bark cookies, chocolate chip cookies, holiday cookies, Christmas cookies, easy cookie recipe